
Welcome to Smart Home Forum by FIBARO
Dear Guest,
as you can notice parts of Smart Home Forum by FIBARO is not available for you. You have to register in order to view all content and post in our community. Don't worry! Registration is a simple free process that requires minimal information for you to sign up. Become a part of of Smart Home Forum by FIBARO by creating an account.
As a member you can:
- Start new topics and reply to others
- Follow topics and users to get email updates
- Get your own profile page and make new friends
- Send personal messages
- ... and learn a lot about our system!
Regards,
Smart Home Forum by FIBARO Team

.thumb.png.d4cdaed51f345b01992386e25e167dcc.png)


Virtual Devices
The category contains virtual devices submitted by users.
Downloading and submission terms have to be accepted.
Types of files accepted: LUA, VFIB, ZIP, TAR, RAR, JSON.
Virtual devices have to be described properly, screen shots are optional.
Support topics are created automatically here Virtual devices
Report topics and files that are no longer supported by authors.
All the files submitted have to be approved by administrators.
85 files
-
Honeywell_Lyric_API
By Guest
This is an API for Honeywell Lyric T6. The idea is based on Remco B's version for the Honeywell Evo.
Using a virtual device with API scene, you can change setpoint and set away, holiday and schedule modes. Because it is a virtual device, you can call these buttons from any other scene. For example I use it while tracking my phones location, this creates options for GeofenceMode in combination with ScheduleMode
You will need a webserver (or access to a webserver) for the initial setup. This is to retrieve some keys from Honeywell. As soon as you have the keys, you do not need the webserver anymore. For further details please follow instruction in the pdf and use at own risk.
release 1.1 added checkCertificate option to bypass https check.
Installation instructions Honeywell Lyric API.pdf
Fibaro_Lyric_API.lua
105 downloads
-

Nefit Easy thermostat VD
By ReneNL
A virtual device to interface with the Nefit Easy thermostat. First credits where credits are due: this VD leverages the cool stuff made by Robert Klep.So what you need is to
Install the nefit-easy-http-server developed by robertklep (see https://github.com/robertklep/nefit-easy-http-server) on another device. I use a raspberry pi. Follow the instructions on the site and check if the server is working properly Install the virtual device you can download here Add the IP address of the device where you run the nefiteasy server in the advanced setting of the VD Same for the port (standard setting of the server is 3000) You can use the icon provided if you like I use the two buttons at the bottom of the VD to lower the temperature when I am away (trigerred by a scene), and go back to the normal clock program when I'm back home By inspecting the code in the VD I guess you can see how you can read and write data to the server. There are many more info and settings you can extract or change from the server (see https://github.com/robertklep/nefit-easy-core/wiki/List-of-endpoints for the list of endpoints you can use). These are the ones I picked but I assume you understand how to change to your needs
Rene.
78 downloads
-

Smarter Coffee VD
By Sankotronic
Smarter Coffee VD
Hello friends of Fibaro and a good cup of coffee!!!
When I became proud owner of Smarter coffee machine, I didn't know that Smarter is making smart appliances that are actually not connectible to home automation. I have ask them several times if they plan to publish coffee machine API or what ever is needed so that it can became connected part of our every day smarter home. What is the use of smart coffee machine if you have to grab mobile phone every morning in bed to tell it that you want coffee to be brewed!! The answer was always "maybe soon". So I get tired of waiting!
I was intensively searching the wast land of internet and just few days ago finally stumble on at least some kind of solution provided by Simone Margaritelli the evilsocket and Aden Forshaw. Of course their solution is written in python but for me is unacceptable to have additional server even on small PI just to start coffee machine. So done little experimenting because this coffee machine has really simple commands in bytes where first byte is command and last byte is marking end of command. Here is what evilsocket and Aden found and I provide translation to our LUA language with this little knowledge I have just in case if you want to experiment further or do similar VD for iKittle 2:
-- Smarter coffee commands: command - hexadecimal - decimal format used in LUA -------------------------------------------------------------------------------------- brew = "7" = "7" reset = "\x10" = "\16" get wifi aps = "\xD" = "\13" toggle grind = "\x3c\x7e" = "\60\126" set strength = "\x35%\x7e" = "\53\%\126" where % = 0-2 (weak, mid, strong) set cups = "\x36%\x7e" = "\54\%\126" where % = 1-12 cups set config = "\x38\%1\%2\%3\%4\x7e" = "\56\%1\%2\%3\%4\126" where %1 = strength %2 = cups %3 = mode (grind, filter) %4 = warm time warm % min = "\x3e%\x7e" = "\62\%\126" where % = 1-30 min warm stop = "\x4a\x7e" = "\74\126" -- Smarter coffee response response - hex - decimal counterpart ------------------------------------------------------- brewing or OK = "\x03\x00~" = "\3\0~" already brewing = "\x03\x01~" = "\3\1~" invalid argument = "\x03\x04~" = "\3\4~" no carafe = "\x03\x05~" = "\3\5~" no water = "\x03\x06~" = "\3\6~" low water = "\x03\x07~" = "\3\7~" reset ok = "\x03i~" = "\3i~" -- In LUA backslash \ is used to mark byte in the string so it cannot stand alone or be -- last character in string like this: "\" or this "\56\". ''So this is problem if you want -- to combine different values in string commands like for changing number of cups -- since it is impossible to join "\54\" ..cups.. "\126". 'Only possibility that -- came across my mind is to use table with predefined strings for coffee strenght, -- number of cups and Keep wamring time as listed bellow. local comm = "\56"; local cups = {"\1", "\2","\3", "\4","\5", "\6","\7", "\8","\9", "\10", "\11", "\12"}; local stre = {"\0", "\1","\2"}; local mode = {"\0", "\1"}; local time = {"\5", "\10", "\15", "\20", "\25", "\30", "\35", "\40"} local endb = "\126" -- example of building command for setting coffee machine default settings local command = comm..stre[2]..cups[2]..mode[1]..time[1]..endb I should actually put this part in developer section but here it is for those of you who like to play with it.
So here it is SMARTER COFFEE VD V0.1 first release
Smarter_coffee.vfib.json
To be able to use this VD you will need following devices:
1) HC2 - VD will work only on HC2 due to LUA code (Will try to do HCL version but will not be with all possibilities as LUA version)
2) Smarter Coffee machine with latest firmware V 22.0 (will work with older version but you will not be able to stop Keep warming or set it to 40 min)
3) FGWP smart plug or any other similar. It is needed to monitor coffee machine consumption from which is determined if it is brewing, keep coffee warm or stopped
Also after importing VD to your system you need to setup IP address and TCP port. Since it is not possible to get IP address of your precious coffee machine from original app you will need some other app to find it for you. I used Fing on my iPhone. TCP port is 2081. And it should be entered on advanced tab of the VD:
Before you start using VD first you will need to define some global variables in global variable panel. I was planning to add code to do that part for you, but since Fibaro is constantly changing API on HC I decided to leave this part to you. Besides you can put values of global variables in your language but then you will also have to change few things in code of each button and main loop. Will explain later what to change.
So this are global variables that are needed for Smarter coffee VD to work properly:
First are variables (top part in panel):
Name of variable - possible value that you must enter when adding (DO NOT leave 0 if is not possible value!!)
-----------------------------------------------------------------------------------------------------------------------------
SmarterCups - possible values: between 1 and 12. Do not leave 0. Keeps number of cups of coffee.
SmarterStrength - possible values: 0 - Weak, 1 - Medium or 2 - Strong. Keeps value of coffee strength
SmarterWarm - possible values: 5, 10, 15, 20, 25, 30, 35 and 40. Keeps time for how long coffee will be kept warm
Following are predefined global variables (bottom part in panel):
Name of variable - possible values that you must enter in order I put them here bellow.
-----------------------------------------------------------------------------------------------------------------------------
SmarterBrewed - possible values: No, Yes. Used to prevent starting brewing twice in a row. This is filter coffee and filter is better to cleaned after each use.
SmarterDefaults - possible values: table that contains coffee machine default values for strength, number of cups, mode (Filter or Grind) and time to Keep warm. You need to define only one value with name Table and then save. Open again to edit and then delete Value2. VD will take care of the rest.
SmarterMode - possible values: Filter, Grind. It is self explanatory
SmarterPush - possible values: No, Yes. It is used to send push notification only ones from VD main loop when coffee is ready
SmarterStatus - possible values: Ready, Not ready, Brewing, Keep warm, Faulty, No carafe, No water, Low water. Status of the machine.
SmarterUseDef - possible values: No, Yes. If using default values then VD needs to restore to those values after brewing is finished.
For global variables SmarterBrewed, SmarterMode and SmarterStatus you can use words in your language but if you do then you will have to change in code as follows:
-- GLOBAL VARIABLES -- enter names and value mapping of your -- global variables or leave as it is and add to variables panel -- "SmarterStatus" is predefined global variable. Enter your -- name and mapping of values local smarterStatus = "SmarterStatus"; -- change value mapping to corresponds to your values in your global variable local smarterStatusMapping = {ready="Ready", notready="Not ready", brewing="Brewing", warming="Keep Warm", faulty="Faulty", nocarafe="No carafe", nowater="No water", lowater="Low water"}; -- "SmarterMode" is predefined global variable local smarterMode = "SmarterMode"; -- change value mapping to corresponds to your values in your global variable local smarterModeMapping = {filter="Filter", grind="Grind"}; -- "SmarterWarm" is global variable possible value 5 to 40 in -- step of 5 local smarterWarm = "SmarterWarm"; -- "SmarterBrewed" is predefined global variable used to change -- machine status local smarterBrewed = "SmarterBrewed"; -- change value mapping to corresponds to your values in your global variable local smarterBrewedMapping = {Yes="Yes", No="No"}; and this has to be done in all code for each button and main loop!
Next step is to add icons and then do mapping of their IDs in the code. Here are the icons in order and with their names in code:
Main icon that you will set as default on the VD and all buttons except on button Brew and Keep warm:
In code is named iconBrewing so you will need ID and also set it up on Brew button:
In code is named iconWarming so you will need ID and also set it up on Keep warm button:
in code is named iconNoCarafe so you will need ID:
in code is named iconLoWater and ID is needed:
in code is named iconNoWater and ID is needed:
in code is named iconFilter0 you need ID and it is showing setting for Weak strength and Filter mode:
in code is named iconFilter1 you need ID and it is showing setting for Middle strength and Filter mode:
in code is named iconFilter2 ID is needed and it is showing setting for Strong coffee and Filter mode:
in code is named iconGrind0 ID is needed and it is showing setting for Weak coffee and Grind mode:
in code is named iconGrind1 Id is needed and it is showing setting for Medium coffee and Grind mode:
and the last one is named in code iconGrind2 Id needed and is showing setting for Strong coffee and Grind mode:
How to get icon ID is explained many times here on forum so I will skip that. After you get ID of all icons then you need to replace them in main loop and for buttons Brew, Keep warm, Weak, Medium, Strong, Change mode, Reset machine and main loop. Code is well commented and looks like this:
-- VD ICONS ---------------------------------------------------- -- enter ID numbers of corresponding icons on your system local iconBrewing = 1041; local iconWarming = 1042; local iconNoCarafe = 1044; local iconFilter0 = 1045; local iconFilter1 = 1046; local iconFilter2 = 1047; local iconGrind0 = 1048; local iconGrind1 = 1049; local iconGrind2 = 1050; local iconLoWater = 1051; local iconNoWater = 1052; And before you can start enjoying your coffee there is one more touch that needs to be done. You need to go to main loop code and first setup smart plug ID. Look for this code in main loop:
-- SMART PLUG -------------------------------------------------- -- enter ID nuber of smart plug to which Smarter cofee is -- connected. Smart plug is the only way to check machine status -- at the present moment so it is needed for proper functioning -- of this VD local plugID = 135; Then if you want to be notified by VD when coffee is ready then find this code and enter ID of your mobile devices to which will be send. You can put as many as you like between brackets {} just separate them by comma eg. {2, 45, 121}:
-- PUSH NOTIFICATIONS ------------------------------------------ -- define users that will receive push notifications when -- coffee is ready if leaved empty no notification will be send local userID = {} -- enter default flags: 1 - will send, 0 - will not send -- must be same number of flas as users local userFlag = {}; -- enter push message text that will be sent when coffee is -- ready local pushMessage = "Coffee is ready!" -- here you can put code that will change flags to whom push -- notification will be sent function setupUsers() -- here you can put code to dynamically change which users -- will get push notifications if you use flags end If you want to change who will receive push notifications you can use variable userFlag for that. For each userID you can enter 1 to send push notification or 0 not to send. Then you can add some code in function setupUsers() where you can change flags as you wish. For example I use that code to stop receiving push notifications when I'm away from home. If you don't need this feature then just leave brackets empty. And of course you can change message for pushMessage to your language.
And if you want to completely translate VD to your language you just need to check all code for this part:
-- MESSAGES ---------------------------------------------------- -- enter messages in your language -- response messages from coffee machine local _respBrewing = "Brewing"; local _respAlready = "Already brewing"; local _respInvalid = "Invalid argument"; local _respNocarafe = "No carafe" local _respNowater = "No water"; local _respLowater = "Low water"; local _respResetOK = "Reset OK"; local _respCheck = "Check machine"; local _respFailed = "Transfer failed"; -- command sent by this button local _command = "Brew"; -- coffee machine status messages local _statReady = "Ready"; local _statNotready = "Not ready - fill in coffee"; local _statBrewing = "Already brewing!"; local _statWarming = "Warming coffee!"; local _statFaulty = "Faulty - check machine"; local _statNocarafe = "No carafe - put it back"; local _statLowater = "Warning! - Low water"; local _statNowater = "No water - fill tank"; I try to make it easier for you as much as I could in this four days of development so all messages I collected on beginning of the code. Some buttons have more messages, some don't so you better check them all.
At the end just short explanation how it works. Before first run, you will need to check if settings in VD corresponds to machine settings by checking display on the machine or original app. When this is synced you can start using it.
Before first brewing status of VD must be Ready. If it is not you can press button Reset status to just reset VD or Reset machine to reset all to factory settings. Reseting machine will clear all default settings so you will need to send them again by pressing button Set above as default after you make your favorite choice of strength, cups and mode. This default settings will be always set back after brewing coffee no matter what settings was for the last brew. After brewing coffee status of the VD will be always set to Not ready except if there is No carafe in place, or No water or Low water. After rectifying cause: placing carafe in place, filling water and cleaning filter you will need to press button Reset status to put it back into Ready state. If this is too annoying you can always setup some short scene that you will trigger with some switch, button or swipe or whatever and reset VD to Ready status. If you want to keep coffee warm after brewing you can do that by setting time and then pressing button Set above as default so warming will start immediately after brewing, or you can setup time and then press button Keep warm. If during Keep warm you press button Keep warm again this will stop warming but only with new machine firmware. Keep warming time can be set up to 40 minutes. And that's it!
Enjoy coding and coffee!!!
EDIT
Still working on 4.180
68 downloads
(1 review)0 comments
Updated
-
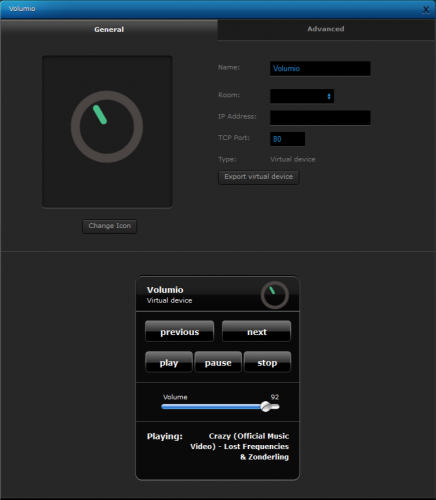
Volumio_VD_1.0
By KevCo
Here's a virtual device I created to control my Volumio Music Player, which is running on a Rasbperry Pi.
Volumio comes with an own built-in ReST API that I use for the this virtual device.
You must have your Volumio connected to your local area network (the same as Fibaro HC).
After importing the virtual device, set the IP address and the port (default port 80) to point at your Volumio.
Offical site of Volumio: www.volumio.org
Volumio ReST API documentation: www.volumio.github.io/docs/API/REST_API.html
Note: Tested on Fibaro HC2 4.180
Enjoy.
114 downloads
- virtual device
- volumio
- (and 1 more)
(0 reviews)0 comments
Updated
-

Bluesound interface, first setup
By doezel
Hi,
here's a quick version to gain basic control of a bluesound device in your network.
Make sure to set up the correct IP address.
TCP port should be 11000
For now the following functions are supported:
- polling of the status, every second
- volume
- pause
- play
137 downloads
-
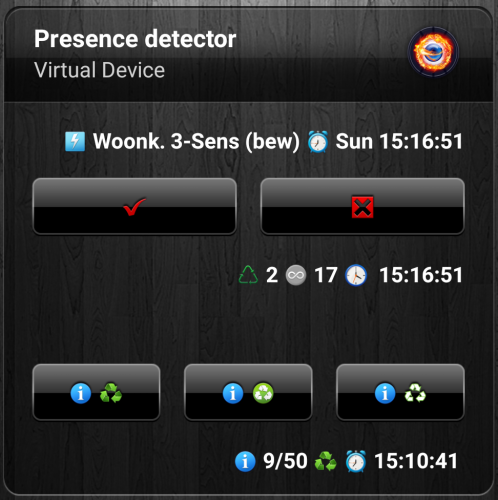
20180525 Presence_Detector (posted).vfib
By Lambik
20180525 (Stable) release
Added/Changed: - Added some code to the mainloop to detect critical error occurring when a device is forced-removed
[ERROR] line 195: attempt to perform arithmetic on a nil value
309 downloads
- presence detector
- vitual device
- (and 1 more)
-

Sleep Timer & Scheduler
By szmyk
Initially it was supposed to be a simple Sleep Timer, similar to what we have in TV but later I added some new functions and now it is a simple Scheduler and Sleep Timer in one VD.
Features:
Sleep Timer - just set the time after which the device will be turned off or turned on Scheduler - set the time when the the device should be turned on and the time when the the device should be turned off (or in the reverse order - first turn off and then turn on) Filtering devices - you can choose only devices with turnOff action attribute Filtering rooms - you can choose only rooms which have devices with turnOff action attribute _ - change on/off setting time ✔ - add device to schedule ❌ - remove device from schedule; triple click to clear the schedule Refresh button - you don't need to touch it. It's called programmatically Displaying the current schedule Logging the events to debug window: add, remove, turn on, turn off automatic support for plugins with turnOff action attribute support for custom virtual devices and plugins instant turn on/off (VD and plugins also) presenting the current device state ( ⚡ when the device is on, and - when is off)
Customization:
change the VD labels to your own language change the texts in the Refresh button code and in the main code: local lT = { newLine = "<br/>", -- change to "\n" if you use this VD on iOS mobile mainly or " " for Android scheduledDevices = "Scheduled devices" } Actually there is a problem with breaking lines in labels, so you can choose new line char. More details here.
add your own virtual devices or plugins in main loop code:
local extraDevices = { -- deviceId, commandOn, parameterOn, commandOff, parameterOff ["335"] = { "pressButton", "2", "pressButton", "3" }, ["339"] = { "setVolume", "20", "setMute", "" }, } icons:
Enjoy...
153 downloads
-
[VD + APP + PHP] Text To Speach (TTS) solution for HC2 and Apple Mac (OS X) - version October 2017
By gucio1234
Text To Speach (TTS) solution for HC2 and Apple Mac (OS X) - version October 2017:
PREFACE :
I am happy to present my second approach for TTS (Text To Speech) and multi room audio for Fibaro HC2 and Apple OS X computer.
I call it “second approach” rather then second version because it uses different mechanism to control audio of the computer, however the goal remain the same.
That is also the reason why I decided to publish it in the new thread.
I hope that this guide let you setup TTS on your Fibaro HC2 and Mac computers.
INTRODUCTION :
I have noticed that wide used solution for TTS and multiroom is to use Sonos speakers (probably because of the Fibaro plugin available) and VoiceRSS (http://www.voicerss.org/).
My solution is different. It uses the text synthesizer (TTS) which we have already implemented in our computers and which can speak in variety of languages – also those not supported by VoiceRSS. To change text into speech I used “SAY” command of OS X. The other advantage is that we are independent on internet connection and there are no charges for TTS processing. It has also multiroom solution. You can have installed all over your place a number of speakers. The volume of each speaker can be individually adjusted from HC2 (Volume range from 0 to 100 %) so it is possible to select in which room/rooms you hear the voice announcement.
If you use the iTunes VD it is also possible to distribute music.
Integration of iTunes with and HC2 was discussed and published here :
The supported speakers/devices/protocols are as for now :
- Apple AirPlay
- Google Chromcast
- Bluetooth
- Windows computers (with installed app to become AirPlay compatible)
The supported languages/voices of OS X v. 10.12.2 (macOS Sierra) are listed in Paragraph 2 below.
WHAT WE NEED :
- Fibaro HC2
- Apple Mac computer
- Audio Mixer VD installed on HC2
- Some LUA experience to fine tune VD on HC2 and have your user defined TTS messages in your scenes
- Airfoil by Rouge Amoeba application installed on Mac - for TTS it is OK to use free demo version
- Fibaro TTS Bridge application for OS X by Marcin S. Milewski (gucio1234) installed on Mac
- Speakers/audio receivers (any from the list of compatible devices) :
. Apple AirPlay
. Google Chromcast
. Mac , Windows or Linux computer with Airfoil Satellite installed
( see https://rogueamoeba.com/airfoil/ )
. iOS or Android device with Airfoil Speakers installed
(if one wants to have TTS on mobile device)
. Bluetooth
The presented solution was tested with the following software versions / hardware :
- Fibaro HC 2 firmware 4.140
- Airfoil for Mac v. 5.5.1
- Airfoil Sattelite for Windows v.5.1.6
- OS X v. 10.12.2 (macOS Sierra) and OS X v. 10.13 (macOS High Sierra)
- Apple AirPort versions A1088, A1264, A1392
- JBL Flip 3 Bluetooth Speaker
- Fibaro TTS Bridge v. 0.1
- Fibaro HC 2 v. 4.110
It was not tested with Google Chromcast (as I do not have any) but this is supported by Airfoil.
IMPLEMENTATION :
Please read the whole instruction carefully before you start.
1.
Define the global variable “PAMessage” in your HC2 (top part of the Variables’ Panel):
This variable will store the text you want to convert to speech, whatever is there, the system will speak when you press TTS button of the VD
2.
Test and select desired language/voice for your TTS.
To change text into speech we used “SAY” command of OS X.
Open “Terminal “ application on your Mac.
Type ‘SAY –v ?’ to see the list of available voices/languages
Type ‘SAY –v <name of the voice>’ to select the voice of your preference
Type ‘SAY “THIS IS A TEST MESSGE IN MY LANGUAGE” ’ to test your selected voice
More details on this can be found here: https://developer.apple.com/legacy/library/documentation/Darwin/Reference/ManPages/man1/say.1.html
Here is the result of
‘SAY –v ?’ :
3.
Install “Airfoil” for Mac downloaded from https://rogueamoeba.com/airfoil/
NOTE: The free demo version lets to transmit audio up to 10 minutes long (which is more than enough for TTS). After that time the noise distortion will be added by the application.
If one wants to use Airfoil for transmission of music it is recommended to purchase a license.
4.
Setup web server with PHP Module running on our Mac computer.
In my case I have it on iMac and I followed this guide :
https://medium.com/@JohnFoderaro/how-to-set-up-apache-in-macos-sierra-10-12-bca5a5dfffba
I skipped "Configuring Virtual Hosts" as that was not working for me.
As my web server is accessible only by my devices, I did not care.
Important is that apache web server is managing PHP scripts .
NOTE: If you already implemented iTunes VD, you should have already running web server with PHP module installed.
5.
Install Audio Mixer VD on your HC 2.
Define parameters of this VD :
Set IP address of your Apple Mac computer
Set port number as 7000. The communication between HC2 and Mac will be on port 7000 and this is hard coded in “Fibaro TTS Bridge v..1” application.
Define in VD as many audio mixer sliders as you have audio devices to be linked with your multi room audio system.
In the VD attached FOR EACH SLIDER you have to define the PATH for your PHP script “airfoil.php”. Also for each slider the local variable ‘pokoj’ has to be defined as substring of the ID of the speakers defined in Airfoil app on Mac.
(see Paragraph 6 “How to know the IDs of your speakers defined for AirFoil”)
Example:
In my case I have my airfoil.php script placed as :
MacintoshHD/Users/username/Sites/airfoilremote/airfoil.php
and my path defined in the VD is :
Note : “LocalSpeaker” is the speaker connected to your Mac.
Example:
In my case I have the following local variables for each slider :
local pokoj = “WIATROLAP"
local pokoj = “LocalSpeaker"
local pokoj = "59-a7”
local pokoj = "POKOJ-3”
local pokoj = “JADALNIA"
local pokoj = “AppleTV"
local pokoj = “ANTRESOLA"
local pokoj = “MIODARNIA"
There are three buttons on Audio Mixer VD :
“Weather Outside” – to send current weather information to TTS system. In my VD it reads information from Netatmo VD.
This should be adjusted to user’s preferences.
User may adjust it to her/his needs at the end when all the rest is up and running.
NOTE: In the code of VD attached it reads the variable from my Netatmo device ID.
It will not work for you without fine tuning.
“Weekday / Time” – to send TTS with the text taken from HC2 system variables
“TTS” – to send TTS with the text taken from global variable “PAMessage”
6.
Place the „airfoil.php” file into you OS X computer. The path for it has to match whatever is defined as the path in your VD
(see example in paragraph 3.)
7.
How to know the IDs of your speakers defined for AirFoil
You have to use Apple Script Editor which is application delivered along with your OS X system. no need to purchase or install anything.
Just use your search bar of OS X system.
You have to write
into Apple Script Editor.
Here is the screen shot of the OS X script editor which shows you the complete IDs of your Airfoil Speakers.
You can see that part of each ID (after @) matches my local variables for each slider of VD.
8.
Setup Airplay/Chromecast/Bluetoth devices with your Mac
9.
If you want to have other computers to act as clients with speakers install Airfoil Sattelite for each of them. The app is to be downloaded from https://rogueamoeba.com/airfoil/
10.
If you want to have mobile devices to act as clients with speakers install Airfoil Speakers for each of them. The info on these apps can be found on https://rogueamoeba.com/airfoil/
11.
Copy the “Fibaro Text to Speech Bridge v.0.1” application to your Mac computer.
Attached is the zipped file. You have to unzip it to have .app file.
NOTE:
If it happens that HC2 needs to be restarted, it is required to restart “Fibaro Text To Speech Bridge v.0.1”also (Exit and Run).
Restart of “Fibaro Text To Speech Bridge v.0.1” is to be done after HC2 is back operational.
FILES TO DOWNLOAD :
Application for OS X (zipped) -> Fibaro_Text-To-Speech_Bridge_0.1.app.zip
VD for HC2 ------------------------> AUDIO_MIXER_+_TTS.vfib
ICON for VD of HC2 ------------>
AIRFOIL.PHP (zipped) ------>
airfoil.php.zip
39 downloads
(0 reviews)0 comments
Updated
-
BLE Detector - Presence detector based on iNode LAN and BLE devices
By macjoker
Features
The virtual device communicates with iNode LAN, receives and decodes information about all BLE devices available nearby. This allows tracking user presence if small BLE tags are attached to their belongings (like notiOne with a bunch of keys, e.g.).
What you need
iNode LAN - it can detect any Bluetooth 4.0/4.1 device (Bluetooth Low Energy = BLE) BLE tag (iNode Beacon , TrackR , notiOne , etc.) Installation
Configure your iNode LAN to use unicast or broadcast for sending datagrams (UDP packets) Go to the Setup page. For "BLE IP address" put your HC2 IP address (unicast) or broadcast address (192.168.1.255e.g.). For "BLE IP port" you may leave the default value (20000). Create a new virtual device (BLE Detector). Update IP Address and TCP Port (use the same values as for iNode LAN in step 1). Create a new scene (BLE Users). Update config values in the scene (provide names and MAC addresses of persons and their belongings).
That's all to make it work!
Now you can use global variables you have defined in Lua scene (users variable) to check if a person is away or home.
Want to tweak it? Sure!
There are more options. Please read all the comments in the source code.
You may try to:
define MACs of devices to ignore in discovery (your iNode LAN itself), define signal values for IN/OUT events (separately for each user), define the timeout value for each device (this also makes user away), turn on/off debug messages. Zip file content
Virtual device: "BLE Detector". Lua scene with user detection configuration: "BLE Users". Device icon for iNode LAN. FAQ
What are these scripts missing?
Only basic information is decoded from BLE datagrams (counter, MAC address, and signal strength). If you use iNode Sensors you will not get additional values (like temperature, pressure, magnetic or movement changes).
Why is it better than other solution (x) of presence detection?
It does not depend on any movement in your house, which can make many false positives - a running dog e.g. (x = motion sensors) It is independent of other devices. HC2 communicates directly with iNode LAN. (x = RaspberryPi to read iNode and press some virtual buttons in HC2) More stable results (x = python script from iNode website; explained below).
The Python script published by iNode manufacturer for presence detection uses only signal strength. That means to detect that someone is leaving we need to use some (lower part) signal range to have the record of going away. This additionally reduces the signal range for detecting "being home" (higher part of the signal range) and can give effect to the person appearing and disappearing all the time.
To avoid that we also check the latest timestamp of the device activity. Owing to this feature we may extend range signal for "being home" to all possible values, and use only timeout to decide whether a person is home or not (set "-100" to both signalIn and signalOut in users config to achieve that).
What messages should I expect to get from working device?
Here are some logs of the working device...
[DEBUG] 23:29:58: No: 35216 MAC: 00:12:6F:E0:BB:DB Signal: -16 dBm [DEBUG] 23:30:03: No: 35217 MAC: C0:36:A0:DC:87:99 Signal: -79 dBm [DEBUG] 23:30:08: No: 35218 MAC: 00:12:6F:E0:BB:DB Signal: -16 dBm [DEBUG] 23:30:09: No: 35219 MAC: C0:36:A0:DC:87:99 Signal: -79 dBm [DEBUG] 23:30:12: No: 35220 MAC: C0:36:A0:DC:87:99 Signal: -69 dBm and the scene:
[DEBUG] 23:30:21: MAC: C0:36:A0:DC:87:99 Signal: -79 (dBm) Time ago: 0 (sec) [DEBUG] 23:30:21: MAC: DF:12:45:F7:40:65 Signal: -84 (dBm) Time ago: 30 (sec) [DEBUG] 23:30:21: Gienia is home [DEBUG] 23:30:21: Zenek is home [DEBUG] 23:30:24: MAC: DF:12:45:F7:40:65 Signal: -84 (dBm) Time ago: 0 (sec) [DEBUG] 23:30:24: MAC: C0:36:A0:DC:87:99 Signal: -79 (dBm) Time ago: 3 (sec) [DEBUG] 23:30:24: Zenek is home [DEBUG] 23:30:24: Gienia is home Is it a stable solution? Can you share any experience about it?
For my configuration, I am using two pieces of notiOne. They are really tiny, the batteries are supposed to stay alive for about a year (from my experience it was usually about 6 months). Additionally, you can track them whenever someone with BLE and their App is near.
The results I get in my flat, where walls are made of silicate blocks, are quite stable. iNode LAN can detect these notiOnes with the weakest signal (-90 to -88 dBm) from a distance of 7-8 meters even through two silicate walls (24cm + 12cm thick). So placing iNode LAN in the middle of the flat covers the whole area.
My iNode LAN works with firmware version published in December 2017 ("FW date: Dec 14 2017/09:10:32"). I had no issues about it for more than 18 months right now. It is stable. I even use it as a power failure indicator: it is not plugged to UPS (whereas HC2 and NAS are), so when the device disappears from my LAN, I know there is something wrong with the power line.
Is there any way to extend Bluetooth range for iNode LAN? My house is too large for a single device of that kind.
Well, the device range is connected to Bluetooth limitations. If you need a larger area to be covered with BLE devices detection you could use more then one iNode LAN device. Each device should use a different global variable for storing detected BLE events (BleDevicesA, BleDevicesB, ...). The best way to merge these results would be an updated Lua scene, which could analyze more variables and properly select best data (i.e. select stronger signal if the same BLE tag is seen in many iNode LAN devices). This is not supported with the current version of Lua scene.
Another (not so nice, but quicker to achieve) workaround for that could be duplicating not only the BLE Detector VD but also the BLE Users scene. Each scene copy should have different global variables for users (like: isZenekHomeA, isZenekHomeB, ...) and additional code can interpret these variables to get final detection value (local isZenekHome = isZenekHomeA or isZenekHomeB or ...)
61 downloads
(0 reviews)0 comments
Updated
-
ZXT-120 AC control VD
By baskalex
This is a simple VD+Scene to control ZXT-120 AC controllers. I use it because of 2 factors:
1) You can control everything on one screen instead of 3 devices in HC2 interface
2) it is visible in Home Center app (ZXT-120 is not visible natively yet)
It supports heating and cooling modes and fan speed. You can see current status as well.
Setup is very simple:
VD - just put ID of the child device of ZXT-120 which controls temperature into the "Port" field of VD
Scene - You have to put IDs of three child deviced of ZXT in the triggers field annd the same ID into "Options" part of the scene. Also put VD ID inn the "Options" part.
Maybe it can be useful for some of you.
ZXT-120.zip
115 downloads
-

Eth008_with_status.vfib
By Vinisz
This is an enhanced version VD fot the ETH008 relay board.
This VD does not only control the board but it also reports back the relay status read via the /status.xml web request.
This VD also makes a very simple example of how to get XML data from any other device and put it into variables.
Examples of usage:
Controlling 24V AC volts solenoids for watering the garden Controlling motorized heating valves with the relay board. Controlling lights with the relay board.
All you need to do is put in the ip address and the port (80) of the ETH008 board in the VD and make sure "http authentication" is turned of in the ETH008 settings.
133 downloads
-
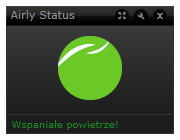
Airly Status - Air Quality Sensor based on Airly.eu (API 2.0)
By macjoker
Device features
Periodic reports on air quality for a defined location.
Be warned about the smog conditions at your place instantly.
Advantages for everyone
Automatic status update. Custom interval value for update queries. Manual update is also available (via button). May use "interpolation mode" (enabled by default in Lua scene). Airly gives you an option to calculate estimated values for any location near their stations, to see more then just what is exactly measured by the station. You may select the language used for Airly messages. Polish and English are supported. Colors to visualize Smog description. This will work on PC only. The mobile app does not interpret HTML tags. Icon color is changing according to air quality measured. The colors are in correspondence with Airly recommendations. One of three different air quality indexes from Airly might be selected. Airly supports: "AIRLY_CAQI", "CAQI" and "PIJP". Each may have different levels, descriptions, and pieces of advice. Customizable location for reports. The location might be read automatically from your Home Center box or it might be set as a fixed one. Data retrieved from Airly are stored in a global variable. The variable might be used to trigger another scene.
Advantages for geeks
Using the newest API 2.0. Missing pieces of data from Airly are properly detected and do not stop the device from working. No label "flickering" ("50%" → "missing data" → "52%", e.g.) on data updates. Changes on any update are reported once. Clear information about the license (MIT). Make any changes you want, distribute, sell or whatever. Just include my name and the copywrite information. Easy to change labels content, data grouping within labels, etc. (data selectors within one config variable labelConfig). Source code easy to maintain and develop: rich debug information; separation of acquisition, extraction and data presentation, etc. Installation
Import the virtual device and create a new Lua scene with the code provided in the file. Add device icons and update their IDs in the virtual device main loop. Replace 'xxx...x' with the key you can get from Airly free of charge. Start the Lua scene manually (just for the first time). (optional) Customize: update interval, display language, labels content and many more (see details below). Configuration
Read comments in Lua scene and VD main loop.
Each configuration parameter is described there in details.
Zip file content
Virtual device: "Airly Status". Lua scene for grabbing data from Airly: "Airly Status scraper". Nine device icons to visualize air quality. Screenshots. FAQ
How can I get Airly API key?
Get one from developer.airly.eu. When you register an account within that website you will get your free API key.
How to upload/add device icons?
Open (any) virtual device configuration page. Press "Change icon". Press "Select file" (in the bottom), choose file, then confirm with "Add" button (even lower). Please make sure to execute step 1 properly. Icons in Home Center are divided into several categories. If your icons are placed not in the "virtual device collection", they will not be visible for the device.
How can I get an icon ID?
Open (any) virtual device configuration page. Press "Change icon". Right click on the icon you want to get an ID. Select "Open graphics in a new tab". The address should be like: "http://hc2/fibaro/n_vicons/User1003.png". 1003 is your ID in this case. How can I change the language for all displayed information?
Change config variable in Lua scene. Only "pl" and "en" messages are supported by Airly API. Update display name of each label. Update labels content (if needed) by editing labelConfig variable in VD main loop. There is the same string formatting as for the Lua print function.206 downloads
-

Advanced Radiation Monitor (ARM) VD standalone
By Sankotronic
IMPORTANT NOTICE!
This VD is currently not working since Radioactive@Home website has changed their map. All users that installed this VD please DELETE it or at least DISABLE it since it can produce some problems on your HC2. Sorry for the inconvenience.
INTRODUCTION
ARM VD collects radiation levels from all available stations around the world and shows 5 nearest stations to your location and one station with highest reading. It is using map of radiation detector stations on Radioactive@Home website. Radioactive@Home is a Polish science project using the distributed computing capabilities of the BOINC platform. The main goal of the project is to create a free and continuously updated map of radiation levels available for everyone, by gathering information about gamma radiation using sensors connected to the computers of volunteers willing to participate in the project. Project is completely non-commercial, participating will be free of charge (excluding cost of detector) and the software will be licensed under the GNU General Public License (GPL).
PREREQUISITES Fibaro Home Center 2 with firmware 4.120 or greater
FEATURES
ARM VD collects radiation levels from all available stations around the world and shows 5 nearest stations to your location and one station with highest readings Simple installation and setup. Uses Developer HERE Geocode API freemium plan to show radiation monitor station location, nearest city name and country. Multi-language support with 27 languages included. Easy setup for VD icons (on UHASTM compatible version is this even easier) Global variables are automatically added, monitored and repaired.
INSTALLATION
Please check provided User Manual where all steps are explained in detail
PACKAGE CONTENT
Advanced Radiation Monitor VD v2.2 standalone Colorful icon pack User Manual v1.2 EN
CREDITS
Many thanks to BodyArt and gucio1234 from Fibaro forum for help with coding, testing, translations and user manual and andre from http://forum.lic.pl for the original idea.
TERMS AND CONDITIONS
Permission to use, copy, modify and distribute this software and its documentation for educational, research, personal use and non-profit purposes, without fee and without a signed licensing agreement is hereby granted, provided that the copyright notice, with "Terms and conditions" and "Disclaimer" appear in all copies, modifications and distributions. It is strictly forbidden to sell, rent, lease and/or lend this software for profit without prior consent from the Author.
DISCLAIMER
This software is provided by copyright owner "as is" and any express or implied warranties, including, but not limited to, the implied warranties of merchantability and fitness for a particular purpose are disclaimed. In no event shall the author and distributor be liable for any direct, indirect, incidental, special, exemplary, or consequential damages (including, but not limited to, procurement of substitute goods or services; loss of use, data, or profits; or business interruption) however caused and on any theory of liability, whether in contract, strict liability, or tort (including negligence or otherwise) arising in any way out of the use of this software, even if advised of the possibility of such damage.
Fibar Group S.A. and their employees are not responsible for support of the ARM VD. Please contact the author Sankotronic, on the Fibaro Forum, for any questions or support required.
VERSION HISTORY
2.2 – Corrected bug that was stopping code on error if HERE service does not send city name for the location provided by VD.
2.1 – Replaced Google location service to get nearest city name and country and introduced HERE service. Also moved code for getting country and city name for location of the station from scene to Update button on VD.
2.0 – Completely revamped ARM VD to show five nearest radiation measuring stations and the one with highest measuring. Also introduced Google service to retrieve nearest city name and country for the station location provided.
Here is look of the ARM VD:
Enjoy coding and your new ARM virtual device!
Sankotronic
205 downloads
-

[VD] Daily Triggers
By J3R3M
Daily Triggers
First release on french board in April 2018
INTRODUCTION
This VD was my first contribution on the french forum. I was so glad! I learnt to use LUA tables just before and I wanted to use them in a VD which can be useful.
This VD allows you to easily manage some one-time actions for each day in a week. With it, you quickly can change the time to trigg one or many actions, or see when an action will be done. It's possible to set one our per day, using a time shift if needed.
It's my first VD, I was learning how to program in LUA and I was beginning to work with time in LUA, so it's not perfect in the programming way, but it works! I used it for a long time and I have never met any issue!
INSTALLATION
Create a Global Variable called VD_TRIGGERS Import the VD Change the Icons ID in the Main Loop, using the icons below -- Icons IDs local icone_ok = 1156 local icone_wait = 1158 local icone_no_trigg = 1155 local icone_triggers_off = 1157 local icone_vd_off = 1160 Add your to-do actions for each day with the totrigg() function, into the Main Loop -- To do each day local function totrigg(day) -- Here actions for everyday if day == 1 then -- Actions for Monday elseif day == 2 then -- Actions for Tuesday elseif day == 3 then -- Actions for Wednesday elseif day == 4 then -- Actions for Thursday elseif day == 5 then -- Actions for Friday elseif day == 6 then -- Actions for Saturday elseif day == 7 then -- Actions for Sunday end end
VD CONFIGURATION AND USE
This VD is divided into 4 parts :
Information about the next trigger The Programmer View on all triggers set Enable/Disable VD
3 Sliders and the OFF button can be used to prepare trigger informations : Hours Sliders will convert 0-100 value to 1 - 23 in the programmer Minutes Sliders will convert 0-100 value to 1 - 59 in the programmer Time Shift Sliders will convert 0-100 value to -30 - +30 in the programmer Please take care to set 0 (Slider at 50) if you want to trigg your actions at the time set! OFF Button will replace all the programmer's informations by OFF If you want to set a new time information, you only need to click on any slider above After each slider move, check the Prog Label content to avoid any error Once the Prog content is correct and checked, you can affect its value for each day you want by simply clicking on its name! You will be able to see the affected times just 3 seconds after in the Triggers Views At this time, the actions set in the totrigg() function will be done Of course, if the VD is disabled, no actions will be triggered
ICONS
Waiting to trigg today's action Today's action triggered No action planned today (OFF) All triggers set at OFF VD OFF79 downloads
-
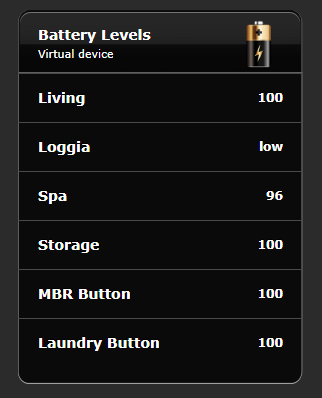
Battery Level Display
By RohitNz
The Virtual Device shows the battery status of battery powered devices. In addition, it will send an email to a user when the battery is low or dead. It is suitable for a small number of devices and gives you a snapshot view.
Note that the Lithium battery drops suddenly and if its below 80 then its marked as low and should be replaced. The battery is checked once a day roughly.
The lua code is attached. I have written it for efficiency instead of accuracy, as lua execution is so so slow. Hence the use of delays. You need as many labels in the VD as the number of devices and it uses label1..labeln for simplicity.
CODE.TXT
262 downloads
-
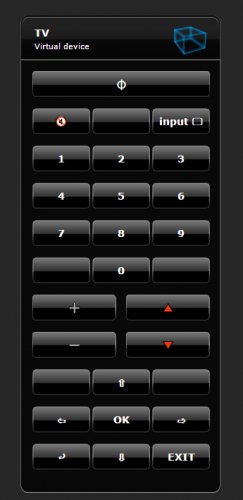
Remotec Multimedia VD
By marshal
ZXT-120 is an IR extender for air conditioners, but it can be learned up to 20 defferent ir code for multimedia. The process of learning of zxt-120 is written in its manual, but i want to show a way to use that codes in fibaro HC.
For this purpose we have to change the virtual device IP Address with your HC ip, and write 80 in TCP port box:
You can change the buttons according to your custom multimedia device (here we made a TV control):
Now you have to change commands for corresponding buttons.
For example for first button:
Authorization code is your username:password in 64Base format.
admin:admin => YWRtaW46YWRtaW4=
We can learn up to 20 code according to this list:
Use this command for changing mode :
/api/callAction?deviceID=107&name=setMode&arg1=0
For setting temperature (in cooling mode):
/api/callAction?deviceID=107&name=setThermostatSetpoint&arg1=2&arg2=23
For setting temperature (in heating mode):
/api/callAction?deviceID=107&name=setThermostatSetpoint&arg1=1&arg2=21
118 downloads
- remotec
- multimedia
- (and 3 more)
-
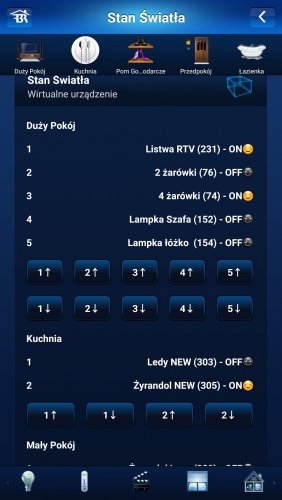
Stan_ON_OFF.vfib
By tefil
Stan_ON_OFF.vfib
VD pozwala na sprawdzenie stanu urządzeń ON/OFF z możliwością szybkiego ich włączania/wyłączenia
178 downloads
-

Ambient Weather Station VD
By Sankotronic
Ambient Weather Station VD standalone
INTRODUCTION
Ambient Weather station (AWS) VD reads measurements provided by Ambient weather stations which are connected to ambientweather.net service on internet. VD is tested with Ambient Weather station WS-1401-IP OBSERVER, but should also work with other similar types of Ambient weather stations.
PREREQUISITES
Fibaro Home Center 2 with firmware 4.560 or greater
Emoji VD standalone must be downloaded and installed for AWS VD to function properly.
At least one Ambient weather station connected to internet and user application key and API key
FEATURES
User can install multiple instances of VD for as many Ambient Weather stations he/she might have. Uses ambient weather cloud API to retrieve latest measurements. Provides measurements in imperial or metric units and also wind speed in m/s. Provides global variables for indoor and outdoor temperature, indoor and outdoor humidity, wind and gust speed, rain event, solar radiation, UV, outdoor and indoor PM25 and CO2 that can be used to trigger block or LUA scenes for specific user actions. Multi-language support with 27 languages included (see APPENDIX 1 for the list). VD can use HC selected language or user can select any other available language. VD will be automatically translated to selected language Easy setup for VD icons (on UHAS™ compatible version is this even easier) Global variables are automatically added, monitored, repaired and cleaned and does not require user intervention
INSTALLATION
Please check provided User Manual
PACKAGE CONTENT
Ambient Weather Station VD v1.1 Icon pack User manual EN
TERMS AND CONDITIONS
Permission to use, copy, modify and distribute this software and its documentation for educational, research, personal use and non-profit purposes, without fee and without a signed licensing agreement is hereby granted, provided that the copyright notice, with "Terms and conditions" and "Disclaimer" appear in all copies, modifications and distributions. It is strictly forbidden to sell, rent, lease and/or lend this software for profit without prior consent from the Author.
DISCLAIMER
This software is provided by copyright owner "as is" and any express or implied warranties, including, but not limited to, the implied warranties of merchantability and fitness for a particular purpose are disclaimed. In no event shall the author and distributor be liable for any direct, indirect, incidental, special, exemplary, or consequential damages (including, but not limited to, procurement of substitute goods or services; loss of use, data, or profits; or business interruption) however caused and on any theory of liability, whether in contract, strict liability, or tort (including negligence or otherwise) arising in any way out of the use of this software, even if advised of the possibility of such damage.
Fibar Group S.A. and their employees are not responsible for support of the ABC VD. Please contact the author Sankotronic, on the Fibaro Forum, for any questions or support required.
113 downloads
(0 reviews)0 comments
Submitted
-

Netatmo Public Weather Station suite
By Sankotronic
Netatmo Public Weather Station suite standalone v1.1
INTRODUCTION
Netatmo Public Weather station suite brings local weather data to users that do not have their own personal weather station. It is must have in combination with Weather State & Forecast suite to provide better control of your beautiful garden irrigation system.
PREREQUISITES
Fibaro Home Center 2 with firmware 4.160 or greater
Sankotronic Lab. Emoji VD standalone (not required since v1.1)
Netatmo Weather station
FEATURES
Great solution for users that do not have personal weather station. Can be used together with Weather State & Forecast suite to provide necessary data to Irrigation Control VD for watering adjustments and delays.
Integration of nearest public Netatmo weather station with HC2 including rain gauge and anemometer
Support for multiple public Netatmo weather stations
Smart update system that follows Netatmo weather station cloud updates
Public Netatmo weather station measurements can be shown on Weather State VD and HC2 web GUI and mobile applications by means of Weather State VD and Weather provider plugin
VD has built in multi-language support with 27 languages included (see APPENDIX 1 for the list). VD can use HC selected language or user can select any other available language.
Easy setup for VD icons (on UHASTM compatible version is this even easier)
Global variables are automatically added, monitored and repaired and does not require user intervention
INSTALLATION and UPGRADE
Please follow the instructions provided in User manual
PACKAGE CONTENT
Netatmo Public module VD Netatmo Public Weather station scene Set of icons
UPGRADE PACKAGE CONTENT
Netatmo Public module VD main loop and update button upgrade code Netatmo Public Weather station scene
NOTE - User manual is now provided as separate download.
TERMS AND CONDITIONS
Permission to use, copy, modify and distribute this software and its documentation for educational, research, personal use and non-profit purposes, without fee and without a signed licensing agreement is hereby granted, provided that the copyright notice, with "Terms and conditions" and "Disclaimer" appear in all copies, modifications and distributions. It is strictly forbidden to sell, rent, lease and/or lend this software for profit without prior consent from the Author.
DISCLAIMER
This software is provided by copyright owner "as is" and any express or implied warranties, including, but not limited to, the implied warranties of merchantability and fitness for a particular purpose are disclaimed. In no event shall the author and distributor be liable for any direct, indirect, incidental, special, exemplary, or consequential damages (including, but not limited to, procurement of substitute goods or services; loss of use, data, or profits; or business interruption) however caused and on any theory of liability, whether in contract, strict liability, or tort (including negligence or otherwise) arising in any way out of the use of this software, even if advised of the possibility of such damage.
Fibar Group S.A. and their employees are not responsible for support of the ABC VD. Please contact the author Sankotronic, on the Fibaro Forum, for any questions or support required.
VERSION HISTORY
1.0 - First public release 1.1 - Scene code changed to use new Netatmo API grant access by replacing username and password with tokens. VD since v1.1 do not need Emoji VD to be installed to work properly. Here is look and feel of the Netatmo Public Weather VD:
Enjoy coding and your new Netatmo Public weather station suite!
Sankotronic
214 downloads
(0 reviews)0 comments
Updated
-
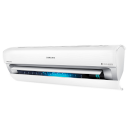
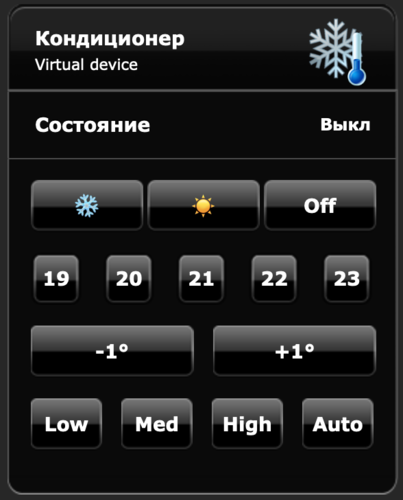
Samsung Air Conditioner
By szmyk
Since Samsung Plugin doesn't work I decided to write custom Samsung Air Conditioner VD.
Requirements:
Samsung AC Local PHP server (NAS, RPI, ...)
Installation:
Copy smarthome folder to your php server Edit/rename Bedroom.php, Living room.php files. For each device you need separate file. In each file: enter IP of your AC device enter token of your AC device To get token follow steps 3.1 - 3.5 from this site. Check if your PHP server is working: http://192.168.0.10/smarthome/samsung-ac/Bedroom.php
Of course change 192.168.0.10 with the IP of your PHP server.
You should see JSON result with status. Something like this: { "power": "Off", "mode": "Cool", "virusDoctor": "Off", "quiet": "On", "wind": "Fix", "temperature": 22, "currentTemperature": 23, "sleep": 0 } Install Air Conditioner VD Edit Air Conditioner VD:
Room name must be the same as your PHP file name without .php extension, e.g. Bedroom Enter Address IP of your PHP server, e.g. 192.168.0.10 Port number of your PHP server, usually 80 Add VD icons and enter icons ID at "refresh" button section:
Enjoy...
129 downloads
- air conditioner
- ac
- (and 1 more)
-

Helios KWL Modbus Integration
By hanswurst
Helios-KWL has a Modbussupport. I found an implementation in C for Loxone (https://www.loxwiki.eu/pages/viewpage.action?pageId=1639038)
and created a VirtualDevice for HC2,
104 downloads
-

TIMER_RTV.vfib
By tefil
TIMER_RTV.vfib
Pozwala określić czas wyłączenia dane urządzenia, pokazuje jego aktualny stan, możliwość szybkiego wyłączenia, powiadomienie push na telefon, o zrealizowanym zadaniu.
130 downloads
-
[VD + APP] Text To Speach (TTS) solution for HC2 and Apple Mac (OS X) - version February 2017
By gucio1234
Text To Speach (TTS) solution for HC2 and Apple Mac (OS X) :
PREFACE :
It took me two months of tests to make this solution at present stage and I had to learn a little Python and Applescript.
I am aware that lots of details can be improved. However all programmers knows there are no software without bugs and there is never final version. The attached OS X app is fully functional and it is called “Fibaro Airfoil Bridge v.0.1”.
I had no experience with OS X programming. This is the very first OS X app I wrote.
INTRODUCTION :
I have noticed that wide used solution for TTS and multiroom is to use Sonos speakers (probably because of the Fibaro plugin available) and VoiceRSS (http://www.voicerss.org/).
My solution is different. It uses the text synthesizer (TTS) which we have already implemented in our computers and which can speak in variety of languages – also those not supported by VoiceRSS. To change text into speech I used “SAY” command of OS X. The other advantage is that we are independent on internet connection and there are no charges for TTS processing. It has also multiroom solution. You can have installed all over your place a number of speakers. The volume of each speaker can be individually adjusted from HC2 (Volume range from 0 to 100 %) so it is possible to select in which room/rooms you hear the voice announcement.
The supported speakers/devices/protocols are as for now :
- Apple AirPlay
- Google Chromcast
- Bluetooth
- Windows computers (with installed app to become AirPlay compatible)
The supported languages/voices of OS X v. 10.12.2 (macOS Sierra) :
PLANS FOR FUTURE :
Fine tune the app and improve GUI of Fibaro Airfoil Bridge application.
Enhance the functionality with multiroom audio with distribution music from internet radio and iTunes.
This is an open project and I count on your constructive comments.
If there is anybody who would like to be involved in future enhancements please let me know in private message.
WHAT WE NEED :
- Fibaro HC2
- Apple Mac computer
- Audio Mixer VD installed on HC2
- Some LUA experience to fine tune VD on HC2 and have your user defined TTS messages in your scenes
- Airfoil by Rouge Amoeba application installed on Mac (for TTS it is OK to use free demo version)
- Fibaro Airfoil Bridge by Marcin S. Milewski (gucio1234) installed on Mac
- Speakers/audio receivers (any from the list of compatible devices) :
o Apple AirPlay
o Google Chromcast
o Mac , Windows or Linux computer with Airfoil Satellite installed
o iOS or Android device with Airfoil Speakers installed (if one wants to have TTS on mobile device)
o Bluetooth
The presented solution was tested with the following software versions / hardware :
- Airfoil for Mac v. 5.5.1
- Airfoil Sattelite for Windows v.5.1.6
- OS X v. 10.12.2 (macOS Sierra)
- Apple AirPort versions A1088, A1264, A1392
- JBL Flip 3 Bluetooth Speaker
- Fibaro Airfoil Bridge v. 0.1
- Fibaro HC 2 v. 4.110
It was not tested with Google Chromcast (as I do not have any) but this is supported by Airfoil.
IMPLEMENTATION :
Please read the whole instruction carefully before you start.
1.
Define the global variables in your HC2 (top part of the Variables’ Panel):
“PAMessage” - This variable will store the text you want to convert to speech.
“AudioMixer” – This variable will store the audio mixer settings for the devices.
2.
Install Audio Mixer VD on your HC 2.
Define parameters of this VD :
Set IP address of your Apple Mac computer
Set port number as 7000. The communication between HC2 and Mac will be on two ports: 7000 and 7001.
Define in VD as many audio mixer sliders as you have audio devices to be linked with your multi room audio system. Provide names for each slider corresponding to the devices/rooms you want to control. You may use your local language names, with spaces and local characters.
IMPORTANT:
Remember what is the order of your sliders. It is needed in next steps for proper link between HC2 and Mac.
The LUA code for each slider has to be same but it depends on the number of sliders one has defined. Here are examples :
If there are two sliders, LUA definition for each should be :
If there are four sliders, LUA definition for each should be :
Adjust the LUA code of each slider according to number of sliders there are in your VD.
There are four buttons on Audio Mixer VD (they can be adjusted for user’s preferences ):
“Test Message” – to send a test message to TTS system. In my VD the predefined test message is in Polish. It should be adjusted to your language.
“TTS” – to execute TTS with the text taken from global variable “PAMessage”
“Weather Outside” – to send present weather conditions to TTS system. In my case it is based on global weather variables received from Netatmo weather station. The message is in Polish. It should be adjusted to your local language and preferences.
“Send Data” – to send audio mixer settings from HC2 to Airfoil without processing any TTS
3.
Test and select desired language/voice for your TTS.
To change text into speech I used “SAY” command of OS X.
Open “Terminal “ application on your Mac.
Type ‘SAY –v ?’ to see the list of available voices/languages
Type ‘SAY –v <name of the voice>’ to select the voice of your preference
Type ‘SAY “THIS IS A TEST MESSGE IN MY LANGUAGE” ’ to test your selected voice
More details on this can be found here: https://developer.apple.com/legacy/library/documentation/Darwin/Reference/ManPages/man1/say.1.html
4.
Setup Airplay/Chromecast/Bluetoth devices with your Mac
5.
If you want to have other computers to act as clients with speakers install Airfoil Sattelite for each of them. The app is to be downloaded from https://rogueamoeba.com/airfoil/
6.
If you want to have mobile devices to act as clients with speakers install Airfoil Speakers for each of them. The info on these apps can be found on https://rogueamoeba.com/airfoil/
7.
Install “Airfoil” for Mac downloaded from https://rogueamoeba.com/airfoil/
NOTE: The free demo version lets to transmit audio up to 10 minutes long (which is more than enough for TTS). After that time the noise distortion will be added by the application.
If one wants to use Airfoil for transmission of music (which I hope will be introduced with future version of my solution) it is recommended to purchase a license.
IMPORTANT:
All the names of the audio devices configured with Airfoil HAVE TO HAVE names of the speakers without spaces and without any special/national characters. Rename the devices in Airfoil if it is needed.
8.
Copy the “Fibaro Airfoil Bridge v.0.1” application to your Mac computer. DO NOT RUN IT YET.
Attached is the zipped file. You have to unzip it to have .app file.
IMPORTANT:
Right click on “Fibaro Airfoil Bridge v.0.1” and select “Show Package Content”
Navigate to Contents -> Resources
Locate the file “SpeakersNAME.txt”
Edit the file “SpeakersNAME.txt”. Put names of your speakers each in the new line. They have to be same as names defined in Airfoil (paragraph 7.). The order of the speakers is EXACTLY SAME as order of the sliders of your HC 2 VD “Audio Mixer” (paragraph 2.) .
NOTE: The very first speaker has to be “LocalSpeaker” which is the default speaker of your Mac computer. This has to be defined even if you do not use the speaker of your Mac.
Here is an example of “SpeakersNAME.txt” file:
LocalSpeaker JADALNIA AppleTV PC-ANTRESOLA POKOJ-3 WIATROLAP MIODARNIA
9.
After the “SpeakersNAME.txt” is updated one can run “Fibaro Airfoil Bridge v.0.1” applicaton.
NOTE:
If it happens that HC2 needs to be restarted, it is required to restart “Fibaro Airfoil Bridge v.0.1”also (Exit and Run).
Restart of “Fibaro Airfoil Bridge v.0.1” is to be done after HC2 is back operational.
IMPORTANT:
This is known bug with 0.1 version. If you want to close the app use the EXIT button on the main window or the EXIT option of the second pull down menu.
If you close the app with red circle on top left corner of the application’s window or with the QUIT option from the first pull down menu the application is not closed completely. In this case you have to find its icon on the bottom bar of OS X, right click and force close it .
17 downloads
(0 reviews)0 comments
Updated
-

Heating
By szmyk
Heating VD, which I use especially when I go on winter holidays.
On the day of departure we have no time to adjust heating, so a few days before using this VD I set the date/time when the heating should be turned off and date/time when it should be turned on again. Of course you can use this VD everyday just to turn on/off heating or to set the heating timer on/off.
When it turn off the heating it just turn on vacation mode for every zone.
Features:
instant turn on/off the heating in all zones set the date and time when the heating will be turned off and/or turned on _ - change on/off setting time ❌ - clear timer ♻️ - refresh button - you don't need to touch it. It's called programmatically displaying the current state (on/off) sending push messages about changing heating state (by scheduler)
Customization:
change the VD labels to your own language set mobile device id to get push messages about changing heating state -- USER MODIFICATION local pushDeviceId = 0 -- mobile device id to send push messages local scheduleFreq = 1 -- [min] -- END OF USER MODIFICATION Screenshot:
Icon:
Enjoy...
137 downloads
(0 reviews)0 comments
Updated
-
Daikin SkyFi
By seiq
Virtual device for control of Daikin air conditioners with the SKYFi addon. (untested)
125 downloads
- air conditioning
- daikin
- (and 3 more)
(0 reviews)0 comments
Submitted
-
Download Statistics
-
New reviews
-

-

-
 By SmartHomeEddy · PostedGreat QuickApp and excellent configuration manual. QuickApp works smooth. Thanks!
 -

-

-

-
 By OBewan · Posteding data from Gardena services... I am getting the following error from the installation script. Any idea how to fix it? Thanks [DEBUG] 21:35:13: 2022-04-11 21:35:13.093196 [ error] Handshake error: wrong version number [DEBUG] 21:35:13: 2022-04-11 21:35:13.093777 [ error] Handshake error: sslv3 alert handshake failure [DEBUG] 21:35:13: HTTP error: Transport endpoint is already connected
 -

-

-

-
-
Highest Rated Submitters
No ratings this week.
No ratings this month.
No ratings this year.
-
1

-
2

-
3

-
4

-
5

-