
Welcome to Smart Home Forum by FIBARO
Dear Guest,
as you can notice parts of Smart Home Forum by FIBARO is not available for you. You have to register in order to view all content and post in our community. Don't worry! Registration is a simple free process that requires minimal information for you to sign up. Become a part of of Smart Home Forum by FIBARO by creating an account.
As a member you can:
- Start new topics and reply to others
- Follow topics and users to get email updates
- Get your own profile page and make new friends
- Send personal messages
- ... and learn a lot about our system!
Regards,
Smart Home Forum by FIBARO Team

.thumb.png.d4cdaed51f345b01992386e25e167dcc.png)


Virtual Devices
The category contains virtual devices submitted by users.
Downloading and submission terms have to be accepted.
Types of files accepted: LUA, VFIB, ZIP, TAR, RAR, JSON.
Virtual devices have to be described properly, screen shots are optional.
Support topics are created automatically here Virtual devices
Report topics and files that are no longer supported by authors.
All the files submitted have to be approved by administrators.
85 files
-
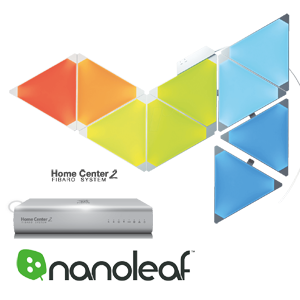
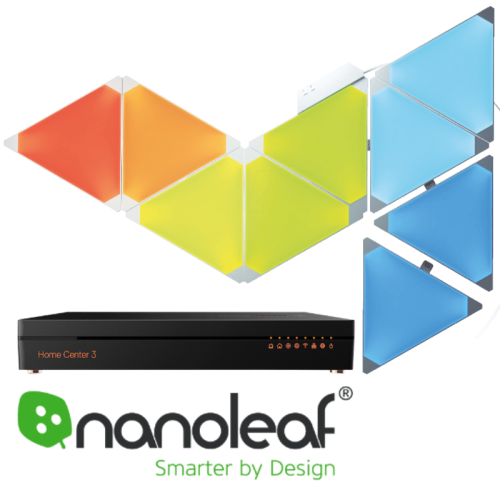
Nanoleaf Aurora VD standalone
By Sankotronic
Nanoleaf Aurora VD v2.0.1
(standalone version)
INTRODUCTION
Nanoleaf Aurora light panels https://nanoleaf.me/en/ brings new way of lighting experience. Nanoleaf Aurora VD enables Fibaro Home Center 2 to control this lights and show their status. This is new updated version.
PREREQUISITES
Fibaro Home Center 2 with firmware 4.120 or higher (tested up to 4.530) Nanoleaf Aurora starter kit with firmware 1.5.1 up to 3.0.6
FEATURES
Control brightness, hue, saturation, color temperature and activate Aurora effects VD automatically updates list of the available effects when added or deleted with Nanoleaf mobile application Scroll with buttons through available effects on VD and activate Selected and running effect type can now be recognized by small icon in front of the effect name.
Support for Rhythm module. VD automatically recognizes if Rhythm module is attached to Aurora light and enables selection of input between built in microphone or aux input. Use Process button to control Aurora light by other scenes and VD Built in button for generating authorization token for easy connection to Aurora light Multilanguage support with 27 languages. VD will be automatically translated to HC selected language or user can select any other available language. Easy setup for VD icons with automatic setup of icons for buttons and sliders too. (UHAS™ compatible version has even more easier icon setup) User can setup VD to have separated on and off buttons or to have toggle on/off button Light can be turned on/off with buttons and brightness slider. Even if brightness slider is used to turn off Aurora light, VD remembers last brightness settings so if light is turned back on with button it will be turned on at last brightness level. Self adding and checking of global variable data integrity. Automatic repair of global variables without user intervention New approach to programming other code to control this VD enables future upgrades without needing to change that code. (See more about that in User Manual provided)
INSTALLATION
Please check provided User Manual where all steps are explained in detail and this video made by @MarcoTorino71:
UPGRADE
To upgrade from v2.0 to v2.0.1 just paste provided code in package over old Main loop code and redo settings
To upgrade from v1.0s and v1.1 to version 2.0.1 just delete old version and import new version of VD.
PACKAGE CONTENT
Nanoleaf Aurora VD v2.0.1 (standalone) Icons for VD User manual v1.3 EN
CREDITS
Many thanks to
gucio1234 and BodyArt from forum.fibaro.com for help with testing, translations and manual.
TERMS AND CONDITIONS
Permission to use, copy, modify, and distribute this software and its documentation for educational, research, personal use and non-profit purposes, without fee and without a signed licensing agreement, is hereby granted, provided that the copyright notice, with "Terms and Conditions" and "Disclaimer" appear in all copies, modifications, and distributions.
It is strictly forbidden to sell, rent, lease and/or lend this software for profit without prior consent from the Author.
DISCLAIMER
This software is provided by copyright owner "as is" and any express or implied warranties, including, but not limited to, the implied warranties of merchantability and fitness for a particular purpose are disclaimed. In no event shall the author and distributor be liable for any direct, indirect, incidental, special, exemplary, or consequential damages (including, but not limited to, procurement of substitute goods or services; loss of use, data, or profits; or business interruption) however caused and on any theory of liability, whether in contract, strict liability, or tort (including negligence or otherwise) arising in any way out of the use of this software, even if advised of the possibility of such damage.
Fibar Group S.A. and their employees are not responsible for support of the Nanoleaf Aurora VD. Please contact the author Sankotronic, on the Fibaro Forum, for any questions or support required.
LEGAL NOTICE
Nanoleaf and Aurora are registered trademarks or trademarks of Nanoleaf Energy Technology ShenZhen Limited registered in PR China and other countries.
LATEST NEWS
1 April 2019
Nanoleaf Aurora light panels latest firmware update 3.0.8 is out. If you upgrade to this latest firmware Nanoleaf Aurora VD v2.0 will not be able to show VD main icon for effects anymore due to color mode type name "effects" changed to "effect". Even if effect is selected VD will have icon set for solid color. Other functionality of the VD remained intact and will function properly with this latest firmware.
12 September 2019
Nanoleaf Aurora VD is working with the latest Aurora firmware 3.2.0. Problem from 1 April this year with icon functionality is solved!
VERSION HISTORY
2.0.1 - Corrected bug in VD main loop that prevented saving updated effect
2.0 - Code rewritten to enable recognizing type of the running and selected effect. Further optimized part of the code and cleaned some bugs.
1.1 - Corrected some bugs in code and replaced light unreachable icon
1.0 - First release of standalone version build on code of VD for UHAS™
Here is look of the Nanoleaf Aurora VD:
Enjoy coding and your new Nanoleaf Aurora virtual device!
Sankotronic
314 downloads
-
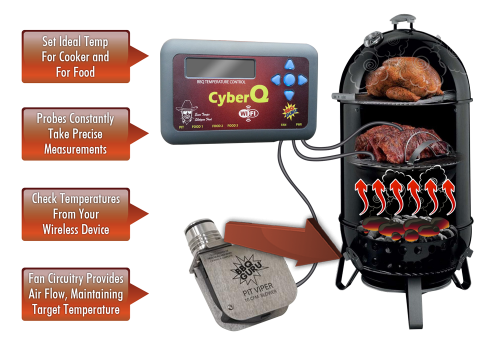
[VD] BBQ Guru CyberQ WIFI
By Barlow
Monitor:
Fan speed Temperature of the Pit and core temperatures of Food1, Food2 and Food 3 probes in Celsius or Fahrenheit. Status of each of the temperature sensors ("OK", "HIGH", "LOW", "DONE", "ERROR", "HOLD", "ALARM", "SHUTDOWN"). Status codes are also available as global variables for use in block scenes. Control:
1. Temperature setpoints for the Pit and Food1, Food2 and Food 3 cores.
2. Timer and timeout actions (none, sound alarm, hold pit at set temperature, shutdown fan; or any scene-based action you specify.
3. Ramp the pit temperature (cook and hold) from any selected food item.
Installation and configuration:
Install the CyberQ WIFI VD, which you can download below. I will also post it on Fibaro Marketplace.
Enter the CyberQ WIFI IP address and port number in the advanced settings. Scroll down to the main loop section to set the authentication details.
14 downloads
-

Advanced Radiation Monitor (ARM) VD standalone
By Sankotronic
IMPORTANT NOTICE!
This VD is currently not working since Radioactive@Home website has changed their map. All users that installed this VD please DELETE it or at least DISABLE it since it can produce some problems on your HC2. Sorry for the inconvenience.
INTRODUCTION
ARM VD collects radiation levels from all available stations around the world and shows 5 nearest stations to your location and one station with highest reading. It is using map of radiation detector stations on Radioactive@Home website. Radioactive@Home is a Polish science project using the distributed computing capabilities of the BOINC platform. The main goal of the project is to create a free and continuously updated map of radiation levels available for everyone, by gathering information about gamma radiation using sensors connected to the computers of volunteers willing to participate in the project. Project is completely non-commercial, participating will be free of charge (excluding cost of detector) and the software will be licensed under the GNU General Public License (GPL).
PREREQUISITES Fibaro Home Center 2 with firmware 4.120 or greater
FEATURES
ARM VD collects radiation levels from all available stations around the world and shows 5 nearest stations to your location and one station with highest readings Simple installation and setup. Uses Developer HERE Geocode API freemium plan to show radiation monitor station location, nearest city name and country. Multi-language support with 27 languages included. Easy setup for VD icons (on UHASTM compatible version is this even easier) Global variables are automatically added, monitored and repaired.
INSTALLATION
Please check provided User Manual where all steps are explained in detail
PACKAGE CONTENT
Advanced Radiation Monitor VD v2.2 standalone Colorful icon pack User Manual v1.2 EN
CREDITS
Many thanks to BodyArt and gucio1234 from Fibaro forum for help with coding, testing, translations and user manual and andre from http://forum.lic.pl for the original idea.
TERMS AND CONDITIONS
Permission to use, copy, modify and distribute this software and its documentation for educational, research, personal use and non-profit purposes, without fee and without a signed licensing agreement is hereby granted, provided that the copyright notice, with "Terms and conditions" and "Disclaimer" appear in all copies, modifications and distributions. It is strictly forbidden to sell, rent, lease and/or lend this software for profit without prior consent from the Author.
DISCLAIMER
This software is provided by copyright owner "as is" and any express or implied warranties, including, but not limited to, the implied warranties of merchantability and fitness for a particular purpose are disclaimed. In no event shall the author and distributor be liable for any direct, indirect, incidental, special, exemplary, or consequential damages (including, but not limited to, procurement of substitute goods or services; loss of use, data, or profits; or business interruption) however caused and on any theory of liability, whether in contract, strict liability, or tort (including negligence or otherwise) arising in any way out of the use of this software, even if advised of the possibility of such damage.
Fibar Group S.A. and their employees are not responsible for support of the ARM VD. Please contact the author Sankotronic, on the Fibaro Forum, for any questions or support required.
VERSION HISTORY
2.2 – Corrected bug that was stopping code on error if HERE service does not send city name for the location provided by VD.
2.1 – Replaced Google location service to get nearest city name and country and introduced HERE service. Also moved code for getting country and city name for location of the station from scene to Update button on VD.
2.0 – Completely revamped ARM VD to show five nearest radiation measuring stations and the one with highest measuring. Also introduced Google service to retrieve nearest city name and country for the station location provided.
Here is look of the ARM VD:
Enjoy coding and your new ARM virtual device!
Sankotronic
205 downloads
-

Advanced Battery Check (ABC) VD standalone
By Sankotronic
INTRODUCTION
Advanced Battery Check VD (further in text ABC VD) scans for all included battery devices and adds them to the list sorted by either battery level, device ID or room ID depending on user settings. Also it can send list of all devices or just devices that needs battery to be replaced to e-mail and/or popup. Can also send push notification with the worst battery status.
PREREQUISITES
Fibaro Home Center 2 with firmware 4.160 or greater
FEATURES
Scans for all battery powered devices adds them to the list and shows their battery level status. It is possible to scroll through the list of battery devices and see battery level, type, amount of battery needed for selected device and price of the battery (if entered by user). Easy adding or removing battery devices to be ignored Included 30 types of battery devices (products) in ABC VD version 1.0 for the list please check APPENDIX 2 Automatic recognition and adding of not included types of devices (products) for which user can setup battery type, amount needed and price Predefined types of battery types including Unknown and Rechargeable Sends list of all battery devices found or only dead devices and devices with battery level bellow 35% to e-mail and popup notification depending on user selection. Calculates total price for devices that need battery replacement on the bottom of the list sent to e-mail (user need to setup currency and price for batteries) Sends push notification for device with lowest battery level found or dead device It can automatically remember date when battery is replaced on device after updating the list. This is done by comparing previous measured battery level with the currentone. VD has built in multi-language support with 28 languages included (see APPENDIX 1 for the list). VD can use HC selected language or user can select any other available language. VD will be automatically translated to selected language (visible after refreshing page on browser or refreshing network data on Fibaro mobile application) Easy setup for VD icons (on UHASTM compatible version is this even easier) Global variables are automatically added, monitored and repaired and does not require user intervention
INSTALLATION
Please check provided User Manual and video provided by @MarcoTorino71:
PACKAGE CONTENT
Advanced Battery Check VD v.1.0 Standalone Icon pack User manual EN
TERMS AND CONDITIONS
Permision to use, copy, modify and distribute this software and its documentation for educational, research, personal use and non-profit purposes, without fee and without a signed licencing agreement is hereby granted, provided that the copyright notice, with "Terms and conditions" and "Disclaimer" appear in all copies, modifications and distributions.
It is strictly forbidden to sell, rent, lease and/or lend this software for profit without prior consent from the Author.
DISCLAIMER
This software is provided by copyright owner "as is" and any express or implied warranties, including, but not limited to, the implied warranties of merchantability and fitness for a particular purpose are disclaimed. In no event shall the author and distributor be liable for any direct, indirect, incidental, special, exemplary, or consequential damages (including, but not limited to, procurement of substitute goods or services; loss of use, data, or profits; or business interruption) however caused and on any theory of liability, whether in contract, strict liability, or tort (including negligence or otherwise) arising in any way out of the use of this software, even if advised of the possibility of such damage.
Fibar Group S.A. and their employees are not responsible for support of the ABC VD. Please contact the author Sankotronic, on the Fibaro Forum, for any questions or support required.
VERSION HISTORY
1.0 – First release used as a base for UHAS version
Here is look of the ABC VD:
Enjoy coding and your new ARM virtual device!
Sankotronic
866 downloads
-

HC2 Icon Preview VD standalone
By Sankotronic
INTRODUCTION
HC2 Icon Preview VD provides easy way to search custom icons installed on Fibaro Home Center 2 to find their ID number. User can also use it to list through all virtual devices and set their main icon and also icon of all VD buttons and sliders. This capability greatly speeds up building of new virtual devices with many buttons and sliders since their icons can be set at once.
PREREQUISITES
Fibaro Home Center 2 with firmware 4.120 or greater
Any internet browser on computer locally connected to HC2
FEATURES
Provides simple preview of all room, scene and VD custom icons imported to HC2 what makes it great tool for developers and users to find icon ID numbers Provides easy way to setup main icon and icon of all buttons and sliders of all virtual devices installed with just one click on Setup VD icon button VD automatically updates list of the installed virtual devices and icons Multi-language support with 27 languages included (see APPENDIX 1 for the list in user manual). VD can use HC selected language or user can select any other available language. VD will be automatically translated to selected language (visible after refreshing page on browser or refreshing network data on Fibaro mobile application) Global variables are automatically added, monitored and repaired and does not require user intervention
INSTALLATION
Please check provided User Manual and this video by Mr Apple @MarcoTorino71:
PACKAGE CONTENT
HC2 Icon Preview VD v2.1 Standalone Beautiful main icon User manual EN
TERMS AND CONDITIONS
Permission to use, copy, modify and distribute this software and its documentation for educational, research, personal use and non-profit purposes, without fee and without a signed licensing agreement is hereby granted, provided that the copyright notice, with "Terms and conditions" and "Disclaimer" appear in all copies, modifications and distributions. It is strictly forbidden to sell, rent, lease and/or lend this software for profit without prior consent from the Author.
DISCLAIMER
This software is provided by copyright owner "as is" and any express or implied warranties, including, but not limited to, the implied warranties of merchantability and fitness for a particular purpose are disclaimed. In no event shall the author and distributor be liable for any direct, indirect, incidental, special, exemplary, or consequential damages (including, but not limited to, procurement of substitute goods or services; loss of use, data, or profits; or business interruption) however caused and on any theory of liability, whether in contract, strict liability, or tort (including negligence or otherwise) arising in any way out of the use of this software, even if advised of the possibility of such damage.
Fibar Group S.A. and their employees are not responsible for support of the ABC VD. Please contact the author Sankotronic, on the Fibaro Forum, for any questions or support required.
VERSION HISTORY
2.1 – VD completely redesigned and added possibility to set virtual devices main and all buttons and sliders icon. Added checking of global variables integrity and automatic repair. It also automatically updates list of available virtual devices on HC2 and list of custom icons after each change. 1.0 – Code optimized and resolved some bugs 0.1 – First release
Here is look of the HC2 Icon preview VD:
Enjoy coding and your new HC2 Icon Preview virtual device!
Sankotronic
1,505 downloads
-
Konnected Alarm Panel
By Vangelis
Hello Everyone,
I 've tried Konnected alarm panel in parallel with my old alarm system, and it is working great. (Konnected)
My task that was assigned to myself was to integrate Konnected directly to my HC2.
So with a little LUA magic we have ready the Konnected Virtual Device for HC2.
You can find the Virtual Device Repository here.
Enjoy!
79 downloads
-
CO_MANAGER
By lukasztylski
https://github.com/litepl/fibaro-heating-vd
Heating solution VD, based on Danfoss's thermostats and temperature sensors.
13 downloads
(0 reviews)0 comments
Submitted
-
LOQED Touch Smart Lock Virtual Device for FIBARO Home Center 2
By tinman
What features does the LOQED Touch Smart Lock offer with Fibaro?
The LOQED Touch Smart Lock & Fibaro integration is done via the local bridge API.
Currently, the following functionalities are supported:
Send real-time status changes of the lock (open, unlock, lock) and battery, Wi-Fi, Bluetooth state to the Fibaro HC2 gateway.
Receive commands from the Fibaro HC2 gateway to change the lock state (open, unlock, lock).
Only English language supported, however you can edit the VD code to add your own language.
Currently this VD can’t decode json data POSTed by the bridge, as FIBARO API simply ignores any unknown data and accept only JSON key args:[{}]. Therefore, one can’t decode who opened/closed the LOQED via App (or if it was manually, with knob).
Security consideration: the LOQED bridge sends any status change (e.g. "the door was opened") to Fibaro over an unsecure HTTP connection in your Wi-Fi network. There is no way to add digital signature (like used by LOQED QuickApp on e.g. Home Center 3) into the Home Center 2 VD. Note that this does not affect opening/locking the door, it is only concerns the status information.
Requirements
A supported gateway, such as:
Fibaro Home Center 2
Installation
Step 1: create API key
Go to https://app.loqed.com/API-Config and log in with your LOQED app e-mail address and password (note that you will be logged out of the LOQED app). Click on the “API Configuration tool" button. Click the “Add new API key” button. Set any name and create the API key. It is normal the “Remove unlocking/locking checkbox is greyed out.
After the key is created, click on the "view / edit" button. Leave this screen open.
Step 2: Install the Loqed VD on the Fibaro HC2 gateway
Login into your Fibaro gateway.
Download the VD, unzip the content, go to "Devices" -> "Add or Remove Device"->"Import virtual device" and click "select file".
Select the "LOQED.vfib" file and upload it.
Once uploaded, few things need to be set in the VD, go to advanced tab of the VD:
enter the LOQED Bridge IP Address into the VD "IP Address" field enter 80 for the VD "TCP Port" field
in each every Button (Lock, Unlock and Open) code window, change these two variables: local loqed_key_id = 0 local loqed_key = 'TE9RRUQgVkQgdi4wMSBmb3IgSG9tZSBDZW50ZXIgMiAoYykgdGlubWFu' to the values from the LOQED API Config website
loqed_key_id is LOQED API Config -> "API Keys (incoming webhooks)" -> "Local Key ID"
loqed_key is LOQED API Config -> "API Keys (incoming webhooks)" -> "Key"
Save the VD.
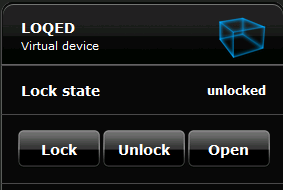
You should get now some values displayed in the VD,
if this is working please change the loop value in VD mail loop window to something like e.g. 10 minutes
fibaro:sleep(1000*60*10)
instead of the 10 seconds
fibaro:sleep(1000*10)
which are fine for test, but not daily use.
Step 3: Setup Variables on the Fibaro HC2 gateway
Go to "Panels" -> "Variables Panel"
Scroll down to "Predefined variables"
Click on "Add"
For variable name use "LOQED"
Add two extra values, you need totally 4 of them
For the values use following values:
open unlocked locked unknown
Click on save.
Later, you will be able to run your own block and LUA scenes, based on the LOQED variable values.
Step 4: Create webhook scenes on the Fibaro HC2 gateway
Go to scenes, and click on create -> new -> LUA
You need totally 4 scenes, the scene name does not matter, the scene ID is only important (for LOQED webhook).
For the vd_id please use the LOQED VD device ID, which you previously wrote down.
for "Open State" scene
--[[ %% properties %% events %% globals --]] -- change the xxx below to the LOQED VD ID on your HC2 local vd_id = xxx fibaro:call(vd_id, "setProperty", "ui.LabelStatus.value", "Open") fibaro:setGlobal("LOQED", "open")
for "Locked State" scene
--[[ %% properties %% events %% globals --]] -- change the xxx below to the LOQED VD ID on your HC2 local vd_id = xxx fibaro:call(vd_id, "setProperty", "ui.LabelStatus.value", "Locked") fibaro:setGlobal("LOQED", "locked")
for "Unlocked State" scnene
--[[ %% properties %% events %% globals --]] -- change the xxx below to the LOQED VD ID on your HC2 local vd_id = xxx fibaro:call(vd_id, "setProperty", "ui.LabelStatus.value", "Unlocked") fibaro:setGlobal("LOQED", "unlocked")
for "Unknwon Position" scene
--[[ %% properties %% events %% globals --]] -- change the xxx below to the LOQED VD ID on your HC2 local vd_id = xxx fibaro:call(vd_id, "setProperty", "ui.LabelStatus.value", "Unknown position") fibaro:setGlobal("LOQED", "unknown")
Write down the scene IDs, you will need them in Step 7
Step 5: Test VD / Scenes
Go to "Your Home" on your HC2 webpage, to be able to see the VD and scenes together.
Clicking on the Open, Unlock and Lock buttons of the VD should controll your LOQED Lock, additionally you should see in the VD "Lock state" label some messages,
e.g. when you click on "Unlock" the status will be "Unlock clicked" right after you clicked, and "Unlock executed" right after your LOQED Lock recieved that command.
Executing (simply manually click on start) of the 4 scenes, should change the VD "Lock state" label to "open", "locked", "unlocked" and "unknown position".
If all these tests are successful, you can continue with the next step.
Step 6: Create a user and set access permissions on the Fibaro HC2 gateway
Go to Settings->Access Control
Create new local user, e.g. loqed
Setup password for the user, please don't use any special characters
Change the user Access Control rights, give the user full access to the LOQED VD and these 4 LUA webhook scenes
Step 7: Create webhooks on LOQED bridge
The LOQED bridge can send any status change of the lock to your gateway as soon as they happen. For this, you need to set some URL's on the LOQED Bridge.
You need to create 4 webhooks on the LOQED Bridge to inform the gateway about the 4 different lock statuses.
Go to https://app.loqed.com/API-Config --> "Outgoing Webhooks via LOQED Bridge" --> click the button "Add/delete webhooks".
On that page, add the following URLs:
http://gw_user:gw_password@gw_ip/api/scenes/123/action/start
(only for the night lock trigger, change the 123 to the ID of the "Locked State" scene)
http://gw_user:gw_password@gw_ip/api/scenes/124/action/start
(only for the latch trigger, change the 124 to the ID of the "Unlocked State" scene)
http://gw_user:gw_password@gw_ip/api/scenes/125/action/start
(only for the open trigger, change the 125 to the ID of the "Open State" scene)
http://gw_user:gw_password@gw_ip/api/scenes/126/action/start
(only for the unknown state trigger, change the 126 to the ID of the "Unknwon Position" scene)
Above, "gw_user" and "gw_password" is your gateway's username and password created in previous step, "gw_ip" is the IP of ypur Home Center 2
Done
That's it! You can now control your LOQED Touch using Fibaro Home Center 2.
Questions?
If you have any questions regarding this VD, comments or improvements requests, please send me PM
tinman
13 downloads
(0 reviews)0 comments
Updated
-

Control McLighting v2 based on ESP8266 board
By Pcg
Control ESP8266 lighting gadget developed by Tobias Blum
Change light modes and control through HC2
Requirements:
ESP8266 board programmed with McLighting software For every button you should change "local led_pin = [your control pin]" Use your own ip address and port
Fell free use and modify,but let me have a copy please for improving my knowledge.
25 downloads
(0 reviews)0 comments
Updated
-

Checking devices connected to the WI-FI network Sprawdzanie urządzeń podłączonych do sieci WI-FI
By talar26
Checking devices connected to the WI-FI network
Checking devices connected to WI-FI
We create a global variable, for example TabletSony
Then we import the Tablet_Sony_WI-FI virtual device after loading the device, we change the name according to our own needs, e.g. phone of the wife, etc., enter the IP address and port of the device to be checked if it is connected to the local network
tcpSocket = Net.FTcpSocket ("192.168.1.009", 8071) - ip address and device port
bytes, errorCode = tcpSocket: write ("test")
local device = 743 - virtual device id
if errorCode == 0
then
fibaro: call (device, "setProperty", "currentIcon", 1181) - id of the ON icon
fibaro: setGlobal ("TabletSony", "1"); - we create a global variable called eg TabletSony
fibaro: log ("Sony ON tablet ..os.date ("% H:% M ")) - displays the status of the device and the time on the notification bar
else
fibaro: call (device, "setProperty", "currentIcon", 1179) - id of the OFF icon
fibaro: setGlobal ("TabletSony", "0");
fibaro: log ("Sony OFF Tablet" ..os.date ("% H:% M")); ")) - displays the device status and time on the notification bar
end
Sprawdzanie urządzeń podłączonych do WI-FI
Tworzymy zmienną globalną np. TabletSony
Następnie importujemy urządzenie wirtualne Tablet_Sony_WI-FI po załadowaniu urządzenia zmieniamy według własnych potrzeb nazwę np. telefon żony itd. ,wpisujemy adres ip i port urządzenia które ma być sprawdzane czy jest podłączone do sieci lokalnej
tcpSocket = Net.FTcpSocket("192.168.1.009", 8071) -- adres ip i port urządzenia
bytes, errorCode = tcpSocket:write("test")
local device = 743 -- id urządzenia wirtualnego
if errorCode == 0
then
fibaro:call(device, "setProperty", "currentIcon", 1181) -- id ikony ON
fibaro:setGlobal("TabletSony", "1"); -- tworzymy zmienną globalną o nazwie np. TabletSony
fibaro:log("Tablet Sony ON "..os.date("%H:%M"));-- wyświetla na pasku powiadomienie stan urządzenia oraz godzinę
else
fibaro:call(device, "setProperty", "currentIcon", 1179) -- id ikony OFF
fibaro:setGlobal("TabletSony", "0");
fibaro:log("Tablet Sony OFF "..os.date("%H:%M")); "));-- wyświetla na pasku powiadomienie stan urządzenia oraz godzinę
end
295 downloads
-
Download Statistics
-
New reviews
-

-

-
 By SmartHomeEddy · PostedGreat QuickApp and excellent configuration manual. QuickApp works smooth. Thanks!
 -

-

-

-
 By OBewan · Posteding data from Gardena services... I am getting the following error from the installation script. Any idea how to fix it? Thanks [DEBUG] 21:35:13: 2022-04-11 21:35:13.093196 [ error] Handshake error: wrong version number [DEBUG] 21:35:13: 2022-04-11 21:35:13.093777 [ error] Handshake error: sslv3 alert handshake failure [DEBUG] 21:35:13: HTTP error: Transport endpoint is already connected
 -

-

-

-
-
Highest Rated Submitters
No ratings this week.
No ratings this month.
No ratings this year.
-
1

-
2

-
3

-
4

-
5

-