Welcome to Smart Home Forum by FIBARO
Dear Guest,
as you can notice parts of Smart Home Forum by FIBARO is not available for you. You have to register in order to view all content and post in our community. Don't worry! Registration is a simple free process that requires minimal information for you to sign up. Become a part of of Smart Home Forum by FIBARO by creating an account.
As a member you can:
- Start new topics and reply to others
- Follow topics and users to get email updates
- Get your own profile page and make new friends
- Send personal messages
- ... and learn a lot about our system!
Regards,
Smart Home Forum by FIBARO Team
Search the Community
Showing results for tags 'develop'.
Found 2 results
-
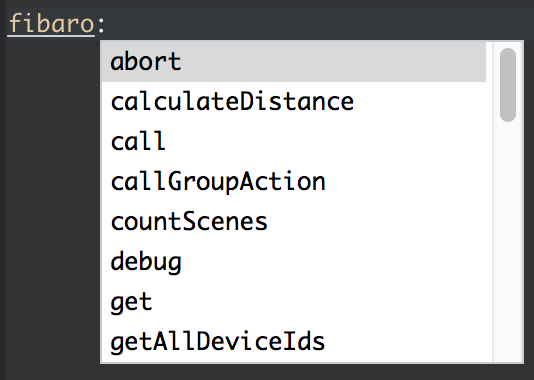
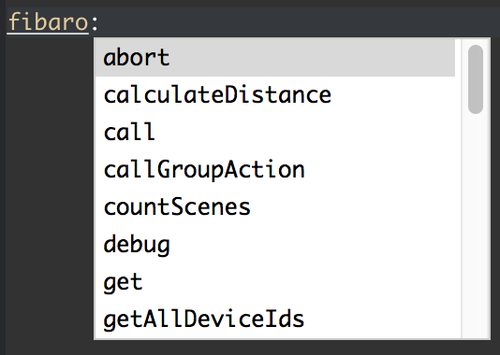
Latest version of Lualibs = lualibs v1.0.1.zip Changelog for v1.0.1 (thank to @petergebruers) - fix HC user authentication (was: user:password in URL, is now: basic authentication).- fix chunked responses (was: use only chunk 1, is now: concatenate chunks). Fixes "getDevicesId".- add error checking and display in the HTTP part, to get sensible error messages. Most of the information came from the french forum which can be found here all credits go to Steven! ZeroBrane is an IDE for development in Lua code. It offers you auto completion and partial support to use the actual fibaro: option in your code too. To get started grab the latest version from https://studio.zerobrane.com/download (1.5.0 as of writing) grab your favorite flavor. It supports Mac, Windows and Linux. To use the Lua Library you have to install it, grab the lua libs (top of page) for fibaro. You need to install these files in your c:\<yourlocation>\ZeroBraneStudio\lualibs (for Mac this would be /Applications/ZeroBraneStudio.app/Contents/ZeroBraneStudio/lualibs) after that a restart of the app is a good thing to do. Use this always in your code when you start testing your setup. For example: require("FibaroSceneAPI") hc2_user = "youraccount" hc2_pwd = "yourpassword" hc2_ip = "192.168.x.x" local data = fibaro:getGlobal("somevariable") print(data) Do keep in mind this is your userid/password on the box itself, do NOT use a fibaro ID since that is only the login to your remote. To change the Colors to be the same as on Fibaro (if you feel really cozy with those colors) edit your user settings at: Edit -> Preferences -> Settings: User styles = loadfile('cfg/tomorrow.lua')('TomorrowNight') stylesoutshell = styles -- apply the same scheme to Output/Console windows styles.auxwindow = styles.text -- apply text colors to auxiliary windows styles.calltip = styles.text -- apply text colors to tooltips local colors = { orange = {255,158,89}, braun = {217,191,140}, darkgray = {38,38,38}, blue = {89,158,255}, green = {188,210,121}, red = {179,94,77}, white = {255,255,255}, gray = {102,102,102} } styles.comment = {fg = colors.gray} styles.operator = {fg = colors.white} styles.number = {fg = colors.red} styles.stringtxt = {fg = colors.green} styles.keywords0 = {fg = colors.blue} styles.text = {fg = colors.braun, bg = colors.darkgray} styles.keywords3 = {fg = colors.orange} styles.keywords4 = {fg = colors.orange} styles.keywords5 = {fg = colors.orange} styles.keywords6 = {fg = colors.orange} styles.keywords7 = {fg = colors.orange} And if you want to have auto completion you have to add fibaro.lua to your ZeroBraneStudio/api/lua folder. Please note that this file is the english file and has some few additions which i didn't see or where incorrect. Looks like: To activate it, please make sure you add it. Go to Edit -> Preferences -> Settings: System Add the following string to it: api = {luadeb = {'fibaro'}} The fibaro:calculateDistance doesn't work and the sourcetrigger needs to be set manually. See below snippet for testing: __fibaroSceneSourceTrigger = {type="global", name="Pushbullet"} -- __fibaroSceneSourceTrigger = {type="global", name="Pushbullet"} -- __fibaroSceneSourceTrigger = {type="property", deviceID=6, propertyName="value"} -- __fibaroSceneSourceTrigger = {type="autostart"} -- __fibaroSceneSourceTrigger = {type="other"} print(fibaro.getSourceTrigger().type) -- global print(fibaro.getSourceTrigger().name) -- Pushbullet __fibaroSceneSourceTrigger = {type="autostart"} print(fibaro.getSourceTrigger().type) -- autostart FAQ: Q: I get the following error message: lualibs/json/decode.lua:74: bad argument #1 to 'match' (string expected, got nil) A: It cannot reach Fibaro system correctly. Please make sure you have the right userid/pwd and correct ip number. Q: I don't see any completion on my fibaro: A: Make sure you added the completion Edit -> Preferences -> Settings: System (lualib) Q: Where do i get all my values from? A: You can make use of the excellent tool from @Krikroff found in this thread to grab all the values. Q: Where is this data coming from? A: Fibaro has an api interface, you can go there via http://192.16.x.x/docs where you can try it out. Q: I click on play but it does not keep running? A: Make sure you click the double green arrow. The other one stops untill you press forward. (F6 = Go, F5 = Waits on next itteration) Q: I want to change the width of the tabs A: Go to Edit -> Preferences -> Settings: User and add "editor.tabwidth = 3" Q: Disable wordwrap for long lines A: Go to Edit -> Preferences -> Settings: User and add "editor.usewrap = false" Q: How to i debug line by line? A: See below (credits go to Fred the Phew for below screenshots & explanation) Open Zerobranstudio and display the following windows if you have not already done so insert the following code in a new blank window Zerobranstudio (we will revise multiplication ) local loop = true local i = 1 local j = 1 while loop == true do i = i + 1 j = j + 2 print ( i .. "x" .. j .. "=" .. i * j ) end To activate dynamic tag tracking, simply select the name of the variable you want to track, then right click on it to bring up a context menu. You must then select the option Add watch expression as in the image below. In our case, it must be done for the 2 variables i & j. To switch to debug mode, press the F5 key once, the window should look like this. The green cursor is positioned on the first instruction, and the Watch window displays the values of i and j (to nil at the moment which is logical) Now press the F10 key to execute the program step by step, until the first result of the multiplication is displayed, as shown below. The result of the multiplication is consistent with the values of i and j. To test now the modification on the fly of a variable, we will re-run the loop a second time by pressing the F10 key several times but without executing the print instruction, as in the image below. The value of the 2 variables has been modified by programming. To modify dynamically the value of j, click on the Remote console tab, type the line i = 20 then press the Enter key to validate the command, as in the image below. We can then see that the value of ja has been modified in the Watch window. It is now enough to click on the tab Output (suspended), and to press the key F10 to resume the execution of the program. It is now that the value of j set by hand has been dynamically taken into account by the program. Happy Coding! \o/ (feel free to make remarks so i can make it better) lualibs.zip
- 25 replies
-
- 3
-

-
- development
- zerobrane
- (and 2 more)
-
Hi guys! recently I bought a fibaro hc2. there was said to me that I can develop my own plugins. But I can't find any documentation for it... (the http://developer.fibaro.com) isn't existing anymore only it redirects me to the Rest API section and Lua documentation I really wanted to build a plugin so that the devices of Plugwise "http://plugwise.com" are compatible with the fibaro. (i know that it is possible) Hope that some of you can help me. and have documentation or something else where I can work with Kind regards, pepijn dik