Welcome to Smart Home Forum by FIBARO
Dear Guest,
as you can notice parts of Smart Home Forum by FIBARO is not available for you. You have to register in order to view all content and post in our community. Don't worry! Registration is a simple free process that requires minimal information for you to sign up. Become a part of of Smart Home Forum by FIBARO by creating an account.
As a member you can:
- Start new topics and reply to others
- Follow topics and users to get email updates
- Get your own profile page and make new friends
- Send personal messages
- ... and learn a lot about our system!
Regards,
Smart Home Forum by FIBARO Team
Search the Community
Showing results for tags 'use'.
Found 12 results
-
Telegram messenger became more popular and it is cool to use it for Home Center notification also. You can use FibaroBot to convert emails from HC to regular Telegram messages. This solution can be easy used both on HC2 and HCL and does not required scripting. Messages not limits only to text, but can be used for camera snapshots delivering. You can read more details about the bot HERE. Bot link in telegram is t.me/fibarobot P.S. Please share your feedback or ideas of using the bot.

-
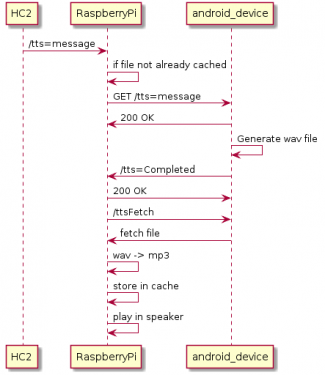
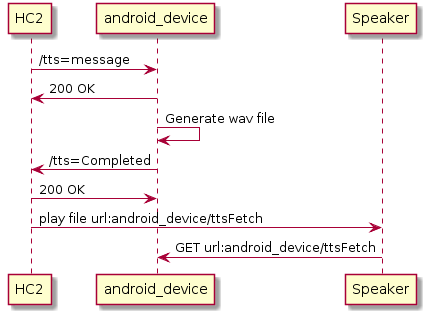
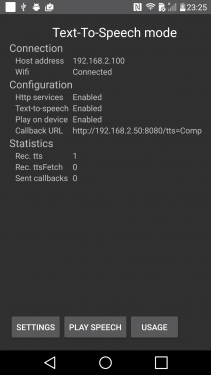
Hi, I have been working for a while to get an android device working as a text-to-speech engine and to generate speech from text that I can play in any speaker at home, and now I have finally got it working! Android has a pretty good tts engine and you can even configure custom voices that creates speech on languages not yet supported by android itself. Description The scenario is the following: HC2 or some other device wants a text translated to speech, it sends an http request including the text towards the android device, on the android device there is a http server started that receives the request and generates the synthesized speech using androids builtin TextToSpeech api, the android device can then either immediately play the speech in the device and/or store the synthesized content in a file. After successfully generated the speech file the android device sends a request to a configurable "callback url" to notify that the generated .wav file can now be downloaded. I realized during the work, that there are more scenarios than I from the beginning thought of, but the setup I was looking at was the following: However it is not really needed to convert and cache the file, you could also just notify your wifi speaker to play it. A third solution would be to let the android device itself play the speech, either through its internal speaker or via a speaker connected to headphone jacket. Ok so that was the idea and description of different use cases, if you want to try this out you need: Download and install the app on a android device 2. Start the app in Text-to-speech mode 3. Initial configuration 4. Test it 5. Create a scene/vd that sends tts requests. 6. Create a scene/vd that is invoked when tts speech is completed. 7. Download the speech file or tell your speaker system to download and play it. Download and install the app on a android device The app can be downloaded from here (app-debug.apk), you need to allow installation from unknown sources in android this is normally configured through "Android Settings" --> "Security" --> "Unknown Sources" I have tested the app on devices running android 5.0 and 6.0, earlier I also tested it on 4.4 but my samsung s2 finally seemed to give up so I dont know the current status on 4.4. The app needs "Storage" permissions to store the wav file on device. You can find and set the needed permission that by Android Settings --> apps --> --> permissions --> ZenitGatekeeper Short background around the app, I wrote the app originally with another thought in mind and that was to make it easy for the rest of the family to arm/disarm the home alarm (I am currently using the fibaro system as my security system at home), so it is wall mounted in the entrance and works like a keypad where you can arm the alarm or enter a pin to disarm the alarm. Since the device is always on and always connected to wifi I thought I would try to re-use the app also for generating text-to-speech. The app will start a web server and wait for requests, it currently supports a few different types of requests, - /ping : will just respond with 200 ok - /wakeup : will turn on the device screen (I use a fibaro motion sensor that triggers this event) - /tts=msg : will generate a tts file based on the provided message. - /ttsFetch : will return the latest generated speech file. - /log : returns the application logfile At successful text-to-speech generation the app will invoke an configured url to notify that the .wav file is ready. Start the app in Text-to-speech mode Start the app and push the text-to-speech button to start text-to-speech mode. As described above, the app was originally written to be used as a keypad, but I have added a "TTS mode" which only starts the app to be used as a TTS engine. Initial configuration The app needs some basic configuration to work properly, following configuration describes what is needed to get text-to-speech mode to work. Click "Settings" button (default password to settings menu is "1234") -> Application Settings -> Http services -> * "Enable http services" : will start the http server that listens on port 8080. * "Enable Text-To-Speech service" : will enable the text-to-speech function * "Play speech in device" : will play the speech in the device speakers if enabled. * "Text-To-Speech callback URL" : an callback url used to notify the requester that the speech is completed and can be downloaded. Push back button until you get to the TTS mode main page again, now it should look something like this and you should be ready to test it out: Test it To start with you could just open a webbrowser and type http://<ipadress to android device>:8080/tts=hey%20it%20works If it works out properly your android device should now play the speech and you should also receive a callback to your configured callback url. Next step would be to invoke it from your scenes/vd but I guess that is up to you decide how to do. For the interested reader source is available at https://github.com/davandev/AlarmController New releases of the app will be available at https://github.com/davandev/AlarmController/releases Let me know if you run into problems. Cheers

- 69 replies
-
- 1
-

-
- text-to-speech
- tts
- (and 2 more)
-
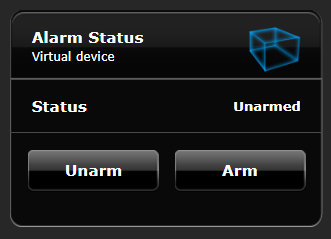
I want to use my HC2 as a replacement for my aging alarm system. Yes I know there are people who say don't build an alarm system with z-wave devices, but here's what I've come up with so far. I want to be able to use the Fibaro Alarm Panel to enable, disable the arming of my system, to report on breaches and set off the sirens I have. It should have been easy to find the appropriate API call to arm, disarm and get the status but seemingly nothing exists. I did a bit of digging and found that when the arm button is pressed there is a call to /api/devices/1/multiSetArmed with a list of all the devices that need to be armed. I played with that for a while and it wasn't as elegant as I wanted so I abandoned it in favour of my own code. I use two scenes, one to disarm, one to arm along with a virtual device. Each all use the same piece of logic to iterate around the security devices: -- Get the list of all the security sensors local filter = { enabled = "true", interfaces = {"fibaroAlarmArm"}, isTypeOf = "com.fibaro.securitySensor", properties = { alarmExclude = "false" } } local deviceIds = fibaro:getDevicesId(filter) This snippet of code returns a list of all the security devices in my system that are enabled i.e. don't have the Sensor Is Excluded from Alarm checkbox ticked in the advanced properties. This almost meets my desire to have elegant code and above means I don't need to worry about hardcoding device IDs everywhere. So moving straight to the code, here's the arm scene: --[[ --%% autostart %% properties %% events %% globals --]] -- Get the list of all the security sensors local filter = { enabled = "true", interfaces = {"fibaroAlarmArm"}, isTypeOf = "com.fibaro.securitySensor", properties = { alarmExclude = "false" } } local deviceIds = fibaro:getDevicesId(filter) fibaro:debug(json.encode(deviceIds)) -- Iterate around all security sensors arming them for k,v in ipairs(deviceIds) do fibaro:debug (fibaro:getName(v)) fibaro:call(v, "setArmed", 1) end The unarm scene is almost identical. Only changes are in the arguments for the "setArmed" method: --[[ %% properties %% weather %% events %% globals --]] -- Get the list of all the security sensors local filter = { enabled = "true", interfaces = {"fibaroAlarmArm"}, isTypeOf = "com.fibaro.securitySensor", properties = { alarmExclude = "false" } } local deviceIds = fibaro:getDevicesId(filter) fibaro:debug(json.encode(deviceIds)) -- Iterate around all security sensors unarming them for k,v in ipairs(deviceIds) do fibaro:debug (fibaro:getName(v)) fibaro:call(v, "setArmed", 0) end These go round each enabled security device and arm or disarm it as required and Fibaro Alarm panel keeps up to date with the progress. Any doors that have an alarm delay on them also work as expected and during the delay the Alarm Panel shoes the partially armed state, followed by the fully armed when the delay time expires. For ease and status I created this virtual device to find the status and present a easy to find device for my users: The code behind this each button simply calls the appropriate scene to arm or unarm. This bit I don't like as I have to manually find the alarm scenes IDs. I could have put the arm/unarm code in this device, but I want to be able to call the scenes using other devices like keypads etc and controlling a virtual device is a pain. If Fibaro get around to allow developers to create plugins then I'll keep all the code in one device, but until then.... The Status label using the same snippet of code to find the security devices and this time in the for loop I have two counters. The first one counts the total number of devices, the second counts the number that are armed. The logic then checks if the number of armed is 0, and if so the status is UNARMED, if the number of armed equals the number of security devices, then the status is "ARMED" otherwise if the counts are different then we're partially armed. local selfId = fibaro:getSelfId(); -- Get the list of all the security sensors local filter = { enabled = "true", interfaces = {"fibaroAlarmArm"}, isTypeOf = "com.fibaro.securitySensor", properties = { alarmExclude = "false" } } local deviceIds = fibaro:getDevicesId(filter) fibaro:debug(json.encode(deviceIds)) -- Iterate around all security sensors arming them local totalCount = 0; local armedCount = 0; for k,v in ipairs(deviceIds) do totalCount = totalCount + 1 if (tonumber(fibaro:getValue(v, "armed")) == 1) then fibaro:debug (fibaro:getName(v)) armedCount = armedCount + 1 end end fibaro:debug (armedCount) fibaro:debug (totalCount) local status if (armedCount == 0) then status = "Unarmed" elseif (armedCount == totalCount) then status = "Armed" else status = "Partial armed" end fibaro:call(selfId, "setProperty", "ui.Label1.value", status) There's probably a method in Lua to find the size of an array/table and save a bit of code, but I'm not to familiar with Lua. The complete VD code is attached, just change the scene IDs for arming and unarming to those on your system. Back in the Fibaro Alarm panel I've enabled the Lights Scene and added my sirens as the devices to trigger. Its a real shame that Fibaro failed to have a scene which catered for sirens and went for lights, window blinds and everything else as I'd like to have the sirens set in the system as an alarm device not as a light. On a side note if you set an actor as a security breach device it disappears from the main pages. The next stage is to get a keypad device, either the Zipato RFID, or a homebrew device using the Universal Sensor or the Z-Uno using one of these RFID keypads https://www.amazon.co.uk/KKmoon-Proximity-AccessControl-Access-Control/dp/B01HR302BE . I'm leaning towards the Z-Uno as it has a lot more pins that I can use for giving feedback about armed/unarmed status. That's still very much in the experimental stages for now, but I'm happy that I can now easily arm/unarm the Fibaro Alarm. Alarm_Status.vfib
-

Hikvision DVR integration - solved!
ggrizliv posted a question in Other Devices / Third-party devices
Hi. How to add 4 cameras to Fibaro HCL 4.100? I know http links to show all 4 channels: HIKVISION DVR DS-7204HWI-SH - DVR videorecorder with 4 analog kamerashttp://<USER>:<PASS>@<DVR IP ADDRESS>:<PORT>/PSIA/Streaming/channels/101/picture - Cam 1http://<USER>:<PASS>@<DVR IP ADDRESS>:<PORT>/PSIA/Streaming/channels/201/picture - Cam 2http://<USER>:<PASS>@<DVR IP ADDRESS>:<PORT>/PSIA/Streaming/channels/301/picture - Cam 3http://<USER>:<PASS>@<DVR IP ADDRESS>:<PORT>/PSIA/Streaming/channels/401/picture - Cam 4 How to use these links to add cameras in Fibaro Home Center Lite??? These links work great on Vera EDGE controller and other software to use with cameras.... Please, help. TNX! -
Hi, Was searching to display the date and time parts and came across this %a abbreviated weekday name (e.g., Wed) %A full weekday name (e.g., Wednesday) %b abbreviated month name (e.g., Sep) %B full month name (e.g., September) %c date and time (e.g., 09/16/98 23:48:10) %d day of the month (16) [01-31] %H hour, using a 24-hour clock (23) [00-23] %I hour, using a 12-hour clock (11) [01-12] %M minute (48) [00-59] %m month (09) [01-12] %p either "am" or "pm" (pm) %S second (10) [00-61] %w weekday (3) [0-6 = Sunday-Saturday] %x date (e.g., 09/16/98) %X time (e.g., 23:48:10) %Y full year (1998) %y two-digit year (98) [00-99] and used on conjunction with the normal os.date you can display/use any part of a date/time fibaro:debug(os.date("%A")) fibaro:debug(os.date("%b")) fibaro:debug(os.date("%d")) gives [DEBUG] 20:30:46: Thursday [DEBUG] 20:30:46: Jul [DEBUG] 20:30:46: 14 and the time is (os.date("%H:%M:%S")) might save other newbee's like myself from too much head scratching -Frank
-
 If you want to generate an audio message from a scene or virtual device and ear it on a Google Home or a Chromcast device, just do this: configure a server (e.g.: a Raspberry PI) with the following software: Google Home Notifier. add a global variable in Home Center create a simple Home Center scene activated by the variable And then simply put a text string into the variable and ear it play on the audio device. Expect between 3 to 6 seconds between the variable setting and the audio to play (depending on the various devices involved).
- 15 replies
-
- 1
-
-
- chromecast
- google home
- (and 2 more)
-
Hi! sometimes I'm lazy I want to turn on/off some devices without FIBARO UI / Mobile or Lili (particularly during Friday Shabbat ) I want to share with you, may be, useless script... but... so. here is simple powershell script for Windows desktop shortcut. you can run it powershell -File fibaro.ps1 5 turnOn powershell -File fibaro.ps1 5 turnOff where 5 is device id, turnOn / turnOff - command for a switcher powershell -File fibaro.ps1 544 50 where 544 is device id, 50 (or any) - level for a dimmer also, you can trigger state... simple skip last param... pass only deviceId powershell -File fibaro.ps1 5 will automatically turn off if on and vice versa. Have a nice day! Param( [Parameter(Mandatory = $true,Position = 0,HelpMessage = 'DeviceId')] [ValidateNotNullorEmpty()] [String]$deviceId, # fan - 541 # light - 5 # 544 # etc [Parameter(Mandatory = $false,Position = 1,HelpMessage = 'Command')] [ValidateNotNullorEmpty()] [String]$command # turnOn # turnOff # setValue ) $url = "192.168.1.36" $user = "[email protected]" $pass= "fb1234567890" $secpasswd = ConvertTo-SecureString $pass -AsPlainText -Force $cred = New-Object System.Management.Automation.PSCredential($user, $secpasswd) $requestDevice = "http://" + $url + "/api/devices?id=" + $deviceId $var = Invoke-WebRequest $requestDevice -Credential $cred | ConvertFrom-Json | select -expand properties | select value if (!$command) { if ($var.value -eq "true") { $command = "turnOff" } elseif ($var.value -eq "false") { $command = "turnOn" } elseif ($var.value -match "^[\d\.]+$") { [int]$cValue = [convert]::ToInt32($var.value, 10) if ($cValue -eq 0) { $command = "99" } else {$command = "0"} } else { Write-Host "Error!" } } if ($var.value -eq "true" -Or $var.value -eq "false") { $request = "http://" + $url + "/api/callAction?deviceID=" + $deviceId + "&name="+$command } else { $request = "http://" + $url + "/api/callAction?deviceID=" + $deviceId + "&name=setValue&arg1=" + $command } $var = Invoke-WebRequest -Uri $request -Method GET -Credential $cred | ConvertFrom-Json | select -expand result | select result Write-Host "Done! Error: "$var.result notice: please change var $url = "192.168.1.36" - FB HC IP $user = "[email protected]" - your login to FB HC $pass= "fb1234567890" your password to FB HC attached code in a post please save in file fibaro.ps1
-
Hi guys, I've made a little python program that will locate all chromecasts in your network and update a global variable on your fibaro host for each chromecast it finds. You need to create the variable before the script can update it in the format of cc_<chromecast_name> where spaces in the name gets replaced with underscores. https://gist.github.com/tcastberg/b4ceb4763c2b6c86f8b8d22658281de3 I use this to dim the light in our TV room while content is playing. Because it's using callback from the chromecast it will immediately trigger a change when you pause or play again.
-
Because i had the same problems after last 3 or 4 upgrades i write small simple external watchdog. Why? - After message about successful upgrade my HC display error 503 with button to restart services and wait. - After several hours of working my HC2 display screen without any switch, dimmer, scenes only static info and stop working Because the proxy Apache still work on HC2 in case of this two error my script use for check and restart php and api pages on HC2. Script work without problem on openwrt or dd-wrt routers, Windows 10 linux shell. qnap nas. #!/bin/ash ############## # add this script to crontab of your router or any linux machine # i use openwrt router with sendmail, curl packages # */15 * * * * /scripts/hc2watchdog ############## set -e # IP of HC2 HCIP="192.168.1.n" # login string for HC2 HCLOG="[email protected]:password" # email from mserver="mail.mail.pl" muser="[email protected]" mpass="password" # email to memail="[email protected]" status_www=`curl -N -I --user $HCLOG $HCIP/api/settings/info 2>/dev/null | head -n 1` echo $status_www status_server=`curl -N --user $HCLOG $HCIP/api/refreshStates 2>/dev/null | head -n 1 | cut -d',' -f1 | cut -d "{" -f2` status_time=`curl -N --user $HCLOG $HCIP/api/refreshStates 2>/dev/null | head -n 1 | cut -d',' -f3` echo "HC2 response:" echo "===============================" echo $status_server echo $status_time case "$status_server" in *status*) echo "HC2 working" echo $status_time exit ;; esac echo "Problem..." # send syslog message to my syslog server, put hash begin of next line if you not use logger "HC2 - restart $status_server" -p authpriv.alert -t HC2 echo "HC2 restart..." curl --user $HCLOG http://$HCIP/services/finishUpgradeAfterError.php # send email to you after restart, put hash begin of next line if you not use mailsend -smtp $mserver -port 587 -auth -user $muser -pass $mpass -starttls -f [email protected] -name "HC2 watchdog" -t $memai echo "HC2 status " $status_server > /tmp/hc2.status echo "HC2 - oczekiwanie na restart" sleep 60s echo "HC2 - check after restart" echo "================================" status_www=`curl -N -I --user $HCLOG $HCIP/api/settings/info 2>/dev/null | head -n 1` echo $status_www status_server=`curl -N --user $HCLOG $HCIP/api/refreshStates 2>/dev/null | head -n 1 | cut -d',' -f1 | cut -d "{" -f2` status_time=`curl -N --user $HCLOG $HCIP/api/refreshStates 2>/dev/null | head -n 1 | cut -d',' -f3` echo $status_server echo $status_time
-
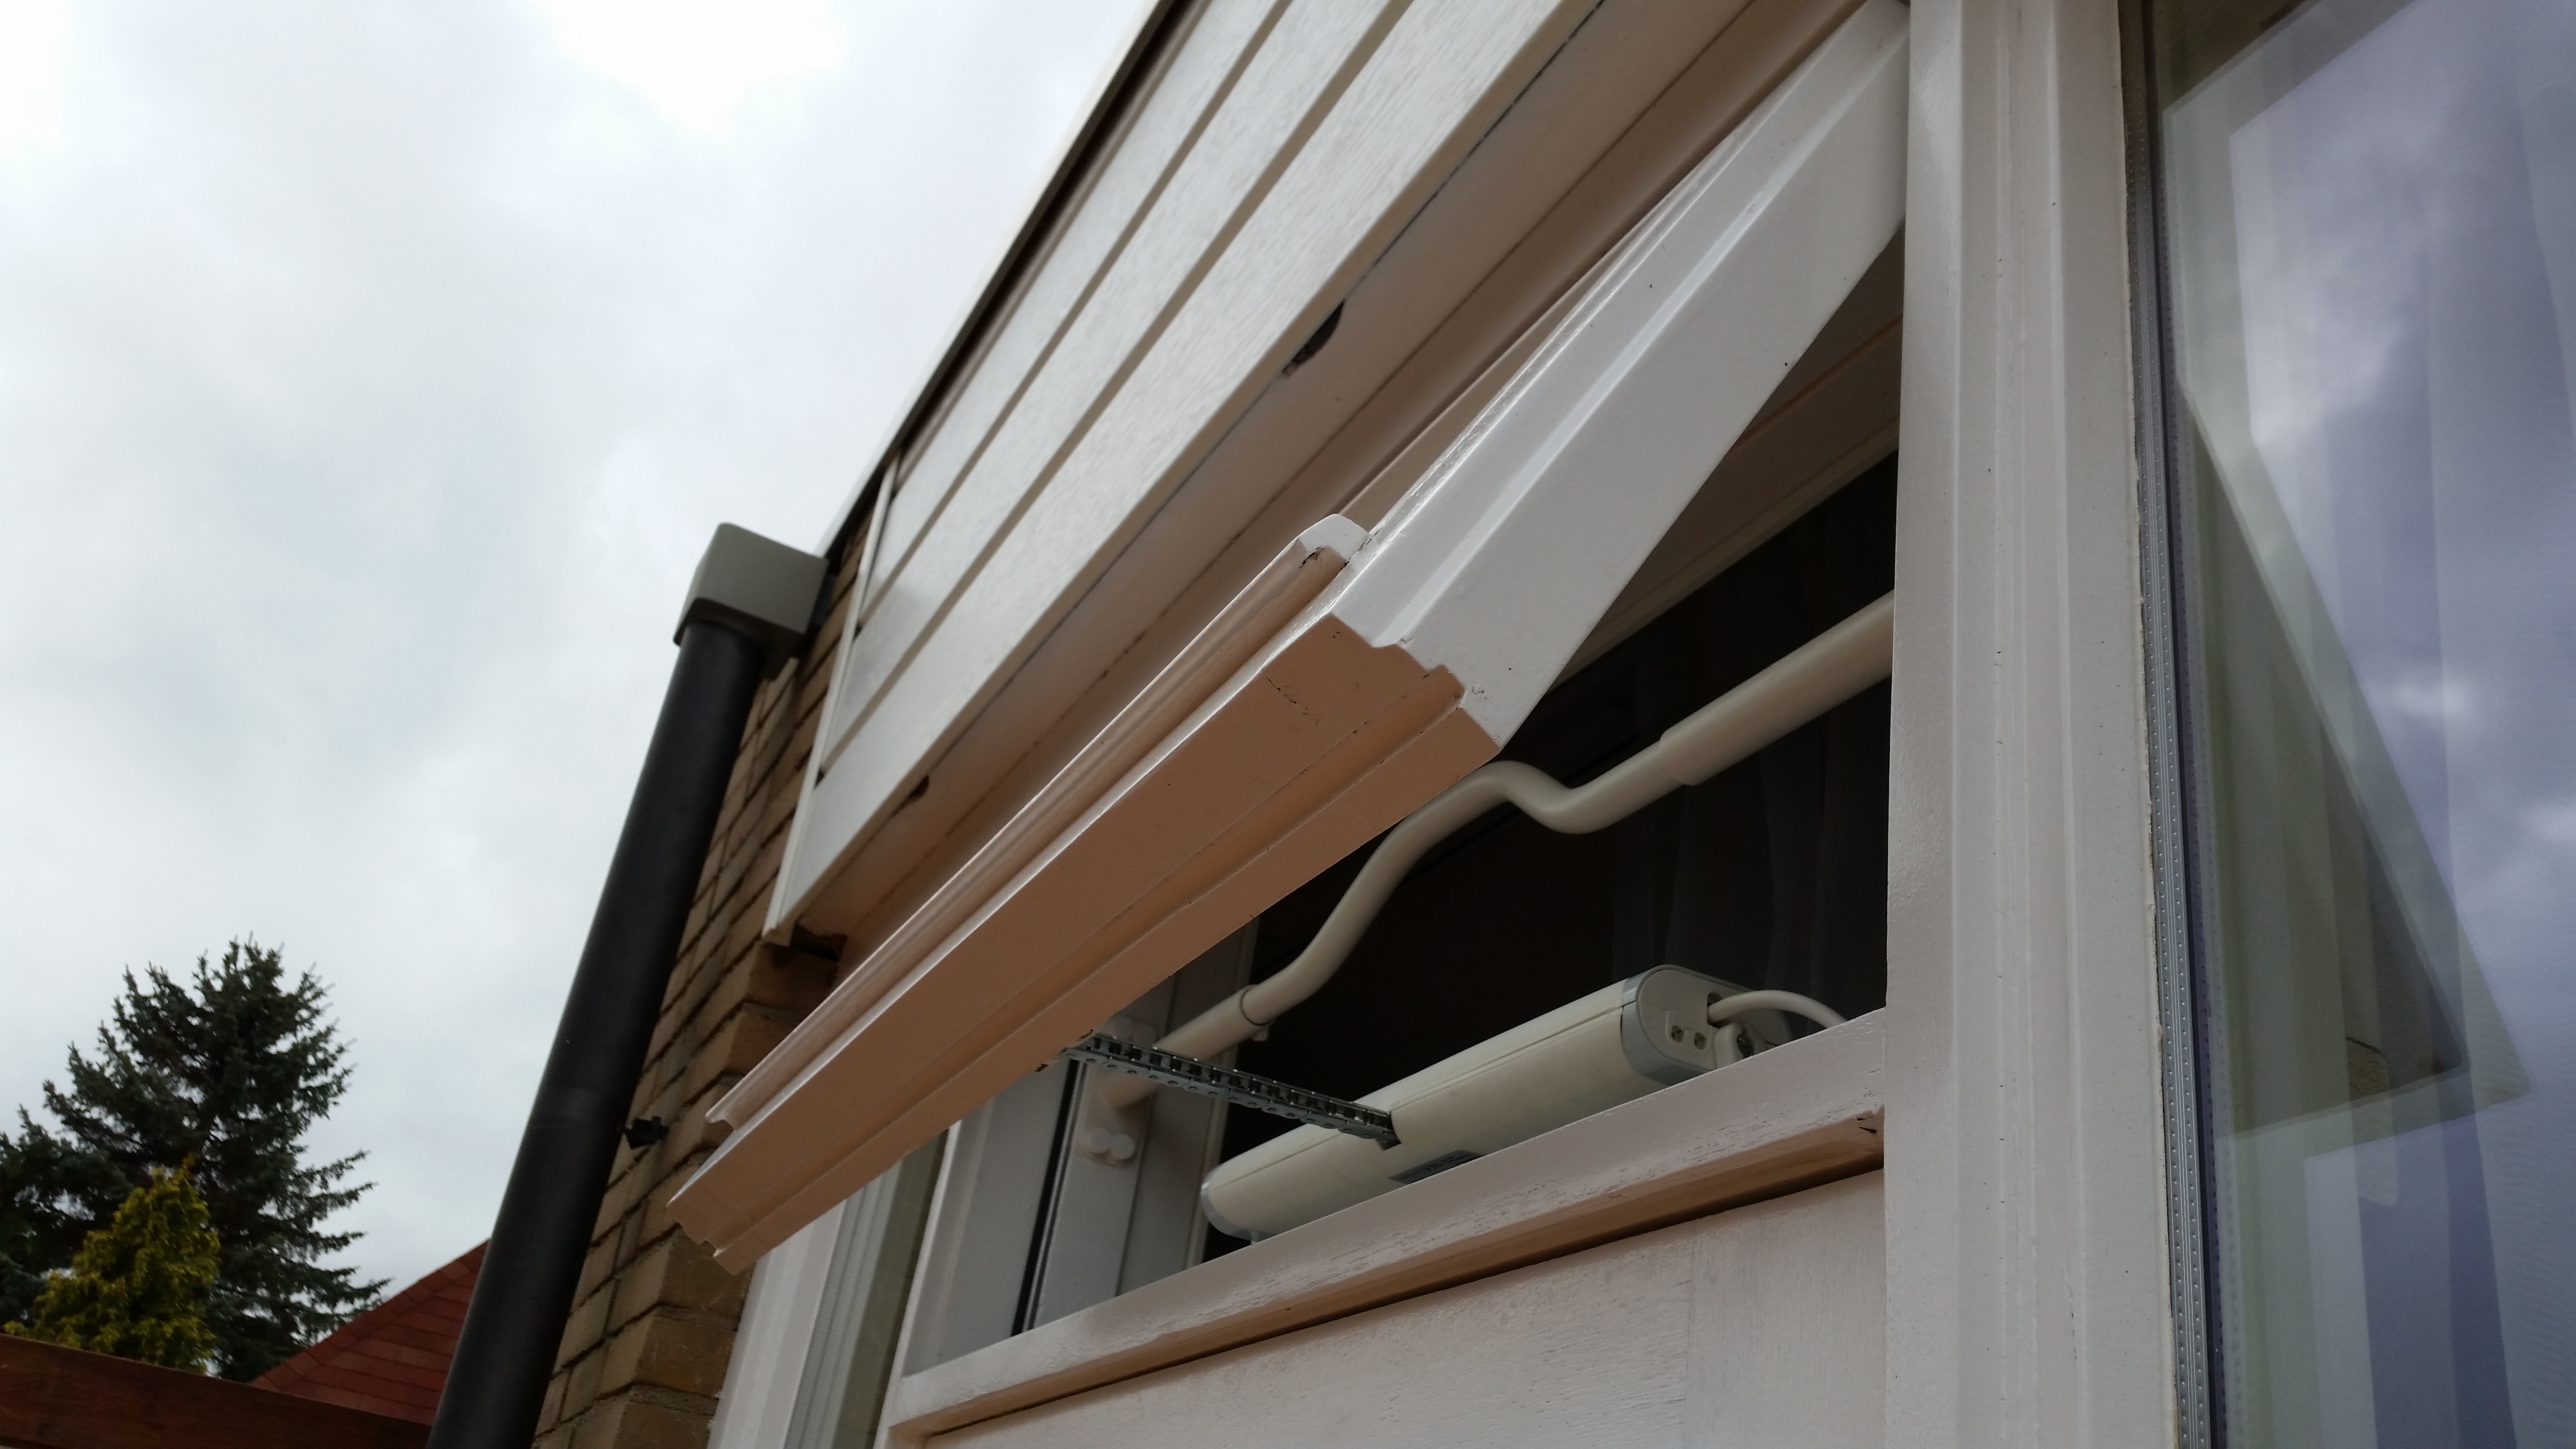
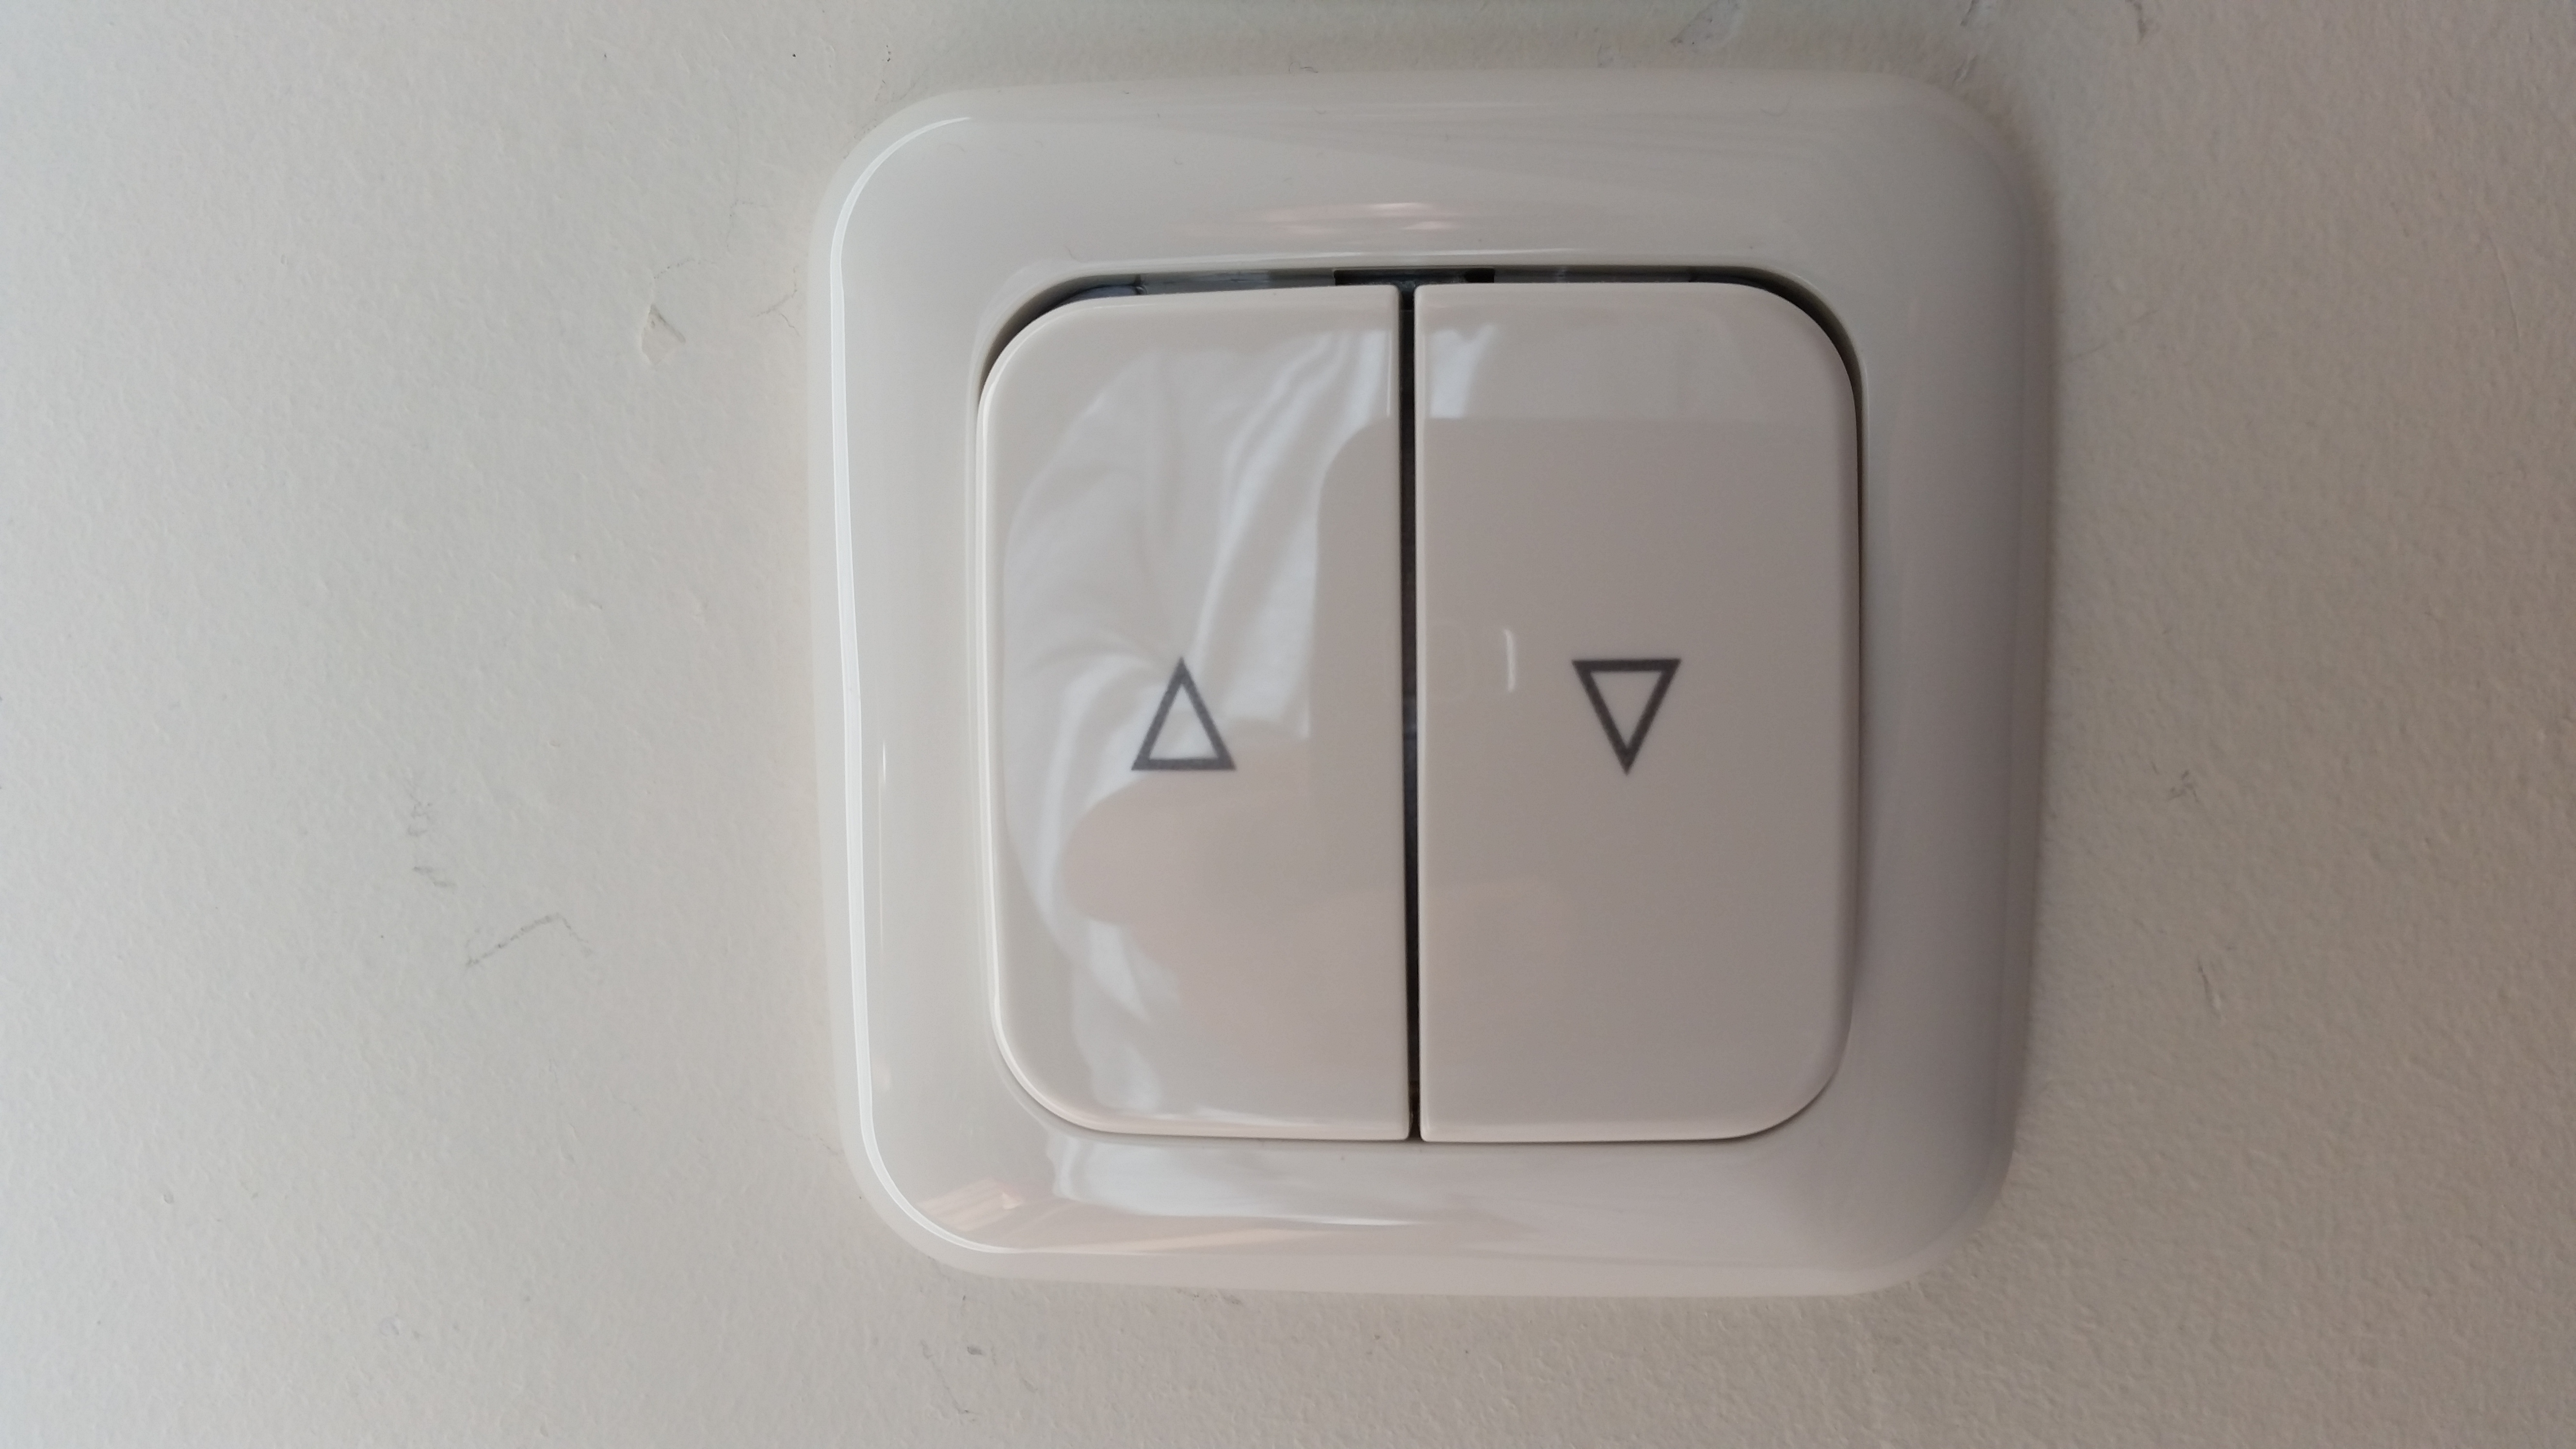
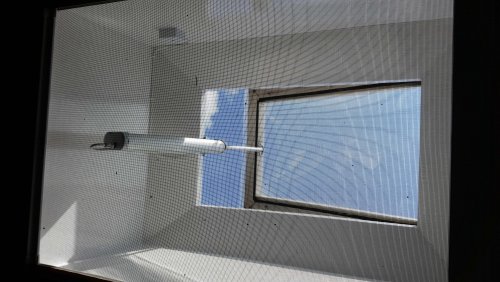
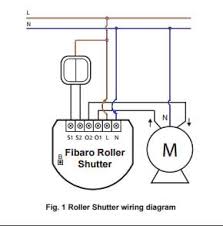
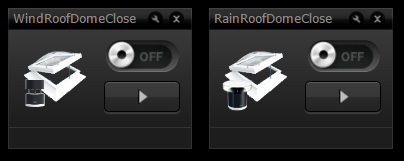
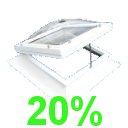
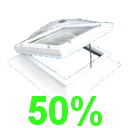
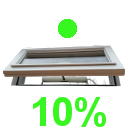
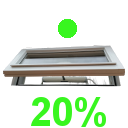
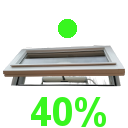
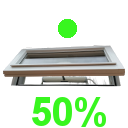
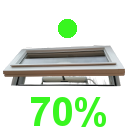
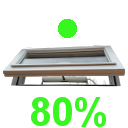
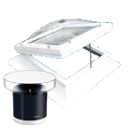
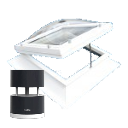
Hi there Forum-peoples… Here’s my post on Window Automation using chain- and spindle actuators with an Roller shutter 2 module from Fibaro… Sure this is already done, but I think I found an way for easy hardware install and payable solution. An other reason is that i dint find a sollution within the Zwave products range that can open a roof dome up to 30cm or higher. First off all, something about me… I am an newbie in the Zwave (or so with Fibaro) world. I am learning by Trial on Error… The little things I know I learned in this forum and I follow @Sankotronic’s post mainly. Please keep in mind I am new to this, so always pick your own brain for your own solution you need for your house… I can only give you guys a head start or a burned down house. I needed a solution for my roof domes and for my bedroom top windows. So here is how I did it: You need the following: - The right motor for your window - A regular Roller shutter wall switch (not automated) - Some electric cabling - A Roller shutter 2 module from Fibaro - A piece of wood to bite on when you get frustrated (so your wife won’t hear you scream) - The Power of @Sankotronic VD and Scenes Choosing the motor: There are a few things you might wane consider before buying the most expensive thing for this project. - How much space do you have to screw on and place the motor. For my solution I always want to have a mosquito-net available. I build an extra wooden frame around my bedroom window to get it fitted. - How far do you want to have the windows opened? I personally (by Trial on Error) think that 30 cm will do for the roof domes. If you want more cm, then the motor you will need might be bigger and wont fit. - How much Newton power will you need. On the website I will give you, there is a calculation table you can use, about the Newton power you will need. But I think about 250N to 450N will be enough. The more Newton the more you pay. Also lookout that the Power of the motor wont crush your window (my rooftop is from the material PVC) - Take a motor with an in build auto stop! I think you need this to get it to work with the Roller Shutter 2 Module of Fibaro. You need to adjust a parameter (will discuss this later). - Take a good look at the currents you need for your country. For easy installation I went for 230V motors (and not the 12V versions). They could be directly connected to the Roller shutter 2 module of Fibaro. - Which type of motor do you need (Chain- or Spindle Actuator) I tried the Chain actuator first for my roof dome. But as it needs to open up to 30 cm the chain starts to hang to the right. So when wind blows there may be some sounds coming from the movement of the chain. I didn’t want this. If you only want to open an window for 15 cm then the chain version will work fine. A spindle actuator needs more space for placing. But I think a spindle actuator is ideal for Roof domes. For a top windows you want to go for a chain actuator. Else you don’t have the space for a mosquito net. Take a look at this website: http://www.windowo.eu/window_automation The company is in Italy.. At first I didn’t trust this website, because they have a few mistakes on it (like the VAT: it says its included but its not) I tested the website by beginning to buy 1 motor first. The delivery took about 2 to 4 weeks to the Netherlands. Then again they are so cheap its unbelievable… For my Roof dome I bought the: Spindle Actuator Raywin R45 450N 230V 50 Hz Comunello Mowin Raywin R45 - stroke (mm): 235-300 mm 2 motors for 261 euro (incl Vat and shipment) For the bedroom Top Window I bought the: Liwin L35 Chain Actuator 230V 50 Hz L=<1250 Comunello Mowin Comunello color choice: White 2 motors for 169 euro (incl Vat and shipment) I can adjust the max stroke with a dipswitch setting on the motors (Chain and Spindle) Choosing a Wall switch (no automation): I bought a standard roller shutter wall switch. With this switch you can’t push accidentally up and down at the same time… Not sure if it is important, but I went for this solution. So if your HC2 isn’t working you still can close your windows. Choosing a Zwave module: I went for the Roller Shutter 2 module from Fibaro. Yes indeed, you need some space in your walling to connect all cables, the wall switch and the Fibaro module… So keep that in mind for where you want to place the switch’s. I have two rooftop windows and two bedroom top windows… Yes you can connect all four windows to one Roller shutter 2 module of Fibaro (as long you don’t exceed the power levels of the module). But I need a different scene for my rooftop window (must close quicker when rain or wind) then for my bedroom top windows… So I decided to buy 2 Roller shutters… General tip: Buy only one thing of each item you need and make a test environment. Also test first and then place it. Connecting it all: Ok here you need to pick your own brain, if you cant then don’t start this project yourself. Get a friend to help you with the electricity etc. In generally you can directly connect the cable’s from the motor for up and down to the Roller Shutter 2 Module of Fibaro Q1 and Q2. Use S1 and S2 for your wall switch. Installing the Roller Shutter 2 Module from Fibaro: For me this was the most difficult part. If you won’t succeed at first, don’t give up (I almost did) Connect/install the Roller Shutter to your Fibaro. I hope you have first made a test environment to setup your first motor. You need to calibrate it for Max open and close. This took me some time and I found it easier to test it all, so I wouldn’t have to run across the whole house. On the “Advance-tab” of your Device under topic “Advanced” you need to put the “Controlled Device:” to “Blinds with positioning active” Parameter 18: Here starts your Trial on Error and you need that piece of wood I mentioned in the beginning and place it between your teeth… I have set my Chain actuator to 3 Watt for parameter 18. If you don’t change this setting it will not work. You now have to press Calibration button (almost back on top off page). If the Chain doesn’t go all the way up or down, adjust the amount of Watt. I noticed that while going Up or Down, the Roller Shutter 2 module of Fibaro needs to detect an amount of power. So it knows if the motor is on its top or bottom. This is also why you need to buy an Motor that has its own Auto Stop. So when the motor has power, the roller shutter module senses it and gives it current until the motor stops and doesn’t consume power. For my Spindle actuator it didn’t work with only adjusting Parameter 18. They are different motors so I had set this Parameter 18 to 6Watt. But still it didn’t always worked. Then I found that I also needed to adjust parameter 17. I set this parameter to 5.2 seconds. I think this is the time it waits when last minimal current was measured… So playing with Parameter 17 and 18 was my biggest struggle. Scenes Now you have created your devices, you need a scene… Again as a newbie I just created something that works for me. It has no clean code (error checking etc). I hope that @Sankotronic or others will use my solution so I can get a proper Scene in the future. Because I have Netatmo weather station I can use the CO2 lvl for automatic opening. Handy if you have visitors. It might also first check if the windows shouldn’t be opened in case of wind and rain. One other thing I like about window automation is that with an simple code you can at it to your smoke alarm, opening windows when smoke is detected so you get the change to run out of your house without to many smoke in your way. Even now you got use for the Netatmo Noise sensor. It can help you close your bedroom window when noice is detected. Not hard to code but I have no need for this now. For now I only created a scene for automatic closing, when it rains or when the wind gusts are too high. I did this for the wind and rain separately. I use an Netatmo Wind- and rainsensor. You will need the power of @Sanktronic [VD] Weather State v2.0 and [SCENE+VD] Netatmo weather station v2.0 - to get the weather information. Main scene for time based events v1.2.5 - for the scene’s to start. WindRoofDomeClose - Scene: When Windgust are to high i need them to close automaticly. --[[ %% properties %% events %% globals --]] -- setting up variables wT = json.decode(fibaro:getGlobalValue("WeatherState")) local stationNo = 1 local guststrenght = wT.netatmo[stationNo].wind.gust; local idroofdomes = tonumber(fibaro:getGlobalValue("IDRoofDomes")); -- IDRoofDomes is ID of my RolleshutterModule local idgsmibie = tonumber(fibaro:getGlobalValue("IdGsmIbie")); -- ID of my mobile phone local roofdomesstate = tonumber(fibaro:getValue(idroofdomes,"value")); -- Open or Close state if roofdomesstate > tonumber "0" and guststrenght >= tonumber "75" -- here i can adjust the Wind gust strength for Closing then -- Sending message to my phone fibaro:call(idgsmibie, "sendDefinedPushNotification", "183") -- 183 is the ID for my message created in the Notification panel -- Close window fibaro:call(idroofdomes, "setValue", "0") end RainRoofDomeClose - Scene: This script is checking the weather on http://openweathermap.org/ As a test I also added a check for my Netatmo Rainsensor. If Internet would be down, it works as a sort of fail save… Floors will be wet because it will take at least 15 min. to close. But rather 15 mins then hours of rain in my home when I am asleep in summer. --[[ %% properties %% events %% globals --]] -- setting up variables wT = json.decode(fibaro:getGlobalValue("WeatherState")) local stationNo = 1 local weathercastid = wT.openmap[stationNo].w_id; -- Weathercast ID local netatmorainsensor = wT.netatmo[stationNo].rain.hour; -- Netatmo rain/hour local idroofdomes = tonumber(fibaro:getGlobalValue("IDRoofDomes")); -- IDRoofDomes is ID of my RolleshutterModule local idgsmibie = tonumber(fibaro:getGlobalValue("IdGsmIbie")); -- ID of my mobile phone local roofdomesstate = tonumber(fibaro:getValue(idroofdomes,"value")); -- Open or Close state if roofdomesstate > tonumber "0" and -- rain detection from http://openweathermap.org/ ( (weathercastid == tonumber("200")) or (weathercastid == tonumber("201")) or (weathercastid == tonumber("202")) or (weathercastid == tonumber("210")) or (weathercastid == tonumber("211")) or (weathercastid == tonumber("212")) or (weathercastid == tonumber("221")) or (weathercastid == tonumber("230")) or (weathercastid == tonumber("231")) or (weathercastid == tonumber("232")) or (weathercastid == tonumber("300")) or (weathercastid == tonumber("301")) or (weathercastid == tonumber("302")) or (weathercastid == tonumber("310")) or (weathercastid == tonumber("311")) or (weathercastid == tonumber("312")) or (weathercastid == tonumber("313")) or (weathercastid == tonumber("314")) or (weathercastid == tonumber("321")) or (weathercastid == tonumber("500")) or (weathercastid == tonumber("501")) or (weathercastid == tonumber("531")) or (weathercastid == tonumber("502")) or (weathercastid == tonumber("503")) or (weathercastid == tonumber("504")) or (weathercastid == tonumber("511")) or (weathercastid == tonumber("520")) or (weathercastid == tonumber("521")) or (weathercastid == tonumber("522")) -- rain detection from Netatmo Rain Sensor or netatmorainsensor > tonumber "0" ) then -- Sending message to my phone fibaro:call(idgsmibie, "sendDefinedPushNotification", "186") -- 186 is the ID for my message created in the Notification panel -- Close Windows fibaro:call(idroofdomes, "setValue", "0") end Icons: Roof Dome device and scene: Bedroom Top Window Device: Note: Please keep in mind I am still a rookie… Not used to create this automation and not used to write about what I have created… Hope my post will help some of u to take a leap of faith and start automate your windows. I like to end this as @Sankotronic says: Enjoy coding and in this case assembling I am also working on a Walking Fridge solution… But as long my future wife’s name isn’t Fridge, it’s not going to happen

.jpg.1df2ec6394d2ce55356436132583fbd7.jpg)


- 5 replies
-
- 1
-
-
- window
- window automotaion
- (and 8 more)
-
Better than orginal fibaro door window sensor mount Who need to include/exclude sensor and do not make holes in windows is better method.
-
regarding: working solution for qubino on/off thermostat in HC2 (including app integration) device: qubino on/off thermostat controller: HC2 version 4.1 issue: setting target temperature fails status: found workaround Hi all, This week I decided to replace my ugly physical wallmounted thermostats with an invisible (in wall) alternative. I decided to go for the Qubino on/off thermostat to control my electrical infloor heating based on some web-site that claimed it was compatible with the HC2. Unfortunately it does not work out of the box, but I do believe I found a work-around that hopefully can be of use for some of you. First the problems: 1. The current temperature is not visible in HC2 2. Not possible to set the desired temperature from within HC2. This seems to be caused by misinterpretation of numerical values between qubino and HC2 (more below) The Solutions: 1. read current environment temperature The qubino thermostat does not actively send updates when the temperature changes, but HC2 is able to read it when you poll the device. I simply changed the polling interval to 1 minute, and that solved the issue 2. Setting the desired temperature This is the tricky one that requires a triggered event script as workaround. The problem is that setting a value of eg "22°C" for some reason becomes set as "2.2°" (notice the decimal point). This problem does not occur when you try to set the temperature to a decimal value, eg "21.5°" does get set correctly. My workaround is based on the observation that decimal values work correctly: instead of setting a desired temp of "22" we will request a desired temp of "22.01". This will be sent to qubino who will set the temp to "22.0" because it only supports one decimal (not 2). The HC2 will notice the value change in the qubino to 22.0 (being different from 22.01 triggering a seccond change event) and update the HC2 status to 22.0 Magic Now the remaining challenge is that the iPad/iPhone app do not allow us to set a value of "22.01" in the interface. We can only pick integers such as 21, 22, ... The following event script takes care of this. It gets triggered when the value of the qubino thermostat changes (value is the setpoint for the desired heating temp). If the value is too low, I assume it's due to the misinterpretation of the desired set point, and I reformat it before setting it again. I simply convert "2.2" into "22.01" and then set that value. Here is the event script that gets triggered on a "value" change of the qubino thermostat (that's the device ID we trigger on): --[[ %% properties 352 value %% events %% globals --]] local startSource = fibaro:getSourceTrigger(); local startSourceID = tonumber(startSource["deviceID"]); local setTemp=tonumber(fibaro:getValue(startSourceID, "value")); fibaro:debug("qubino value is "..setTemp); if (tonumber(setTemp) < 4) then fibaro:debug("need to adjust Temp"); setTemp=setTemp*10+0.01; fibaro:debug("qubino corrected value is "..setTemp); fibaro:call(startSourceID, "setThermostatSetpoint", "1", setTemp); end Feedback appreciated... Cheers, Koen