Welcome to Smart Home Forum by FIBARO
Dear Guest,
as you can notice parts of Smart Home Forum by FIBARO is not available for you. You have to register in order to view all content and post in our community. Don't worry! Registration is a simple free process that requires minimal information for you to sign up. Become a part of of Smart Home Forum by FIBARO by creating an account.
As a member you can:
- Start new topics and reply to others
- Follow topics and users to get email updates
- Get your own profile page and make new friends
- Send personal messages
- ... and learn a lot about our system!
Regards,
Smart Home Forum by FIBARO Team
Search the Community
Showing results for tags 'pushover'.
Found 2 results
-
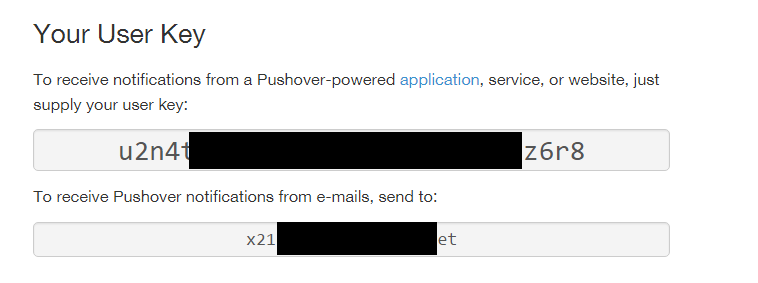
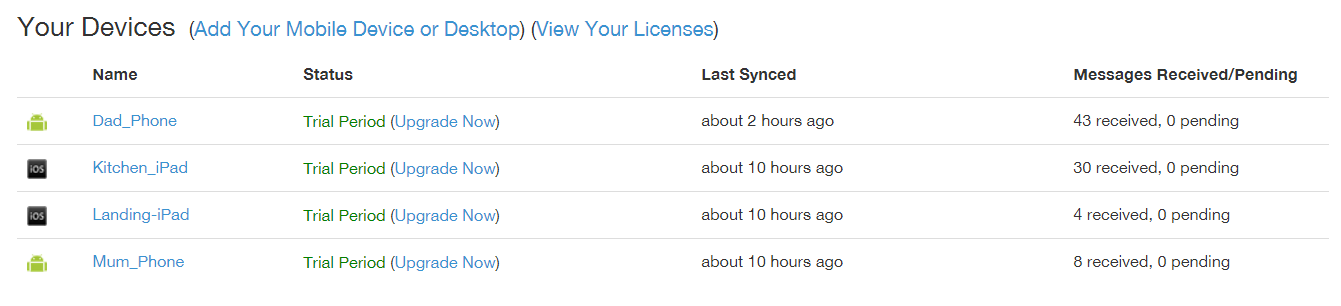
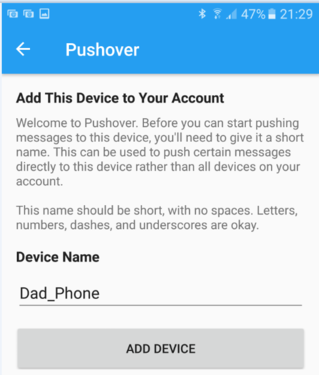
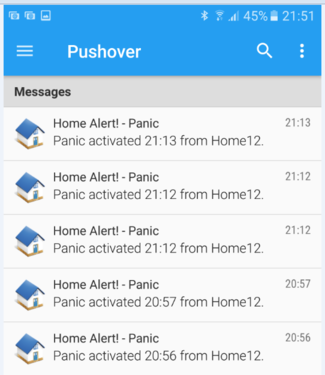
Hi, I have been working with the pushover service recently as an alternative the native notification service within the HC2. I think it is worth exploring if you are looking for another option. Since it is fresh in my mind I thought I'd document it and share to hopefully help others This draws on previous work from @SDeath and @sj3fk3 and others so all credit goes to them. STEP 1 – SIGN UP AND GET USER KEY 1. Sign up at pushover.net, usual stuff. You can use a trial account for 7 days and after that you'll need to purchase a license per platform (ie iOS, Android, etc) irrespective of how many devices you have with each platform. The licenses per platform are approx €5 each so they shouldn't break the bank 2. Open confirmation email and verify account 3. Log back into pushover and make note of your User Key which will be something like ubp44xxxxxxxxxxxxxx8497aihkq and this is your User Key 4. Copy this out as you will need this in the scenes in HC2 Note: There is also a pushover email address under your user key should you need this for another project but you don't need it for what we are doing here STEP 2 - REGISTER YOU APPLICATION 1. Scroll down to the bottom of the dashboard and click (Register Application/Create an API Token) 2. Give it a Name (we call our HC2 domino so I named it domino) This will appear in your client device where you receive your messages 3. Type = Application 4. Description/URL and icon all optional. (I added an icon as it appears on the alerts that you receive on your client devices (72px x 72px, png) and attached is the one I used) 5. Check the box and Click Create Application 6. This is the second Token Key, it’s something like aphmpbezxxxxxxxxxerqjwsg. Copy is out as you will need this in the scenes in HC2 STEP 3 – ADD CLIENT DEVICES (TO RECEIVE ALERTS ON ) 1. Android/iOS - Download the app from the appropriate store playstore or appstore 2. Log in to the app using your username and password that you got when you opened your pushover.net account 3. Give your device a name and click Register Device (I think it's better to avoid spaces and special characters if possible) 4. Go back to pushover.com and on your dashboard you'll see this new device added with the name you gave it. (Clicking the Pushover icon on the top left gets you back to your dashboard should you navigate off to another page) Repeat all part of STEP 3 for all other client devices. If you have multiple you'll end up with something like following You will see an Alert in your pushover app for each device that is added Within the pushover dashboard you can set up quiet times, groups and aliases but you don't need any of this to get started. STEP 4 – HC2 SETUP 1. Create a variable called pushoverBody in the top part of the variables panel 2. Create a new scene called pushoverSend and copy the following code into it ( this is the 'engine' that will call the pushover api and send the alert) 3. You will need to add your own user key and token key to line 14 -- SCENE THAT SAVES THE DATA TO THE GLOBAL VARIABLE 'pushoverBody' AND SENDS TO API --[[ %% events %% properties %% globals pushoverBody --]] -- Stops the scene if gv not populated if (tonumber(fibaro:getGlobalValue("pushoverBody")) == 0) then fibaro:abort(); end local selfhttp = net.HTTPClient({timeout=2000}) local tkn, usr = "a51eryn9t2qcg5bvoubzhqs29z2yc6", "u2n4tb99eckm6qw3hz365ts9r5z6r8" local msg = fibaro:getGlobalValue("pushoverBody") local requestBody = 'token=' ..tkn ..'&user=' ..usr ..msg selfhttp:request('https://api.pushover.net/1/messages.json', { options={ headers = selfhttp.controlHeaders, data = requestBody, method = 'POST', timeout = 5000 }, success = function(status) local result = json.decode(status.data); if result.status == 1 then fibaro:debug("Success: " ..result.request); else fibaro:debug("Failed: " ..status.data); end end, error = function(error) fibaro:debug("Success: " ..error); end }) --Reset the gv to 0 for next message fibaro:setGlobal("pushoverBody", "0") 4. Create another scene and call the pushover Test 5. Copy the following code to run a test (Change line 11 & 12 to the names of your device(s) that you wish to send the alert to. I have included 2 devices on my sample code) Change the Alert/Message Text as required -- CODE THAT SENDS THE DATA TO 'pushoverBody' GLOBAL VARIABLE -- THIS IS THE PART THAT YOU INCLUDE IN A SCENE TO SEND THE ALERT --[[ %% events %% properties %% globals pushoverBody --]] local dvc, prio = "Dad_Phone,Kitchen_iPad", "0" local ttl, msg = "Home Alert! - Panic", "Panic activated from Home." local requestBody = '&device='..dvc ..'&priority=' ..prio ..'&title=' ..ttl ..'&message=' ..msg fibaro:setGlobal("pushoverBody", requestBody) 6. Confirm that you should see an alert on the devices that you specified This is the code that you can put into any scene that you wish to send an alert from, making the necessary adjustments to receiving devices, message and priority should you wish Full details of the API can be found at https://pushover.net/api After 7 days it will stop working and you will need to purchase the required licenses at ~ €5 each .. and that it !! -f


-
HI, I'm just getting into pushover and impressed so far. I searched the forum and can't find the answer to sending to multiple devices This is what I'm trying so far and I'm not sure if its not possible or just not the correct syntax local dvc = "Dad_Phone, Kitchen_iPad" local prio = "0" local ttl = "House Alert! - Security" local msg = "message goes here" local requestBody = '&device='..dvc ..'&priority=' ..prio ..'&title=' ..ttl ..'&message=' ..msg fibaro:setGlobal("pushoverBody", requestBody) fibaro:debug(requestBody) Thanks -f @jompa68 any thoughts...