Welcome to Smart Home Forum by FIBARO
Dear Guest,
as you can notice parts of Smart Home Forum by FIBARO is not available for you. You have to register in order to view all content and post in our community. Don't worry! Registration is a simple free process that requires minimal information for you to sign up. Become a part of of Smart Home Forum by FIBARO by creating an account.
As a member you can:
- Start new topics and reply to others
- Follow topics and users to get email updates
- Get your own profile page and make new friends
- Send personal messages
- ... and learn a lot about our system!
Regards,
Smart Home Forum by FIBARO Team
Search the Community
Showing results for tags 'virtual devices'.
Found 11 results
-
It's just me or Home Center 3 (HC3) don't allow to upload .vfib files (virtual devices)? If it does, how can I do it?
-
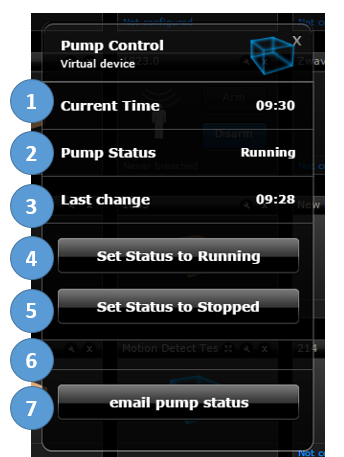
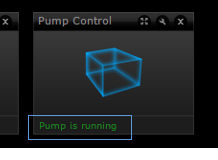
Hi, I know that when I started working with the HC2 I struggled with some of the simpler stuff. In some case it was down to a lack of understanding of the concepts rather than the code. I decided to put together this Virtual Devices 101 for new people starting out. I put some of this together to answer a few posts but decided to bring it into one post here to make it easier for newer users to find, I am starting from the basics and if anybody has ideas on how to make it better please let me know Some Virtual device basics LABELS - enable the user to display a title and a value. A label with no value entered can act as a divider BUTTONS - enable a user to execute an action, button can be manually pressed or through code. A VD can press one of its own buttons MAIN LOOP - Code here runs continuously in a loop - you can add fibaro:sleep code to slow down how fast the main loop code executes. Variables that are defined in the MAIN LOOP cannot be reused in the buttons. Seperate declarations are required DEBUG - option on Main loop or Button to what is being echo'd back as it executes The easiest way to understand virtual devices is to take apart a very simple one and understand the various parts I've attached a very simple VD. This will run on any HC2 after you have created the following two variables (Panels, Variables) Use the Add button but NOT the save button that is part of the right side vertical menu (as this may corrupt some of your other variable values) Go to "Add New Device" and import the VD (Pump Control) attached to this post. It's a very simple VD that interacts with the two variables you just created. (I don't expect the VD to be any use in real life but hopefully acts as a good learning tool. Press the appropriate set Status buttons to adjust the status displayed and also updates the Last change time to current time that indicates when somebody last changed the status. Send email send the current status and when this status was set I'll step through each part Current Time - label that display the current time from a local variable Pump Status - label that takes the value of a global variable and display appropriate text (1 = Runnnig, 0 = Stopped) Last Change - label that displays the value of a global variable. This global variable is whenever the status is adjusted by the following two buttons (#4, #5) Set Status to Running - Button that adjust a global variable to 1 value of 1. This also updates the global variable that holds the Last Change time to the current time. Set Status to Stopped - Button that adjust a global variable to 1 value of 1. This also updates the global variable that holds the Last Change time to the current time Divider - Label with now label value entered email Pump Status - This reads some global variables and using the Sendemail command sends the email to whatever emaila ccount is associated with HC2 admin role. MAIN LOOP - this keeps the global and local variable values up to date so they can be displayed in the labels Pick your way through the VD code, I think its straightforward enough. I did add some debug lines so you'll see more info in the debug screens Press Button action if you wanted to press one of the on the VD from another scene you need to know two things to use the following command fibaro:call(986, "pressButton",10) The id of the virtual device (986 above) and the button position (10 above) The id can be derived from the browser url when you have either the General or Advanced tab open n my screenshot above it 1870 but when you import it, the id will be different The second is the button position You need to count all elements in the VD so above buttons 4, 5 and 7 are valid PressButton actions These can be activated from within this VD, another VD or a scene using the following commands -- Set Status to Running fibaro:call(1870, "pressButton",4) -- Set Status to Stopped fibaro:call(1870, "pressButton",5) -- email pump status fibaro:call(1870, "pressButton",7) fibaro:log command The fibaro.log command in the VD presents the information on the VD when looked at in the full list of devices Virtual device - Advanced Config Tab In the advanced Tab of a VD you can define an IP address and Port If these are defined then the data can be used throughout the VD as follows. Place this code at the top of the main loop, button or label local device = fibaro:getSelfId(); local zonename = fibaro:getName(device); local ipaddress = fibaro:getValue(device, "IPAddress"); local port = fibaro:getValue(device, "TCPPort"); This takes what was entered as part of the advanced tab and assigns them as local variables (ipaddress and port) This are generally used where a VD is used to execute a http request Some other commands -- display a text value in a VD label fibaro:call(thisId, "setProperty", "ui.label1.value", "offline") -- display a variable value in a VD label fibaro:call(thisId, "setProperty", "ui.downavg.value",downavg.." °C") -- some slightly more complicated examples fibaro:call(thisId, "setProperty", "ui.hall.value",roundit(fibaro:getValue(1974, "value"),1).." °C") fibaro:call(thisId, "setProperty", "ui.hall.value",roundit(fibaro:getValue(hallTemp, "value"),1).." °C") fibaro:call(thisId, "setProperty", "ui.downavg.value",downavg.." °C") -- variable declaration local data = 1 local parameter = 5 local data, parameter = 1, 5 local msg = "1st "..alarmStatus.." alert with "..alertMsg.."." -- press button #1518 is the VD id and 1 is the button or through a local variable called SonosTTS fibaro:call(1518, "pressButton",1) fibaro:call(SonosTTS, "pressButton",5) -- Action to start a scene by either ID or variable that represents a numerical value fibaro:startScene(AlarmSet) fibaro:startScene(284) -- allow user to send email, 2 is the user id ("Alert" is email subject, "Garden sensor.." is the email body) fibaro:call(2, "sendEmail","Alert!", "Garden Sensor triggered") Suggestions to improve welcome -f EDIT : Feb 11 I added one more VD as an attachment from a suggestion from @Jamie mccrostie It's called Rack Temp Mngt It reads and displays the temperature from two probes I have, one is above each of my equipment racks . (The temp probes are 1-wire and use a Fibaro UBS to connect to HC2) I have two fans arrays to the side of the racks and these are switched from the two sides of a Fibaro dual relay This status is displayed as Fan status II then have two ON/OFF buttons to switch the Fans on or off if I see the temp running high. (I plan on automating this with temp threshold and notifications but it's on my long to-do list) It's a simple scene but I thought it was a good scene to help understand how things can setup It does use a HomeTable so the devices are all jT.equipment_rack.XXXX - just replace these with a relay id or equivalent local variable. Pump_Control.vfib Rack_temp_Management (1).vfib


- 18 replies
-
- 8
-

-

-
- newbie
- virtual devices
- (and 4 more)
-
As has been re-iterated many many times on this forum, there are two methods of updating a slider in a virtual device from a scene or another VD: Using fibaro:call(device, "setProperty", "ui.sliderX,value", value) causes the numerical value of the slider to be updated, but not the length of the slider bar. Neither does it execute the code behind the slider. Using fibaro:call(device, "setSlider", X, value) causes the numerical value and the length of the slider to be updated,, and executes the code behind the slider. In both cases, "device" is the ID number of the VD, "X" is the slider reverence number and "value" is the new slider value (0-100). Generall, option 2 is preferred because everything is updated. However, there seems to be an issue if the VD has more that nine sliders. Executing a few lines of test code for each of the methods illustrates this. First, method 1. Executing this code: local device = fibaro:getSelfId() local sliderString1 local sliderString2 local numSliders = 13 fibaro:debug('-----------------------------------------------------------') fibaro:debug('--Set Sliders----------------------------------------------') for i = 1, numSliders do sliderString1 = ('ui.Slider' .. tostring(i) .. '.value') fibaro:call(device, "setProperty", sliderString1, tostring(i)) fibaro:debug('Slider ' .. tostring(i) .. ' = ' .. tostring(i)) end fibaro:debug('--Read Sliders---------------------------------------------') for i = 1, numSliders do sliderString1 = ('ui.Slider' .. tostring(i) .. '.value') sliderString2 = fibaro:getValue(device, sliderString1) fibaro:debug(device .. ', ' .. sliderString1 .. ' = ' .. sliderString2) end Gives: [DEBUG] 16:21:04: --Set Sliders---------------------------------------------- [DEBUG] 16:21:04: Slider 1 = 1 [DEBUG] 16:21:05: Slider 2 = 2 [DEBUG] 16:21:05: Slider 3 = 3 [DEBUG] 16:21:05: Slider 4 = 4 [DEBUG] 16:21:05: Slider 5 = 5 [DEBUG] 16:21:05: Slider 6 = 6 [DEBUG] 16:21:05: Slider 7 = 7 [DEBUG] 16:21:05: Slider 8 = 8 [DEBUG] 16:21:05: Slider 9 = 9 [DEBUG] 16:21:05: Slider 10 = 10 [DEBUG] 16:21:05: Slider 11 = 11 [DEBUG] 16:21:05: Slider 12 = 12 [DEBUG] 16:21:05: Slider 13 = 13 [DEBUG] 16:21:05: --Read Sliders--------------------------------------------- [DEBUG] 16:21:05: 1044, ui.Slider1.value = 1 [DEBUG] 16:21:05: 1044, ui.Slider2.value = 2 [DEBUG] 16:21:05: 1044, ui.Slider3.value = 3 [DEBUG] 16:21:05: 1044, ui.Slider4.value = 4 [DEBUG] 16:21:05: 1044, ui.Slider5.value = 5 [DEBUG] 16:21:05: 1044, ui.Slider6.value = 6 [DEBUG] 16:21:05: 1044, ui.Slider7.value = 7 [DEBUG] 16:21:05: 1044, ui.Slider8.value = 8 [DEBUG] 16:21:05: 1044, ui.Slider9.value = 9 [DEBUG] 16:21:05: 1044, ui.Slider10.value = 10 [DEBUG] 16:21:05: 1044, ui.Slider11.value = 11 [DEBUG] 16:21:05: 1044, ui.Slider12.value = 12 [DEBUG] 16:21:05: 1044, ui.Slider13.value = 13 As would be expected. However executing a code snippet using method 2, like this: local device = fibaro:getSelfId() local sliderString1 local sliderString2 local numSliders = 13 fibaro:debug('-----------------------------------------------------------') fibaro:debug('--Set Sliders----------------------------------------------') for i = 1, numSliders do fibaro:call(device, "setSlider", tostring(i), tostring(i)) fibaro:debug('Slider ' .. tostring(i) .. ' = ' .. tostring(i)) end fibaro:debug('--Read Sliders---------------------------------------------') for i = 1, numSliders do sliderString1 = ('ui.Slider' .. tostring(i) .. '.value') sliderString2 = fibaro:getValue(device, sliderString1) fibaro:debug(device .. ', ' .. sliderString1 .. ' = ' .. sliderString2) end Give this: [DEBUG] 16:43:02: --Set Sliders---------------------------------------------- [DEBUG] 16:43:02: Slider 1 = 1 [DEBUG] 16:43:02: Slider 2 = 2 [DEBUG] 16:43:02: Slider 3 = 3 [DEBUG] 16:43:02: Slider 4 = 4 [DEBUG] 16:43:02: Slider 5 = 5 [DEBUG] 16:43:02: Slider 6 = 6 [DEBUG] 16:43:02: Slider 7 = 7 [DEBUG] 16:43:02: Slider 8 = 8 [DEBUG] 16:43:02: Slider 9 = 9 [DEBUG] 16:43:03: Slider 10 = 10 [DEBUG] 16:43:03: Slider 11 = 11 [DEBUG] 16:43:04: Slider 12 = 12 [DEBUG] 16:43:04: Slider 13 = 13 [DEBUG] 16:43:04: --Read Sliders--------------------------------------------- [DEBUG] 16:43:04: 1044, ui.Slider1.value = 10 [DEBUG] 16:43:04: 1044, ui.Slider2.value = 11 [DEBUG] 16:43:04: 1044, ui.Slider3.value = 12 [DEBUG] 16:43:04: 1044, ui.Slider4.value = 13 [DEBUG] 16:43:04: 1044, ui.Slider5.value = 5 [DEBUG] 16:43:04: 1044, ui.Slider6.value = 6 [DEBUG] 16:43:04: 1044, ui.Slider7.value = 7 [DEBUG] 16:43:04: 1044, ui.Slider8.value = 8 [DEBUG] 16:43:04: 1044, ui.Slider9.value = 9 [DEBUG] 16:43:04: 1044, ui.Slider10.value = 10 [DEBUG] 16:43:04: 1044, ui.Slider11.value = 11 [DEBUG] 16:43:04: 1044, ui.Slider12.value = 12 [DEBUG] 16:43:04: 1044, ui.Slider13.value = 13 Which is clearly wrong. Is this a bug, or have I done something really dumb (if so please enlighten me). If it is a bug, does a workaround exist? TIA.
-
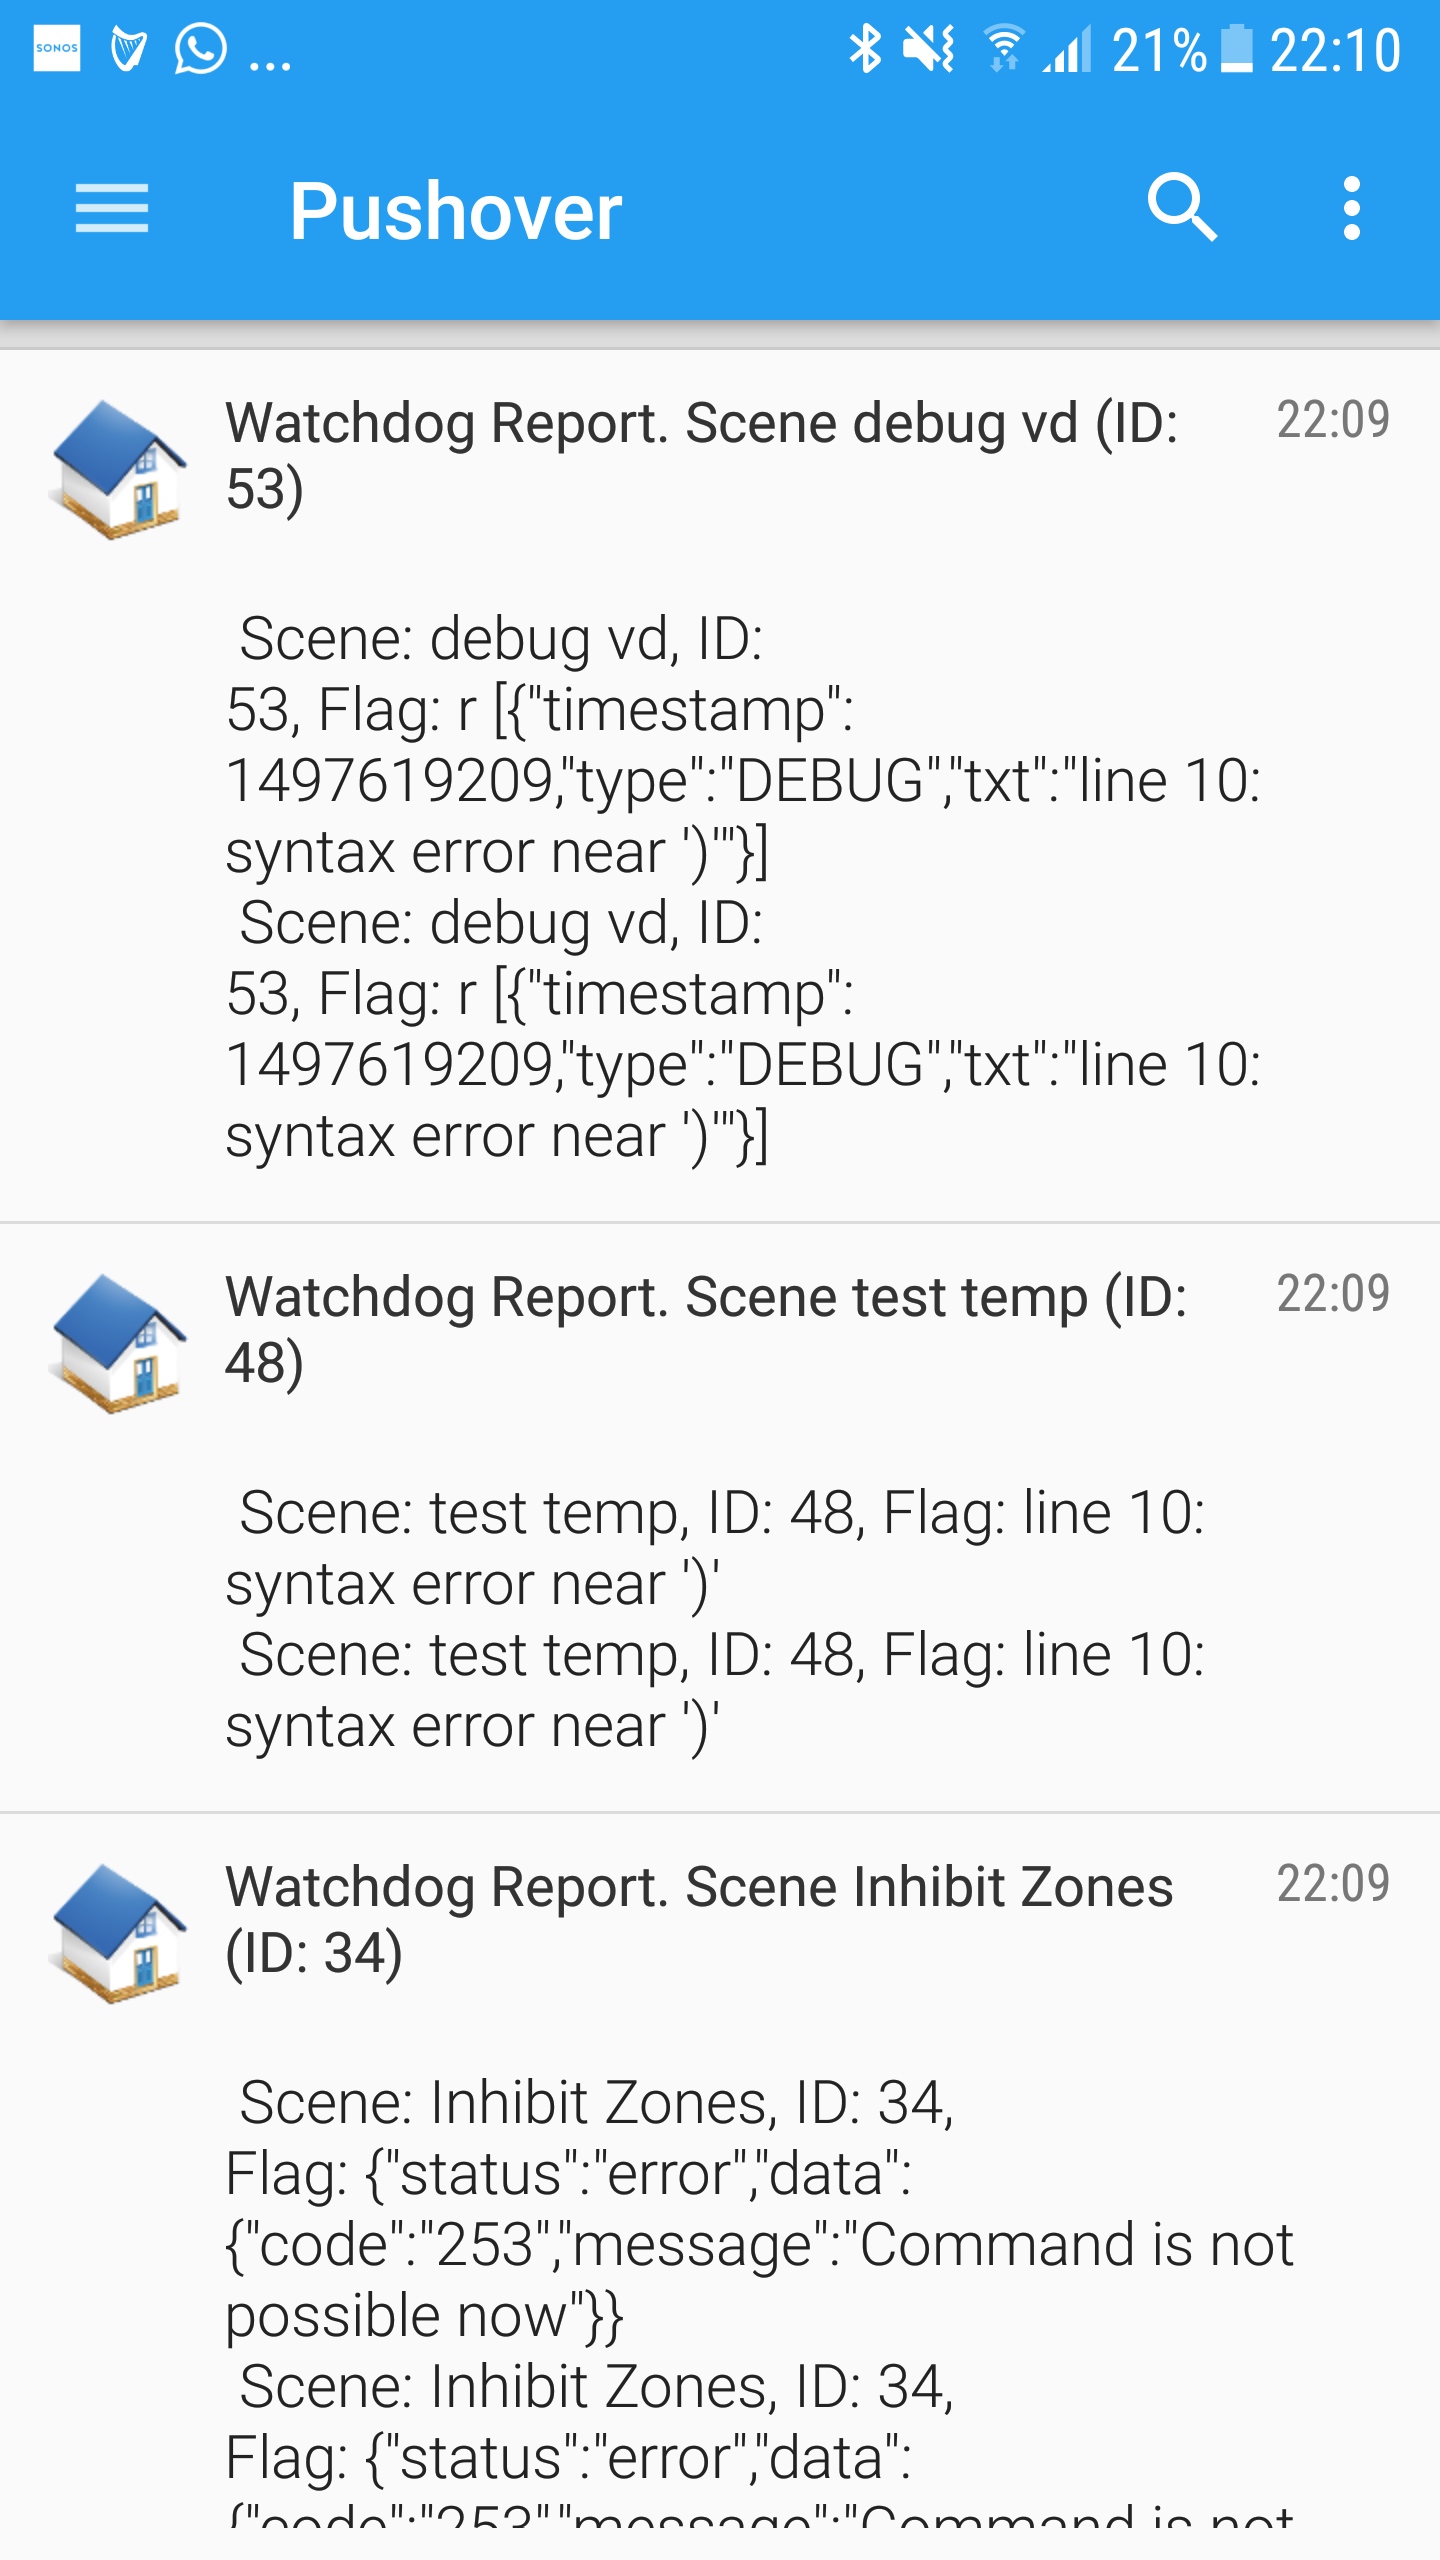
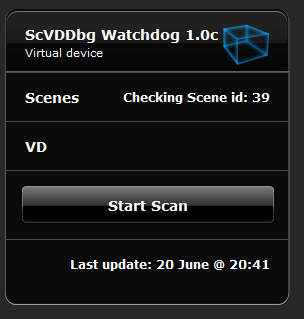
Hi UPDATED 1.1 UPDATED THIS VD FROM A SCENE WATCHDOG TO A SCENE & VIRTUAL DEVICE WATCHDOG Hopefully this will be a useful little VD to some users It was inspired by a comment made by @tinman (I think) This VD Enables a user to scan all scene and virtual device DEBUG MESSAGES and trigger on predefined key words in the debug messages. This may be useful to see if a scene develops an error or perhaps you are just looking for a keyword for a different reason All scenes and virtual devices are included by default Specific scenes and virtual device id's can be flagged to exclusion Separate watch lists for scenes and virtual devices A watchdog report is sent for all matches identified. Can be sent via email or smart message hub You get one email or message per id flagged ( not per watch word) It will send message if no match in either vd or scene is found (added in v 1.1) Suggested icon included below Note: If you use the Smart Message Hub please add that scene ID into the exclusion list as that scene will be flagged by the watchdog after the first use. This can be run on demand or on a schedule using Main Scene by @Sankotronic or similar. I run it on a schedule once per day Installation Import the VD Configure the following as required -- user configurable local jT = json.decode(fibaro:getGlobalValue("HomeTable")) -- comment out if HomeTable is not used watchListSC = {"syntax", "error", "line334", "concatinate"} -- words that you want to watch in scenes watchListVD = {"expected", "unfinished"} -- words that you want to watch in virtual devices excludeList = {"23", "32"} -- scene and virtual device id's that you would like to exclude from watching SMsgH = true -- set to false if you don't use smart message hub SMsgHtarget = "pushover" -- set to preferred medium if you use smart message hub deBug = false -- enable for greater debug verbosity Place on a scheduler if required The VD has a status label and when it was last run and this is what the report looks like on pushover VD attached scvd_Watchdog_1.1.vfib


-
Hi, My name is Raul. I'm volunteering in a residence for people with disabilities where we're trying to setup a domotic system for a therapy SPA. I'm configuring a scene where Sonos needs to play a couple of songs that are hosted in PC (for the moment). I set up the Music library without any problems. However, when referencing the path to the song, the Sonos app prompts the following message: "Unable to play track1.mp3 - cannot connect to /// because the server cannot be found" To give you more context, here you can find the tutorial I'm using: https://doonic.wordpress.com/2015/08/14/sonos-und-fibaro-hc2/ Works for the radio although I don't need it. I'm only interested in playing my local mp3 files. My music library: Local path: C:\MusicSonos Sonos Music Library path: //DESKTOP-PVTSA31/MusicSonos/ Predefined variable SONOS_MUSIC set to //DESKTOP-PVTSA31/MusicSonos/track1.mp3 Not sure what I'm missing here. Could you please give me a hand? Thanks a lot!! Raul.
-
Like several other users, I struggle to customize the Fibaro (iPad) mobile app to suit my needs. The graphical looks is superb, but we are in great need of better configuration and shortcut functionalities. Too many clicks are needed to access the most frequently used devices, scenes or rooms. Too much fancy graphics that will impress my friends, but confuse and annoy my wife. The widgets are however a start and bring scenes to the immediately accessible surface, but it's only a start. Here are a few improvement proposals (or questions, if I have missed some already available obvious solutions). (1) Why limit the number of available widget slots to 6 ? My iPad has a huge fancy empty dark blue screen. I would gladly sacrifice the energy graph or some other elements of graphically pleasing looks but dubious information value. (2) I need to get some of my VDs to the surface. Widgets are limited to Scenes. Any chance I have missed something? (3) I need the icons of the widgets to reflect status. I have found no way to dynamically change this. LUA fibaro: getSelfId() can only pick up VD IDs as far as I been able to confirm. Any solutions out there? Just one simple example: I have a great VD which changes the heating scheme from "Scheduled" to "Holiday" to "Home" status. VDs change icons dynamically. No way to bring this to the dashboard. A bit irritating.
-
 This is feature request with low priority. So i will post it only on forum Better function of clipboarding from debug windows from VD debug window and LUA scene debug window. How it is now works: Succesfull clipboard: Hold left mouse button to select some debug lines and then ctrl+C for copy, while left mouse button is held down. Unsuccesfull clipboard: Hold left mouse button to select some debug lines, release mouse button and then ctrl+C for copy, while left mouse button is holded. What is requested: Hold left mouse button to select some debug lines, release mouse button and then ctrl+C for copy, while left mouse button is holded.
 -
Hi! I need to create this functionality in LUA Code on Virtual Devices: Aim: To toggle commands each time that button is pressed. Description: The Virtual Device button called “Cursor Left” needs to save Two Commands “Global Cache Executable : InfraRed Code 1” and “Global Cache Executable : InfraRed Code 2”. Working: We need that each time we press the button “Cursor Left”, “IR Code 1” is sent and the second time we press the button “IR Code 2” is sent, when we press it the third time “IR Code 1” is sent and so on. At no instance “IR Code 1” and “IR Code 2” should be sent together. It should always execute Code 1 then Code 2 then Code 1 . . . . . only when the virtual device button is pressed. The program would be saved on each button of the virtual device, virtual device in this case would be a remote comprising of different buttons and codes. How RC6 Codes Work : RC6 each codes is used in alternating order. After the first code gets sent, the equipment is looking for the next code. Best Regards, Kunal Sabharwal
-

Urządzenie wirtualne uruchamia lub wyłącza gotowe sceny
Rychu posted a question in Sceny i Interfejs
Witam wszystkich, Jestem tutaj nowy, tak samo jest z moją znajomością systemu Fibaro. Mam prośbę ponieważ posiadam centrlkę HCL i nie jestem w stanie napisać sceny, która dawała by mi możliwość użycia "else". Mam 2 sceny jedna która włącza piec, gdy temperatura spanie poniżej 25 stopni, a druga, która go wyłącza gdy ją przekroczy. Gdy sceny są aktywne chodzi to dobrze, lecz jest to domek do wynajęcia i nie zawsze są w nim goście. Wtedy dochodzą kolejne dwie sceny, które utrzymują temperaturę 10 stopni w pomieszczeniu. Tylko znowu muszę wchodzić i ustawiać sceny na aktywne. Dlatego piszę tutaj czy nie da się tego zrobić za pomocą urządzenia wirtualnego, które sprawdzi mi temperaturę w pokoju i jeśli mam włączoną opcję, że są goście aktywuje mi te dwie sceny i na zmianę będzieą się uruchamiały te sceny, aby utrzymać temperaturę. Jeśli da się to zrobić inaczej też proszę o podpowiedzi, ponieważ chce się uczyć, lecz nigdzie nie mogę znaleźć jakiegoś poradnika od czego można by zacząć pracę i jak ustawić chociaż dane dostępowe do centralki w przycisku żeby mi się łączył z centralką i uruchamiał dane sceny. Z góry dziękuje za jakąkolwiek pomoc. -
i have a schlage deadbolt z wave lock that i use with my revolve, i recently upgraded to the home centre 2, how can i add this lock and another z wave kwikset lock, i didn't find any plugin that matches what i need so i guess i have to add them as a virtual devices, but I'm new to the fibre world and i don't have a lot of programming experience please advice Thank you
-
Hi, I just recently upgraded to HC2 v4, and am quite pleased so far with what I'm experiencing, especially with the plugins. Quick question: How do I use the buttons on a plugin device in an existing Virtual Device or scene? Prior to 4.0xx, I mapped all my Home Theater components' (TV, Blu Ray, AVR etc) remote IRs to different Virtual Devices, and created one 'universal' VD to control them all. For example, I created a power button to press button 1 of my AVR remote, button 2 of my TV remote etc etc. Question is how do I use the buttons on the new plugins in my 'universal' VD? Any help would be appreciated. Thanks!