Welcome to Smart Home Forum by FIBARO
Dear Guest,
as you can notice parts of Smart Home Forum by FIBARO is not available for you. You have to register in order to view all content and post in our community. Don't worry! Registration is a simple free process that requires minimal information for you to sign up. Become a part of of Smart Home Forum by FIBARO by creating an account.
As a member you can:
- Start new topics and reply to others
- Follow topics and users to get email updates
- Get your own profile page and make new friends
- Send personal messages
- ... and learn a lot about our system!
Regards,
Smart Home Forum by FIBARO Team
Search the Community
Showing results for tags 'tutorial'.
Found 16 results
-
Hello. I wanted post it here: https://forum.fibaro.com/forum/129-other-solutions/ but i have no rights for it. First of all I want to say that it is totally not recommended to do it. If you have similar problems - ask for support first! DO IT ON YOUR OWN RISK! Probably this will end your warranty (but my already ended). Two days ago a need to do some electric works and I shutdown my HC2 by pressing power button. Then, when I finished - I switch it on leds start to blinking... but nothing hapened. I tried to boot to recovery but it did not boot also. I unscrewed left panel of HC and attach monitor to see whtats hapening. And I sawed that it is immediatly reboot after selcecting a boot device. It was a GRUB problem. This tutorial is for linux users. Btw, my HC2 version is 4.550. 1. You need: >=1Gb flash drive Keyboard Monitor with VGA connector Linux PC (you can prepare USB drive on Windows, but I do not know how, sorry) 2. Preparing flash drive Download Debian 6 image: https://cdimage.debian.org/mirror/cdimage/archive/6.0.10-live/amd64/usb-hdd/debian-live-6.0.10-amd64-rescue.img And flash it to usb drive (this will erase all your data on flash drive): dd if=debian-live-6.0.10-amd64-rescue.img of=/dev/sdc /dev/sdc - is your USB Flash. 3. Boot with prepared flash drive Power off HC2. Insert USB Flash. Remove fibaro recovery usb-drive. Press F10 like crazy after power on. Select your USB flash in menu. 4. Fixing grub When GRUB of flash drive appering - select failsafe mode and press enter After boot sequence will compleate you have about 5 minutes to fix your problem (after sometime something will reboot your HC2). Determine system drive device: ls -al /dev/disk/by-label You will see something like: ... lrwxrwxrwx 1 root root 10 Nov 9 14:38 SystemFS -> ../../sdb2 ... So, sdb is your target drive. Mount SystemFS with write permissions: sudo mount /dev/disk/by-label/SystemFS /mnt -rw Install GRUB to your target device. sudo /usr/grub/grub-install --root-directory=/mnt /dev/sdb Now you need to fix grub.cfg vi /mnt/boot/grub/grub.cfg grub.cfg should become like this: set default="0" set timeout="5" menuentry "Buildroot" { set root=(hd0,msdos2) linux /boot/bzImage initrd /boot/initramfs boot } 5. Reboot Do not forget to remove your flash drive. It shodl boot normaly now.
-
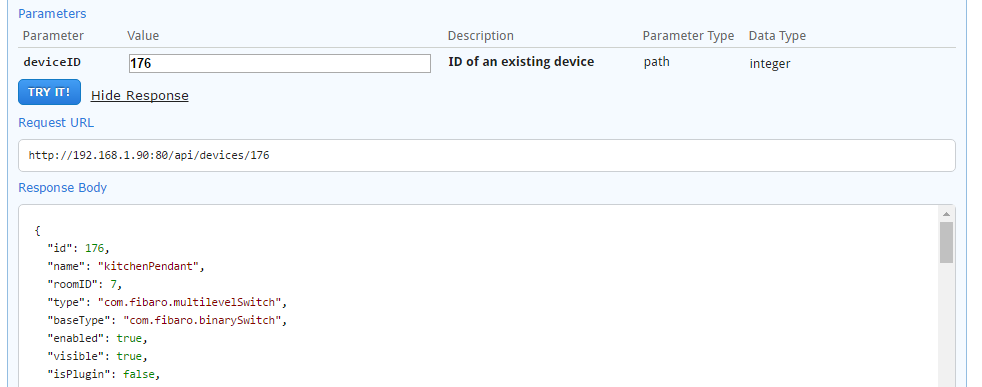
 Introduction to API and http requests Like the other 'Introduction to' posts I'm h0ping this may help some of the people begining their HC2 and lua journey Corrections and suggestions to improve always welcome. What is an API An API can be used to execute commands but the majority are used to request a response or status. Most API’s are interrogated through a http or https request. Some API’s require authentication in the form of a username or a password or an API key. There are public API’s and private API’s. There are a number of API types and the one of the most widely used is a called RESTAPI. This type of API is supported by the HC2 but there are others such MQTT, SOAP, etc The following are API’s that you may have come across in this forum and there are many others Home Center 2 : http://<hc2-ip>/docs (where hc2-ip is the ipaddress of your hc2 192.168.x.x OWN : open weather map ( https://openweathermap.org/api ) Sonos-http-api : ( https://github.com/jishi/node-sonos-http-api ) AWS Polly: used for TTS (http://docs.aws.amazon.com/polly/latest/dg/API_Reference.html ) VoiceRSS : used for TTS (http://www.voicerss.org/api/documentation.aspx ) Some organisations like AWS or Google have multiple API’s that are used for different purposes Structure All API’s has a set of web methods with a set structure. An API call or request can be either a GET, DELETE, POST, PUT and for this introduction we will focus on the GET This means that the data format is predictable and as such is easy to traverse and extract responses. Most RESTAPI responses have a format that conforms to json standard. Json is a way to store information in an organized, easy-to-access manner. It gives us a human-readable collection of data that we can access in a really logical manner. All public API’s are documented like the ones outlined above so a under will know what to expect when they issue a http request. A simple json example would be something like local jStr = {"age" : "24", “hometown" : "Missoula, MT", "gender" : "male" }; A slightly more complicated json string could be be {"coord":{"lon":15.98,"lat":45.81},"weather":[{"id":802,"main":"Clouds","description":"scattered clouds","icon":"03d"}],"base":"stations","main" :{"temp":10.86,"pressure":1018.82, "humidity":66,"temp_min":10.86,"temp_max":10.86,"sea_level":1035.43,"grnd_level":1018.82},"wind":{"speed":1.06,"deg":281.501},"clouds":{"all":32},"dt":1487346966,"sys":{"message":0.0038,"country":"HR","sunrise":1487310847,"sunset":1487348795},"id":6618983,"name":"Zagreb - Centar","cod":200} This could also be referreed to as a tbale because of it's structured format. Fortunately there are websites like http://jsonprettyprint.com/ that make these json strings easier to read { "coord": { "lon": 15.98, "lat": 45.81 }, "weather": [ { "id": 802, "main": "Clouds", "description": "scattered clouds", "icon": "03d" } ], "base": "stations", "main": { "temp": 10.86, "pressure": 1018.82, "humidity": 66, "temp_min": 10.86, "temp_max": 10.86, "sea_level": 1035.43, "grnd_level": 1018.82 }, "wind": { "speed": 1.06, "deg": 281.501 }, "clouds": { "all": 32 }, "dt": 1487346966, "sys": { "message": 0.0038, "country": "HR", "sunrise": 1487310847, "sunset": 1487348795 }, "id": 6618983, "name": "Zagreb - Centar", "cod": 200 } To access an api you need 2 things ip address, port, etc to make the http/https request Structure/format of the response so you know how to traverse it and extract what you want The easiest way to explain and learn is by example. As it is highly likely that everybody reading this will have a HC2 we can use to demonstrate the principles. The HC2 RESTAPI is documented on the Fibaro developer site at https://developer.fibaro.com/docs/fghc-restapi The one we will look at is devices. This the first one under the General category at the developers website above. The developer website shows the various parameters that are returned with this call. The API can be used to request information or complete an action. We will look at the request for information If you go to http://,hc2-ip./docs you will see the interactive or inline documentation for web API Go to the section on devices and select deviceid enter a device number ( I selected device 176 which is a dimmer module ) and click Try It. You will see the json formatted or encoded response for that API call. You will also see the full url for the call. If you copy the url and paste it into a browser you will get the same thing (except as one long string) {"id":176,"name":"kitchenPendant","roomID":7,"type":"com.fibaro.multilevelSwitch","baseType":"com.fibaro.binarySwitch","enabled":true,"visible":true,"isPlugin":false,"parentId":175,"remoteGatewayId":0,"interfaces":["deviceGrouping","fibaroFirmwareUpdate","levelChange","light","power","zwave","zwaveConfiguration","zwaveSceneActivation"],"properties":{"parameters":[{"id":1,"lastReportedValue":255,"lastSetValue":255,"size":1,"value":255},{"id":6,"lastReportedValue":0,"lastSetValue":0,"size":1,"value":0},{"id":7,"lastReportedValue":1,"lastSetValue":1,"size":1,"value":1},{"id":8,"lastReportedValue":1,"lastSetValue":1,"size":1,"value":1},{"id":9,"lastReportedValue":5,"lastSetValue":5,"size":1,"value":5},{"id":10,"lastReportedValue":1,"lastSetValue":1,"size":1,"value":1},{"id":11,"lastReportedValue":1,"lastSetValue":1,"size":1,"value":1},{"id":12,"lastReportedValue":99,"lastSetValue":99,"size":1,"value":99},{"id":13,"lastReportedValue":2,"lastSetValue":2,"size":1,"value":2},{"id":14,"lastReportedValue":2,"lastSetValue":2,"size":1,"value":2},{"id":15,"lastReportedValue":1,"lastSetValue":1,"size":1,"value":1},{"id":16,"lastReportedValue":1,"lastSetValue":1,"size":1,"value":1},{"id":17,"lastReportedValue":0,"lastSetValue":0,"size":1,"value":0},{"id":18,"lastReportedValue":0,"lastSetValue":0,"size":1,"value":0},{"id":19,"lastReportedValue":0,"lastSetValue":0,"size":1,"value":0},{"id":20,"lastReportedValue":110,"lastSetValue":110,"size":1,"value":110},{"id":30,"lastReportedValue":3,"lastSetValue":3,"size":1,"value":3},{"id":39,"lastReportedValue":600,"lastSetValue":600,"size":2,"value":600},{"id":41,"lastReportedValue":0,"lastSetValue":0,"size":1,"value":0}],"pollingTimeSec":0,"zwaveCompany":"Fibargroup","zwaveInfo":"3,3,52","zwaveVersion":"2.2","configured":"true","dead":"false","deviceControlType":"23","deviceGroup":"[]","deviceGroupMaster":"0","deviceIcon":"15","emailNotificationID":"0","emailNotificationType":"0","endPointId":"0","firmwareUpdate":"{\"info\":\"\",\"progress\":0,\"status\":\"UpToDate\",\"updateVersion\":\"2.2\"}","isLight":"true","liliOffCommand":"","liliOnCommand":"","log":"","logTemp":"","manufacturer":"","markAsDead":"false","model":"","nodeId":"49","parametersTemplate":"235","power":"0.00","powerConsumption":"42","productInfo":"1,15,1,0,16,10,2,2","pushNotificationID":"0","pushNotificationType":"0","remoteGatewayId":"0","saveLogs":"true","sceneActivation":"0","serialNumber":"","showEnergy":"true","smsNotificationID":"0","smsNotificationType":"0","updateVersion":"","useTemplate":"true","userDescription":"","value":"0"},"actions":{"associationGet":1,"associationSet":2,"getParameter":1,"reconfigure":0,"setParameter":2,"setValue":1,"startLevelDecrease":0,"startLevelIncrease":0,"stopLevelChange":0,"turnOff":0,"turnOn":0,"updateFirmware":1},"created":1486747960,"modified":1486747960,"sortOrder":13} EXAMPLE - API Call from a Virtual Device The following is a http request to the HC2 api. Copy the following in a button or main loop in a virtual device local device = fibaro:getSelfId() localhost = '127.0.0.1' local port = 11111 diag = Net.FHttp(localhost, port); response = diag:GET("/api/devices/176") result = json.decode(response); fibaro:debug("name: "..result.name) fibaro:debug("properties.value: "..result.properties.value) run the vd and open the debug window You’ll see the name and value of the device you selected. If you look through the json response from further up in the tutorial you’ll see the correlation between the results and the json There are some examples of how to iterate through an array in another one of the tutorials I posted. Please see my signature… One last one in case you have difficulty sleeping and the if the above was too simple This function iterates through all the virtual devices on your HC2 and looks for one called 'LAN Network 2.0' The 'LAN Network 2.0' virtual device has multiple labels The function iterates through the virtual device and counts all the labels ( in the json for the virtual device these are called rows) For each row above it looks for an element type ‘Label’ It then iterates through all the labels checking that they match the default format of Label1, Lable2, etc. string.match(jT[i].properties.rows[r].elements[e].name, "Label")) == "Label" The result is a loop inside a loop inside another loop, iterating and checking at each step full code for function to pick through when you have some time. function labelCheck() fibaro:log("vdCheck mode enabled") local device, localhost, port = fibaro:getSelfId(), '127.0.0.1', 11111; diag = Net.FHttp(localhost, port); response = diag:GET("/api/virtualDevices") jT = json.decode(response); for i = 1, #jT do if jT[i].name == "LAN Monitor 2.0" then if #jT[i].properties.rows == #jN then labelCount = "true" else labelCount = "false" end for r = 1, #jT[i].properties.rows do for e = 1, #jT[i].properties.rows[r].elements do if (string.match(jT[i].properties.rows[r].elements[e].name, "Label")) == "Label" then labelMatch = labelMatch else labelMatch = "false" end end end end end if labelCount == "true" and labelMatch ~= "false" then fibaro:debug("Quantity and format of labels is correct") else if labelCount == "false" then fibaro:debug("Quantity of labels incorrect") fibaro:log("Quantity of labels incorrect") end fibaro:sleep(3000) if labelMatch == "false" then fibaro:debug("Label format is incorrect") fibaro:log("Label format is incorrect") end end end Happy coding and suggestions to improve/correct always welcome -f
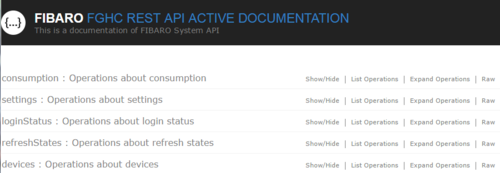


-
Hi, This tutorial is based on an idea that i believe originated to @cag014 some time back and has been adopted by many. So well deserved kudos to @cag014 and others that helped originate and develop the concept. I am merely a scribe that has benefited from this and wanted to share the process I used. Special thanks to @ReneNL who provided the part of the scene that searches through you HC and parses/formats the table before saving. I decided to write a quick tutorial for two reasons... I implemented this over christmas and and found it very useful and much easier than I thought It would appear that we have some new forum members that got HC2 devices from Santa The core of this approach is to store all the reference ID's to your devices, virtual devices, scenes, etc in a json encoded table. The references like jT.kitchen.light are used in the scene or vd and device ID can easily be changed in the table. One important benefit is that it you need to exclude/include a device the device ID will change. With this approach you simple change the reference in the Home table and your done. Without this approach you wll need to go through your code and change the device ID where appropriate. ** This doesn't get over the need to enter ID as triggers in the scene headers as fibaro doesn't allow variable in the header ** The solution has two parts to it. The home table itself where the data is stored. - this is held in a predefined variable (lower part of variables panel) The references in your scenes and virtual devices use this table HOME TABLE This can be created and maintained through either a scene or a virtual device. Edit: I use a scene with %% autostart. This allows the table to be reloaded after a HC2 restart in addition to saving the scene. (thanks @Sankotronic ) Go to Panel, Variables Panel and create a new predefined variable (lower part of panel) called HomeTable. When you create a predefined variable it has two values. Name the variable and save. Edit the variable and simply delete the second value. When working with the variables panel please DON'T use the save button on the right side. It can corrupt other variables. Using either a scene or a vd create your table with your data and store it. This is lua from the scene. The top part shows the format of the table. I opted to place each element I am looking to store into rooms and/or other natural groupings but you can choose any way to structure. I'll attached a copy of my full table at the end of this to show what I use it for. The next part encodes and stores the data The last part is where I read back one entry to show the table stored okay. --[[ %% autostart %% properties %% events %% globals --]] local debug = true --set to false to stop debug messages -- HOME TABLE FOR ANYTHING IN ADDITION TO DEVICES, VDs, iOS DEVICES -- EDIT TO YOUR NEEDS OR KEEP BLANK: jsonHome = {} jsonHome = { scene = { MainScene=614,AlarmControl=598,rebootHC2=593,goodMorning=463,goodNight=331,LeavingHome=483,welcomeHome=488,quietMorning=499,kidsToBed=490,plaroomTvOn=580,firstFloorMusicOn=579,firstFloorAllOff=578, hallSceneControl=519,StairsLight30=556,GateOpen5=526,GateOpenHold=361,GateOpenClose=425,DumpEventLog=565,PlayroomOff=617 }, users = { admin=2,frank=1564,sylvia=1565 }, } -- NO USER EDITS NEEDED BELOW local function log(str) if debug then fibaro:debug(str); end; end devices=fibaro:getDevicesId({visible = true, enabled = true}) -- get list of all visible and enabled devices log("Fill hometable with "..#devices.." devices") -- FILL THE HOMETABLE WITH ALL VDs, DEVICES AND iOS DEVICES for k,i in ipairs(devices) do deviceName=string.gsub(fibaro:getName(i), "%s+", "") -- eliminate spaces in devicename -- Uncomment this to eliminate all non-alphanumeric characters in devicename -- deviceName=string.gsub(fibaro:getName(i), "%W", "") if fibaro:getType(i) == "virtual_device" then -- Add VDs to Hometable if jsonHome.VD == nil then -- Add VD to the table jsonHome.VD = {} end jsonHome.VD[deviceName]=i log("i="..i..", type="..fibaro:getType(i)..", device="..deviceName) elseif fibaro:getType(i) == "iOS_device" then -- Add iOS devices to Hometable if jsonHome.iOS == nil then -- Add iOS devices to the table jsonHome.iOS = {} end jsonHome.iOS[deviceName]=i log("i="..i..", type="..fibaro:getType(i)..", device="..deviceName) else -- Add all other devices to the table roomID = fibaro:getRoomID(i) if roomID == 0 then roomname = "Unallocated" else roomname=string.gsub(fibaro:getRoomName(roomID), "%s+", "") -- eliminate spaces in roomname -- Uncomment this to eliminate all non-alphanumeric characters in roomname -- roomname=string.gsub(fibaro:getRoomName(roomID), "%W", "") end if jsonHome[roomname] == nil then -- Add room to the table jsonHome[roomname] = {} end jsonHome[roomname][deviceName]=i log("i="..i..", type="..fibaro:getType(i)..", device="..deviceName..", room="..roomname) end end jHomeTable = json.encode(jsonHome) -- ENCODES THE DATA IN JSON FORMAT BEFORE STORING fibaro:setGlobal("HomeTable", jHomeTable) -- THIS STORES THE DATA IN THE VARIABLE log("global jTable created:") -- STANDARD DEBUG LINE TO DISPLAY A MESSAGE log(jHomeTable) When I run the scene, it reads back the ID (1548) stored for Motion under the kitchen grouping. This allows me to verify that the table saved correctly. I would recommend using an external editor like Notepad++ or Zerobrane to edit/manage the code in the vd and then copy back to the vd when ready to update as the HC2 lua editor is very small @ReneNL has rewritten the scene so it eliminates the need for both the py script and manually create the data yourself. When you run the scene it'll dump out the table but can be difficult to read. To make it easier to see the table and the structure copy the lower part of the debug window Head over to http://jsonprettyprint.com/ and paste the data into the windows and it presents the json in a more readable format. REFERENCING THE TABLE CONTENTS IN YOUR SCENES AND VIRTUAL DEVICES For this you need to place the following line of code in each scene or vd local jT = json.decode(fibaro:getGlobalValue("HomeTable")) and then use references instead of device ID's in the scene code. The easiest way to explain this is with an example. This scene switches on a light in my kitchen if it is dark, motion is detected and no light is on already --[[ %% properties 1548 value %% events %% global --]] local jT = json.decode(fibaro:getGlobalValue("HomeTable")) -- KITCHEN AUTOLIGHTS if (tonumber(fibaro:getGlobalValue("Darkness")) == 1 ) and (tonumber(fibaro:getValue(jT.kitchen.Motion, "value")) > 0 ) and (tonumber(fibaro:getValue(jT.kitchen.Spotlights, "value")) == 0 ) and (tonumber(fibaro:getValue(jT.kitchen.Pendant, "value")) == 0 ) and (tonumber(fibaro:getValue(jT.kitchen.Table, "value")) == 0 ) and (tonumber(fibaro:getValue(jT.sunroom.Light, "value")) == 0 ) and (tonumber(fibaro:getValue(jT.sunroom.Lamp, "value")) == 0 ) then fibaro:call(jT.kitchen.Pendant, "setValue", "40") UpdateEventLog("kitchen lights auto on") end It's easy enough to see how the references are built up if you examine the scene v the table n the pre-defined variableat the top of this post I also like to read back a entry in the table to make sure it saved correctly and use the following code -- I then like to read back a entry from the table to show that the table didnt get corrupt in the process. local jT = json.decode(fibaro:getGlobalValue("HomeTable")) -- REFERENCE TO DECODE TABLE log(jT.scene.MainScene) -- DISPLAY ONE VARIALE You will need to change the last line jT.scene.MainScene to jT.section.entry where 'section' and 'entry' exist in your HomeTable Slight addition for folks from the international community (special chars in the names or labels) thanks @FredrikKarlsson Therefore, your scene "Start på morgonen" will be encoded as ""Startpåmorgonen" in the table. You will need to use square brackets log(jT.VD.["Startpåmorgonen"]) jt["Köket"]["Läckagediskmaskinen"] AMENDING A SINGLE PARAMETER IN THE TABLE This can be useful if you don't want to adjust one value in the table -- NEW PARAMETER VALUE jT.kitchen.Motion=2000 -- TO SAVE THE CHANGE jSonosTable = json.encode(jT) fibaro:setGlobal("SonosTable", jSonosTable) fibaro:debug("global jTable created") Hopefully this will help some users If you have any suggestions as to how to improve this please let me know and I'll edit @AutoFrank & @ReneNL Copy of my table to show what I use it for Sample HomeTable.json


-
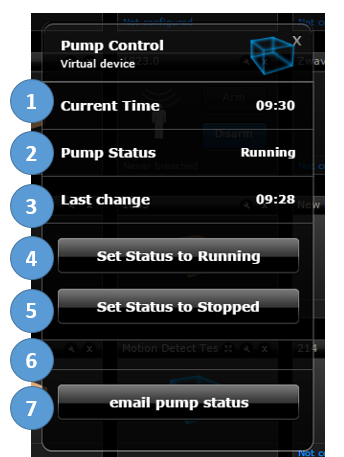
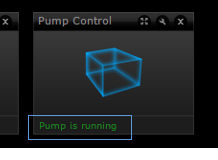
Hi, I know that when I started working with the HC2 I struggled with some of the simpler stuff. In some case it was down to a lack of understanding of the concepts rather than the code. I decided to put together this Virtual Devices 101 for new people starting out. I put some of this together to answer a few posts but decided to bring it into one post here to make it easier for newer users to find, I am starting from the basics and if anybody has ideas on how to make it better please let me know Some Virtual device basics LABELS - enable the user to display a title and a value. A label with no value entered can act as a divider BUTTONS - enable a user to execute an action, button can be manually pressed or through code. A VD can press one of its own buttons MAIN LOOP - Code here runs continuously in a loop - you can add fibaro:sleep code to slow down how fast the main loop code executes. Variables that are defined in the MAIN LOOP cannot be reused in the buttons. Seperate declarations are required DEBUG - option on Main loop or Button to what is being echo'd back as it executes The easiest way to understand virtual devices is to take apart a very simple one and understand the various parts I've attached a very simple VD. This will run on any HC2 after you have created the following two variables (Panels, Variables) Use the Add button but NOT the save button that is part of the right side vertical menu (as this may corrupt some of your other variable values) Go to "Add New Device" and import the VD (Pump Control) attached to this post. It's a very simple VD that interacts with the two variables you just created. (I don't expect the VD to be any use in real life but hopefully acts as a good learning tool. Press the appropriate set Status buttons to adjust the status displayed and also updates the Last change time to current time that indicates when somebody last changed the status. Send email send the current status and when this status was set I'll step through each part Current Time - label that display the current time from a local variable Pump Status - label that takes the value of a global variable and display appropriate text (1 = Runnnig, 0 = Stopped) Last Change - label that displays the value of a global variable. This global variable is whenever the status is adjusted by the following two buttons (#4, #5) Set Status to Running - Button that adjust a global variable to 1 value of 1. This also updates the global variable that holds the Last Change time to the current time. Set Status to Stopped - Button that adjust a global variable to 1 value of 1. This also updates the global variable that holds the Last Change time to the current time Divider - Label with now label value entered email Pump Status - This reads some global variables and using the Sendemail command sends the email to whatever emaila ccount is associated with HC2 admin role. MAIN LOOP - this keeps the global and local variable values up to date so they can be displayed in the labels Pick your way through the VD code, I think its straightforward enough. I did add some debug lines so you'll see more info in the debug screens Press Button action if you wanted to press one of the on the VD from another scene you need to know two things to use the following command fibaro:call(986, "pressButton",10) The id of the virtual device (986 above) and the button position (10 above) The id can be derived from the browser url when you have either the General or Advanced tab open n my screenshot above it 1870 but when you import it, the id will be different The second is the button position You need to count all elements in the VD so above buttons 4, 5 and 7 are valid PressButton actions These can be activated from within this VD, another VD or a scene using the following commands -- Set Status to Running fibaro:call(1870, "pressButton",4) -- Set Status to Stopped fibaro:call(1870, "pressButton",5) -- email pump status fibaro:call(1870, "pressButton",7) fibaro:log command The fibaro.log command in the VD presents the information on the VD when looked at in the full list of devices Virtual device - Advanced Config Tab In the advanced Tab of a VD you can define an IP address and Port If these are defined then the data can be used throughout the VD as follows. Place this code at the top of the main loop, button or label local device = fibaro:getSelfId(); local zonename = fibaro:getName(device); local ipaddress = fibaro:getValue(device, "IPAddress"); local port = fibaro:getValue(device, "TCPPort"); This takes what was entered as part of the advanced tab and assigns them as local variables (ipaddress and port) This are generally used where a VD is used to execute a http request Some other commands -- display a text value in a VD label fibaro:call(thisId, "setProperty", "ui.label1.value", "offline") -- display a variable value in a VD label fibaro:call(thisId, "setProperty", "ui.downavg.value",downavg.." °C") -- some slightly more complicated examples fibaro:call(thisId, "setProperty", "ui.hall.value",roundit(fibaro:getValue(1974, "value"),1).." °C") fibaro:call(thisId, "setProperty", "ui.hall.value",roundit(fibaro:getValue(hallTemp, "value"),1).." °C") fibaro:call(thisId, "setProperty", "ui.downavg.value",downavg.." °C") -- variable declaration local data = 1 local parameter = 5 local data, parameter = 1, 5 local msg = "1st "..alarmStatus.." alert with "..alertMsg.."." -- press button #1518 is the VD id and 1 is the button or through a local variable called SonosTTS fibaro:call(1518, "pressButton",1) fibaro:call(SonosTTS, "pressButton",5) -- Action to start a scene by either ID or variable that represents a numerical value fibaro:startScene(AlarmSet) fibaro:startScene(284) -- allow user to send email, 2 is the user id ("Alert" is email subject, "Garden sensor.." is the email body) fibaro:call(2, "sendEmail","Alert!", "Garden Sensor triggered") Suggestions to improve welcome -f EDIT : Feb 11 I added one more VD as an attachment from a suggestion from @Jamie mccrostie It's called Rack Temp Mngt It reads and displays the temperature from two probes I have, one is above each of my equipment racks . (The temp probes are 1-wire and use a Fibaro UBS to connect to HC2) I have two fans arrays to the side of the racks and these are switched from the two sides of a Fibaro dual relay This status is displayed as Fan status II then have two ON/OFF buttons to switch the Fans on or off if I see the temp running high. (I plan on automating this with temp threshold and notifications but it's on my long to-do list) It's a simple scene but I thought it was a good scene to help understand how things can setup It does use a HomeTable so the devices are all jT.equipment_rack.XXXX - just replace these with a relay id or equivalent local variable. Pump_Control.vfib Rack_temp_Management (1).vfib


- 18 replies
-
- 8
-

-

-
- newbie
- virtual devices
- (and 4 more)
-
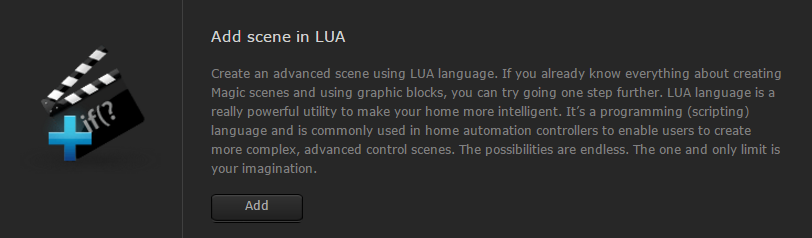
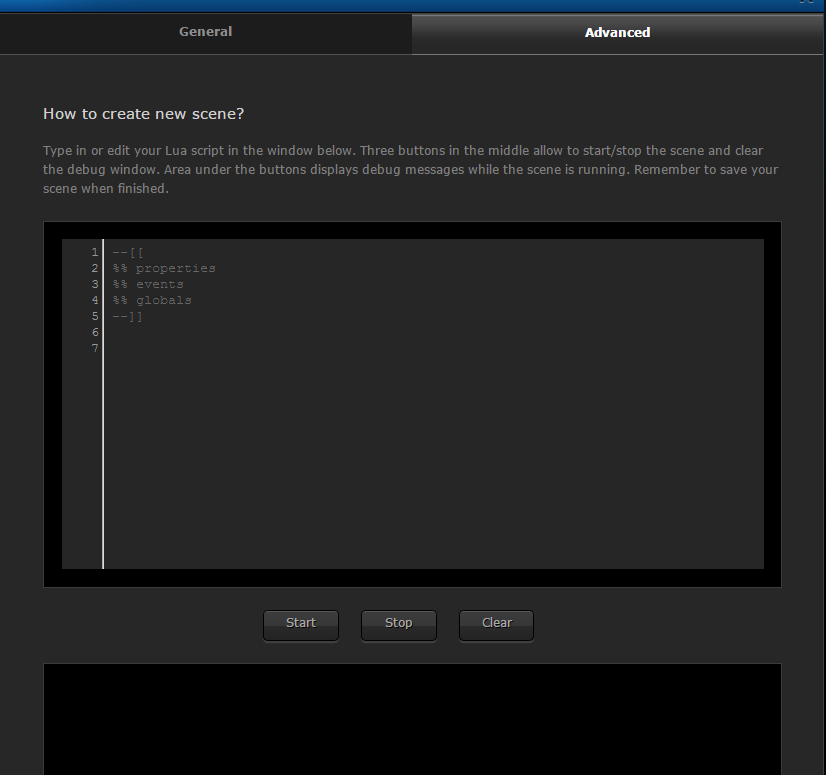
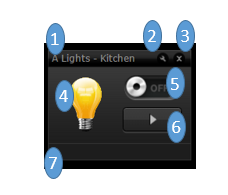
Hi, After I put together the Virtual devices Introduction Tutorial I was asked would I do something similar for Scenes. I’ll preface this post (like the Virtual devices) that I am no expert but I am willing to document what I understand and it can be added to over time. It would be great if some of the experst could read through, fill in the coupelof gaps and let me know if I havesomething wrong or coudl do with better explanation I also start at a very basic level as some of the newer users people liked that with the virtual device tutorial I am also only going to Lua scenes as I have never worked with Magic Scenes or Graphics Blocks Scene Basics A scene is a mechanism to execute a lua code script for an on-demand basis. General Tab Name, Room - self explanatory ID – set when the scene is saved, doesn’t change for life of scene. This is the unique identifier for this scene and can be used as part of the startScene command fibaro:startScene (ID) Max number of instances – A scene can be called from a number of different sources. This dictates how many instance of the scene can be running concurrently. This can also be set within the scene using lua. I’m not sure if these two settings are in conflict which one takes priority. if (fibaro:countScenes()>2) then fibaro:abort() end -- or if (fibaro:countScenes()>1) then fibaro:debug("stop scene") fibaro:abort() end Lili commands – voice control for running/stopping scene using Lili who is the native HC2 personal assistant. Run Scene Automatic – it can be called from other scenes or run manually Manual – it can be called from other scenes or run manually (unsure what the difference is between manual and automatic) Disabled – scene cannot be run Scene Hidden: Not visible in the Web UI (unless you select HC2 hidden devices) Protect by Pin: Prompted for PIN CODE if scene is set to running Do Not Alarm to Stop: ??? Change Icon – select a new icon to display alongside the scene (128x128 png transparent) Advanced Tab Lua Window The code in the lua window is the defaulst header for any scene and needs to be kept. Debug window (debug output from scene code when it is run) START – Start the script running STOP – Stop the script running CLEAR – Clear the debug window Web UI View 1. Title of scene 2. Edit 3. Delete (confirmation req) 4. Icon 5. Disable/enable 6. Run/Stop scene 7. Status – populated by fibaro:log command Lua Scene Header The header of a scene always contains some of all of the following. These are used to trigger the scene in a number of different way. --[[ %% autostart %% properties %% events %% globals --]] %%autostart – including this means that the scene will run when it is saved or when the HC2 restarts. $$ properties – the user can add a device ID and parameter. Any change to this parameter will trigger/run the scene. The format is ID following by parameter. --[[ %% autostart %% properties 1429 value %% events %% globals --]] In the example above if 1429 was a door sensor and value was the status parameter that changed (0 <-> 1) when the door opened than any status change would cause the scene to run. This has to be the device ID and cannot be a variable that represents the ID %%events – ?? %%globals – the user can add the name of global variable (exactly and case sensitive). Any change to the value of the global variable will trigger/run the scene An example would be --[[ %% autostart %% properties %% events %% globals G_AREA__1 --]] A scene can be setup to trigger from properties, events or global variables The following code allows a different action depending on the trigger if this is what’s required. -- Trigger Management local currentDate = os.date("*t") local startSource = fibaro:getSourceTrigger() --Start of Scene Execution if (startSource["type"] == 'property') then fibaro:debug("Started through property") tempFunc1() -- this is calling the the function if something happens. elseif (startSource["type"] == 'global') then fibaro:debug("Started through variable") tempFunc2() -- this is calling the the function if something happens. elseif (startSource["type"] == "autostart") then fibaro:debug("Started through autostart") tempFunc3() -- this is calling the the function if something happens. elseif (startSource["type"] == "other") then fibaro:debug("Started through other ") tempFunc4() -- this is calling the the function if something happens. else fibaro:debug("Scene not started, this can only be started through other, property, global or autostart!"); end In the example above the following happens Scene triggered from property (1425 value) - it will execute function1() Scene triggered from global variable(sleepState) - it will execute function2() Scene triggered from an autostart - it will execute function3() Scene triggered from any other valid method - it will execute function4() or else the scene will no start Local Variable declaration These are variables tha you intend to use within the scene. You can also use global variable but these do not need to be declared prior to usage Many people put the local variable declaration at the start of the scene followed by the functions -- example of local variable declaration local HC2email = "true" -- Notification Alerts using Fibaro email service local HC2popUp = "true" -- Notification Alerts using Fibaro popup service notifications local pushOver = "false" -- Notification Alerts using Pushover Notification Service (Tutorial by AutoFrank) local ALLINONE = "false" -- Notification Alerts using 'All in one Notification' scene (created by jompa68) local updateData = "false" -- Set to true to update the data in the table. ** SET BACK TO FALSE ONCE COMPLETE ** Code Comments Comments /explanations in the code are very useful as the allow you to explain what the code is doing to either yourself or others You need to preface or encapsulated all comments to prevent them being executed at runtime. Example of single line and multi-line comments are shown below -- Example of a single line comment --[[ example of a multiline comment where the sentence spans one or more lines in the scene --]] In general all scenes will have the following structure but over time most people develop your own style … --[[ %% autostart %% properties %% events %% globals --]] if (fibaro:countScenes()>2) then fibaro:abort() end -- explanation of the code purpose or usage or installation -- local variable declarations -- functions -- Main Code sequence (calling the functions above) Lua command syntax is generally the same whether it is used in a scene or used in a virtual device (exceptions to this are http requests) Some useful lua command if fibaro:getGlobalValue("Occupancy_HOUSE") == "no" -- compare global value if fibaro:setGlobal("Alarm_TrigCount", "0") then -- setting global value if tonumber(fibaro:getValue(GardenSensor, "value")) == 1 -- get device status value fibaro:startScene(AlarmSet) -- Start a scene fibaro:call(1387, "pressButton", 10) -- press a button on a vd fibaro:debug("Notify Alert! "..jN[i].device.." is offline") -- print a mix of variable and text string fibaro:call(2, "sendEmail","Alert!", "Garden Sensor triggered") -- send email using HCC2 native email service -- HC2 native popup notirfication service HomeCenter.PopupService.publish({ title = 'Home Alarm Activated ', subtitle = os.date("%I:%M:%S %p | %B %d, %Y"), contentTitle = 'Zones Status', contentBody = fibaro:getGlobalValue("G_SPC_AREA_STATUS_1"), type = 'Success', }) Some useful lua functions ENCODING - replace a space in a string with another character, a + symbol in the example below This function takes one parameter - s so The Cat and the Mat will be changed to The+Cat+and+the+Mat -- function to replace a space in a text string with a + function urlencode(s) if (s) then s = string.gsub (s, "\n", "\r\n") s = string.gsub (s, "([^%w ])", function (c) return string.format ("%%%02X", string.byte(c)) end) s = string.gsub (s, " ", "+") end return s end test = urlencode(message) ROUNDIT Rounds a number to a defined number of decimal places This function takes one parameter - num (the number you want rounded) and idp (the number of decimal places) so roundit(2.12348, 3) would result in 2.123 function roundit(num, idp) local mult = 10^(idp or 0) return math.floor(num * mult + 0.5) / mult end If there are any other useful functions that you feel would be of benefit to new users please let me know and I'll include them Overall the best way to gain a greater understanding is to download the many scenes that are published to the forum and start to take them apart. I hope this will be of benefit to some users and suggestions and corrections are always welcome happy coding -f


-
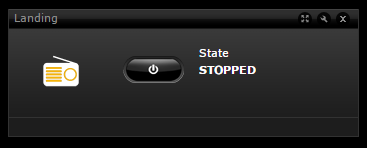
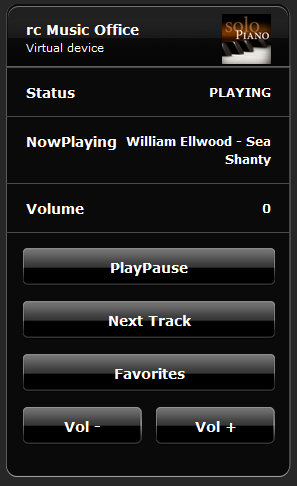
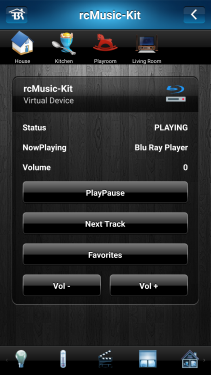
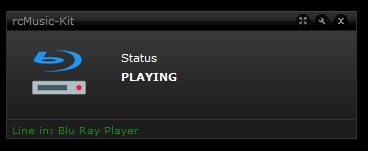
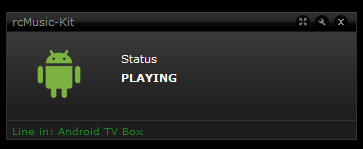
Implement Sonos VD using node-http-API running on raspberry PI The following should help if you want to implement an sonos VD that leverages the node sonos http api by jishi The post consists in two parts Setting up the API on a raspberry pi Creating the VD and summary of other uses of the API and some sample code I use **I'll structure this in a better format in the coming weeks but for now it should be sufficient** I have tested this with Play1, 3, 5 (older version) ZP100, ZP80, ZP90. I don’t have a sonos soundbar or sub but from reading other forums it should work fine for those I intend to use this more in ‘Press Button’ mode rather than directly as a remote control but it should be good either way. You can also select what appears in HC2 UI by clicking the ‘main’ checkbox on the appropriate VD button ( I think you can have one button, one label and one slider) Credit & Reuse: This work draws on the work of many many people from both this forum as well as other forums. Without these people and the work they have done as well as what they have helped me learn over the last 12 months this wouldn't have been created. Like all VD’s please feel free to constructively criticise or modify it to meet your needs STEP1: Setup api on node.js device: This VD requires jishi’s node-sonos-http-api to be installed on a node.js capable device. This can be a RPi, a NAS or something similar. Details on where to get the code and install can be found on Git - https://github.com/jishi/node-sonos-http-api You will also find an excellent blog/issue tracker at the link above for any issues you encounter I have mine installed on a Rpi Added Feb 5th The fastest way I found to get up and running on a PI if you're unsure and just want to try it (takes about 15 minutes) Use the sonos-api precompiled rpi image at http://jishi.github.io/node-sonos-http-api/ (apply to blank sd card) when you login over SSH (with something like putty) the password is root Map a network drive or Start Run to \\<IP of Pi>\flash click apps folder and you'll see the sonos-http-api folder Get an API from VoiceRSS and create a settings.json file (details in the post) and drop it into the sonos-http-api folder reboot and that's it - test through browser with something like http://<ip-of-Pi:5005/<playername>/Say/Hello If you want to upgrade to the latest api release Download the latest zip from https://github.com/jishi/node-sonos-http-api (green button on right) In the flash folder rename the sonos-http-api to -old Rename what you downloaded to to sonos-http-api Drop in your settings.json file SSH into the Pi - login = root cd /flash/apps cd sonos-http-api npm install --production when finished reboot DOCKER from @riemers (thanks ) You could also use docker Some nas systems include docker too (synology) from the gui. Using docker is easy and simple to give to someone else too, work on Pi3 too. For node-sonos-api there is a docker image https://github.com/chrisns/docker-node-sonos-http-api saves you the hassle of installing all dependency's, assuming you have some knowledge with linux. # Edit - additional observation - I like the Synology NAS option but mine doesn't reboot in the event of a power outage. The Rpi does reboot. If you use a NAS it might be good to use a UPS or find a way to reboot after an outage Once you have this setup you are ready to move on to Step 2 STEP 2 : Import the VD, you will need one VD per sonos zone node-sonos-api VD.vfib Name - The zone name needs to be the same as what it is in native Sonos (try and avoid chars such as /,etc) Spaces are okay IP Address: This is the IP of the device where the api is installed (This is NOT the IP address of the sonos zone) Port: Leave at 5005 (can be changed it needed, see git above) STEP 3 : Configure Play, Stop, Repeat, Shuffle, etc – this should work as is The parts you may want to modify are as follows => Volume I opted for the vol + / vol – as opposed to the slider as I find the sliders difficult to use on a tablet Vol + / - operates in increments of 2%. This is easy to change in the url string. The Vol 10% button is also easy to change => Favourites You will need to modify this to your favourites and how they are named in your sonos setup I would advise simplifying these names in the native Sonos setup as much as you can. Spaces are okay, you just need to use %20 where you have a space in a name If you need more of less favourites, please add/delete buttons as required => Playlists I don’t really use them but these are easily enough added in a similar way to the favourites above. => Line-in selection You can create one button for each line in option on your setup for any connect/connect amp or Zp unit.. (I have 4 on my setup) You will need to get the UUID for the zone that has the line in physically connected to it. You can get the UUID of that zone by viewing the topology of the zone with the topology url. (drop it into chrome/ff) http://[IP of any of your zone]:1400/status/topology The format of the url http://192.168.1.89:5005/kitchen/setavtransporturi/x-rincon-stream:RINCON_000E5832B85401400 and you will need to change the last numerical string for your own UUID. => Grouping Zones I have included two examples of grouping and ungrouping The url format is simple and easy to read. below are two examples that were setup on the kitchen zone where I wanted to group the Playroom zone two it and play what was playing on the kitchen zone Group - [playroom joining kitchen and playing kitchen music] http://192.168.1.89:5005/playroom/join/kitchen Ungroup - [playroom leaving kitchen zone] http://192.168.1.89:5005/playroom/ungroup/kitchen You could also include a group all and an ungroup all by stacking the commands from each zone under one button. There are also options to control volume of grouped zones if you like but I haven't explored that yet Beyond this… The api is very extensive and still undergoing development. There are other functions in the api that could be used and might be worth a glance depending on your system and patterns of use I'll update the post this evening with the actual VD as I can't seem to export it remotely. The node.js api will need to be installed first before the VD will be of any use. Hopefully it will be of use to some people Thanks -Frank Update: Adding VD file Adding some extra information The api is very extensive and seems to keep growing I use it for mainly behind the scenes control rather than me clicking the vd/scenes buttons manually If you look at http://zone_ip:5005/room_name/state for any of your players you’ll see all the state json info and what’s possible to control/trigger from Pretifying the json will show it's structure better { "currentTrack": { "title": "x-sonosapi-stream:s2846?sid=254&flags=32", "albumArtUri": "\/getaa?s=1&u=x-sonosapi-stream%3as2846%3fsid%3d254%26flags%3d32", "duration": 0, "uri": "x-sonosapi-stream:s2846?sid=254&flags=32", "type": "radio", "absoluteAlbumArtUri": "http:\/\/192.168.1.63:1400\/getaa?s=1&u=x-sonosapi-stream%3as2846%3fsid%3d254%26flags%3d32" }, "nextTrack": { "artist": "", "title": "", "album": "", "albumArtUri": "", "duration": 0, "uri": "" }, "volume": 10, "mute": false, "trackNo": 1, "elapsedTime": 651, "elapsedTimeFormatted": "00:10:51", "playbackState": "PLAYING", "playMode": { "repeat": "none", "shuffle": false, "crossfade": false } } I have a VD that shows me the status of all my players (attached) main scene code (just add labels local device = fibaro:getSelfId(); local zonename = fibaro:getName(device); local ipaddress = fibaro:getValue(device, "IPAddress"); local port = fibaro:getValue(device, "TCPPort"); sonos = Net.FHttp(ipaddress, port); local jS = json.decode(fibaro:getGlobalValue("StateTable")) -- zero the counter for each loop local zoneCount = 0 -- LANDING response = sonos:GET("/Landing/state") jsonTable = json.decode(response); if jsonTable.playbackState == "PLAYING" then zoneCount = zoneCount + 1 jS.Landing_Stairs.isPlaying = 1 else jS.Landing_Stairs.isPlaying = 0 end jS.Landing_Stairs.volPlaying = jsonTable.volume jS.Landing_Stairs.nowPlaying = jsonTable.currentTrack.artist jStateTable = json.encode(jS) fibaro:setGlobal("StateTable", jStateTable) fibaro:call(device,"setProperty","ui.lblLanding.value",""..jsonTable.playbackState.." | "..jsonTable.volume..""); -- TWINS BEDROOM response = sonos:GET("/Bed_LE/state") jsonTable = json.decode(response); if jsonTable.playbackState == "PLAYING" then zoneCount = zoneCount + 1 jS.lau_eth_bedroom.isPlaying = 1 else jS.lau_eth_bedroom.isPlaying = 0 end jS.lau_eth_bedroom.volPlaying = jsonTable.volume jS.lau_eth_bedroom.nowPlaying = jsonTable.currentTrack.artist jStateTable = json.encode(jS) fibaro:setGlobal("StateTable", jStateTable) fibaro:call(device,"setProperty","ui.lblBedLE.value",""..jsonTable.playbackState.." | "..jsonTable.volume..""); -- FRANK BEDROOM response = sonos:GET("/Bed_Frank/state") jsonTable = json.decode(response); if jsonTable.playbackState == "PLAYING" then zoneCount = zoneCount + 1 jS.frank_bedroom.isPlaying = 1 else jS.frank_bedroom.isPlaying = 0 end jS.frank_bedroom.volPlaying = jsonTable.volume jS.frank_bedroom.nowPlaying = jsonTable.currentTrack.artist jStateTable = json.encode(jS) fibaro:setGlobal("StateTable", jStateTable) fibaro:call(device,"setProperty","ui.lblBedFrank.value",""..jsonTable.playbackState.." | "..jsonTable.volume..""); -- GUEST BEDROOM response = sonos:GET("/Bed_Guests/state") jsonTable = json.decode(response); if jsonTable.playbackState == "PLAYING" then zoneCount = zoneCount + 1 jS.guest_bedroom.isPlaying = 1 else jS.guest_bedroom.isPlaying = 0 end jS.guest_bedroom.volPlaying = jsonTable.volume jS.guest_bedroom.nowPlaying = jsonTable.currentTrack.artist jStateTable = json.encode(jS) fibaro:setGlobal("StateTable", jStateTable) fibaro:call(device,"setProperty","ui.lblGuests.value",""..jsonTable.playbackState.." | "..jsonTable.volume..""); -- OFFICE response = sonos:GET("/Bed5_Office/state") jsonTable = json.decode(response); if jsonTable.playbackState == "PLAYING" then zoneCount = zoneCount + 1 jS.office.isPlaying = 1 else jS.office.isPlaying = 0 end jS.office.volPlaying = jsonTable.volume jS.office.nowPlaying = jsonTable.currentTrack.artist jStateTable = json.encode(jS) fibaro:setGlobal("StateTable", jStateTable) fibaro:call(device,"setProperty","ui.lblOffice.value",""..jsonTable.playbackState.." | "..jsonTable.volume..""); -- MASTER BED response = sonos:GET("/Bed_MasterL/state") jsonTable = json.decode(response); if jsonTable.playbackState == "PLAYING" then zoneCount = zoneCount + 1 jS.master_bedroom.isPlaying = 1 else jS.master_bedroom.isPlaying = 0 end jS.master_bedroom.volPlaying = jsonTable.volume jS.master_bedroom.nowPlaying = jsonTable.currentTrack.artist jStateTable = json.encode(jS) fibaro:setGlobal("StateTable", jStateTable) fibaro:call(device,"setProperty","ui.lblMaster.value",""..jsonTable.playbackState.." | "..jsonTable.volume..""); -- HALL response = sonos:GET("/Hallway/state") jsonTable = json.decode(response); if jsonTable.playbackState == "PLAYING" then zoneCount = zoneCount + 1 jS.hall.isPlaying = 1 else jS.hall.isPlaying = 0 end jS.hall.volPlaying = jsonTable.volume jS.hall.nowPlaying = jsonTable.currentTrack.artist jStateTable = json.encode(jS) fibaro:setGlobal("StateTable", jStateTable) fibaro:call(device,"setProperty","ui.lblhallway.value",""..jsonTable.playbackState.." | "..jsonTable.volume..""); -- KITCHEN response = sonos:GET("/Kitchen/state") jsonTable = json.decode(response); if jsonTable.playbackState == "PLAYING" then zoneCount = zoneCount + 1 jS.kitchen.isPlaying = 1 else jS.kitchen.isPlaying = 0 end jS.kitchen.volPlaying = jsonTable.volume jS.kitchen.nowPlaying = jsonTable.currentTrack.artist jStateTable = json.encode(jS) fibaro:setGlobal("StateTable", jStateTable) fibaro:call(device,"setProperty","ui.lblkitchen.value",""..jsonTable.playbackState.." | "..jsonTable.volume..""); -- PLAYROOM response = sonos:GET("/playroom/state") jsonTable = json.decode(response); if jsonTable.playbackState == "PLAYING" then zoneCount = zoneCount + 1 jS.playroom.isPlaying = 1 else jS.playroom.isPlaying = 0 end jS.playroom.volPlaying = jsonTable.volume jS.playroom.nowPlaying = jsonTable.currentTrack.artist jStateTable = json.encode(jS) fibaro:setGlobal("StateTable", jStateTable) fibaro:call(device,"setProperty","ui.lblplayroom.value",""..jsonTable.playbackState.." | "..jsonTable.volume..""); -- GARAGE response = sonos:GET("/Garage/state") jsonTable = json.decode(response); if jsonTable.playbackState == "PLAYING" then zoneCount = zoneCount + 1 jS.garage.isPlaying = 1 else jS.garage.isPlaying = 0 end jS.garage.volPlaying = jsonTable.volume jS.garage.nowPlaying = jsonTable.currentTrack.artist jStateTable = json.encode(jS) fibaro:setGlobal("StateTable", jStateTable) fibaro:call(device,"setProperty","ui.lblgarage.value",""..jsonTable.playbackState.." | "..jsonTable.volume..""); -- PIZZA BBQ response = sonos:GET("/PizzaBBQ_Area/state") jsonTable = json.decode(response); if jsonTable.playbackState == "PLAYING" then zoneCount = zoneCount + 1 jS.pizza_bbq_area.isPlaying = 1 else jS.pizza_bbq_area.isPlaying = 0 end jS.pizza_bbq_area.volPlaying = jsonTable.volume jS.pizza_bbq_area.nowPlaying = jsonTable.currentTrack.artist jStateTable = json.encode(jS) fibaro:setGlobal("StateTable", jStateTable) fibaro:call(device,"setProperty","ui.lblpizza.value",""..jsonTable.playbackState.." | "..jsonTable.volume..""); -- LIVING response = sonos:GET("/Living_Room/state") jsonTable = json.decode(response); if jsonTable.playbackState == "PLAYING" then zoneCount = zoneCount + 1 jS.living_room.isPlaying = 1 else jS.living_room.isPlaying = 0 end jS.living_room.volPlaying = jsonTable.volume jS.living_room.nowPlaying = jsonTable.currentTrack.artist jStateTable = json.encode(jS) fibaro:setGlobal("StateTable", jStateTable) fibaro:call(device,"setProperty","ui.lblliving.value",""..jsonTable.playbackState.." | "..jsonTable.volume..""); -- GARAGE response = sonos:GET("/DiningRoom/state") jsonTable = json.decode(response); if jsonTable.playbackState == "PLAYING" then zoneCount = zoneCount + 1 jS.dining_room.isPlaying = 1 else jS.dining_room.isPlaying = 0 end jS.dining_room.volPlaying = jsonTable.volume jS.dining_room.nowPlaying = jsonTable.currentTrack.artist jStateTable = json.encode(jS) fibaro:setGlobal("StateTable", jStateTable) fibaro:call(device,"setProperty","ui.lbldining.value",""..jsonTable.playbackState.." | "..jsonTable.volume..""); fibaro:setGlobal("ActiveMusicZones", zoneCount); fibaro:call(device,"setProperty","ui.activeZones.value",zoneCount); Three of my zones use power amps (the are sonos connects) and I use the ‘playstate’ to turn the amp on / off when required. That’s the code at the bottom of the vd At one stage I was even displaying the image (radio station, music album) on an openremote UI using the uri part of the state json. I use the VoiceRSS TTS on teh http api but there are others. That all that was there when I found it and it worked well I have TTS to tell me “welcome home”, “good night”, "gate opening/closing", "garage door opening/closing" and all the usual stuff but I vary the volume it at night so it doesn’t wake everybody up. I intend this expand this feedback out so If we come home and the alarm went off it would tell me or that the washing machine has finished, the humidity is still too high in the bathroom and I should open the window (or that a fan was turned on) or some HC2 system info like the available memory went beyond certain thresholds, temp in a room rose or dropped, My siemens alarm is connected to my HC2 and I keep track of all the status of the alarm zones and when we press the “Leaving Home” button it checks the alarm zones and if one or many are open, it will TTS the open alarm zones in the hall sonos so we know where to go and close. Same thing when we go to bed at night. I found that each of my zones have different volume levels that work at night and during the day. I’ll be using my HomeTable (different topic) to store this info for each zones but it can written directly into the scene/vd. (This is what the the following code is for) I also plan on using a central TTS engine (simple a scene that take a zone/message and vol) so I can TTS more easily to any player. For now I have specific TTS code on a per player basis. I leverage the global variables that @Sankotronic Weather Basic VD populates and a scene that allows me to send the current weather (temp, humidity, wind speed direction, etc) as a TTS to our bedroom in the morning as well as the temp of the house as part of our wake up routine The API has a presets concept. This allows the user to pre-define a set of grouped players, source and volume. This is a file on the rpi and is referenced by a single command rather than starting one zone and grouping other zones. An example of its structure is as follows ... { "players": [ { "roomName": "Landing", "volume": 0 }, { "roomName": "Bed_MasterL", "volume": 0 }, { "roomName": "Bed_LE", "volume": 0 }, { "roomName": "Bed_Frank", "volume": 0 } ], "pauseOthers": false, "favorite": "96FM" } You may notice that the volume is set as 0 because I use another scene to slowly raise the volume so we are not woken to the sharp shock to a loud song. This simple vd button code is what I use to slowly raise the volume slowly local device = fibaro:getSelfId(); local zonename = fibaro:getName(device); local ipaddress = fibaro:getValue(device, "IPAddress"); local port = fibaro:getValue(device, "TCPPort"); sonos = Net.FHttp(ipaddress, port); for v = 1, 10 do response = sonos:GET("/Bed_Frank/volume/"..v.."") fibaro:debug("vol= "..v.."") fibaro:sleep(1000) end I use this for morning music upstairs and downstairs as well as when the kids go to bed. (changing the presets on the rpi requires a restart of the api - i normally just reboot the pi ) Watch out for radio favorites and playlists - try and not have spaces in the names on sonos and you should have no issue calling them ADDED - Jan 21st Creating a single button on a VD to cycle through favorites or playlist instead of using 1 per favorite. Every time you click the button it selects the next favorite. I have it limited to 5 favorites but this is easily adjusted. I store the favorite in my HomeTable but it could also be a global variable. I use an array to decode the numerical value stored globally into the actual favorite so I can append to the sonos api call. This will need to be adjusted to suit your system VD button code .... local device = fibaro:getSelfId(); local ipaddress = fibaro:getValue(device, "IPAddress"); local port = fibaro:getValue(device, "TCPPort"); local jT = json.decode(fibaro:getGlobalValue("HomeTable")) -- Get the current favorite number stored, increment by 1 and if > 5 set back to 1 local f = tonumber(jT.Landing_Stairs.RadFav) + 1 if f > 5 then f = 1 end -- Store the new favorite jT.Landing_Stairs.RadFav = f fibaro:setGlobal("HomeTable", json.encode(jT)) -- Array for the favorites fav = {[1] = "4FM", [2] = "96FM", [3] = "Calm", [4] = "Heart", [5] = "Red_FM"} -- Execute the sonos conmmand sonos = Net.FHttp(ipaddress, port); response = sonos:GET("/Landing/favorite/"..fav[f]..""); I also reflect this on a status label on the VD. -- Get favorite stored globally local f = tonumber(jT.Landing_Stairs.RadFav) -- Translate into favorite name to be displayed fav = {[1] = "96FM", [2] = "4FM", [3] = "Calm", [4] = "Heart", [5] = "Red_FM"} -- fav[f] represents the name. I apppend to otehr date and display in one label local status = " "..fav[f].." | "..jTS.playbackState.." | Volume "..jTS.volume.."%" fibaro:call(device,"setProperty","ui.status.value", status); This display at the top of the VD doesn't account is somebody changes the favorite from the native sonos app. I'll add code later to keep alignment between what is selected and what is stored in the global variable, This is what it looks like on my setup that is still a work in progress x Please see post 163 on this topic on how to get the VD icons dynamic for radio station or line in


-
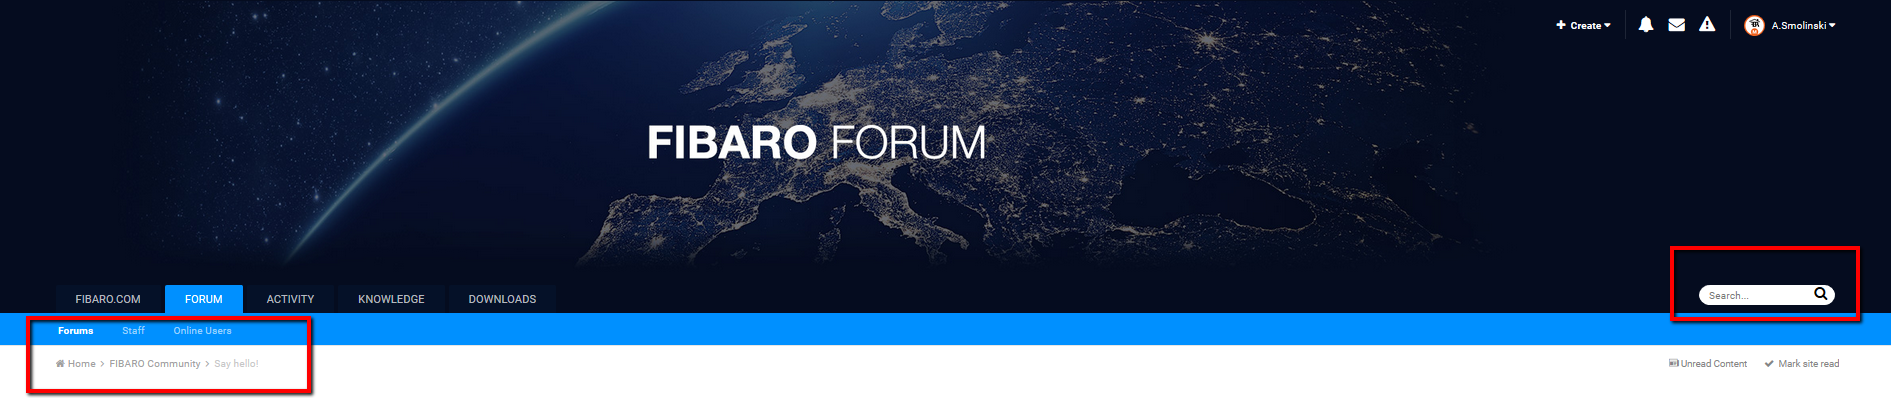
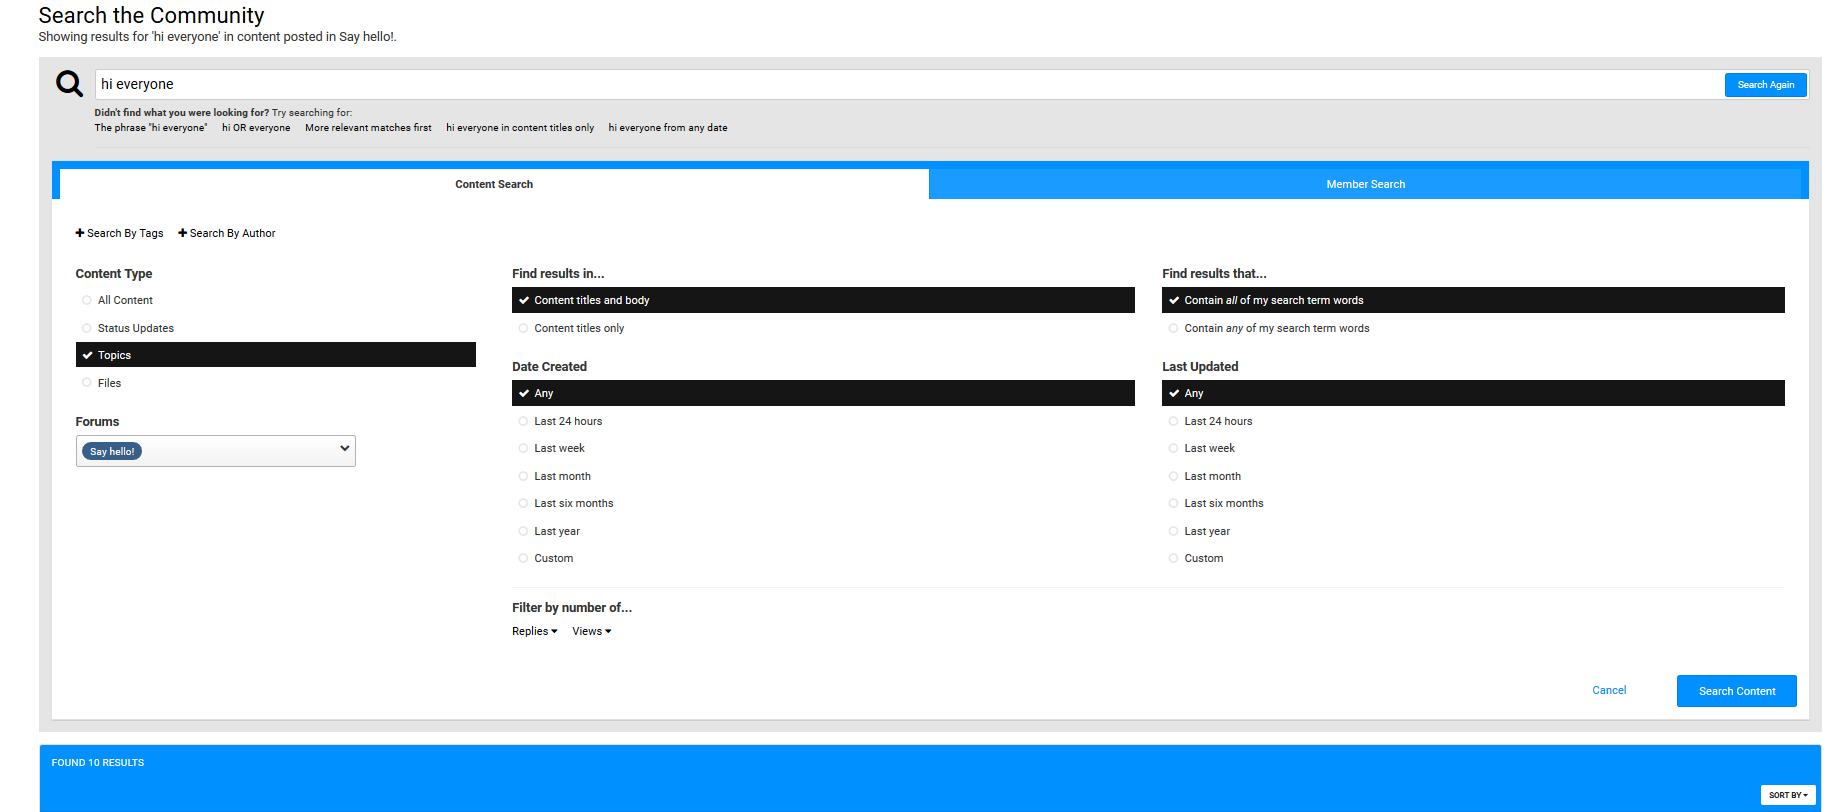
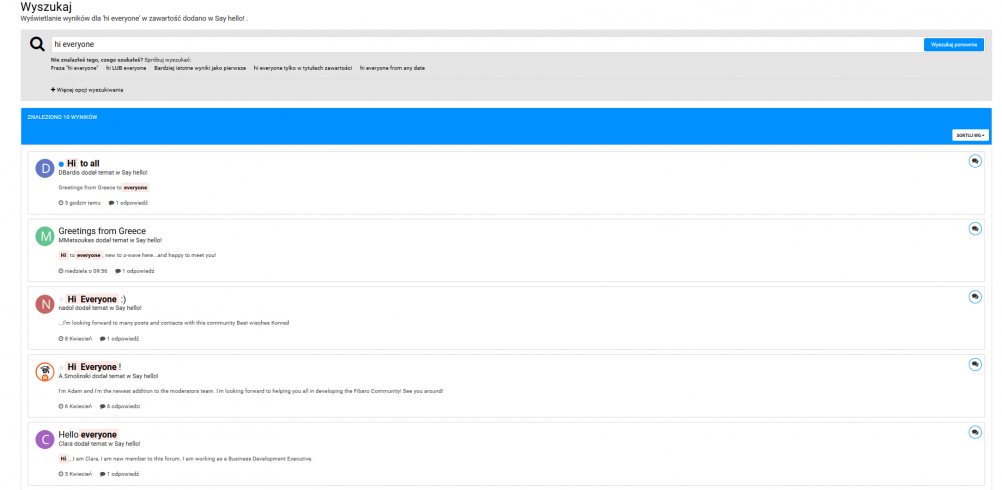
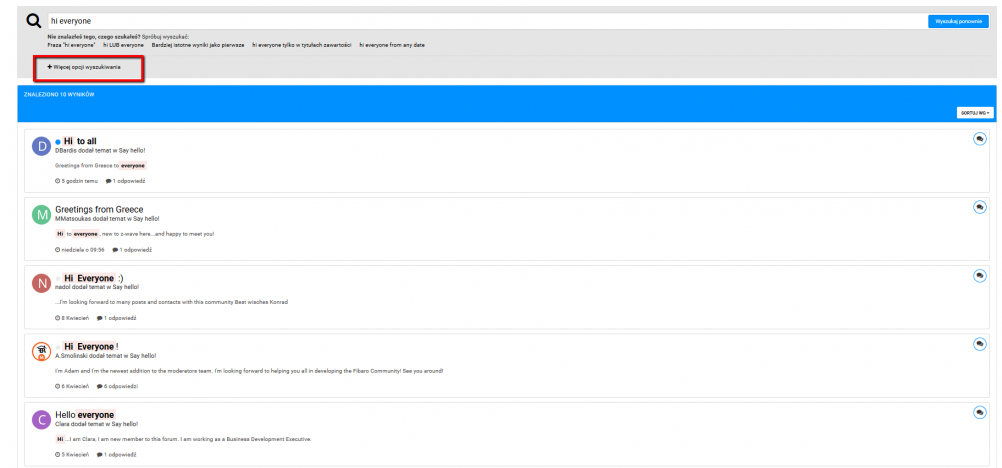
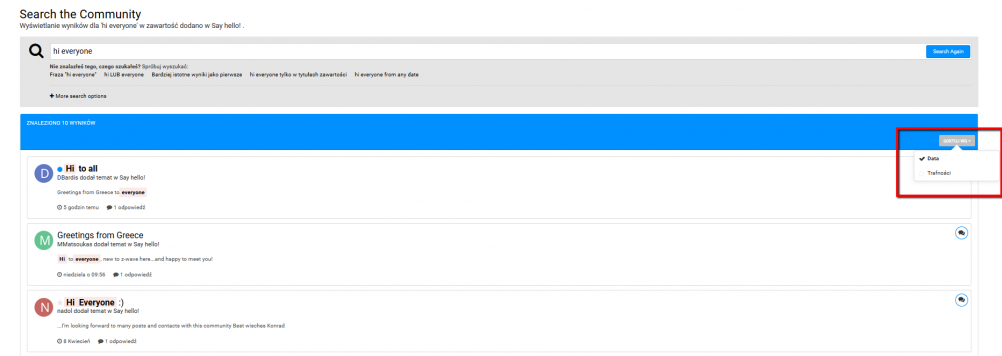
 1. Wchodzimy w sekcję forum, w której chcemy dokonać wyszukiwania i klikamy w pole obok ikony z lupą, w które wpisujemy interesującą nas frazę: 2. Teraz możemy przeglądać wszystkie wpisy zawierające wyszukiwaną frazę. 3. Jeśli chcemy sprecyzować nasze wyszukiwanie, należy kliknąć „Więcej opcji wyszukiwania” i dowolnie zmodyfikować opcje wyszukiwarki: 4. Można też zmienić sposób wyświetlania wyników klikając „Sortuj wg”: 5. Gotowe! Oto cały proces wyszukiwania w pigułce.

-
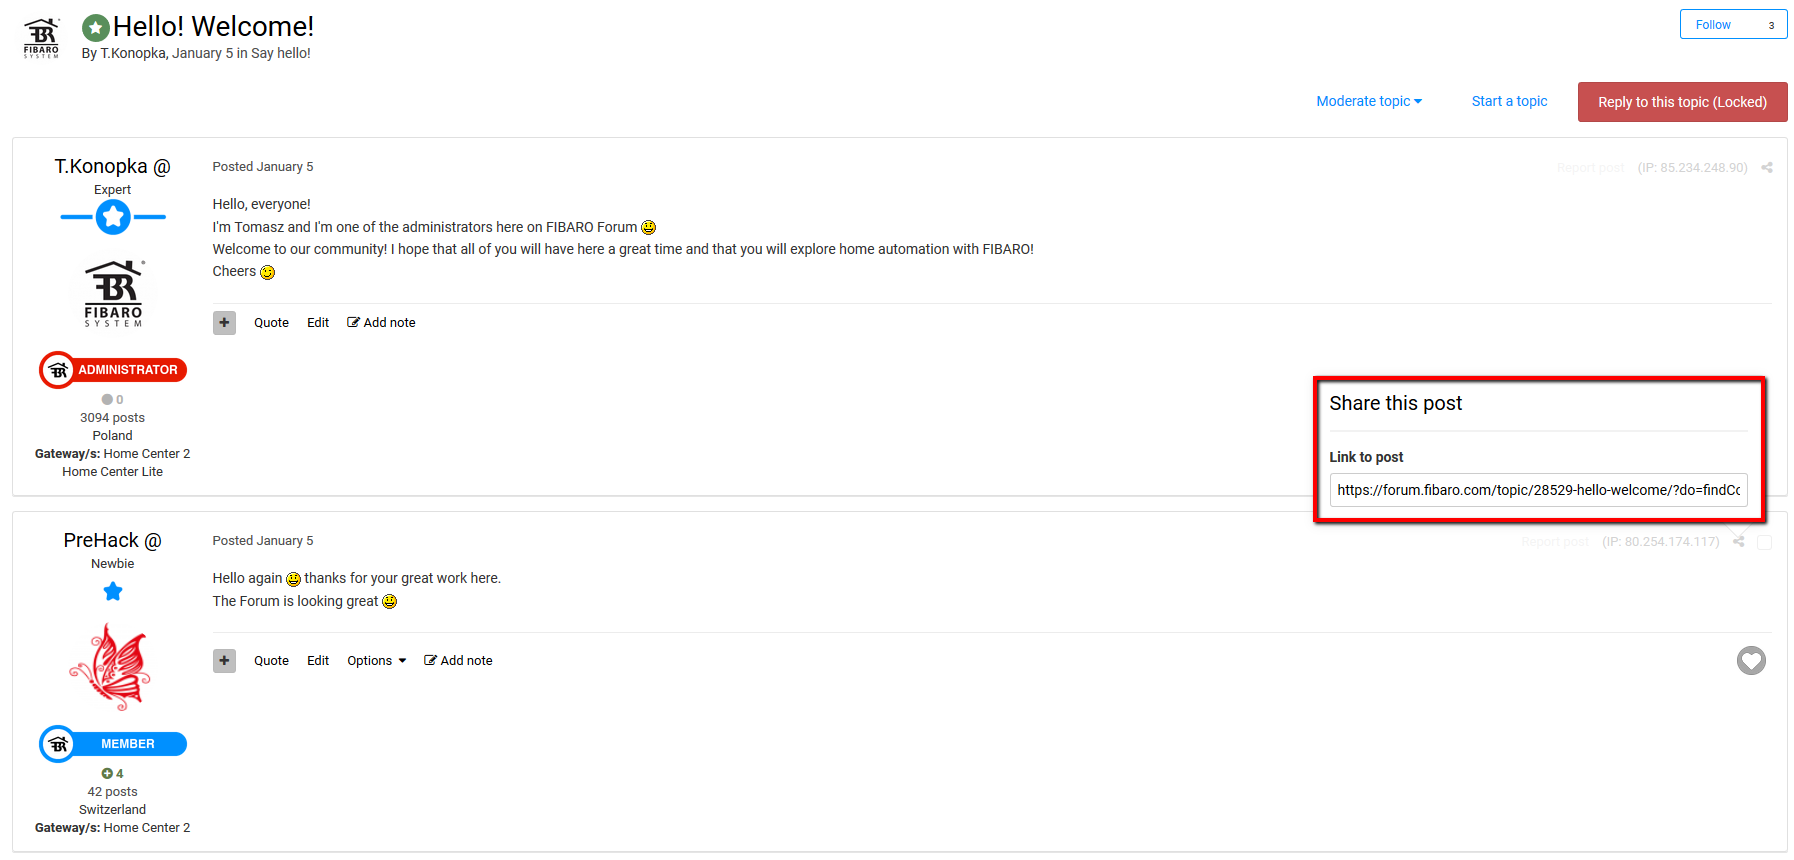
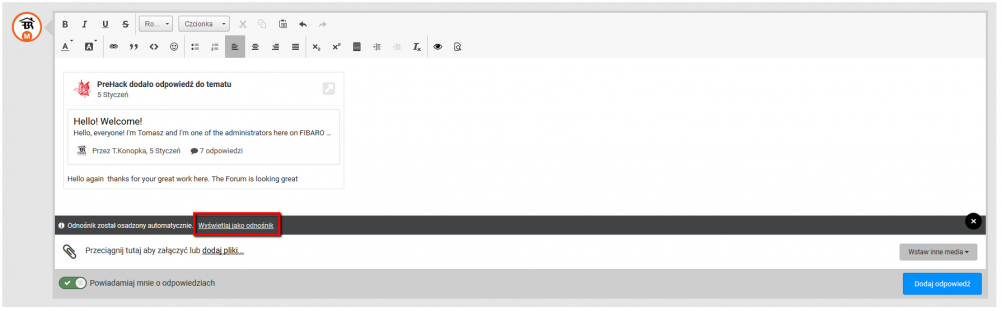
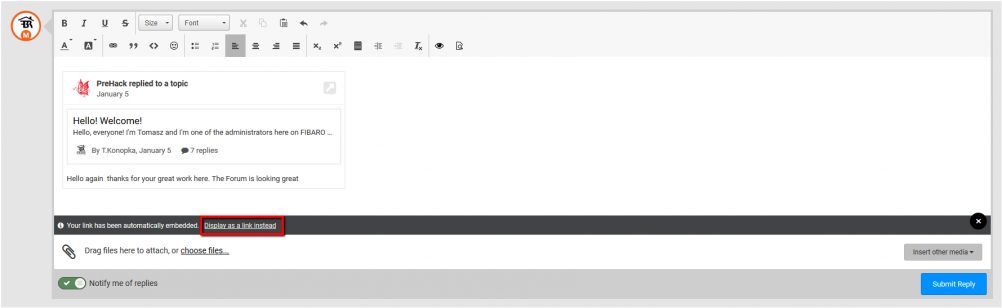
Aby udostępnić post z forum należy: 1. Odnaleźć dany post w wątku 2. Kliknąć w odpowiednią ikonkę w prawym górnym rogu posta 3. Gotowe! Pojawi się okienko, w którym znajduje się link do posta, który można w dowolny sposób udostępnić dalej. 4. W przypadku udostępniania danego posta w innym wątku na forum, należy wkleić go w oknie odpowiedzi: 5. Jeżeli zamiast standardowej formy okienka chcemy, żeby post pojawiał się w formie prostego odnośnika, należy kliknąć „Wyświetlaj jako odnośnik”: 6. Klikamy „Dodaj odpowiedź” i gotowe!


-
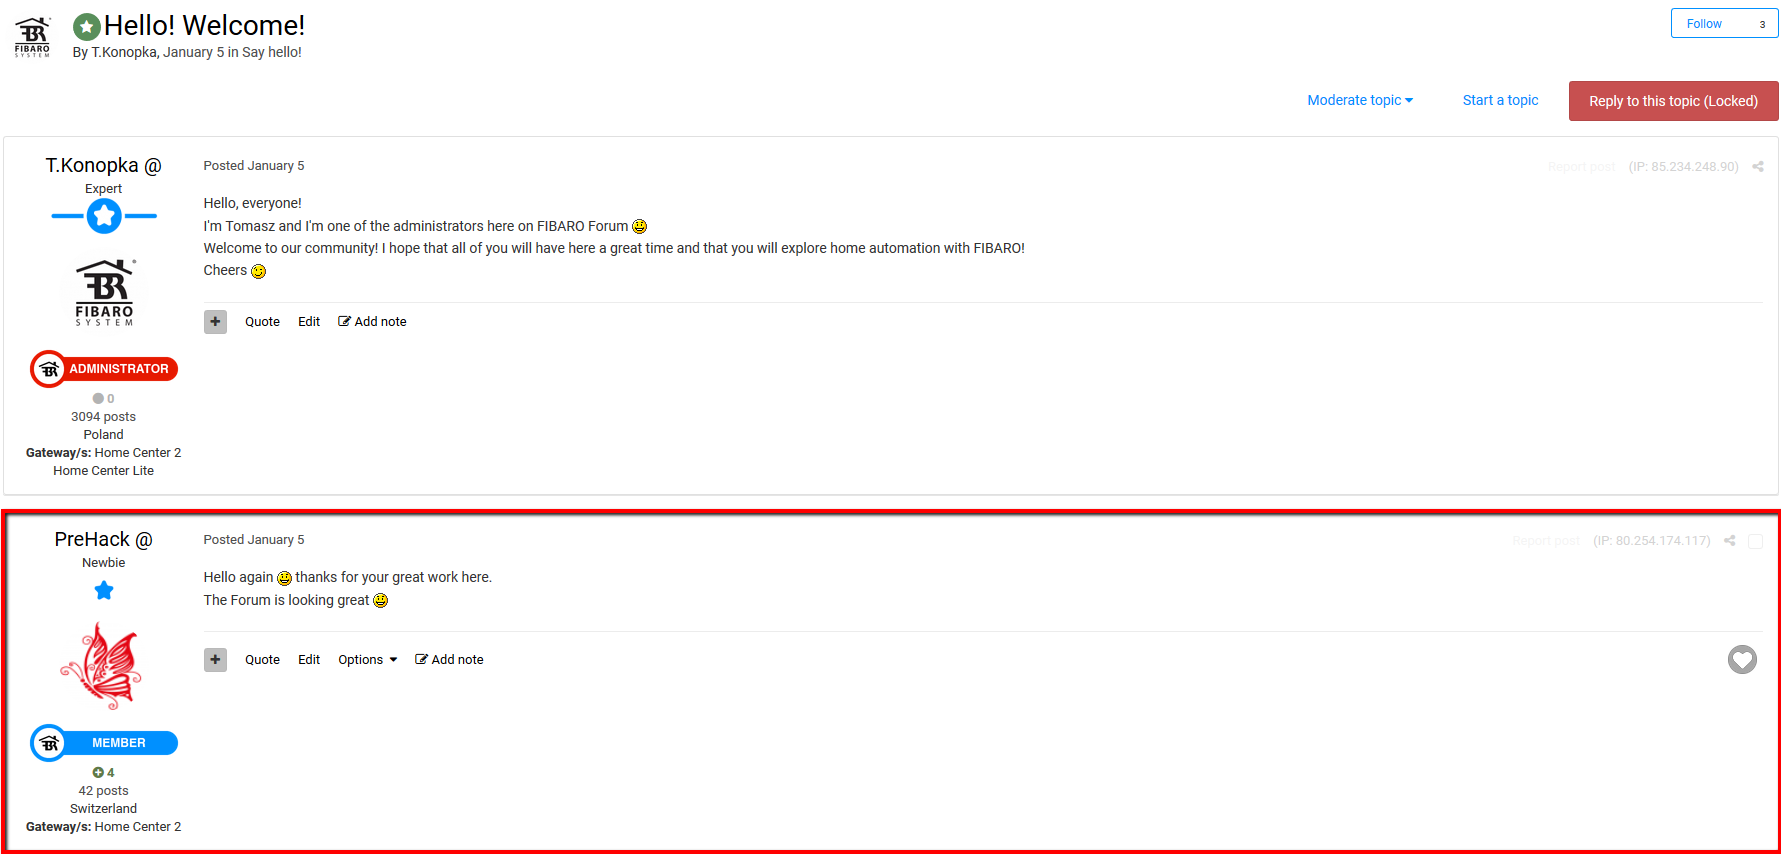
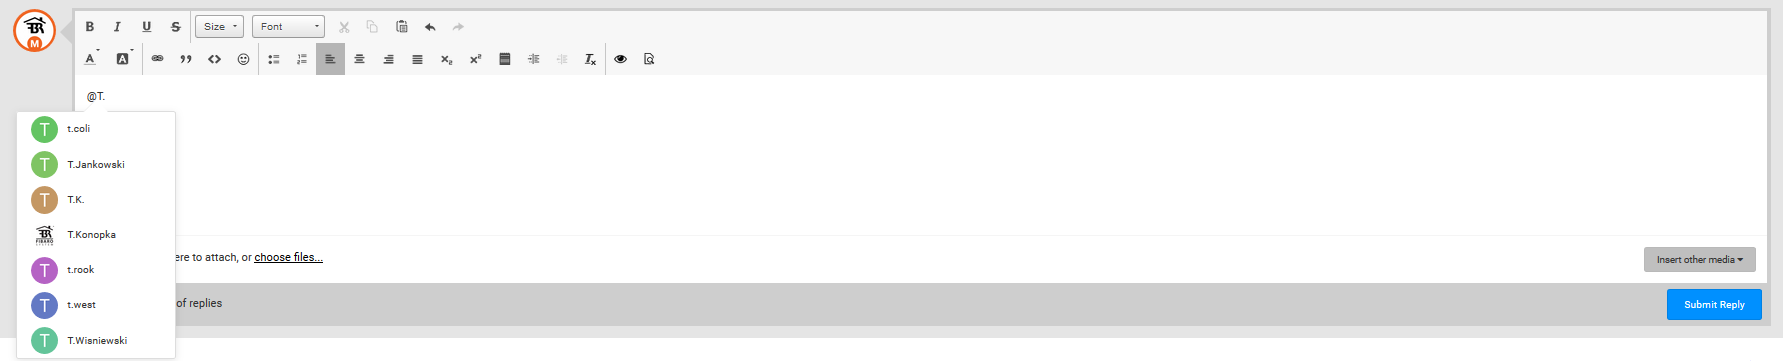
Wielu z Was pytało, jak oznaczać użytkowników w wypowiedzi. Oto krótka instrukcja krok po kroku: 1. Jeżeli dany użytkownik nie udzielał się jeszcze w danym wątku, wystarczy w wypowiedzi umieścić jego nick poprzedzony znakiem „@” bez spacji. 2. Jeśli użytkownik udzielał się już w danym wątku, wystarczy kliknąć na znak „@” towarzyszący jego nickowi przy jego wypowiedzi. W obu wypadkach efekt będzie ten sam. Nick użytkownika pojawi się w niebieskiej ramce, a on sam otrzyma powiadomienie:


-
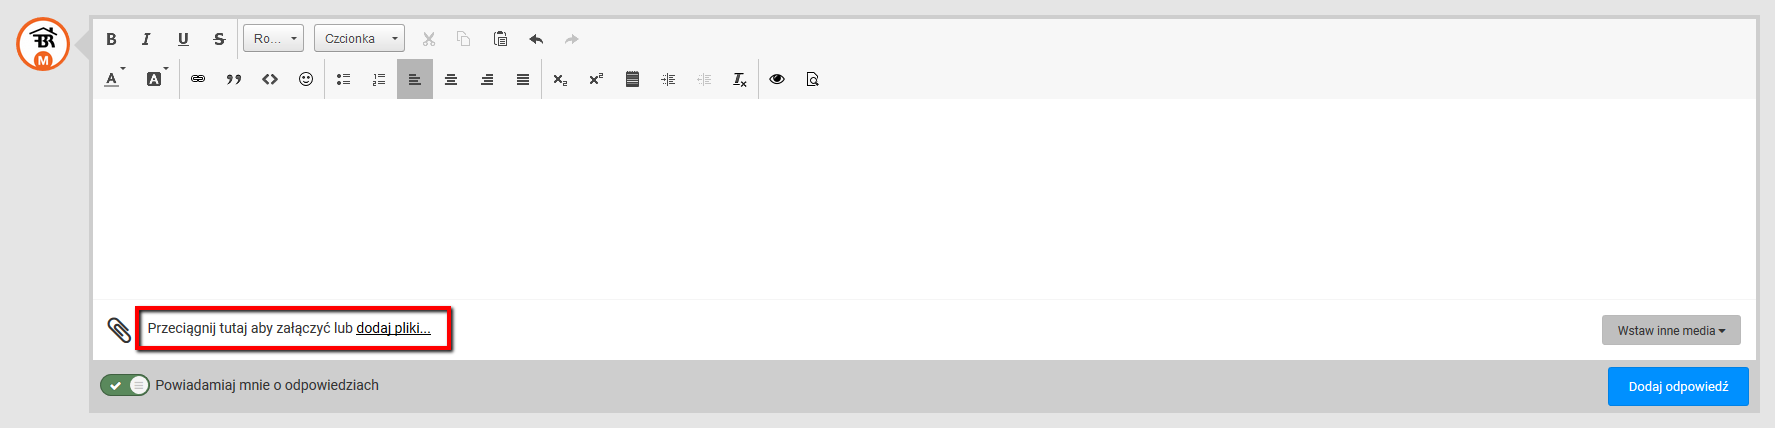
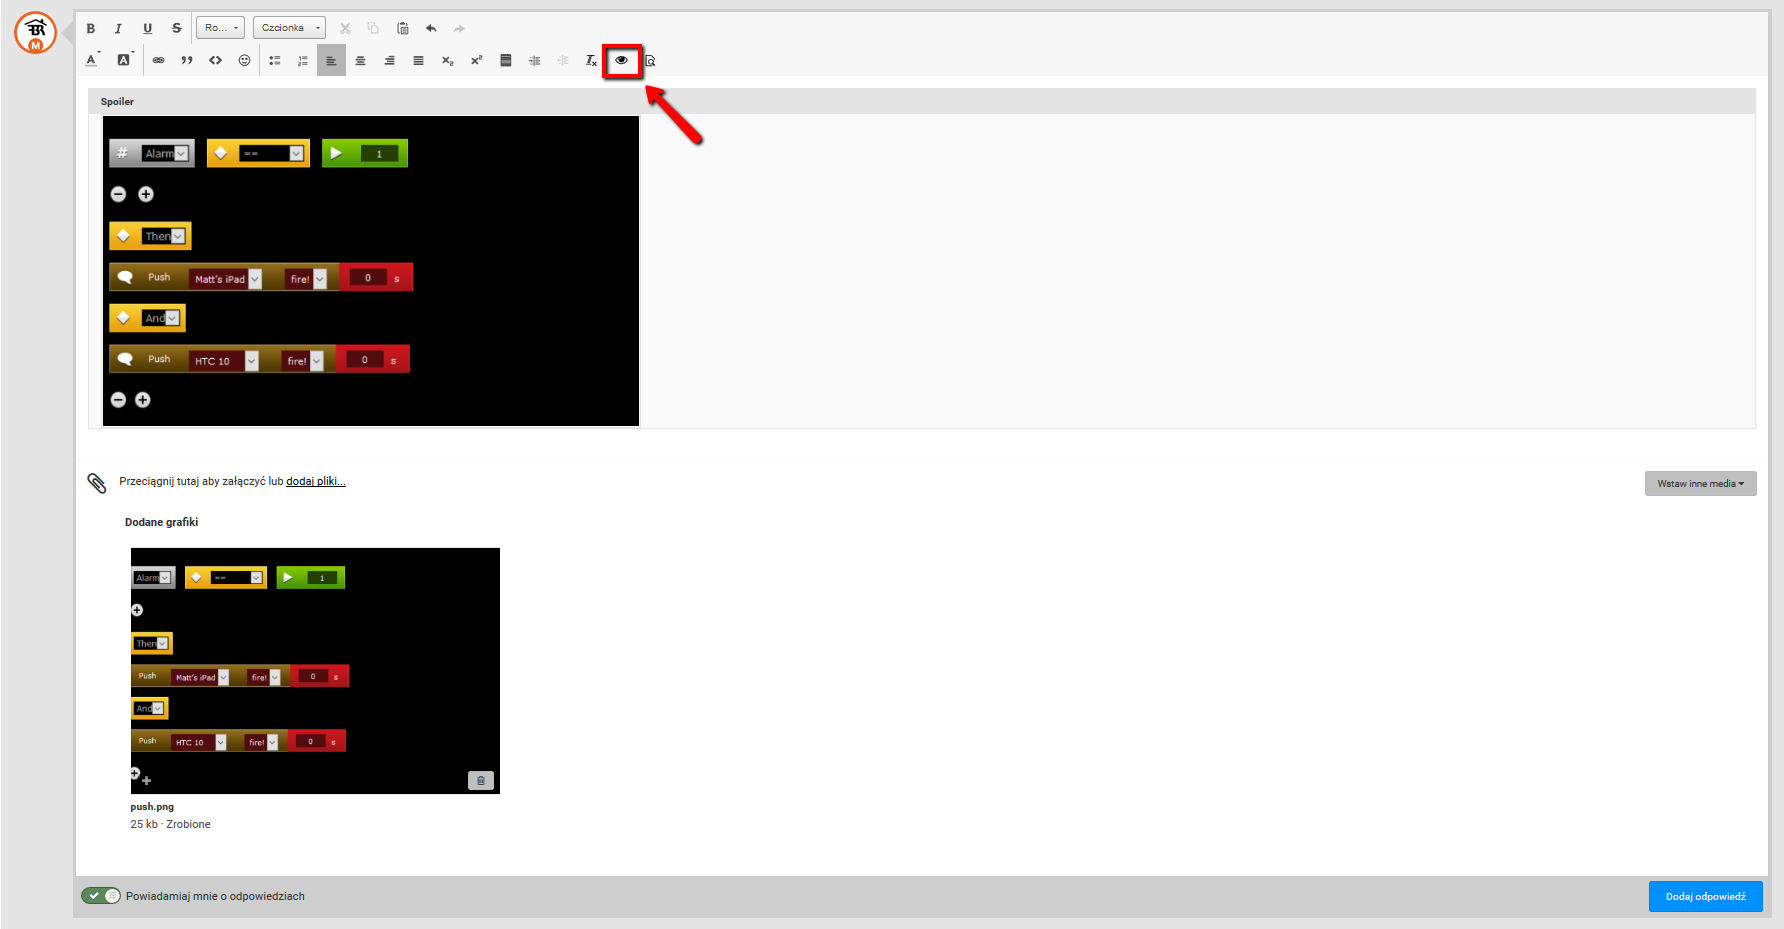
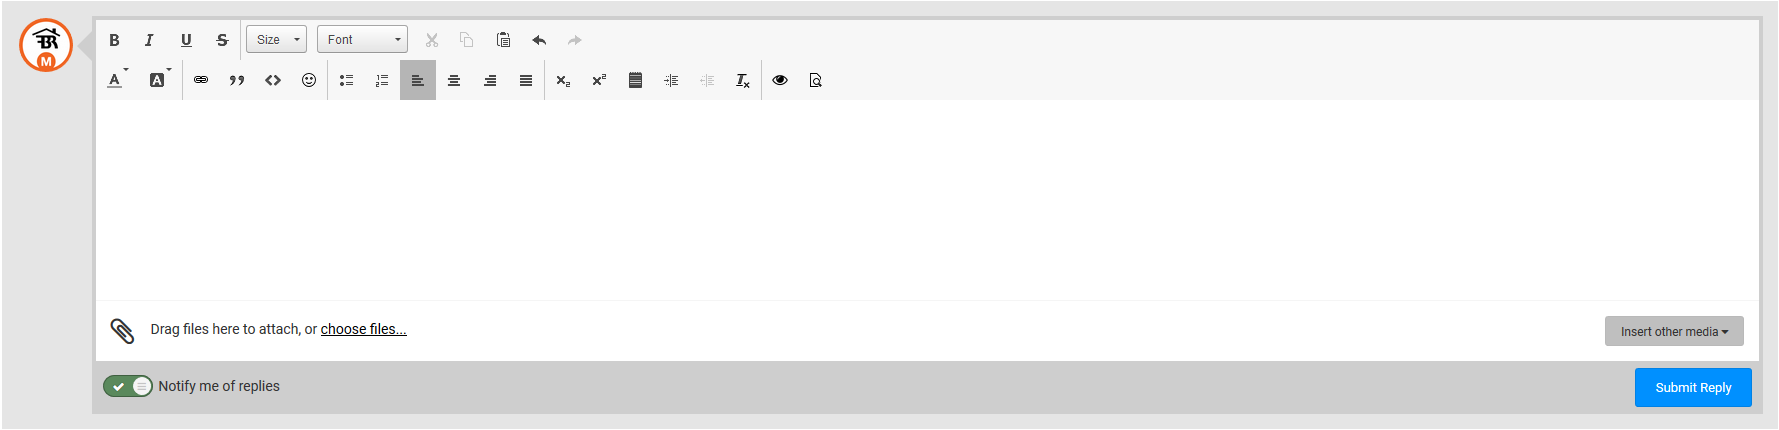
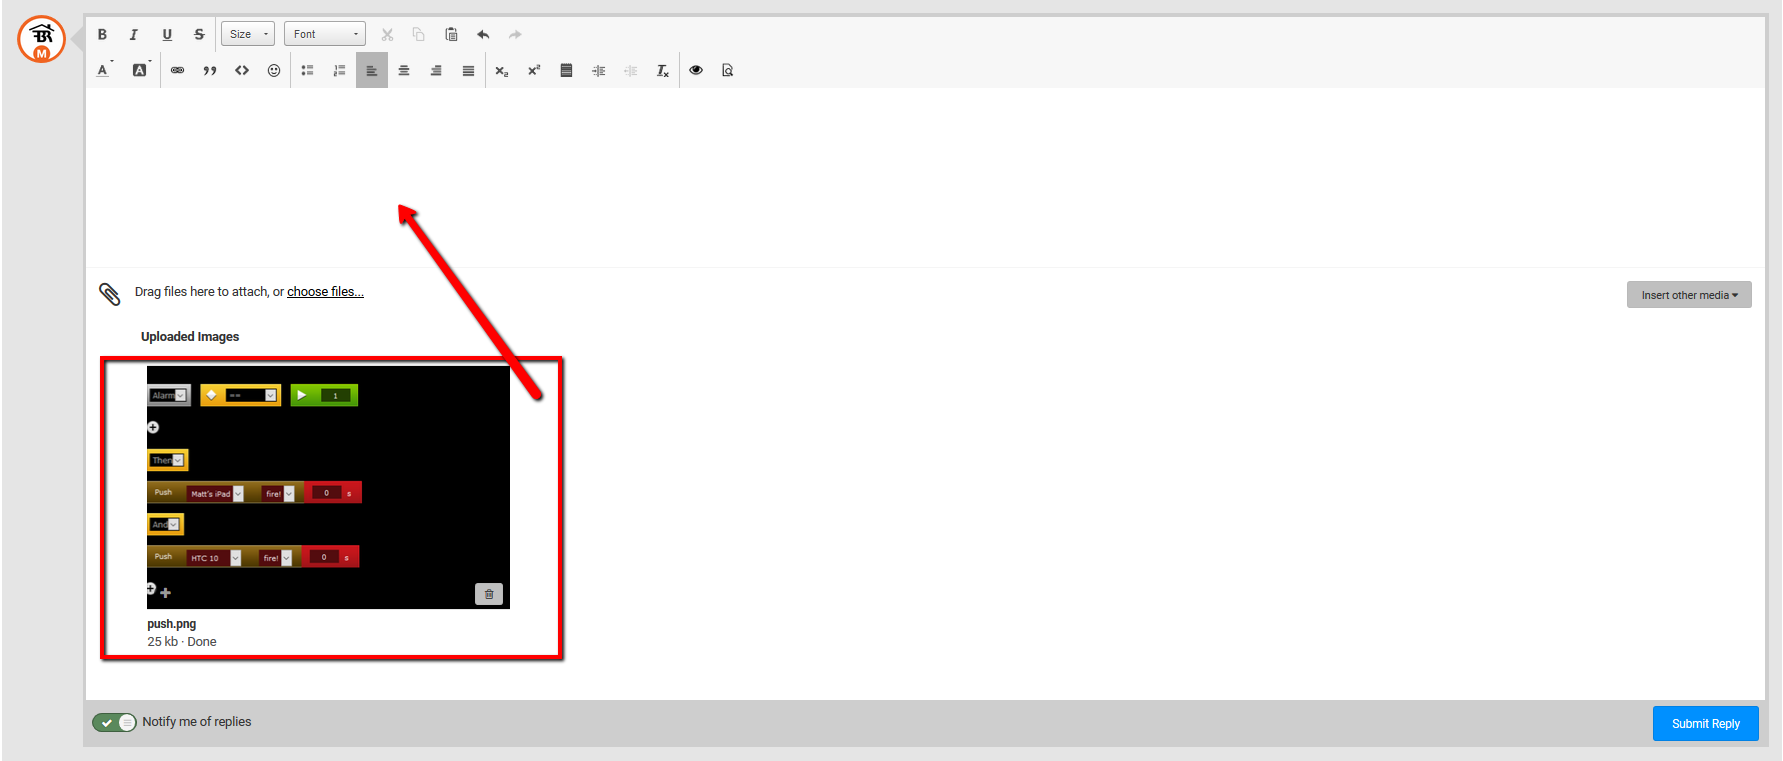
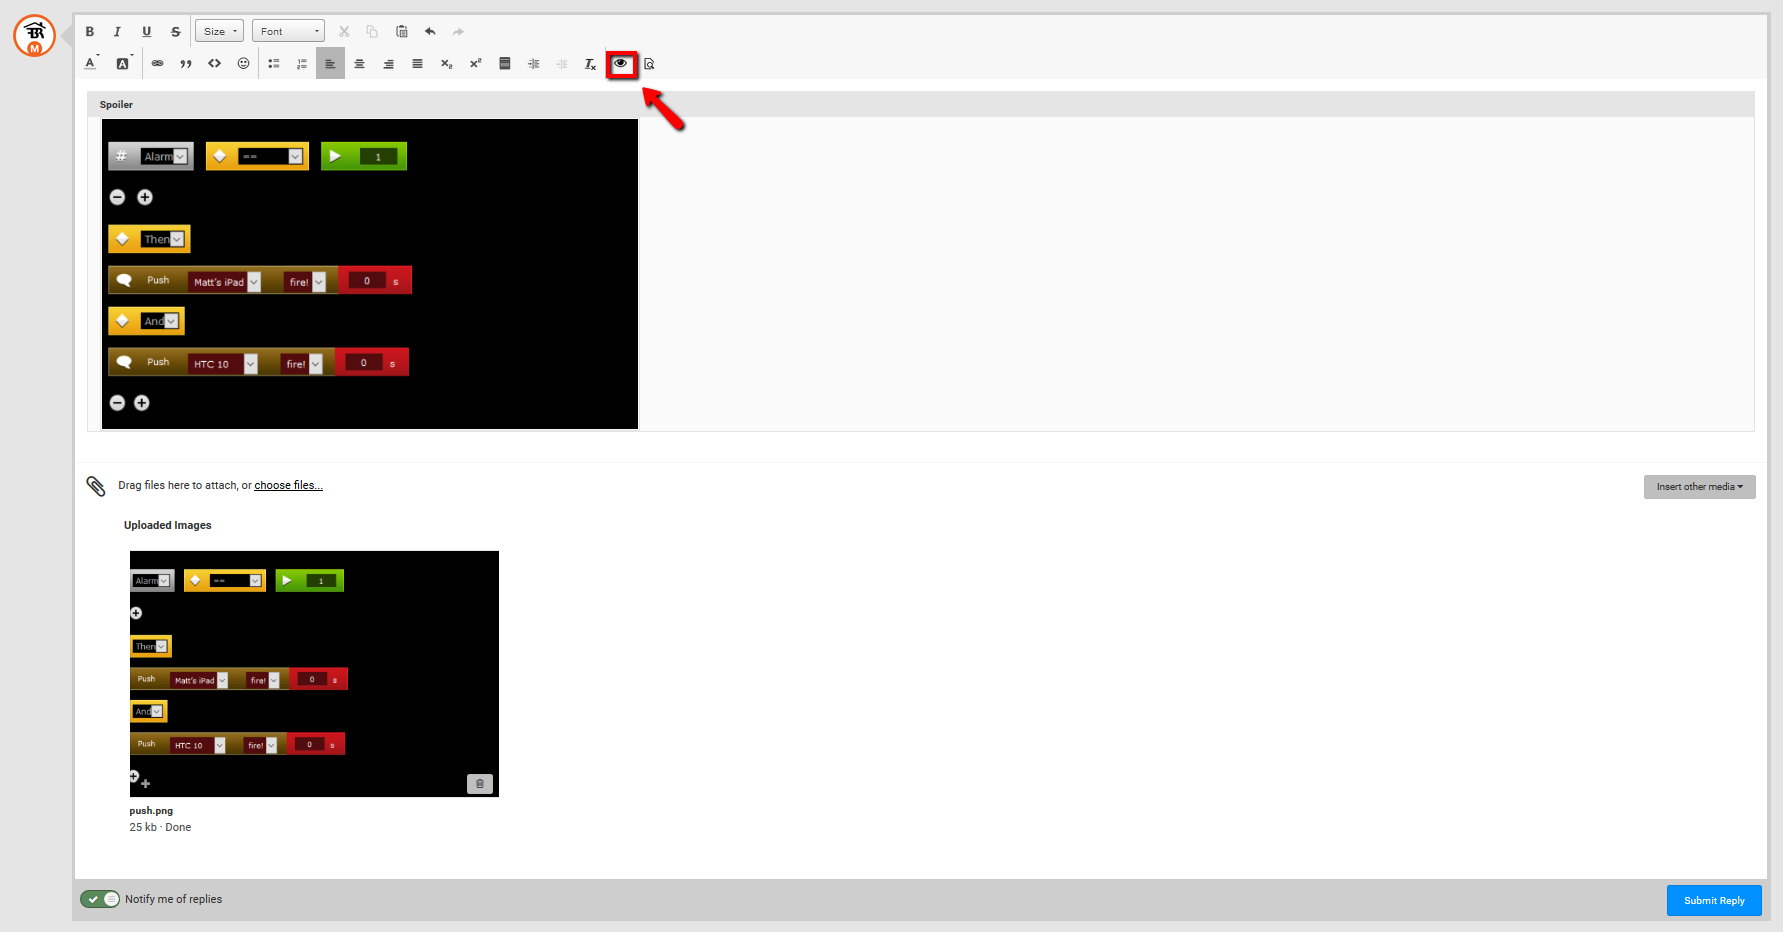
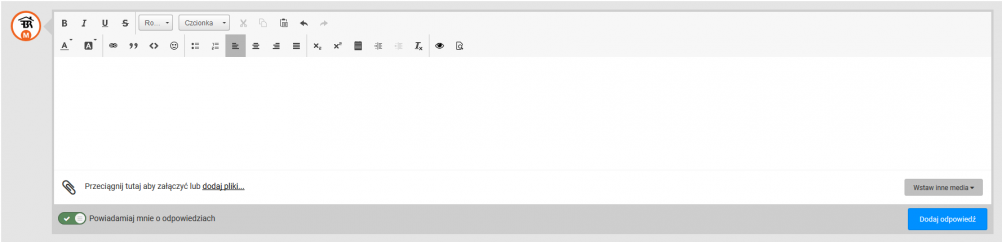
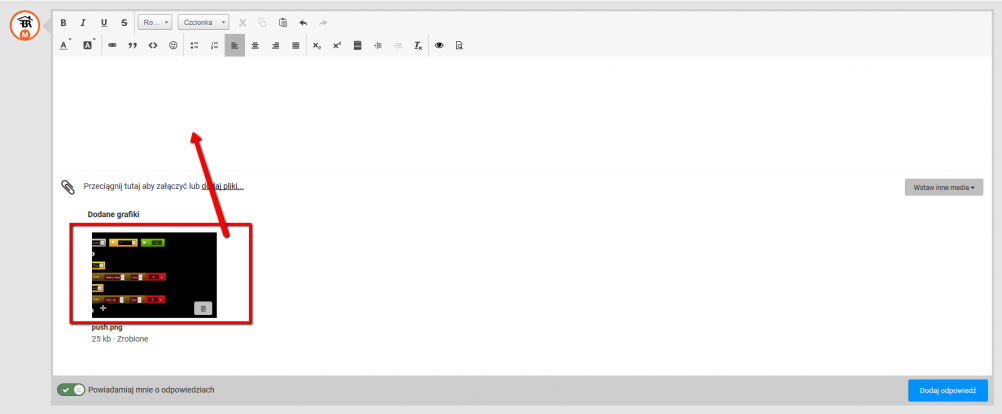
Mając na uwadze czytelność i przejrzystość forum, zalecamy dodawanie grafik i filmów przy użyciu funkcji „spoiler”. Oto krótki poradnik, który przeprowadzi Was przez ten proces: 1. Dodaj grafikę do tworzonego przez siebie posta: 2. Przeciągnij dodaną grafikę z pola dodane grafiki do pola z treścią posta: 3. Kliknij na przeniesioną grafikę, aby ją zaznaczyć, a następnie kliknij ikonę „Spoiler”: Uwaga! Wklejając link do YouTube należy najpierw kliknąć ikonę spoiler, aby stworzyć odpowiednie pole i to do niego wkleić link do udostępnianego filmu. 4. Klikamy „Dodaj odpowiedź” i gotowe!


-
1. Enter the section of the forum that we would like to search, click the field next to the magnifying glass icon and type the phrase that you’re interested in: 2. Now you can browse through the entries containing your phrase: 3. If you want to perform a more specified search, click „More search options” and modify the search options to fit your needs: 4. You can also change the way the results are shown by clicking „Sort by”: 5. And there it is! That’s the search process in a nutshell.


-
In order to share a post from the forum you need to: 1. Navigate to the post that you want to share: 2. Click the proper icon in the top right corner of the post: 3. Done! You should see a window with a link to the post pop up: 4. If you want to share this post in a different thread, just paste it in the reply window: 5. If you want to post it as a link, instead of it being show in the form of a window, just click „Display as a link instead”: 6. Click „Submit Reply” and done!


-
A lot of you were asking how to mention other users in your posts. Here’s a step-by-step guide: 1. In case when a particular user is yet to be involved in a given thread, all you have to do is type their nick preceded by „@” (no space) 1. In case when said user had already contributed to a given thread, all you need to do is click on the „@” symbol next to their nick by their post. In both cases, the effect would be the same. The user’s nick would appear in a blue border and they’ll receive a notification:


-
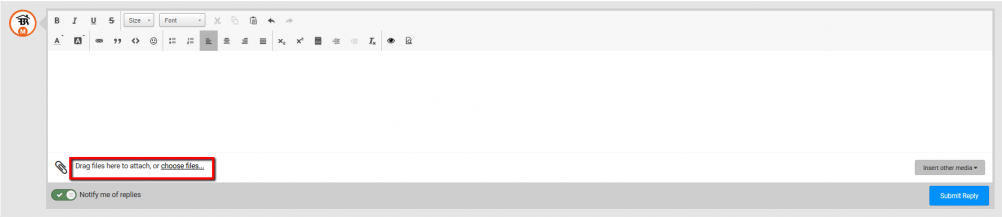
In order to ensure that the forum stays clear and easy to read, we strongly advise to use the „spoiler” feature when attaching an image or a video clip to your post. Here’s a short tutorial to guide you through the process: 1. Attach a file to your post: 2. Drag the attached image from the „Uploaded images” field and drop it in the one above. 3. Click on the image that you’ve just moved to select it and click on the “Spoiler” icon: Remember! If you want to attach a link from YouTube you should first click the „Spoiler” icon, in order to create a proper field, and then paste the link into it. 4. Click on „Submit Reply” and done!


-
hi, This tutorial is based on an idea that i believe originated to @cag014 some time back and has been adopted by many. So well deserved kudos to @cag014 and others that helped originate and develop the concept. I am merely a scribe that has benefited from this. I decided to write a quick tutorial for two reasons... I implemented this over christmas and and found it very useful and much easier than I thought It would appear that we have some new forum members that got HC2 devices from Santa The core of this approach is to store all the reference ID's to your devices, virtual devices, scenes, etc in a json encoded table. The references like jT.kitchen.light are used in the scene or vd and device ID can easily be changed in the table. One important benefit is that it you need to exclude/include a device the device ID will change. With this approach you simple change the reference in the Home table and your done. Without this approach you wll need to go through your code and change the device ID where appropriate. ** This doesn't get over the need to enter ID as triggers in the scene headers as fibaro doesn't allow variable in the header ** The solution has two parts to it. The home table itself where the data is stored. - this is held in a predefined variable (lower part of variables panel) The references in your scenes and virtual devices use this table HOME TABLE This can be created and maintained through either a scene or a virtual device. I chose a VD but there is no advantage I can thing of using one way or the other. Go to Panel, Variables Panel and create a new predefined variable (lower part of panel) called HomeTable. When you create a predefined variable it has two values. Name the variable and save. Edit the variable and simply delete the second value. Using either a scene or a vd create your table and store it. This is lua from my VD. I create one button and enter the code below. The top part shows the format of the table. I opted to place each element I am looking to store into rooms and/or other natural groupings but you can choose any way to structure. I'll attached a copy of my full table at the end of this to show what I use it for. The next part encodes and stores the data The last part is where I read back one entry to show the table stored okay. -- HOME TABLE FOR ALL DEVICES, SCENES ETC. jsonHome = { hall = { Lights=88,Lamp=1421,Temp=1,Motion=1,Humidity=1,Lux=1,ZRC90=1447,SmallBathLight=147,SmallBathMotion=1, SmallBathTemp=1,SmallBathLux=1,TTS_message="",TTS_volume=10,RadFav=3,IsPlaying=1,nowPlaying="",vol=1,clip="" }, kitchen = { Pendant=176,Table=174,Spotlights=90,Temp=1549,Motion=1548,Humidity=1551,Lux=1550,UV=1552,XmasLight=1531, WineFridgeTemp=1,Dishwasher=1,rcTV=1490,rcSonos=1561,TTS_message="",TTS_volume=10,RadFav=3,IsPlaying=1,nowPlaying="",vol=1,clip="" }, } jHomeTable = json.encode(jsonHome) -- ENCODES THE DATA IN JSON FORMAT BEFORE STORING fibaro:setGlobal("HomeTable", jHomeTable) -- THIS STORES THE DATA IN THE VARIABLE fibaro:debug("global jTable created") -- STANDARD DEBUG LINE TO DISPLAY A MESSAGE -- I then like to read back a entry from the table to show that the table didnt get corrupt in the process. local jT = json.decode(fibaro:getGlobalValue("HomeTable")) -- REFERENCE TO DECODE TABLE fibaro:debug(jT.kitchen.Motion) -- DISPLAY ONE VARIALE the output of this when I click the button (or run the scene is as follows) It is reading back the ID (1548) stored for Motion under the kitchen grouping I would recommend using an external editor like Notepad++ or Zerobrane to edit/manage the code in the vd and then copy back to the vd when ready to update as the HC2 lua editor is very small At this stage you now have your table REFERENCING THE TABLE CONTENTS IN YOUR SCENES AND VIRTUAL DEVICES For this you need to place the following line of code in each scene or vd local jT = json.decode(fibaro:getGlobalValue("HomeTable")) and then use references instead of device ID's in the scene code. The easiest way to explain this is with an example. This scene switches on a light in my kitchen if it is dark, motion is detected and no light is on already --[[ %% properties 1548 value %% events %% global --]] local jT = json.decode(fibaro:getGlobalValue("HomeTable")) -- KITCHEN AUTOLIGHTS if (tonumber(fibaro:getGlobalValue("Darkness")) == 1 ) and (tonumber(fibaro:getValue(jT.kitchen.Motion, "value")) > 0 ) and (tonumber(fibaro:getValue(jT.kitchen.Spotlights, "value")) == 0 ) and (tonumber(fibaro:getValue(jT.kitchen.Pendant, "value")) == 0 ) and (tonumber(fibaro:getValue(jT.kitchen.Table, "value")) == 0 ) and (tonumber(fibaro:getValue(jT.sunroom.Light, "value")) == 0 ) and (tonumber(fibaro:getValue(jT.sunroom.Lamp, "value")) == 0 ) then fibaro:call(jT.kitchen.Pendant, "setValue", "40") UpdateEventLog("kitchen lights auto on") end It's easy enough to see how the references are built up if you examine the scene v the table at the top of this post and that it !! Addition: If you need to adjust a single parameter in the table you can use the following. This can be useful if you don't want to adjust one value and then copy the whole table back into the vd and update or more useful if you want to adjust the value in the fly in a script. -- NEW PARAMETER VALUE jT.kitchen.Motion=2000 -- TO SAVE THE CHANGE jSonosTable = json.encode(jT) fibaro:setGlobal("SonosTable", jSonosTable) fibaro:debug("global jTable created") Hopefully this will help some users If you have any suggestions as to how to improve this please let me know and I'll edit -frank ++++++++++++++++++++++++++++++++++++++++++++++++++++++++ Copy of my table to show how flexible this approach can be jsonHome = { system = { Sunset_SunRise=1560,houseStatus=1507,alarmStatus=881,HouseTemps=1236,sonosSummary=1407,sonosTTS=1452, sonosSequences=1536,TVSequences=1545,lightingSequences=1534,powerConsump=1484,specialHouseMode=1538 }, hall = { Lights=88,Lamp=1421,Temp=1,Motion=1,Humidity=1,Lux=1,ZRC90=1447,SmallBathLight=147,SmallBathMotion=1, SmallBathTemp=1,SmallBathLux=1,TTS_message="",TTS_volume=10,RadFav=3,IsPlaying=1,nowPlaying="",vol=1,clip="" }, playroom = { Light=84,TVLight=1438,XmasLight=1518,Motion=1595,Temp=1596,rcPlayroomTV=1487,rcSonos=1574,Lux=1597,Humidity=1598,UV=1598,TTS_message="",TTS_volume=10,RadFav=3,IsPlaying=1,nowPlaying="",vol=1,clip="" }, living_room = { Light=231,libraryLight=164,libraryTopSocket=166,Temp=1584,Lamp=1423,Lux=1585,Motion=1583,Humidity=1,UV=1,TVLight=1499,XmasLight=1513,rcSonos=1,rcLivingRoomTV=1506,TTS_message="",TTS_volume=10,RadFav=3,IsPlaying=1,nowPlaying="",vol=1,clip="" }, utility_room = { Light=141,Temp=1194,Motion=1270,Humidity=1,Lux=1,UV=1,FreezerTemp=1,Washer=1,Dryer=1 }, equipment_rack = { RackSummary=1453,Rack1Temp=1192,Rack2Temp=1193,fanUpper1=1432,fanLower2=1434,powerAmpLower=1269, powerAmpUpper=1267,heatingFlowTemp=1199,rcSatBox=1491,SatBoxPresets=1492,rcHdmiMatrix=1489,rcAppleTV=1539, rcAppleTvSystem=1540,rcBluRay=1544,rcDroidBox=1541,networkMonitor=1493,avDeviceMonitor=1494,haDeviceMonitor=1495,hc2Resources=1391 }, kitchen = { Pendant=176,Table=174,Spotlights=90,Temp=1549,Motion=1548,Humidity=1551,Lux=1550,UV=1552,XmasLight=1531, WineFridgeTemp=1,Dishwasher=1,rcTV=1490,rcSonos=1561,TTS_message="",TTS_volume=10,RadFav=3,IsPlaying=1,nowPlaying="",vol=1,clip="" }, sunroom = { Light=172,Lamp=6,projectionScreenPower=1509,rcProjector=1542,rcProjectorScreen=1543 }, dining_room = { Light=25,Lamp=1,Motion=1,Temp=1202,Lux=1,Humidity=1,rcSonos=1,TTS_message="",TTS_volume=10,RadFav=3,IsPlaying=1,nowPlaying="",vol=1,clip="" }, pizza_bbq_area = { CenterLights=253,Spotlight=710,Lanterns=712,HeaterSwitch=255,LEDLights=238,Motion=705,Heaters=250,Temp=1,Lux=1, Humidity=1,rcSonos=1,PizzaBbqCam=761,TTS_message="",TTS_volume=10,RadFav=3,IsPlaying=1,nowPlaying="",vol=1,clip="" }, garage = { Light=895,BenchLight=1,DoorOpener=80,DoorStatus=778,Temp=1578,Humidity=1590,Lux=1589,Motion=1587,UV=1591, GarageControl=1559,rcSonos=1,TTS_message="",TTS_volume=10,RadFav=3,IsPlaying=1,nowPlaying="",vol=1,clip="" }, driveway = { porchLight=68,pillarLights=145,Spotlight=893,Motion=1429,GateTemp=958,GateOpener=94,GateStatus=956,GateControl=1537,DrivewayCam=1556,FrontDoorCam=1557 }, back_garden = { patioLight=64,utilityLight=76,sidePatioLights=60,boundaryLights=62,Spotlight=58,Motion=1427,Humidity=218,Lux=217,Temp=958,XmasLight=1523,BackGardenCam=1558 }, hotpress = { Light=143,DoorStatus=888,Temp=890 }, bathroom = { Light=162,MirrorLight=1468,MirrorDemist=1470,Temp=1170,Humidity=1,Motion=1 }, guest_bedroom = { Light=31,Lamp=718,Temp=1588,Motion=1587,Lux=1589,Humidity=1590,UV=1591,BathLight=1,BathTemp=1,BathMotion=1,BathHumidity=1,BathFan=1,BathMirrorLight=1460,BathMirrorDemist=1462,rcSonos=1,TTS_message="",TTS_volume=10,RadFav=3,IsPlaying=1,nowPlaying="",vol=1,clip="" }, master_bedroom = { Light=56,LampDad=29,LampMum=1,Temp=1,Motion=1247,Lux=1, Humidity=1,BathLight=1,BathTemp=871,BathMotion=870,BathHumidity=1,BathLux=872,BathFan=1,BathMirrorLight=1464,BathMirrorDemist=1466,rcSonos=1,TTS_message="",TTS_volume=10,RadFav=3,IsPlaying=1,nowPlaying="",vol=1,clip="" }, lau_eth_bedroom = { Light=52,Temp=1185,Motion=1253,Lamp=1440,rcSonos=1,TTS_message="",TTS_volume=10,RadFav=3,IsPlaying=1,nowPlaying="",vol=1,clip="" }, frank_bedroom = { Light=54,Temp=1200,Motion=1255,Lamp=1450,rcSonos=1,TTS_message="",TTS_volume=10,RadFav=3,IsPlaying=1,nowPlaying="",vol=1,clip="" }, office = { Light=33,Temp=1186,Motion=1251,Lamp=720,rcSonos=1,TTS_message="",TTS_volume=10,RadFav=3,IsPlaying=1,nowPlaying="",vol=1,clip="" }, Landing_Stairs = { stairsLight=92,landingLight=168,rcSonos=1,TTS_message="",TTS_volume=10,RadFav=3,IsPlaying=1,nowPlaying="",vol=1,clip="" }, scene = { MainScene=614,AlarmControl=598,rebootHC2=593,goodMorning=463,goodNight=331,LeavingHome=483,welcomeHome=488,quietMorning=499,kidsToBed=490,plaroomTvOn=580,firstFloorMusicOn=579,firstFloorAllOff=578, hallSceneControl=519,StairsLight30=556,GateOpen5=526,GateOpenHold=361,GateOpenClose=425,DumpEventLog=565,PlayroomOff=617 }, vd = { AlarmManagement=881,TVPresets=1545,SonosTTS=1452,LightPresets=1534,HouseModeExt=1538,SonosPresets=1536,RackTempMngt=1453,MediaSourcePresets=1567,JhomeTable=1566,GateControl=1537,GarageControl=1559 }, users = { admin=2,frank=1564,sylvia=1565 }, ios = { frankS6=993,sylviaS7=1526,frankipad=1532,sylviaipad=1533 }, IsOnline = { GlobalCache=1,SatBox=1,AppleTV=1,AndroidBox=1,TVPlayroom=1,TVKitchen=1,TVLiving=1,Projector=1,HC2=1,SynNAS=1,AlarmGateway=1,AlarmPanel=1,SonosAPI=1,DrivewayCam=1,GardenCam=1,FrontDoorCam=1,PizzaBBQCam=1,Internet=1,USG=1,HouseAP=1,GarageAP=1 }, }
-
Hi there Forum-peoples… Here’s my post on Window Automation using chain- and spindle actuators with an Roller shutter 2 module from Fibaro… Sure this is already done, but I think I found an way for easy hardware install and payable solution. An other reason is that i dint find a sollution within the Zwave products range that can open a roof dome up to 30cm or higher. First off all, something about me… I am an newbie in the Zwave (or so with Fibaro) world. I am learning by Trial on Error… The little things I know I learned in this forum and I follow @Sankotronic’s post mainly. Please keep in mind I am new to this, so always pick your own brain for your own solution you need for your house… I can only give you guys a head start or a burned down house. I needed a solution for my roof domes and for my bedroom top windows. So here is how I did it: You need the following: - The right motor for your window - A regular Roller shutter wall switch (not automated) - Some electric cabling - A Roller shutter 2 module from Fibaro - A piece of wood to bite on when you get frustrated (so your wife won’t hear you scream) - The Power of @Sankotronic VD and Scenes Choosing the motor: There are a few things you might wane consider before buying the most expensive thing for this project. - How much space do you have to screw on and place the motor. For my solution I always want to have a mosquito-net available. I build an extra wooden frame around my bedroom window to get it fitted. - How far do you want to have the windows opened? I personally (by Trial on Error) think that 30 cm will do for the roof domes. If you want more cm, then the motor you will need might be bigger and wont fit. - How much Newton power will you need. On the website I will give you, there is a calculation table you can use, about the Newton power you will need. But I think about 250N to 450N will be enough. The more Newton the more you pay. Also lookout that the Power of the motor wont crush your window (my rooftop is from the material PVC) - Take a motor with an in build auto stop! I think you need this to get it to work with the Roller Shutter 2 Module of Fibaro. You need to adjust a parameter (will discuss this later). - Take a good look at the currents you need for your country. For easy installation I went for 230V motors (and not the 12V versions). They could be directly connected to the Roller shutter 2 module of Fibaro. - Which type of motor do you need (Chain- or Spindle Actuator) I tried the Chain actuator first for my roof dome. But as it needs to open up to 30 cm the chain starts to hang to the right. So when wind blows there may be some sounds coming from the movement of the chain. I didn’t want this. If you only want to open an window for 15 cm then the chain version will work fine. A spindle actuator needs more space for placing. But I think a spindle actuator is ideal for Roof domes. For a top windows you want to go for a chain actuator. Else you don’t have the space for a mosquito net. Take a look at this website: http://www.windowo.eu/window_automation The company is in Italy.. At first I didn’t trust this website, because they have a few mistakes on it (like the VAT: it says its included but its not) I tested the website by beginning to buy 1 motor first. The delivery took about 2 to 4 weeks to the Netherlands. Then again they are so cheap its unbelievable… For my Roof dome I bought the: Spindle Actuator Raywin R45 450N 230V 50 Hz Comunello Mowin Raywin R45 - stroke (mm): 235-300 mm 2 motors for 261 euro (incl Vat and shipment) For the bedroom Top Window I bought the: Liwin L35 Chain Actuator 230V 50 Hz L=<1250 Comunello Mowin Comunello color choice: White 2 motors for 169 euro (incl Vat and shipment) I can adjust the max stroke with a dipswitch setting on the motors (Chain and Spindle) Choosing a Wall switch (no automation): I bought a standard roller shutter wall switch. With this switch you can’t push accidentally up and down at the same time… Not sure if it is important, but I went for this solution. So if your HC2 isn’t working you still can close your windows. Choosing a Zwave module: I went for the Roller Shutter 2 module from Fibaro. Yes indeed, you need some space in your walling to connect all cables, the wall switch and the Fibaro module… So keep that in mind for where you want to place the switch’s. I have two rooftop windows and two bedroom top windows… Yes you can connect all four windows to one Roller shutter 2 module of Fibaro (as long you don’t exceed the power levels of the module). But I need a different scene for my rooftop window (must close quicker when rain or wind) then for my bedroom top windows… So I decided to buy 2 Roller shutters… General tip: Buy only one thing of each item you need and make a test environment. Also test first and then place it. Connecting it all: Ok here you need to pick your own brain, if you cant then don’t start this project yourself. Get a friend to help you with the electricity etc. In generally you can directly connect the cable’s from the motor for up and down to the Roller Shutter 2 Module of Fibaro Q1 and Q2. Use S1 and S2 for your wall switch. Installing the Roller Shutter 2 Module from Fibaro: For me this was the most difficult part. If you won’t succeed at first, don’t give up (I almost did) Connect/install the Roller Shutter to your Fibaro. I hope you have first made a test environment to setup your first motor. You need to calibrate it for Max open and close. This took me some time and I found it easier to test it all, so I wouldn’t have to run across the whole house. On the “Advance-tab” of your Device under topic “Advanced” you need to put the “Controlled Device:” to “Blinds with positioning active” Parameter 18: Here starts your Trial on Error and you need that piece of wood I mentioned in the beginning and place it between your teeth… I have set my Chain actuator to 3 Watt for parameter 18. If you don’t change this setting it will not work. You now have to press Calibration button (almost back on top off page). If the Chain doesn’t go all the way up or down, adjust the amount of Watt. I noticed that while going Up or Down, the Roller Shutter 2 module of Fibaro needs to detect an amount of power. So it knows if the motor is on its top or bottom. This is also why you need to buy an Motor that has its own Auto Stop. So when the motor has power, the roller shutter module senses it and gives it current until the motor stops and doesn’t consume power. For my Spindle actuator it didn’t work with only adjusting Parameter 18. They are different motors so I had set this Parameter 18 to 6Watt. But still it didn’t always worked. Then I found that I also needed to adjust parameter 17. I set this parameter to 5.2 seconds. I think this is the time it waits when last minimal current was measured… So playing with Parameter 17 and 18 was my biggest struggle. Scenes Now you have created your devices, you need a scene… Again as a newbie I just created something that works for me. It has no clean code (error checking etc). I hope that @Sankotronic or others will use my solution so I can get a proper Scene in the future. Because I have Netatmo weather station I can use the CO2 lvl for automatic opening. Handy if you have visitors. It might also first check if the windows shouldn’t be opened in case of wind and rain. One other thing I like about window automation is that with an simple code you can at it to your smoke alarm, opening windows when smoke is detected so you get the change to run out of your house without to many smoke in your way. Even now you got use for the Netatmo Noise sensor. It can help you close your bedroom window when noice is detected. Not hard to code but I have no need for this now. For now I only created a scene for automatic closing, when it rains or when the wind gusts are too high. I did this for the wind and rain separately. I use an Netatmo Wind- and rainsensor. You will need the power of @Sanktronic [VD] Weather State v2.0 and [SCENE+VD] Netatmo weather station v2.0 - to get the weather information. Main scene for time based events v1.2.5 - for the scene’s to start. WindRoofDomeClose - Scene: When Windgust are to high i need them to close automaticly. --[[ %% properties %% events %% globals --]] -- setting up variables wT = json.decode(fibaro:getGlobalValue("WeatherState")) local stationNo = 1 local guststrenght = wT.netatmo[stationNo].wind.gust; local idroofdomes = tonumber(fibaro:getGlobalValue("IDRoofDomes")); -- IDRoofDomes is ID of my RolleshutterModule local idgsmibie = tonumber(fibaro:getGlobalValue("IdGsmIbie")); -- ID of my mobile phone local roofdomesstate = tonumber(fibaro:getValue(idroofdomes,"value")); -- Open or Close state if roofdomesstate > tonumber "0" and guststrenght >= tonumber "75" -- here i can adjust the Wind gust strength for Closing then -- Sending message to my phone fibaro:call(idgsmibie, "sendDefinedPushNotification", "183") -- 183 is the ID for my message created in the Notification panel -- Close window fibaro:call(idroofdomes, "setValue", "0") end RainRoofDomeClose - Scene: This script is checking the weather on http://openweathermap.org/ As a test I also added a check for my Netatmo Rainsensor. If Internet would be down, it works as a sort of fail save… Floors will be wet because it will take at least 15 min. to close. But rather 15 mins then hours of rain in my home when I am asleep in summer. --[[ %% properties %% events %% globals --]] -- setting up variables wT = json.decode(fibaro:getGlobalValue("WeatherState")) local stationNo = 1 local weathercastid = wT.openmap[stationNo].w_id; -- Weathercast ID local netatmorainsensor = wT.netatmo[stationNo].rain.hour; -- Netatmo rain/hour local idroofdomes = tonumber(fibaro:getGlobalValue("IDRoofDomes")); -- IDRoofDomes is ID of my RolleshutterModule local idgsmibie = tonumber(fibaro:getGlobalValue("IdGsmIbie")); -- ID of my mobile phone local roofdomesstate = tonumber(fibaro:getValue(idroofdomes,"value")); -- Open or Close state if roofdomesstate > tonumber "0" and -- rain detection from http://openweathermap.org/ ( (weathercastid == tonumber("200")) or (weathercastid == tonumber("201")) or (weathercastid == tonumber("202")) or (weathercastid == tonumber("210")) or (weathercastid == tonumber("211")) or (weathercastid == tonumber("212")) or (weathercastid == tonumber("221")) or (weathercastid == tonumber("230")) or (weathercastid == tonumber("231")) or (weathercastid == tonumber("232")) or (weathercastid == tonumber("300")) or (weathercastid == tonumber("301")) or (weathercastid == tonumber("302")) or (weathercastid == tonumber("310")) or (weathercastid == tonumber("311")) or (weathercastid == tonumber("312")) or (weathercastid == tonumber("313")) or (weathercastid == tonumber("314")) or (weathercastid == tonumber("321")) or (weathercastid == tonumber("500")) or (weathercastid == tonumber("501")) or (weathercastid == tonumber("531")) or (weathercastid == tonumber("502")) or (weathercastid == tonumber("503")) or (weathercastid == tonumber("504")) or (weathercastid == tonumber("511")) or (weathercastid == tonumber("520")) or (weathercastid == tonumber("521")) or (weathercastid == tonumber("522")) -- rain detection from Netatmo Rain Sensor or netatmorainsensor > tonumber "0" ) then -- Sending message to my phone fibaro:call(idgsmibie, "sendDefinedPushNotification", "186") -- 186 is the ID for my message created in the Notification panel -- Close Windows fibaro:call(idroofdomes, "setValue", "0") end Icons: Roof Dome device and scene: Bedroom Top Window Device: Note: Please keep in mind I am still a rookie… Not used to create this automation and not used to write about what I have created… Hope my post will help some of u to take a leap of faith and start automate your windows. I like to end this as @Sankotronic says: Enjoy coding and in this case assembling I am also working on a Walking Fridge solution… But as long my future wife’s name isn’t Fridge, it’s not going to happen

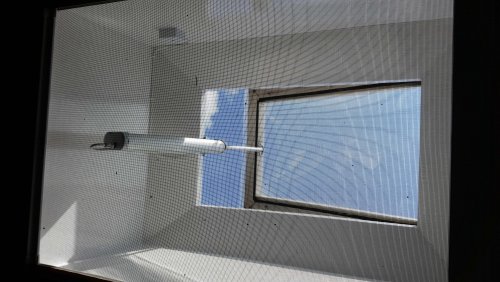
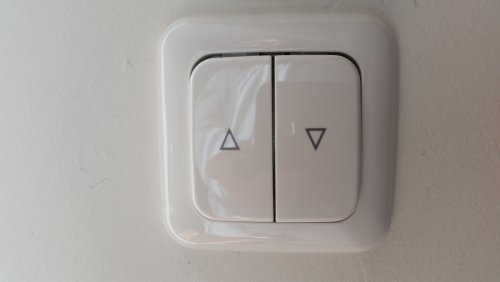
.jpg.1df2ec6394d2ce55356436132583fbd7.jpg)
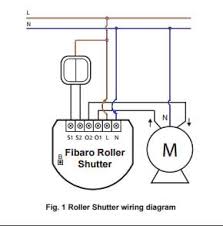
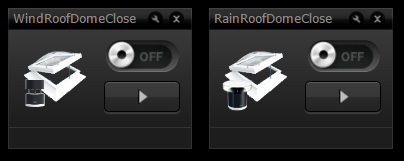


- 5 replies
-
- 1
-
-
- window
- window automotaion
- (and 8 more)