Welcome to Smart Home Forum by FIBARO
Dear Guest,
as you can notice parts of Smart Home Forum by FIBARO is not available for you. You have to register in order to view all content and post in our community. Don't worry! Registration is a simple free process that requires minimal information for you to sign up. Become a part of of Smart Home Forum by FIBARO by creating an account.
As a member you can:
- Start new topics and reply to others
- Follow topics and users to get email updates
- Get your own profile page and make new friends
- Send personal messages
- ... and learn a lot about our system!
Regards,
Smart Home Forum by FIBARO Team
Search the Community
Showing results for tags 'Json'.
Found 24 results
-
 Hello dear Fibaro Users & developers, I am experiencing an issue with my HC3 while making API calls to another system in my network, Domoticz. Who has the same experience or solution to resolve this? The Issue: I created a scene in the HC3 that includes program code to make an API call to Domoticz. However, the API call does not work as expected. To verify the code, I tested the same API call outside the HC3 using curl commands, and it works flawlessly. Each time I activate the scene, I see the following error in the Domoticz system log: 2024-12-16 23:37:36.517 Status: [WebServer] Deprecated RType () for API request. Call ignored, please use correct API Command! (192.168.xx.yyy) < We an say that te network connection between both systems is correct. Otherwise Domoticz can not log the incomming API call > Additional Details: When testing Domoticz without the HC3 making API calls, everything works correctly. It seems the HC3 may be sending an invalid or deprecated request parameter (e.g., RType). My Domoticz system is running the latest version, and the HC3 firmware is up to date (v5.170.16).
 -

VD reading json data Link bezpośredni w VD
ptekien posted a question in Other Devices / Third-party devices
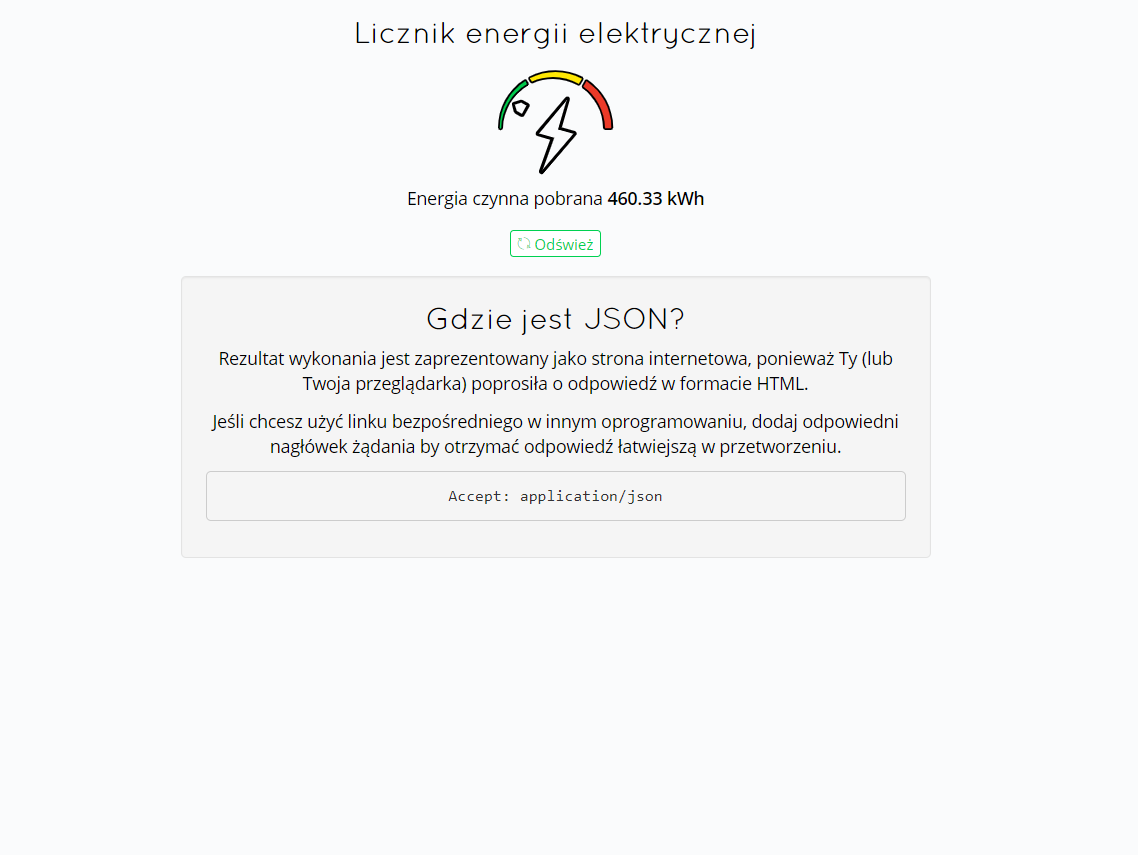
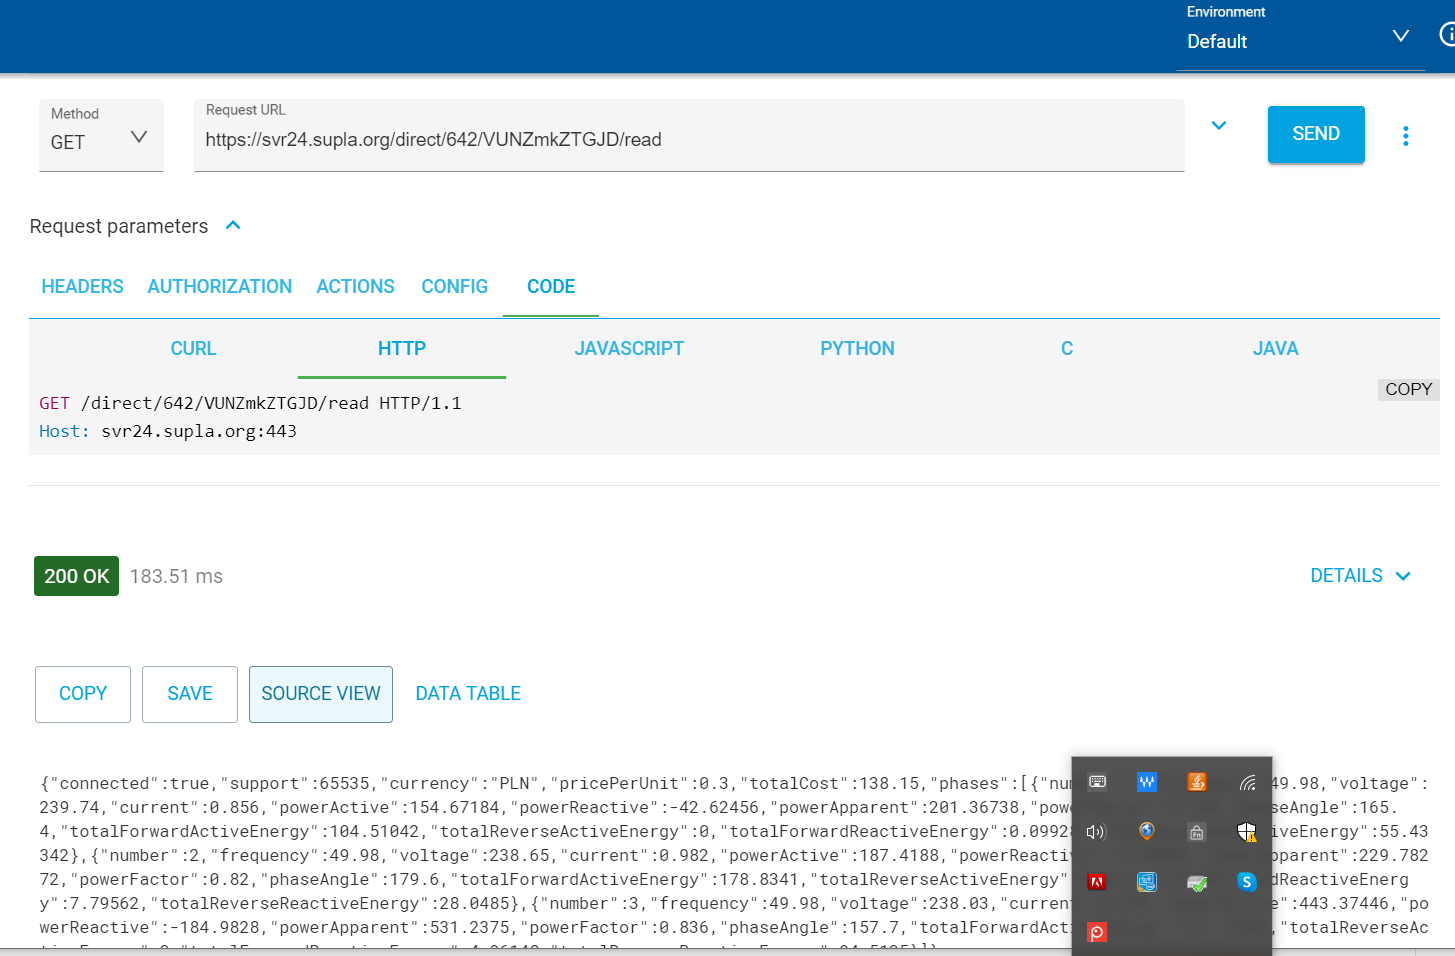
Posiadam miernik energii firmy ZAMEL z zainstalowaną Supla. Przy wykorzystaniu linku bezpośredniego: https://svr24.supla.org/direct/642/VUNZmkZTGJD/read otrzymuję odpowiedź w formacie HTML z informacją żeby odczytać w formacie JSON trzeba dodać odpowiedni nagłówek. Kiedy wpisuję jako scenę poniższy skrypt: --[[ %% properties %% events %% globals --]] local http = net.HTTPClient() local url="https://svr24.supla.org/direct/642/VUNZmkZTGJD/read" http:request(url, { options = { method='GET' }, success = function (response) fibaro:debug (response.data) end, error = function (err) fibaro: debug ("Error:" .. err) end }); otrzymuję niezrozumiały DEBUG: [DEBUG] 15:02:15: [DEBUG] 15:02:15: [DEBUG] 15:02:15: [DEBUG] 15:02:15: [DEBUG] 15:02:15: [DEBUG] 15:02:15: [DEBUG] 15:02:15: content="width=device-width, initial-scale=1"> [DEBUG] 15:02:15: [DEBUG] 15:02:15: content="#00732C"> [DEBUG] 15:02:15: [DEBUG] 15:02:15: [DEBUG] 15:02:15: href="/assets/img/icons/favicon.ico" [DEBUG] 15:02:15: type="image/x-icon"/> [DEBUG] 15:02:15: [DEBUG] 15:02:15: href="/assets/img/icons/favicon.ico" [DEBUG] 15:02:15: type="image/x-icon"/> [DEBUG] 15:02:15: [DEBUG] 15:02:15: type="image/png" [DEBUG] 15:02:15: href="/assets/img/icons/supla16.png" [DEBUG] 15:02:15: sizes="16x16"> [DEBUG] 15:02:15: [DEBUG] 15:02:15: type="image/png" [DEBUG] 15:02:15: href="/assets/img/icons/supla32.png" [DEBUG] 15:02:15: sizes="32x32"> [DEBUG] 15:02:15: [DEBUG] 15:02:15: type="image/png" [DEBUG] 15:02:15: href="/assets/img/icons/supla96.png" [DEBUG] 15:02:15: sizes="96x96"> [DEBUG] 15:02:15: [DEBUG] 15:02:15: type="image/png" [DEBUG] 15:02:15: href="/assets/img/icons/supla160.png" [DEBUG] 15:02:15: sizes="160x160"> [DEBUG] 15:02:15: [DEBUG] 15:02:15: type="image/png" [DEBUG] 15:02:15: href="/assets/img/icons/supla196.png" [DEBUG] 15:02:15: sizes="196x196"> [DEBUG] 15:02:15: [DEBUG] 15:02:15: sizes="57x57" [DEBUG] 15:02:15: href="/assets/img/icons/supla57.png"> [DEBUG] 15:02:15: [DEBUG] 15:02:15: sizes="60x60" [DEBUG] 15:02:15: href="/assets/img/icons/supla60.png"> [DEBUG] 15:02:15: [DEBUG] 15:02:15: sizes="72x72" [DEBUG] 15:02:15: href="/assets/img/icons/supla72.png"> [DEBUG] 15:02:15: [DEBUG] 15:02:15: sizes="76x76" [DEBUG] 15:02:15: href="/assets/img/icons/supla76.png"> [DEBUG] 15:02:15: [DEBUG] 15:02:15: sizes="114x114" [DEBUG] 15:02:15: href="/assets/img/icons/supla114.png"> [DEBUG] 15:02:15: [DEBUG] 15:02:15: sizes="120x120" [DEBUG] 15:02:15: href="/assets/img/icons/supla120.png"> [DEBUG] 15:02:15: [DEBUG] 15:02:15: sizes="144x144" [DEBUG] 15:02:15: href="/assets/img/icons/supla144.png"> [DEBUG] 15:02:15: [DEBUG] 15:02:15: sizes="152x152" [DEBUG] 15:02:15: href="/assets/img/icons/supla152.png"> [DEBUG] 15:02:15: [DEBUG] 15:02:15: [DEBUG] 15:02:15: [DEBUG] 15:02:15: [DEBUG] 15:02:15: [DEBUG] 15:02:15: [DEBUG] 15:02:15: [DEBUG] 15:02:15: [DEBUG] 15:02:15: [DEBUG] 15:02:15: [DEBUG] 15:02:15: [DEBUG] 15:02:15: [DEBUG] 15:02:15: [DEBUG] 15:02:15: [DEBUG] 15:02:15: if it takes too long, check if the JS scripts are loaded correctly [DEBUG] 15:02:15: [DEBUG] 15:02:15: [DEBUG] 15:02:15: [DEBUG] 15:02:15: [DEBUG] 15:02:15: [DEBUG] 15:02:15: [DEBUG] 15:02:15: [DEBUG] 15:02:15: Wysyłając ten sam link z aplikacji ARC otrzymuję właściwe dane nawet bez odpowiedniego nagłówka. Może ktoś pomoże dodać odpowiedni nagłówek tak żeby otrzymać odpowiednie dane?

-

[TUTORIAL] Introduction to Lua tables (2nd edition)
AutoFrank posted a topic in Tutorials and Guides
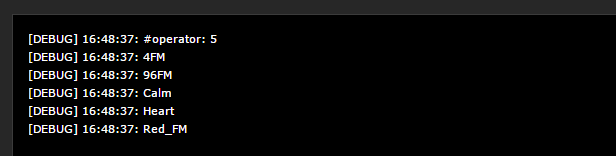
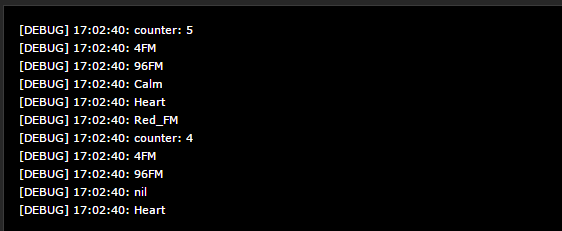
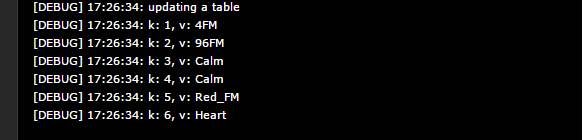
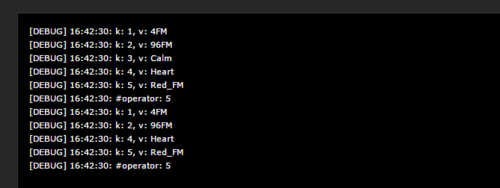
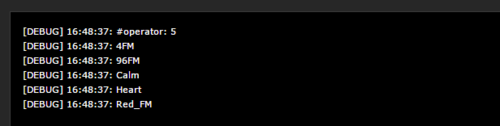
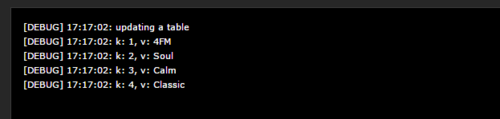
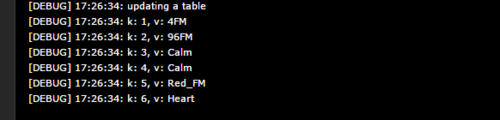
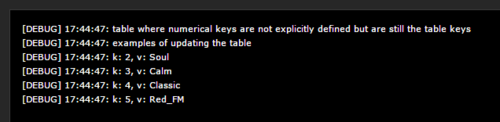
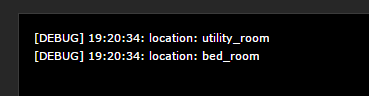
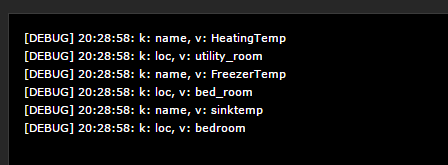
**MAJOR UPDATE TO THIS TUTORIAL** Hi, This tutorial has been going through a major update and expansion since the first release. Special thanks deserved to @petergebruers and others for helping me understand many of the underlying table concepts and for also contributing a lot to this tutorial. It may be a good idea to paste some of the code in this tutorial into a test scene to understand how they work by reviewing the output Topics covered with lots of sample code and expected outputs Table basics Creating tables and printing (ordered, non-ordered, numerical and non numerical keys) #operator - pros and cons kv pairs - advantages Updating tables - adding adding, inserting values Nested Tables - printing, updating, inserting, Summary of key points Storing tables in global variables I would have found this very useful when I started so hopefully some users will find it useful as well. -frank & peter Tables A table is a tree structure, consisting of field and each field has a "key" and "value" pair. The key can be any Lua value except nil and NaN. A table can store anything except nil. The name of the table is the variable that stores a reference to the table so it can be accessed Creating Tables and displaying the table data a = {} This is the smallest table and stores the reference to the table {} in the variable a Consider the following table print("table with numerical keys") fav = {[1] = "4FM", [2] = "96FM", [3] = "Calm", [4] = "Heart", [5] = "Red_FM"} fav is the table (or at least the name of the variable where the table is stored), in the above table 'fav', it has 5 fields and each field consists of a key/value pair 4 is the key and 4FM is the value , 2 is a key and 96FM is the value, etc You can display all the key/value pairs using the following ... print("table with numerical keys and using k/v pairs to display the fields but they won't be in order") fav = {[1] = "4FM", [2] = "96FM", [3] = "Calm", [4] = "Heart", [5] = "Red_FM"} for k,v in pairs(fav) do print("k: " ..k..", v: "..v) end the result is ... and you'll notice that the results are NOT returned in order if you have numerical keys [1], [2] then you will need to use ipairs to return them in order print("table with numerical keys and using k/v ipairs to display the fields in order") fav = {[1] = "4FM", [2] = "96FM", [3] = "Calm", [4] = "Heart", [5] = "Red_FM"} for k,v in ipairs(fav) do print("k: " ..k..", v: "..v) end #operator The #operator (#tablename) is used by a lot of people to identify the length of the table and use this to iterate through the table but it is not always recommended an example of where it will work is here print("table with numerical keys and using the #operator to iterate through the table") radio = {"4FM", "96FM", "Calm", "Heart", "Red_FM"} print("#operator: "..#radio) for i = 1, #radio do print(radio[i]) end if the table keys are numerical and contiguous, it will work.. ....but if they are not or you have inserted or removed values then it won't work A good example of where it doesn't work very well is here print("table where numerical keys are not explicitly defined but are still the table keys") print(" example where the #operator doesnt return the correct count") radio = {"4FM", "96FM", "Calm", "Heart", "Red_FM"} for k,v in pairs(radio) do print("k: " ..k..", v: "..v) end print("#operator: "..#radio) -- remove one value, set it to nil radio[3] = nil for k,v in pairs(radio) do print("k: " ..k..", v: "..v) end print("#operator: "..#radio) you can see that the second loop in the debug is showing an #operator value of 5 (because it is the last key but there are only 4 key/value pairs as we removed one Another approach that is recommended to use is as follows use the k/v approach to count the fields and then use the counter to iterate through.. print("table where numerical keys are not explicitly defined but are still the table keys") print(" example using k/v pairs to calculate the correct table field count") radio = {"4FM", "96FM", "Calm", "Heart", "Red_FM"} counter = 0 for k,v in pairs(radio) do counter=counter+1 end print("counter: "..counter) for i = 1, counter do print(radio[i]) end radio[3] = nil -- remove the row by setting the key to nil counter = 0 for k,v in pairs(radio) do counter=counter+1 end print("counter: "..counter) for i = 1, counter do print(radio[i]) end and you can see that the counter is correct in both loops Updating Tables you can update a table by setting Key/Value pairs or delete a value as follows print("table where numerical keys are not explicitly defined but are still the table keys") print("examples of updating the table") fav = {"4FM", "96FM", "Calm", "Heart", "Red_FM"} -- update one value add another value fav[2] = "Soul" fav[4] = "Classic" -- delete value at key 1 fav[1] = nil for k,v in pairs(fav) do print("k: " ..k..", v: "..v) end if the k/v pair already exists it overwrites it or of the k/v pair didn't exist, it simply adds it as above This is the same example but the table has the numerical keys explicitly defined print("updating a table") fav = { [1] = "4FM", [2] = "96FM", [3] = "Calm", } fav[2] = "Soul" fav[4] = "Classic" for k,v in ipairs(fav) do print("k: " ..k..", v: "..v) end Example of adding key/value pairs to this table using table.insert fav= {"4FM","96FM", "Soul", "Jazz"} table.insert(fav, "Calm") table.insert(fav, "Red_FM") table.insert(fav, "Heart") for k,v in pairs(fav) do print("k: " ..k..", v: "..v) end The extra key/value pairs will be added as extra fields as you cannot specify the exact field you want to update as in the approach above Tables with non-numerical keys are also possible as shown below print("Table initialiser with alpha keys") fav = { ["a"] = "4FM", ["b"] = "96FM", ["c"] = "Calm", ["d"] = "Heart", ["e"] = "Red_FM"} for k,v in pairs(fav) do print("k: " ..k..", v: "..v) end the same table can be represented in a simpler form print("Table initialiser with alpha keys - simplified") fav = { a = "4FM", b= "96FM", c= "Calm", d = "Heart", e= "Red_FM"} for k,v in pairs(fav) do print("k: " ..k..", v: "..v) end If you chose or have to use non numerical keys or a mix, then Lua makes no guarantee on order as the spec says random. The only way to order a table with non-numerical keys (such as alphabetical order) is to use an external reference. Nested Tables Lets take the following table, it looks like each value in the key/value pair is a table in itself as if one table is nested inside the other table = { [1] = {loc="utility_room", name="HeatingTemp"}, [2] = {loc="bed_room", name="FreezerTemp"}, } for k,v in pairs(table) do print(k,v) end if you run the usual k/v code you will see the second/nested set of tables To list the k/v inside the second table you need to iterate through the first table we use a counter like before to find out how many fields are in the outer most table There are two tables nested within the outer most table table [1] which has two fields with k/v pairs table [2] which has two fields with k/v pairs print("Nested table example") table = { [1] = {loc="utility_room", name="HeatingTemp"}, [2] = {loc="bed_room", name="FreezerTemp"}, } for k,v in pairs(table) do print("first level key: " ..k..", first level value: "..tostring(v)) for k2,v2 in pairs(v) do -- This works because we KNOW v is a table. print(" second level key: " ..k2..", second level value: "..v2) end end we then use the counter to expose the k/v pairs at table[1] and table [2] with the following result You could also expose specific values (in the nested able) using the following table = { [1] = {loc="utility_room", name="HeatingTemp"}, [2] = {loc="bed_room", name="FreezerTemp"}, } for k,v in pairs(table) do print("location: "..table[k].loc) end with the following expected result You could also have used the #operator that we discussed earlier BUT only because the key's in the outer-most table are numerical and contingous for i = 1, #table do -- #list refers to the max number of items in the table fibaro:debug(table[i].ip, table[i].port) end Updating a value in a nested table If you want to update a specific value in the nested table you need to use the k/v method we have discussed fav = { [1] = {loc="utility_room", name="HeatingTemp"}, [2] = {loc="bed_room", name="FreezerTemp"}, } -- update nested table on the second field with a new value fav[2].loc = "kitchen" fav[2].name = "Hobtemp" -- or you could use the following format to do accomplish the same update fav[2]["loc"] = "kitchen" fav[2]["name"] = "Hobtemp" -- print out the updated table... for k,v in pairs(fav) do for k,v in pairs(fav[k]) do print("k: " ..k..", v: "..v) end end -- second option to print out the updated table with more explanation for k,v in pairs(fav) do print("first level key: " ..k..", first level value: "..tostring(v)) for k2,v2 in pairs(v) do -- This works because we KNOW v is a table. print(" second level key: " ..k2..", second level value: "..v2) end end the result is If you want to add/insert a new k/v pair in the nested level, you can use the table.insert method fav = { [1] = {loc="utility_room", name="HeatingTemp"}, [2] = {loc="bed_room", name="FreezerTemp"}, } -- insert a new value table.insert(fav,{loc="bedroom", name="sinktemp"}) -- print out the updated table... for k,v in pairs(fav) do for k,v in pairs(fav[k]) do print("k: " ..k..", v: "..v) end end -- second option to print out the updated table with more explanation for k,v in pairs(fav) do print("first level key: " ..k..", first level value: "..tostring(v)) for k2,v2 in pairs(v) do -- This works because we KNOW v is a table. print(" second level key: " ..k2..", second level value: "..v2) end end and the result is three fields in the table So before we go to the last task of storing the table in a global variable, I thought it would be good to have a quick recap.. Summary A table is a tree structure, consisting of field and each field has a "key" and "value" pair. The name of the table is the variable that stores a reference to the table so it can be accessed you can explicitly declare a numerical key in a table but you don't have to for a table with a numerical key - use ipairs to print the table fields in order #operator can be used but ONLY for tables with numerical keys that are contiguous it is recommended to use the standard k/v approach to count the number of fields remove a value by setting its key = nil update a table using the table[key] method add a new field using table.insert(table, "value") and will add a numerical key table.insert will not work with tables with non-numerical keys tables with non-numerical keys cannot be printed in order by ipairs, result will be random nested tables require iteration to print the inner-most tables multiple levels of iteration required for multi-nested tables updating nested table - iterate with k/v and use table[key].nested-key = "value" inserting into nested table - iterate with k/v and use table.insert(table,{key="value, key="value} tables can be very confusing and frustrating to us newbie's , so take your time Storing a table in a global variable if you take the following table structure Table = { group = { option1=1560,option2=1507,option3=881 }, } If you want to store this table in a global variable you will need to encode the table as a string. One of the most common formats to encode a table (structure) is json from json.org "JSON (JavaScript Object Notation) is a lightweight data-interchange format. It is easy for humans to read and write. It is easy for machines to parse and generate." To save the table you need to encode it and then save it to the global variable jTable = json.encode(table) fibaro:setGlobal("StateTable", jTable) In order to read back a single value you need to decode the string local jT = json.decode(fibaro:getGlobalValue("Table")) once it's decoded you can then read one of the values or manipulate the table fibaro:debug(jT.group.option1) Updating a single value - assign the new value, encode it and the store it..... jT.group.option3 = 987 jTable = json.encode(jT) fibaro:setGlobal("StateTable", jTable) Making json strings/output easier to read... Sometimes a json string can be difficult to read and understand its structure. Typically they would look something like this... {"widget": {"debug": "on","window": {"title": "Sample Konfabulator Widget","name": "main_window","width": 500,"height": 500},"image": {"src": "Images/Sun.png","name": "sun1","hOffset": 250, "vOffset": 250,"alignment": "center"},"text": {"data": "Click Here","size": 36,"style": "bold","name": "text1","hOffset": 250,"vOffset": 100,"alignment": "center","onMouseUp": "sun1.opacity = (sun1.opacity / 100) * 90;"}}} There are a number of websites that will 'pretify' the string make it easier to read the structure and enable you to understand how you might navigate it. If you take json string above and paste it into http://jsonprettyprint.com/ it will display it more like a table This format is easier to understand { "widget": { "debug": "on", "window": { "title": "Sample Konfabulator Widget", "name": "main_window", "width": 500, "height": 500 }, "image": { "src": "Images\/Sun.png", "name": "sun1", "hOffset": 250, "vOffset": 250, "alignment": "center" }, "text": { "data": "Click Here", "size": 36, "style": "bold", "name": "text1", "hOffset": 250, "vOffset": 100, "alignment": "center", "onMouseUp": "sun1.opacity = (sun1.opacity \/ 100) * 90;" } } } Finally.... There is a very good discussion on using a table in a predefined variables to store the ID's of scenes and devices for the HC2 - https://forum.fibaro.com/index.php?/topic/23942-tutorial-using-a-hometable-to-store-device-and-scene-ids/ suggestions to improve welcome -f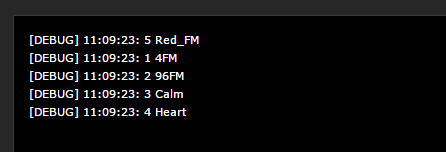


- 47 replies
-
- 9
-

-

-
- 2nd edition
- lua
- (and 3 more)
-
Im trying to turn on my AC using a http request. I am able to turn lights on and off as well as other things no worries, but turning the AC on isn't working. I have a remotec ZXT-600, I am assuming it has to do with not having the right arguments in there. The back end of the url is /api/devices/58/action/setThermostatMode with the arguments as blank { "args": [ "{}", "{}" ], "delay": 0, "integrationPin": "1234" } My question is how and where do I pass in an argument with an action for it to turn to cool or heat. Below is the device data. Any help is appreciated. { "id": 58, "name": "AC Lounge", "roomID": 219, "view": [ { "assetsPath": "/dynamic-plugins/com.fibaro.hvacSystem/assets", "jsPath": "/dynamic-plugins/com.fibaro.hvacSystem", "name": "com.fibaro.hvacSystem", "translatesPath": "/dynamic-plugins/com.fibaro.hvacSystem/i18n", "type": "ts" } ], "type": "com.fibaro.hvacSystem", "baseType": "com.fibaro.device", "enabled": true, "visible": true, "isPlugin": false, "parentId": 57, "viewXml": false, "configXml": false, "interfaces": [ "battery", "coolingThermostatSetpoint", "fibaroFirmwareUpdate", "heatingThermostatSetpoint", "thermostatFanMode", "thermostatMode", "zwave" ], "properties": { "parameters": [ { "id": 27, "lastReportedValue": 17, "lastSetValue": 17, "size": 2, "value": 17 } ], "pollingTimeSec": 0, "zwaveCompany": "Remotec", "zwaveInfo": "3,4,33", "zwaveVersion": "1.7", "batteryLevel": 92, "batteryLowNotification": true, "categories": [ "climate" ], "configured": true, "coolingThermostatSetpoint": 19, "coolingThermostatSetpointCapabilitiesMax": 31, "coolingThermostatSetpointCapabilitiesMin": 16, "coolingThermostatSetpointFuture": 19, "coolingThermostatSetpointStep": { "C": 0.5, "F": 1 }, "dead": false, "deadReason": "", "defInterval": 0, "deviceControlType": 1, "deviceIcon": 70, "deviceRole": "Other", "endPointId": 0, "firmwareUpdate": { "info": "", "progress": 0, "status": "UpToDate", "updateVersion": "1.7" }, "heatingThermostatSetpoint": 28, "heatingThermostatSetpointCapabilitiesMax": 31, "heatingThermostatSetpointCapabilitiesMin": 16, "heatingThermostatSetpointFuture": 28, "heatingThermostatSetpointStep": { "C": 0.5, "F": 1 }, "log": "", "logTemp": "", "manufacturer": "", "markAsDead": true, "maxInterval": 0, "minInterval": 0, "model": "", "nodeId": 9, "parametersTemplate": "0", "productInfo": "82,84,1,2,132,144,1,7", "saveLogs": true, "serialNumber": "", "setpointExpiryDate": 0, "stepInterval": 0, "supportedDeviceRoles": [ "Other" ], "supportedThermostatFanModes": [ "AutoLow", "Low", "High", "Medium" ], "supportedThermostatModes": [ "Off", "Heat", "Cool", "Auto", "Resume", "Fan", "Dry" ], "supportsThermostatFanOff": true, "thermostatFanMode": "High", "thermostatFanOff": false, "thermostatMode": "Cool", "thermostatModeFuture": "", "thermostatModeManufacturerData": [], "unit": "C", "updateVersion": "", "useTemplate": false, "userDescription": "" }, "actions": { "abortUpdate": 1, "reconfigure": 0, "retryUpdate": 1, "setCoolingThermostatSetpoint": 1, "setHeatingThermostatSetpoint": 1, "setInterval": 1, "setThermostatFanMode": 1, "setThermostatMode": 1, "startUpdate": 1, "updateFirmware": 1 }, "created": 1646027026, "modified": 1646027026, "sortOrder": 24 }
-
Hi all, The wife and I have done some work on getting json data from a Raspberry PI, running PI1Monitor. The Pi is reading the data from a smart meter P1 port and we built a virtual device that shows the meter readings in a VD screen. I included the VD and LUA-code. It's not pretty, but it works. We would like to take this to the next level, but here is where we need help. - Would it be possible to change the VD so it delivers the current usage to the power metering of the HC2. Right now, we have only some switches and dimmers that are counted in the power panel and we would like to have all power usage visible and we're not so interested in the usage of individual lights. We could use "some" help with that. - How can we add icons to the labels. We've seen some examples with beautiful screenshots, but we are stuck with plain text. Feel free to use the code. We're happy to share it with you. Regards, Erwin & Linda Slimme meter.lua Slimme_meter.vfib
- 57 replies
-
- 1
-
-
- p1
- smart meter
- (and 2 more)
-

Schema changes HC2 -> HC3 and lack of references
Henn Sarv posted a question in Scenes and Interface
I'm not sure how important it is, but I jump into this hole "lastWorkingRoute and neighborList shemas are changed from HC2 to HC3 HC2 /api/devices/id produces JSON wtih following: "lastWorkingRoute": "[1,422,59]" HC3 /api/devices/ID produces a bit changed JSON: "lastWorkingRoute": [1,422,59] What is difference - HC2 gives me string representation of array but HC3 gives me array. For developer perspective this is quite big difference (agree - important only for tech apps) Is there SOMEWHERE some kind of DOCUMENTATION of that kind things, changes, schemas Both HC2 /docs and and HC3 swagger lack several important interfaces like /api/energy and /api/temperature why they are hidden or where to find SOME kind of reference -
i need to do an http request, put method with a JSON command in the body. Error 400. why? how i can fix the error? function QuickApp:instantArm() self:debug ("function instant arm called") local kseniaip = self:getVariable("IP_PORTIOT"); local kseniaport = self:getVariable("PORT_PORTIOT") function putMethod(requestUrl, data, successCallback, errorCallback) local http = net.HTTPClient() self:debug(requestUrl) http:request(requestUrl, { options = { method = 'PUT', headers = { ["Content-Type"] = "application/json", ["Accept"] = "application/json" }, data = data }, success = successCallback, error = errorCallback }) return args end local url = 'http://' .. kseniaip .. ':' .. kseniaport .. '/partitions/5' local data = [[ <?xml version="1.0" encoding="utf-8"?> <s:Envelope xmlns:s="http://schemas.xmlsoap.org/soap/envelope/" s:encodingStyle="http://schemas.xmlsoap.org/soap/encoding/"> <s:Body> .. "{\n\"mode\": \"disarm\"\n}" .. --JSON COMMAND TO INSERT IN THE BODY { "mode": "disarm" } </s:Body> </s:Envelope> ]] putMethod( url, data, function(resp) print('Status: ' .. resp.status) end, function(err) print('error' .. err) end ) end
-
I want to use a construction in my hometable like for example local HT = { light1 = { fib_id = 211, hue_id = 7 }, light2 = { fib_id = 227, hue_id = 12 }, } HT.ftoh = { [ HT.light1.fib_id ] = HT.light1.hue_id, [ HT.light2.fib_id ] = HT.light2.hue_id, } When i test fibaro:debug( HT.ftoh[ 227 ] ) it gives the expected value 12. I want to use this in a couple of VD's with generic code for hue lights, but when i test local HT2 = fibaro.decode( fibaro.encode( HT ) ) then fibaro:debug( HT2.ftoh[ 227 ] ) gives un expected NIL result. fibaro:debug( HT2.ftoh[ "227" ] ) does give the correct result 12 so the original key index 227 is now a string. Is this normal behaviour of the json.encode / json.decode functions or is this a bug ?
-
I got a VD that collects lux for me and put it as global variable, yesterday i received something wrong in the readout as you could see below. The VD collects data thru json , all code is in mainloop. When this unexpected answer from the device shows up, the VD stop working, the only way to get it up and running again is to reboot the HC:2, is there any other way to get the VD to start again? [DEBUG] 18:03:49: 0.83 [DEBUG] 18:04:49: 0.83 [DEBUG] 18:05:52: 0.83 [ERROR] 18:07:56: line 7: Expected value but found T_END at character 1 Code in mainloop selfId = fibaro:getSelfId() sleeptimer = 1 -- minutes between pollning local WEB = Net.FHttp("192.168.88.65",80) -- IP to your espeasy local response ,status, err = WEB:GET("/json?tasknr=1") -- task id on espeasy if (tonumber(status) == 200 and tonumber(err)==0) then local jsonTable = json.decode(response) name = jsonTable.TaskName value = jsonTable.Lux fibaro:debug(value) --fibaro:log(value) fibaro:call(selfId, "setProperty", "ui.Label1.value", value.." Lux") fibaro:setGlobal("Sun", value) end fibaro:sleep(sleeptimer*1000*57)
-

How to reference embedded attribute using Json.decode
UriT posted a question in Scenes and Interface
Newbie scripting question. Thanks to all the posts here I have learnt a lot in the last few weeks ... so thank you for all your knowledge and insights and generosity for sharing. I am adapting Yamaha MusicCast QA. I have worked out how to query the Yamaha depending on what it is playing eg Tuner or Spotify etc. My query as per below code local queryinfo = "/YamahaExtendedControl/v1/tuner/getPlayInfo" urlinfo = url .. "" .. queryinfo self.httpClient:request(urlinfo, { options={method = "GET" }, success = function (response) if (response.status >= 200 and response.status < 300) then jS = json.decode(response.data) self:debug(response.data) Returns the following response {"response_code":0,"band":"fm","auto_scan":false,"fm":{"preset":4,"freq":106500,"tuned":true,"audio_mode":"mono"}} I have learnt to reference the band I can simply do something like band = (js.band) The question is .. how do I extract the "freq" value? if I do freq = (js.freq) I get "nil" How do you parse the values embedded within a secondary {} ? -
Version 1.0.0
50 downloads
This function can come in handy if you want to print a json structure in readable form for debugging or inspection. It takes a json string as input and returns a HTML formatted string which can be printed in the debug window using fibaro:debug(); Example Input: "{\"api_data\":{\"status\":\"online\",\"timestamp\":\"2019-01-18-18:01:32\",\"sensor_1\":[\"value_1\":125,\"value_2\":35],\"sensor_2\":[\"value_a\":34.5,\"value_b\":45]}}" Output: { "api_data" : { "status" : "online", "timestamp" : "2019-01-18-18:01:32", "sensor_1" : [ "value_1" : 125, "value_2" : 35 ], "sensor_2" : [ "value_a" : 34.5, "value_b" : 45 ] } } -
Hello, i'm trying to get status updates from my Roomba980 cleaner in to a global. I've been able to get the status information from te roomba in a string (as shown on attachment), but I don't know how to get a specifiek value ("phase" for example) in a global. Is there anyone with some more experience who can help me? Thanks

-
Hello Can somebody help me with a JSON POST command ? Simple Idea I need to press a VD button when there is a POST command made -- 'mode': '0' = Disarm should be like {'area': '1', 'mode': '0'} -- 'mode': '1' = Full Arm schould be {'area': '1', 'mode': '1'} I tried several thing but only get " " to send in debug And when I change the code to send ' ' the scripts fails SOLVED: seems that the github forum reactions and phyton code where misleading. with httpPost:post and other raw data was the trick
-
Hi, I'm no fan of the build-in alarm in HC2 so I'd like to create my own scenes/VD's for this. . @Sankotronic is working on a very promising UHAS system but his plans are pushed out (no offence, he released real nice things already, I'm fan) so I decided to move on, writing some code myself with hopefully some help of you ;-)! What do I use in my alarm; > Lights (selected regular lights in the house to switch to 100% when alarm is breached) > Door/window sensors > PIRs > Sirenes (for acoustic alarm) > flashlight (for visual alarm) > RGBW led indicator (at the entrances to notify alarm is; just armed (leave the house indicator), armed (not safe to enter indicator), disarmed(safe to enter indicator) What do I want; > Fibaro remote keychains available to manually arm/disarm the alarm > All users have a IFTTT account on their phones to trigger a scene when entering/leaving home (geofence). This will set my global "guestmode". (bad exerience with Fibaro GPS) > When nobody is at home, the global "alarmmode" should set to "FullAlarm". At "FullAlarm" all PIRs and D/W's sensors are set to armed. (report error when not in safe state when arming). > When at night (Darkness) all users are at home and all PIR and D/W are safe for X time, "sleepstate" to be set "sleep" else "awake". > when at sleep, the "alarmmode" will switch to RingOnly. Only the D/W sensors will be armed (not PIR). When a PIR is breached the alarmmode will be set to disarmed state. When sleep state is reached again the alarmmode will switch back to RingOnly. > if armed and breached, the alarm is triggered. The sirenes and flashlight will start to run and all lights will be set to 100%. If all D/W and PIR are safe for X time, alarm to back to armed state and lights off. > if armed and breached, the timestamp of alarm will be logged. If alarm is disarmed after it was breached the notification LED will warn for this. > If I disarm the alarm, put all lights/DW in safe state. > Notifications via Pushover or even better, use the message hub of @autofrank with Fibaro PopUps and Push services. Unfortunately I currently have errors with the message hub. What is my current status. All code based on simple if/then LUA coding, no fancy loops. DONE: scene to check all PIRs Scene will set global variable DONE: scene to check D/W sensors. Scene will set global variable DONE: One scene to take care of the global sleepstate DONE: One scene to take care of the global guestmode DONE: a VD to manually set alarmstate and alarmmode. DONE: a VD to manually set guestmode todo: a mainalarm scene to arm/disarm the alarm (based on above algorithm) todo: an alarm scene to trigger the alarm when breached (or merge this in the mainalarm scene) todo: scene(s) for RGBW led indicators todo: scene(s) for the push notifications (Alarm breached, error (Eg door/window open when arming the alarm) I noticed that I get stuck with the remaining scenes. I'm no programmer, so I use mainly simple if/then LUA code. With a lot of scenes in the alarm you easily get lost. In an attempt to keep my coding cleaner/more condensed I want to use tables/json. I already use the Hometable but that's just a simple copy the instructions of @AutoFrank. Questions; For the remaining alarm scenes I have difficulties how to store a table in a global and even more how to use from a table. The tutorials on this topic are not clear to me yet. For example, when the alarm is breached, how to switch all lights to 100% for the device IDs in a global(table). I have seen examples of code like k,v in (i)pairs but I don't get it yet. Can somebody help me with some code examples? Any other suggestions on my ideas for an alarm? Thanks! Regards, Jules
-
 I get the following JSON string from my device in a browser by typing the IP of my device: {"data":{ "id":"8200007A","type":"8","detector":"SI29BG","voltage":382,"cpm":14,"temperature":9.45,"humidity":48.29,"pressure":100281,"voc":12800000,"co2":399,"noise":39,"ch2o":0.00,"pm25":3,"uptime": 107787}} is it possible to import these values into a virtual device in HC2? The closest I have found is: local urad = Net.FHttp("192.168.8.106/j") local urad = Net.FHttp("{{192.168.8.106/j}}",80) local urad = assert(io.popen('curl http://192.168.8.106/j')) but these will not get the json string This is a part question for my thread:
 -

Retrieving specific value from device
Rikbast posted a question in Other Devices / Third-party devices
Hi, I retrieved all data of the devices from my HCL with http://192.168.0.33/api/devices and they are written in one file. Now I am want to retrieve temperature, lux etc from different devices, but I can't seem to find the right way to do it. If I just retrieve data from one device for instance 172 with call http://192.168.0.33/api/devices/172 it works: json.properties.value will do the trick But I don't want to sent commands for each device to retrieve data. Is there a way to retrieve specific values from the all devices json table? I tried json.properties[51].value, because this device has the header 51 (see code here below), but that does not work. Anyone an idea how to get the desired value? Thx! Rik 51 => array ( 'id' => 172, 'name' => 'Temp Waskeuken', 'roomID' => 6, 'type' => 'com.fibaro.temperatureSensor', 'baseType' => 'com.fibaro.multilevelSensor', 'enabled' => true, 'visible' => true, 'isPlugin' => false, 'parentId' => 117, 'remoteGatewayId' => 0, 'viewXml' => false, 'configXml' => false, 'interfaces' => array ( 0 => 'battery', 1 => 'zwave', 2 => 'zwaveWakeup', ), 'properties' => array ( 'pollingTimeSec' => 0, 'wakeUpTime' => 7200, 'zwaveCompany' => 'Fibargroup', 'zwaveInfo' => '3,4,5', 'zwaveVersion' => '3.2', 'batteryLevel' => '77', 'batteryLowNotification' => 'true', 'configured' => true, 'dead' => 'false', 'defInterval' => '0', 'deviceControlType' => '0', 'deviceIcon' => '30', 'emailNotificationID' => '0', 'emailNotificationType' => '0', 'endPointId' => '0', 'liliOffCommand' => '', 'liliOnCommand' => '', 'log' => '', 'logTemp' => '', 'manufacturer' => '', 'markAsDead' => 'true', 'maxInterval' => '0', 'minInterval' => '0', 'model' => '', 'nodeId' => '2', 'offset' => '0.00', 'parametersTemplate' => '712', 'productInfo' => '1,15,8,1,16,1,3,2', 'pushNotificationID' => '0', 'pushNotificationType' => '0', 'remoteGatewayId' => '0', 'saveLogs' => 'true', 'serialNumber' => 'h\'0000000000069d6f', 'showFireAlarm' => 'true', 'showFreezeAlarm' => 'false', 'smsNotificationID' => '0', 'smsNotificationType' => '0', 'stepInterval' => '0', 'unit' => 'C', 'useTemplate' => 'true', 'userDescription' => '', 'value' => '22.30', ), 'actions' => array ( 'reconfigure' => 0, 'setInterval' => 1, ), 'created' => 1535543608, 'modified' => 1535543608, 'sortOrder' => 52, ), -

LUA: Extract XML(GET) - REPLACE TAG VALUE - UPLOAD (PUT)
Gianluca S. posted a question in Scenes and Interface
Good Morning Guys, I need to create a Virtual Device in order to enable/disable some functionality of my devices. Shortly in need to extract the XML, modify a tag value, re-upload the xml. I have understood that using "Net.FHttp" and GET/PUT command im able to RETRIEVE and PUT the XML.... Example: response,status,errorcode = device:GET('URL') Example: response,status,errorcode = device:PUT('URL',XML) But how the entire process can be writed in LUA? 1) How to store in a variable the entire XML extracted using teh GET command? 2) How to replace the xml tag parameter ? ex. from enable to disable 3) How to re-upload the modified XML? Thanks in advnace Regards Gianluca -
My Virtual Device (VD) get stuck after a while trying to decode json data. The error is: expected value but found t_end at character 1 Is there any solution to fix that? I've tried to add more seconds with fibaro:sleep but no results. Thanks for your help, Tomax
-
I need some help with json decoding. I'm succesfully got the data in HC2 from Rasspery/Pyton but I'm not able to decode that data in HC2. Any advice, please?! --starting LUA code here local smartmeter= Net.FHttp('192.168.1.10'); response = smartmeter:GET("/index.py") fibaro:debug('Answer: ' ..response) --this is the data response coming from Rasppery/Pyton: {"Amp": 13.29, "Volt": 98.01} if (tonumber(status)==200 and tonumber(errorCode)==0) and response~=nil then fibaro:debug('Decoding...') local harduino = json.decode(response) fibaro:debug('Decode: ', harduino) fibaro:debug('Or decode: ', harduino.Volt) else fibaro:debug('Not able to decode!') -- this is the executed code end --end LUA code here
-
Hi Look at this code below: Its just for understanding/testing purpouses/ With these lines of code I can extract the values... fibaro:debug(dTblZones.Living.StopAt) fibaro:debug(dTblZones.SlaapkamerKM.StopAt) ... but what if I want to extract them all one by one so Living.StopAt, SlaapkamerKM.StopAt, Dressing.StopAt, ......etc So I want to iterate over every main Key. Any help would be great thx. TblZones = { Living = { Temp = 22, SetTemp = 23, Demand = 0, StopAt = 10000.345, Predict = 1, PredictInterv = 1000 }, SlaapkamerKM = { Temp = 19, SetTemp = 18, Demand = 1, StopAt = 1044444.345, Predict = 0, PredictInterv = 1000123 }, Dressing = { Temp = 19, SetTemp = 18, Demand = 1, StopAt = 1044444.345, Predict = 0, PredictInterv = 1000123 }, SlaapkamerH = { Temp = 19, SetTemp = 18, Demand = 1, StopAt = 1044444.345, Predict = 0, PredictInterv = 1000123 }, Nachthal = { Temp = 19, SetTemp = 18, Demand = 1, StopAt = 1044444.345, Predict = 0, PredictInterv = 1000123 }, Sas = { Temp = 19, SetTemp = 18, Demand = 1, StopAt = 1044444.345, Predict = 0, PredictInterv = 1000123 }, Badkamer = { Temp = 19, SetTemp = 18, Demand = 1, StopAt = 1044444.345, Predict = 0, PredictInterv = 1000123 }, Keuken = { Temp = 25, SetTemp = 19.5, Demand = 1, StopAt = 244444.345, Predict = 1, PredictInterv = 1080123 }, } jTblZones = json.encode(TblZones) dTblZones = json.decode(jTblZones) fibaro:debug(dTblZones.Living.StopAt) fibaro:debug(dTblZones.SlaapkamerKM.StopAt)
-
Hi I'm having a little hard time for whatever reason on getting JSON string into local variables in a VD. The JSON string is: [{"sensorTemp": "23.68", "sensorHumidity": "25.50", "sensorPressure": "1014.22", "sensorBattery": "3145"}] my code for this: jsonTable = json.decode(response) fibaro:debug("response: " .. response) local temperature = jsonTable.sensorTemp local humidity = response.sensorHumidity local pressure = response.sensorPressure local battery = response.sensorBattery I have also tried printing the key value pairs but I never got anything into the debug window... Any pointers appreciated! Thanks, Timo L
-
Trying to update a part of json encoded table in a global variable
AutoFrank posted a question in Home Center 2
Hi, I have implemented @cag014 HomeTable to track the device ID's of my HC2 the table structure is like this office = { Light=33,Temp=1186,Motion=1251,Lamp=720,rcSonos=1 }, Landing_Stairs = { stairsLight=92,landingLight=168,rcSonos=1 }, scene = { MainScene=614,AlarmControl=598,rebootHC2=593,goodMorning=463,goodNight=331,LeavingHome=483,welcomeHome=488,quietMorning=499,kidsToBed=490,plaroomTvOn=580,firstFloorMusicOn=579,firstFloorAllOff=578, hallSceneControl=519,StairsLight30=556,GateOpen5=526,GateOpenHold=361,GateOpenClose=425,DumpEventLog=565,PlayroomOff=617 }, vd = { AlarmManagement=881,TVPresets=1545,SonosTTS=1452,LightPresets=1534,HouseModeExt=1538,SonosPresets=1536,RackTempMngt=1453,MediaSourcePresets=1567,JhomeTable=1566,GateControl=1537,GarageControl=1559 }, I can update the whole table but was wondering if it was possible to update a specific vale such as "scene.AlarmControl" in the example I posted above. Any helpful code snippets gratefully accepted thanks -f -
Hi all, I want to send commands to my Rotel amplifier from my HC2, using lua in a virtual device. The service I want to connect to is a websockets service on an RPi2 connected to the Rotel over USB. It's the json-serial-port-server by John Lauer, https://github.com/chilipeppr/serial-port-json-server. I did find connections using tcpsockets in lua, but tcpsockets and websockets are different things. All other (http) connections don't work. If I get something like a connection from lua, an additional window opens on top of my browser connection to my HC2. This is not useful. Anyone any idea how to use websockets from lua? Thanks in advance, Evert
-

Global Variable changes after HTTP PUT Json, but scene not triggered
mvdkallen posted a question in Home Center 2
Dear Fibaro team, In my HC2 I use many global variables which offer me full flexibility with this great controller :-> Lately I noticed that if you change a global variable on HC2 through a HTTP command then the global variable on HC2 will change, but Scenes that are dependent of this global variable change (.. trigger) are not being executed. For testing purpose I then created a new scene within HC2 which changes the same global variable, and now I notice that the other Scenes (.. that are dependent of this global variable change by trigger) are being executed. So it looks like it only works when the job is executed from within the box, and not from external. Is it normal that it doesn't work this way, or is it maybe a minor SW bug? Or, am I doing something wrong here? Thanks for your valuable support. Best regards, Mark van der Kallen