
Welcome to Smart Home Forum by FIBARO
Dear Guest,
as you can notice parts of Smart Home Forum by FIBARO is not available for you. You have to register in order to view all content and post in our community. Don't worry! Registration is a simple free process that requires minimal information for you to sign up. Become a part of of Smart Home Forum by FIBARO by creating an account.
As a member you can:
- Start new topics and reply to others
- Follow topics and users to get email updates
- Get your own profile page and make new friends
- Send personal messages
- ... and learn a lot about our system!
Regards,
Smart Home Forum by FIBARO Team


Virtual Devices
The category contains virtual devices submitted by users.
Downloading and submission terms have to be accepted.
Types of files accepted: LUA, VFIB, ZIP, TAR, RAR, JSON.
Virtual devices have to be described properly, screen shots are optional.
Support topics are created automatically here Virtual devices
Report topics and files that are no longer supported by authors.
All the files submitted have to be approved by administrators.
86 files
-
Airly Status - Air Quality Sensor based on Airly.eu (API 2.0)
By Guest macjoker
Device features
Periodic reports on air quality for a defined location.
Be warned about the smog conditions at your place instantly.
Advantages for everyone
Automatic status update. Custom interval value for update queries. Manual update is also available (via button). May use "interpolation mode" (enabled by default in Lua scene). Airly gives you an option to calculate estimated values for any location near their stations, to see more then just what is exactly measured by the station. You may select the language used for Airly messages. Polish and English are supported. Colors to visualize Smog description. This will work on PC only. The mobile app does not interpret HTML tags. Icon color is changing according to air quality measured. The colors are in correspondence with Airly recommendations. One of three different air quality indexes from Airly might be selected. Airly supports: "AIRLY_CAQI", "CAQI" and "PIJP". Each may have different levels, descriptions, and pieces of advice. Customizable location for reports. The location might be read automatically from your Home Center box or it might be set as a fixed one. Data retrieved from Airly are stored in a global variable. The variable might be used to trigger another scene.
Advantages for geeks
Using the newest API 2.0. Missing pieces of data from Airly are properly detected and do not stop the device from working. No label "flickering" ("50%" → "missing data" → "52%", e.g.) on data updates. Changes on any update are reported once. Clear information about the license (MIT). Make any changes you want, distribute, sell or whatever. Just include my name and the copywrite information. Easy to change labels content, data grouping within labels, etc. (data selectors within one config variable labelConfig). Source code easy to maintain and develop: rich debug information; separation of acquisition, extraction and data presentation, etc. Installation
Import the virtual device and create a new Lua scene with the code provided in the file. Add device icons and update their IDs in the virtual device main loop. Replace 'xxx...x' with the key you can get from Airly free of charge. Start the Lua scene manually (just for the first time). (optional) Customize: update interval, display language, labels content and many more (see details below). Configuration
Read comments in Lua scene and VD main loop.
Each configuration parameter is described there in details.
Zip file content
Virtual device: "Airly Status". Lua scene for grabbing data from Airly: "Airly Status scraper". Nine device icons to visualize air quality. Screenshots. FAQ
How can I get Airly API key?
Get one from developer.airly.eu. When you register an account within that website you will get your free API key.
How to upload/add device icons?
Open (any) virtual device configuration page. Press "Change icon". Press "Select file" (in the bottom), choose file, then confirm with "Add" button (even lower). Please make sure to execute step 1 properly. Icons in Home Center are divided into several categories. If your icons are placed not in the "virtual device collection", they will not be visible for the device.
How can I get an icon ID?
Open (any) virtual device configuration page. Press "Change icon". Right click on the icon you want to get an ID. Select "Open graphics in a new tab". The address should be like: "http://hc2/fibaro/n_vicons/User1003.png". 1003 is your ID in this case. How can I change the language for all displayed information?
Change config variable in Lua scene. Only "pl" and "en" messages are supported by Airly API. Update display name of each label. Update labels content (if needed) by editing labelConfig variable in VD main loop. There is the same string formatting as for the Lua print function.210 downloads
-
Konnected Alarm Panel
By Vangelis
Hello Everyone,
I 've tried Konnected alarm panel in parallel with my old alarm system, and it is working great. (Konnected)
My task that was assigned to myself was to integrate Konnected directly to my HC2.
So with a little LUA magic we have ready the Konnected Virtual Device for HC2.
You can find the Virtual Device Repository here.
Enjoy!
84 downloads
-
![More information about "[VD] BBQ Guru CyberQ WIFI"](https://forum.fibaro.com/uploads/monthly_2019_01/How-CyberQ-Works.thumb.png.ca5021bf7c291fe8ff179b100c621812.png)
[VD] BBQ Guru CyberQ WIFI
By Barlow
Monitor:
Fan speed Temperature of the Pit and core temperatures of Food1, Food2 and Food 3 probes in Celsius or Fahrenheit. Status of each of the temperature sensors ("OK", "HIGH", "LOW", "DONE", "ERROR", "HOLD", "ALARM", "SHUTDOWN"). Status codes are also available as global variables for use in block scenes. Control:
1. Temperature setpoints for the Pit and Food1, Food2 and Food 3 cores.
2. Timer and timeout actions (none, sound alarm, hold pit at set temperature, shutdown fan; or any scene-based action you specify.
3. Ramp the pit temperature (cook and hold) from any selected food item.
Installation and configuration:
Install the CyberQ WIFI VD, which you can download below. I will also post it on Fibaro Marketplace.
Enter the CyberQ WIFI IP address and port number in the advanced settings. Scroll down to the main loop section to set the authentication details.
14 downloads
-
Honeywell_Lyric_API
By Guest
This is an API for Honeywell Lyric T6. The idea is based on Remco B's version for the Honeywell Evo.
Using a virtual device with API scene, you can change setpoint and set away, holiday and schedule modes. Because it is a virtual device, you can call these buttons from any other scene. For example I use it while tracking my phones location, this creates options for GeofenceMode in combination with ScheduleMode
You will need a webserver (or access to a webserver) for the initial setup. This is to retrieve some keys from Honeywell. As soon as you have the keys, you do not need the webserver anymore. For further details please follow instruction in the pdf and use at own risk.
release 1.1 added checkCertificate option to bypass https check.
Installation instructions Honeywell Lyric API.pdf
Fibaro_Lyric_API.lua
112 downloads
-
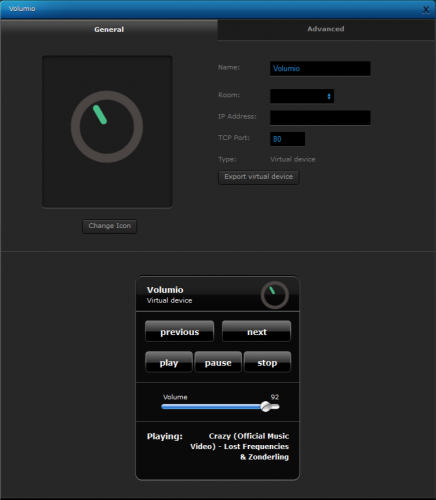
Volumio_VD_1.0
By KevCo
Here's a virtual device I created to control my Volumio Music Player, which is running on a Rasbperry Pi.
Volumio comes with an own built-in ReST API that I use for the this virtual device.
You must have your Volumio connected to your local area network (the same as Fibaro HC).
After importing the virtual device, set the IP address and the port (default port 80) to point at your Volumio.
Offical site of Volumio: www.volumio.org
Volumio ReST API documentation: www.volumio.github.io/docs/API/REST_API.html
Note: Tested on Fibaro HC2 4.180
Enjoy.
118 downloads
- virtual device
- volumio
- (and 1 more)
(0 reviews)0 comments
Updated
-

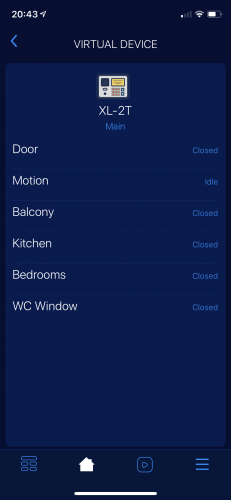
Co_otwarte.vfib
By tefil
Co_otwarte.vfib
Polaczenie dwóch vd z następujące za zgodą autora
Urządzenie pokazuje stan otwarcia/zamknięcia drzwi i okien oraz stan czujników ruchu
136 downloads
(0 reviews)0 comments
Submitted
-

TIMER_RTV.vfib
By tefil
TIMER_RTV.vfib
Pozwala określić czas wyłączenia dane urządzenia, pokazuje jego aktualny stan, możliwość szybkiego wyłączenia, powiadomienie push na telefon, o zrealizowanym zadaniu.
136 downloads
-

Jakość Powietrza w/g Airly (API v2)
By mikloszx
Urządzenie wymaga podania tokena uzyskanego od airly: https://airly.eu/pl/api/ . Wystarczy się zarejestrować by bezpłatnie uzyskać ten kod. Nalezy go wpisac we wskazane miejsce w kodzie pętli głównej VM.
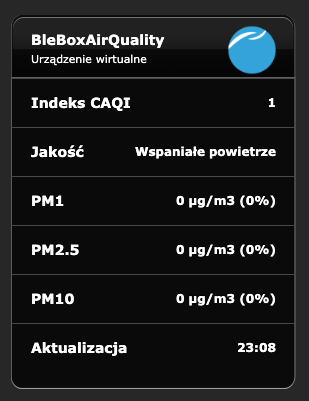
Urządzenie znajduje automatycznie najbliższy czujnik i wyświetla dane jak w załączonym zrzucie ekranu.
Ma możliwość ustawienia zmiennej globalnej o nazwie definiowanej w konfiguracji co daje możliwość na przyklad sterowania oczyszczaczem powietrza.
W konfiguracji znajdziecie tez możliwość zdefiniowania warunków wysyłania informacji PUSH na smartfona.
W załączonym pliku oprócz kodu urządzenia znajduje się komplet ikon, które należy najpierw dodać do centralki, a potem w kodzie urządzenia wpisać odpowiednie numerki. Te numery są indywidualne i niekoniecznie takie w każdej centrali. Żeby zobaczyć jaki numer odpowiada jakiej ikonie, w okienku zmiany ikony należy nacisnąć na ikonie prawy klawisz myszy i wybrać "otwórz grafikę w nowej karcie". Żądany numer zobaczymy w adresie strony. Jako główną ikonę przypisujemy tą szarą z numerkiem 0.
89 downloads
(0 reviews)0 comments
Submitted
-
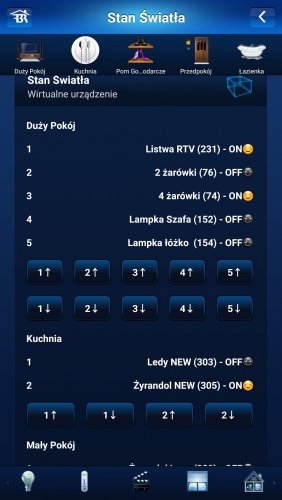
Stan_ON_OFF.vfib
By tefil
Stan_ON_OFF.vfib
VD pozwala na sprawdzenie stanu urządzeń ON/OFF z możliwością szybkiego ich włączania/wyłączenia
179 downloads
-

Stan urządzeń - wirtualka
By Kamol_
Bardzo proste urządzenie wirtualne pokazujące stan poszczególnych elementów w centralce. Urządzenie bazuje na:
local selfId = fibaro:getSelfId()
if fibaro:getValue(xxxx, 'value') == '1' then
fibaro:call(selfId, 'setProperty', 'ui.label1.value', 'ON' )
Długo szukałem i nie znalazłem nigdzie dlatego wrzucam dla początkujących.
Niebędne do wykorzystania w kumunikatach głosowych lub do zobrazowania stanu w innych aplikacjach np. demopad
132 downloads
(0 reviews)0 comments
Submitted
-

Helios KWL Modbus Integration
By hanswurst
Helios-KWL has a Modbussupport. I found an implementation in C for Loxone (https://www.loxwiki.eu/pages/viewpage.action?pageId=1639038)
and created a VirtualDevice for HC2,
106 downloads
-
VD: MQTT bridge
By 10der
0) Create HTTP -> MQTT bridge. (skip if you already have)
$ sudo apt-get install mosquitto mosquitto-clients unzip attached mqtt_php.zip to www root folder, for example, /var/www/html/fibaro/mqtt.php call from browser http://192.168.1.28/fibaro/mqtt.php where "192.168.1.28" www server where you unzip attached mqtt_php.zip and "fibaro/mqtt.php" path in your www server here is valid response 1) import attached VD to HC2 MQTT_bridge.vfib
change VD params
change url path for HTTP bridge in main loop
2) create simple HTML test page
<!DOCTYPE html> <html> <head> <title></title> <meta charset="utf-8" /> </head> <body> <div id="log"></div> <script src="https://code.jquery.com/jquery-3.3.1.min.js"></script> <script src="https://cdnjs.cloudflare.com/ajax/libs/paho-mqtt/1.0.1/mqttws31.min.js" type="text/javascript"></script> <script type="text/javascript"> (function () { if (!console) { console = {}; } var old = console.log; var logger = document.getElementById('log'); console.log = function (message) { if (typeof message == 'object') { logger.innerHTML += (JSON && JSON.stringify ? JSON.stringify(message) : String(message)) + '<br />'; } else { logger.innerHTML += message + '<br />'; } } })(); // Create a client instance client = new Paho.MQTT.Client("192.168.1.28", 1884, "clientId"); // set callback handlers client.onConnectionLost = onConnectionLost; client.onMessageArrived = onMessageArrived; // connect the client client.connect({ onSuccess: onConnect }); // called when the client connects function onConnect() { // Once a connection has been made, make a subscription and send a message. console.log("onConnect"); // Topic: home/roomID/deviceType/deviceID //client.subscribe("home/#"); // all events from all home //client.subscribe("home/4/#"); // all events from 4 room //client.subscribe("home/4/com.fibaro.binarySwitch/#"); // only binarySwitch events from 4 room client.subscribe("home/+/com.fibaro.binarySwitch/#"); // only binarySwitch events from all home } // called when the client loses its connection function onConnectionLost(responseObject) { if (responseObject.errorCode !== 0) { console.log("onConnectionLost:" + responseObject.errorMessage); } } // called when a message arrives function onMessageArrived(message) { console.log("Message Arrived: " + message.payloadString); console.log("Topic: " + message.destinationName); } </script> </body> </html>
please change 192.168.1.28 in code on IP address HTTP MQTT bridge
locate on this test page
you should get page like
Good luck!
159 downloads
-
(0 reviews)
0 comments
Submitted
-
[VD + SCENE + PHP] APC UPS Monitor and auto shutdown of HC2
By gucio1234
PREFACE :
I noticed in the Forum that there is some interest for link APC UPS with Fibaro HC2 and have auto shutdown of HC2 if there is no electricity.
I have spent few evenings and I am happy to share what I did.
I want to thank @Sankotronic for the permission to use part of his code and @Lambik whose icons of UPS I used as a base to create icons representing various status of the UPS device.
Also I have used a bit of the code of @drboss .
INTRODUCTION :
The proposed solution reads the status of the UPS device using SNMP protocol and based on this it triggers appropriate actions.
The status of UPS is represented with the various icons of the VD :
Email messages and pop-up notifications are sent whenever :
there is electricity outage the battery level is critical and HC2 shutdown is triggered the power is restored The status is updated whenever the REFRESH button of VD is pressed.
For constant monitoring I have used @Sankotronic’s scene „Main Timer“ which presses the button every minute.
WHAT WE NEED :
1.
On HC2 - we need :
- VD for UPS monitoring and triggering actions
- Scene to trigger Shutdown of HC2.
2.
We need web server with PHP Module running on something.
It can be RaspberryPI, Windows PC or anything.
In my case I have it on iMac and I followed this guide :
https://medium.com/@JohnFoderaro/how-to-set-up-apache-in-macos-sierra-10-12-bca5a5dfffba
I skipped "Configuring Virtual Hosts" as that was not working for me.
As my web server is accessible only by my devices, I did not care.
Important is that apache web server is managing PHP scripts .
3.
SNMP command line tool has to be present on the server (it is present by default on OS X)
SNMP tool is present by default with OS X.
Here are links describing how to install it for Windows - different resources (not tested) :
https://www.ipconvertertools.com/snmpwalkinstructions
https://syslogwatcher.com/cmd-tools/snmp-walk/
4.
APC UPS with network management card.
The presented solution was implemented and tested with APC Smart UPS 3000 with Network Management Card AP9631
IMPLEMENTATION :
1.
Implement web server with PHP module running.
Activate SNMP command line tool on your server (if not already there).
2.
Copy APC.php script to the web server.
You have to edit the file with any text editor to provide username and password for your HC2, IPs of HC2 and UPS.
If username or password contain `@` it has to be replaced with `%40‘
Eg. If Your username is `user@` You have to enter `user%40`
Note: You have to make a note of the path to the script.
Here is a code :
3.
Create new scene in HC2 for auto shutdown.
IMPORTANT: You have to pay attention NOT TO CHECK MARK that the scene is starting while HC2 starts.
The HC2 would restart itself after boot.
If you do so you have to do restore to factory state and load last working backup.
4.
Import the VD from the attached .vfib file to your HC2.
Import all provided icons for graphical representation of the UPS status.
There is a bunch of global variables needed, but they will be created automatically by the VD – so you do not have to worry. All of these global variables starts with `UPS_` .
Edit the `USER SETTINGS` section of the LUA code for the REFRESH button :
The icon for the REFRESH button should be `IconTimer`.
As the parameters for the VD:
- enter the IP address of web server with PHP script
- enter 80 as a port number
That is all.
I hope those how are interested will be able to implement what I did.
132 downloads
(1 review)0 comments
Updated
-

Eth008_with_status.vfib
By Vinisz
This is an enhanced version VD fot the ETH008 relay board.
This VD does not only control the board but it also reports back the relay status read via the /status.xml web request.
This VD also makes a very simple example of how to get XML data from any other device and put it into variables.
Examples of usage:
Controlling 24V AC volts solenoids for watering the garden Controlling motorized heating valves with the relay board. Controlling lights with the relay board.
All you need to do is put in the ip address and the port (80) of the ETH008 board in the VD and make sure "http authentication" is turned of in the ETH008 settings.
139 downloads
-

LookO2 - Air Quality Sensor
By wronski3
———————————————————————————————————————————————————————
Current Version: 1.15
Fibaro Marketplace: https://marketplace.fibaro.com/items/looko2-air-quality-sensor
———————————————————————————————————————————————————————
Witajcie,
Jakiś czas temu poruszałem tu temat pomiaru Czystości Powietrza (szczególnie PM2.5) we własnym mieszkaniu lub na zewnątrz z określonej okolicy.
W założeniu chodziło o to aby Fibaro potrafiło pobierać dane z własnego czujnika a następnie wyświetlać je i wykorzystywać dalej w działaniu (np. uruchomienie oczyszczacza)
Nie znalazłem gotowego rozwiązania, a z dostępnych (w racjonalnej cenie) najsensowniejsze wydawało się zastosowanie własnego czujnika Looko2 - z obserwacji, dane wyglądają na dość dokładne,
stosują dobre czujniki i udostępniają API (tu wymagany token).
Jak dla mnie idealnie było by, gdyby, przynajmniej ostatnia średnia odczytu i podstawowe dane były dostępne bezpośrednio przez API Web interfejsu urządzenia, w lokalnym LANie
- ale podobno nie można mieć wszystkiego więc póki co zadowalam się API w chmurze
Tutaj podziękowania w stronę zespołu LOOKO2, który wykazał się otwartością na moje pytania dotyczące danych z czujnika a nawet dodał do API parametry, których pierwotnie tam nie było.
Wirtualka została przekazana również do nich, więc być może pojawi się także na stronie projektu.
Po cichu liczę, że na jej bazie FIBARO może przygotuje kiedyś jakiś plugin, być może ze statystyką danych na wykresach centralki
Jeśli chodzi o samo urządzenie to wygląda następująco:
Całość tzn. plik wirtualki, ikony, oraz opis parametrów znajdują się w dołączonym zipie.
Po imporcie urządzenia, należy dodać niezbędne ikony oraz dodać ich ID do configa wirtualki.
Ponadto należy podać tam ID interesującego nas czujnika - ja nie mam jeszcze własnego więc
pobieram dane z dostępnego w pobliżu, oraz token - można go uzyskać mailowo od suportu Looko2.
W celu działania PUSHy oraz dalszego wykorzystania jakości, należy dodać zmienną globalną
o nazwie określonej w konfiguracji. (W przypadku wielu urządzeń / czujników - dla każdego tworzymy nową zmienną), oraz określić ID urządzeń mobilnych/
Wszystkie parametry opisane są w dołączonym pliku oraz komentarzach w konfiguracji samego urządzenia.
Cała konfiguracja znajduje się w pierwszej części kodu urządzenia i nie powinna sprawiać żadnych problemów.
Czas odświeżania danych z API również można modyfikować w konfiguracji - wstępnie zdefiniowałem go na 15 minut.
W mojej ocenie jest to zupełnie wystarczające a częstsze odświeżanie danych nie ma sensu, bo prezentowane w API dane
to średnia ostatnich odczytów - co czyni odczyt bardziej poglądowym niż odczyt chwilowy.
Całość kodu znajduje się w pętli głównej, podczas testowania urządzenia (pewnie około 2 miesiące) zdarzyły mi się sporadyczne
zawieszenia - może 2 - dlatego nie zdecydowałem się na pakowanie kodu pod przycisk i wyzwalanie go sceną.
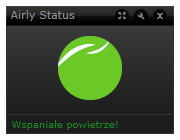
W przypadku interfejsu webowego urządzenie prezentuje jakość poprzez ikonę oraz nr indeksu jakości w dolnej belce pod ikoną urządzenia.
Po wyświetleniu szczegółów, prezentowane są dokładne dane o aktualnej jakości powietrza. Nazwa urządzenia oraz lokalizacja IN / OUT prezentowana w szczegółach urządzenia, pobierana jest z API czujnika,
natomiast pomieszczenie odzwierciedla umiejscowienie czujnika w strukturze pomieszczeń centralki FIBARO.
Procentowe zanieczyszczenie wyliczane jest w oparciu o dostępne normy (z wyjątkiem PM1 - tu nie znalazłem danych więc jako normę przyjąłem 20 µg/m3 - oczywiście można to zmienić w konfiguracji)
Do zmiennej globalnej zapisywana jest informacja o ogólnej jakości powietrza z ustawionego czujnika (0 najlepsza, 1 dobra, itd.) - zakres zgodny z dostępnymi normami i dostępny na stronie czujników
W przypadku urządzeń mobilnych występują drobne problemy z wyświetlaniem m.in z przejściem do nowej linii - szerzej problem opisałem tutaj:
Ogólnie po wprowadzeniu prawidłowego tokenu, wszystko powinno działać bez większych problemów.
Bez podania tokenu urządzenie będzie wyświetlało informacje o błędzie z tym związaną.
22 downloads
(0 reviews)0 comments
Submitted
-
IONIZING RADIATION LEVEL MONITOR
By gucio1234
This Virtual Device reads the information on the level of ionized
radiation from the http://radioactiveathome.org/map/ .
There are sensors distributed all over Europe, some in US,
Japan and other countries.
For the VD to be functional the following has to be adjusted:
The global variable 'temprad" has to be created
Icon of the slider has to be updated as ' yellow radiation with timer'
The code has to be adjusted in USER CONFIG Section (Values marked with ENTER in comments).
ThingSpeak API Key if one wants to push data to ThingSpeak
IDs of the Icons (green, yellow, orange, red, yellow with timer)
Coordiantes of the locaton of the sensor
How to know where are the sensors located and how to get their
coordinates :
The map of the sensors is at: http://radioactiveathome.org/map/
Click on the dot of the sensor you want to know the location ID
You will see the popup with the information of the sensor.
Note 'Details Sensor' number
You need to see the source of the http://radioactiveathome.org/map/
Enter 'view-source:http://radioactiveathome.org/map/'
into the browser (eg. Chrome)
Press Ctrl-F to find the sensor number you noted earlier
Next to the number found you will see the coordinates
Enter coordinates into the code below.
What is new in version 0.67:
- Multilangual support
What is new in version 1.67:
- The VD is not anymore auto-refreshed
with the time interval set by slider, but
it is refreshed by pressing a button.
This is to have it triggered by Main Timer Scene
What is new in version 1.68:
- German translation added (by gobbli of forum.fibaro.com)
What is new in version 1.69:
- Dutch and Slovak translation added (by Bodyart of forum.fibaro.com)
- Italian and Croatian translation added (by Sankotronic of forum.fibaro.com)
Credits to:
andre from forum.lic.pl - author of the idea
rusconidesigner from forum.fibaro.com - author of the multicolor radiation icons
gucio1234 from forum.fibaro.com & forum.lic.pl - who make final version of the VD
Sankotronic from forum.fibaro.com - who make some changes + Croatian and Italian translation
jompa68 from forum.fibaro.com - from whom I got multilangual concept
gobbli from forum.fibaro.com - author of Deutsch translation
Bodyart from forum.fibaro.com - author of Dutch and Slovak translation
38 downloads
(0 reviews)0 comments
Updated
-
[VD + APP + PHP] Text To Speach (TTS) solution for HC2 and Apple Mac (OS X) - version October 2017
By gucio1234
Text To Speach (TTS) solution for HC2 and Apple Mac (OS X) - version October 2017:
PREFACE :
I am happy to present my second approach for TTS (Text To Speech) and multi room audio for Fibaro HC2 and Apple OS X computer.
I call it “second approach” rather then second version because it uses different mechanism to control audio of the computer, however the goal remain the same.
That is also the reason why I decided to publish it in the new thread.
I hope that this guide let you setup TTS on your Fibaro HC2 and Mac computers.
INTRODUCTION :
I have noticed that wide used solution for TTS and multiroom is to use Sonos speakers (probably because of the Fibaro plugin available) and VoiceRSS (http://www.voicerss.org/).
My solution is different. It uses the text synthesizer (TTS) which we have already implemented in our computers and which can speak in variety of languages – also those not supported by VoiceRSS. To change text into speech I used “SAY” command of OS X. The other advantage is that we are independent on internet connection and there are no charges for TTS processing. It has also multiroom solution. You can have installed all over your place a number of speakers. The volume of each speaker can be individually adjusted from HC2 (Volume range from 0 to 100 %) so it is possible to select in which room/rooms you hear the voice announcement.
If you use the iTunes VD it is also possible to distribute music.
Integration of iTunes with and HC2 was discussed and published here :
The supported speakers/devices/protocols are as for now :
- Apple AirPlay
- Google Chromcast
- Bluetooth
- Windows computers (with installed app to become AirPlay compatible)
The supported languages/voices of OS X v. 10.12.2 (macOS Sierra) are listed in Paragraph 2 below.
WHAT WE NEED :
- Fibaro HC2
- Apple Mac computer
- Audio Mixer VD installed on HC2
- Some LUA experience to fine tune VD on HC2 and have your user defined TTS messages in your scenes
- Airfoil by Rouge Amoeba application installed on Mac - for TTS it is OK to use free demo version
- Fibaro TTS Bridge application for OS X by Marcin S. Milewski (gucio1234) installed on Mac
- Speakers/audio receivers (any from the list of compatible devices) :
. Apple AirPlay
. Google Chromcast
. Mac , Windows or Linux computer with Airfoil Satellite installed
( see https://rogueamoeba.com/airfoil/ )
. iOS or Android device with Airfoil Speakers installed
(if one wants to have TTS on mobile device)
. Bluetooth
The presented solution was tested with the following software versions / hardware :
- Fibaro HC 2 firmware 4.140
- Airfoil for Mac v. 5.5.1
- Airfoil Sattelite for Windows v.5.1.6
- OS X v. 10.12.2 (macOS Sierra) and OS X v. 10.13 (macOS High Sierra)
- Apple AirPort versions A1088, A1264, A1392
- JBL Flip 3 Bluetooth Speaker
- Fibaro TTS Bridge v. 0.1
- Fibaro HC 2 v. 4.110
It was not tested with Google Chromcast (as I do not have any) but this is supported by Airfoil.
IMPLEMENTATION :
Please read the whole instruction carefully before you start.
1.
Define the global variable “PAMessage” in your HC2 (top part of the Variables’ Panel):
This variable will store the text you want to convert to speech, whatever is there, the system will speak when you press TTS button of the VD
2.
Test and select desired language/voice for your TTS.
To change text into speech we used “SAY” command of OS X.
Open “Terminal “ application on your Mac.
Type ‘SAY –v ?’ to see the list of available voices/languages
Type ‘SAY –v <name of the voice>’ to select the voice of your preference
Type ‘SAY “THIS IS A TEST MESSGE IN MY LANGUAGE” ’ to test your selected voice
More details on this can be found here: https://developer.apple.com/legacy/library/documentation/Darwin/Reference/ManPages/man1/say.1.html
Here is the result of
‘SAY –v ?’ :
3.
Install “Airfoil” for Mac downloaded from https://rogueamoeba.com/airfoil/
NOTE: The free demo version lets to transmit audio up to 10 minutes long (which is more than enough for TTS). After that time the noise distortion will be added by the application.
If one wants to use Airfoil for transmission of music it is recommended to purchase a license.
4.
Setup web server with PHP Module running on our Mac computer.
In my case I have it on iMac and I followed this guide :
https://medium.com/@JohnFoderaro/how-to-set-up-apache-in-macos-sierra-10-12-bca5a5dfffba
I skipped "Configuring Virtual Hosts" as that was not working for me.
As my web server is accessible only by my devices, I did not care.
Important is that apache web server is managing PHP scripts .
NOTE: If you already implemented iTunes VD, you should have already running web server with PHP module installed.
5.
Install Audio Mixer VD on your HC 2.
Define parameters of this VD :
Set IP address of your Apple Mac computer
Set port number as 7000. The communication between HC2 and Mac will be on port 7000 and this is hard coded in “Fibaro TTS Bridge v..1” application.
Define in VD as many audio mixer sliders as you have audio devices to be linked with your multi room audio system.
In the VD attached FOR EACH SLIDER you have to define the PATH for your PHP script “airfoil.php”. Also for each slider the local variable ‘pokoj’ has to be defined as substring of the ID of the speakers defined in Airfoil app on Mac.
(see Paragraph 6 “How to know the IDs of your speakers defined for AirFoil”)
Example:
In my case I have my airfoil.php script placed as :
MacintoshHD/Users/username/Sites/airfoilremote/airfoil.php
and my path defined in the VD is :
Note : “LocalSpeaker” is the speaker connected to your Mac.
Example:
In my case I have the following local variables for each slider :
local pokoj = “WIATROLAP"
local pokoj = “LocalSpeaker"
local pokoj = "59-a7”
local pokoj = "POKOJ-3”
local pokoj = “JADALNIA"
local pokoj = “AppleTV"
local pokoj = “ANTRESOLA"
local pokoj = “MIODARNIA"
There are three buttons on Audio Mixer VD :
“Weather Outside” – to send current weather information to TTS system. In my VD it reads information from Netatmo VD.
This should be adjusted to user’s preferences.
User may adjust it to her/his needs at the end when all the rest is up and running.
NOTE: In the code of VD attached it reads the variable from my Netatmo device ID.
It will not work for you without fine tuning.
“Weekday / Time” – to send TTS with the text taken from HC2 system variables
“TTS” – to send TTS with the text taken from global variable “PAMessage”
6.
Place the „airfoil.php” file into you OS X computer. The path for it has to match whatever is defined as the path in your VD
(see example in paragraph 3.)
7.
How to know the IDs of your speakers defined for AirFoil
You have to use Apple Script Editor which is application delivered along with your OS X system. no need to purchase or install anything.
Just use your search bar of OS X system.
You have to write
into Apple Script Editor.
Here is the screen shot of the OS X script editor which shows you the complete IDs of your Airfoil Speakers.
You can see that part of each ID (after @) matches my local variables for each slider of VD.
8.
Setup Airplay/Chromecast/Bluetoth devices with your Mac
9.
If you want to have other computers to act as clients with speakers install Airfoil Sattelite for each of them. The app is to be downloaded from https://rogueamoeba.com/airfoil/
10.
If you want to have mobile devices to act as clients with speakers install Airfoil Speakers for each of them. The info on these apps can be found on https://rogueamoeba.com/airfoil/
11.
Copy the “Fibaro Text to Speech Bridge v.0.1” application to your Mac computer.
Attached is the zipped file. You have to unzip it to have .app file.
NOTE:
If it happens that HC2 needs to be restarted, it is required to restart “Fibaro Text To Speech Bridge v.0.1”also (Exit and Run).
Restart of “Fibaro Text To Speech Bridge v.0.1” is to be done after HC2 is back operational.
FILES TO DOWNLOAD :
Application for OS X (zipped) -> Fibaro_Text-To-Speech_Bridge_0.1.app.zip
VD for HC2 ------------------------> AUDIO_MIXER_+_TTS.vfib
ICON for VD of HC2 ------------>
AIRFOIL.PHP (zipped) ------>
airfoil.php.zip
39 downloads
(0 reviews)0 comments
Updated
-
[VD + APP] Text To Speach (TTS) solution for HC2 and Apple Mac (OS X) - version February 2017
By gucio1234
Text To Speach (TTS) solution for HC2 and Apple Mac (OS X) :
PREFACE :
It took me two months of tests to make this solution at present stage and I had to learn a little Python and Applescript.
I am aware that lots of details can be improved. However all programmers knows there are no software without bugs and there is never final version. The attached OS X app is fully functional and it is called “Fibaro Airfoil Bridge v.0.1”.
I had no experience with OS X programming. This is the very first OS X app I wrote.
INTRODUCTION :
I have noticed that wide used solution for TTS and multiroom is to use Sonos speakers (probably because of the Fibaro plugin available) and VoiceRSS (http://www.voicerss.org/).
My solution is different. It uses the text synthesizer (TTS) which we have already implemented in our computers and which can speak in variety of languages – also those not supported by VoiceRSS. To change text into speech I used “SAY” command of OS X. The other advantage is that we are independent on internet connection and there are no charges for TTS processing. It has also multiroom solution. You can have installed all over your place a number of speakers. The volume of each speaker can be individually adjusted from HC2 (Volume range from 0 to 100 %) so it is possible to select in which room/rooms you hear the voice announcement.
The supported speakers/devices/protocols are as for now :
- Apple AirPlay
- Google Chromcast
- Bluetooth
- Windows computers (with installed app to become AirPlay compatible)
The supported languages/voices of OS X v. 10.12.2 (macOS Sierra) :
PLANS FOR FUTURE :
Fine tune the app and improve GUI of Fibaro Airfoil Bridge application.
Enhance the functionality with multiroom audio with distribution music from internet radio and iTunes.
This is an open project and I count on your constructive comments.
If there is anybody who would like to be involved in future enhancements please let me know in private message.
WHAT WE NEED :
- Fibaro HC2
- Apple Mac computer
- Audio Mixer VD installed on HC2
- Some LUA experience to fine tune VD on HC2 and have your user defined TTS messages in your scenes
- Airfoil by Rouge Amoeba application installed on Mac (for TTS it is OK to use free demo version)
- Fibaro Airfoil Bridge by Marcin S. Milewski (gucio1234) installed on Mac
- Speakers/audio receivers (any from the list of compatible devices) :
o Apple AirPlay
o Google Chromcast
o Mac , Windows or Linux computer with Airfoil Satellite installed
o iOS or Android device with Airfoil Speakers installed (if one wants to have TTS on mobile device)
o Bluetooth
The presented solution was tested with the following software versions / hardware :
- Airfoil for Mac v. 5.5.1
- Airfoil Sattelite for Windows v.5.1.6
- OS X v. 10.12.2 (macOS Sierra)
- Apple AirPort versions A1088, A1264, A1392
- JBL Flip 3 Bluetooth Speaker
- Fibaro Airfoil Bridge v. 0.1
- Fibaro HC 2 v. 4.110
It was not tested with Google Chromcast (as I do not have any) but this is supported by Airfoil.
IMPLEMENTATION :
Please read the whole instruction carefully before you start.
1.
Define the global variables in your HC2 (top part of the Variables’ Panel):
“PAMessage” - This variable will store the text you want to convert to speech.
“AudioMixer” – This variable will store the audio mixer settings for the devices.
2.
Install Audio Mixer VD on your HC 2.
Define parameters of this VD :
Set IP address of your Apple Mac computer
Set port number as 7000. The communication between HC2 and Mac will be on two ports: 7000 and 7001.
Define in VD as many audio mixer sliders as you have audio devices to be linked with your multi room audio system. Provide names for each slider corresponding to the devices/rooms you want to control. You may use your local language names, with spaces and local characters.
IMPORTANT:
Remember what is the order of your sliders. It is needed in next steps for proper link between HC2 and Mac.
The LUA code for each slider has to be same but it depends on the number of sliders one has defined. Here are examples :
If there are two sliders, LUA definition for each should be :
If there are four sliders, LUA definition for each should be :
Adjust the LUA code of each slider according to number of sliders there are in your VD.
There are four buttons on Audio Mixer VD (they can be adjusted for user’s preferences ):
“Test Message” – to send a test message to TTS system. In my VD the predefined test message is in Polish. It should be adjusted to your language.
“TTS” – to execute TTS with the text taken from global variable “PAMessage”
“Weather Outside” – to send present weather conditions to TTS system. In my case it is based on global weather variables received from Netatmo weather station. The message is in Polish. It should be adjusted to your local language and preferences.
“Send Data” – to send audio mixer settings from HC2 to Airfoil without processing any TTS
3.
Test and select desired language/voice for your TTS.
To change text into speech I used “SAY” command of OS X.
Open “Terminal “ application on your Mac.
Type ‘SAY –v ?’ to see the list of available voices/languages
Type ‘SAY –v <name of the voice>’ to select the voice of your preference
Type ‘SAY “THIS IS A TEST MESSGE IN MY LANGUAGE” ’ to test your selected voice
More details on this can be found here: https://developer.apple.com/legacy/library/documentation/Darwin/Reference/ManPages/man1/say.1.html
4.
Setup Airplay/Chromecast/Bluetoth devices with your Mac
5.
If you want to have other computers to act as clients with speakers install Airfoil Sattelite for each of them. The app is to be downloaded from https://rogueamoeba.com/airfoil/
6.
If you want to have mobile devices to act as clients with speakers install Airfoil Speakers for each of them. The info on these apps can be found on https://rogueamoeba.com/airfoil/
7.
Install “Airfoil” for Mac downloaded from https://rogueamoeba.com/airfoil/
NOTE: The free demo version lets to transmit audio up to 10 minutes long (which is more than enough for TTS). After that time the noise distortion will be added by the application.
If one wants to use Airfoil for transmission of music (which I hope will be introduced with future version of my solution) it is recommended to purchase a license.
IMPORTANT:
All the names of the audio devices configured with Airfoil HAVE TO HAVE names of the speakers without spaces and without any special/national characters. Rename the devices in Airfoil if it is needed.
8.
Copy the “Fibaro Airfoil Bridge v.0.1” application to your Mac computer. DO NOT RUN IT YET.
Attached is the zipped file. You have to unzip it to have .app file.
IMPORTANT:
Right click on “Fibaro Airfoil Bridge v.0.1” and select “Show Package Content”
Navigate to Contents -> Resources
Locate the file “SpeakersNAME.txt”
Edit the file “SpeakersNAME.txt”. Put names of your speakers each in the new line. They have to be same as names defined in Airfoil (paragraph 7.). The order of the speakers is EXACTLY SAME as order of the sliders of your HC 2 VD “Audio Mixer” (paragraph 2.) .
NOTE: The very first speaker has to be “LocalSpeaker” which is the default speaker of your Mac computer. This has to be defined even if you do not use the speaker of your Mac.
Here is an example of “SpeakersNAME.txt” file:
LocalSpeaker JADALNIA AppleTV PC-ANTRESOLA POKOJ-3 WIATROLAP MIODARNIA
9.
After the “SpeakersNAME.txt” is updated one can run “Fibaro Airfoil Bridge v.0.1” applicaton.
NOTE:
If it happens that HC2 needs to be restarted, it is required to restart “Fibaro Airfoil Bridge v.0.1”also (Exit and Run).
Restart of “Fibaro Airfoil Bridge v.0.1” is to be done after HC2 is back operational.
IMPORTANT:
This is known bug with 0.1 version. If you want to close the app use the EXIT button on the main window or the EXIT option of the second pull down menu.
If you close the app with red circle on top left corner of the application’s window or with the QUIT option from the first pull down menu the application is not closed completely. In this case you have to find its icon on the bottom bar of OS X, right click and force close it .
17 downloads
(0 reviews)0 comments
Updated
-
Keyboard
By seiq
1. The TCP Port setting is used to store the input timeout in seconds. Adjust as required.
2. Change the myGlobal button and code to suit the name of the global you wish to set.
38 downloads
- virtual device
- keyboard
- (and 2 more)
(0 reviews)0 comments
Submitted
-
Daikin SkyFi
By seiq
Virtual device for control of Daikin air conditioners with the SKYFi addon. (untested)
128 downloads
- air conditioning
- daikin
- (and 3 more)
(0 reviews)0 comments
Submitted
-

Enphase Envoy solar panel VD
By ReneNL
Attached a simple VD to show you the output of your Enphase Envoy solar panel. It shows the current W, today's kWhs, and last 7 days kWhs. Enter in the 'Advanced' tab of the VD the ip address of your Enphase Envoy box. TCP port can be left blank.
Also attached a basic icon to use.
Best, Rene.
140 downloads
(0 reviews)0 comments
Updated
-

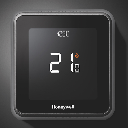
Nefit Easy thermostat VD
By ReneNL
A virtual device to interface with the Nefit Easy thermostat. First credits where credits are due: this VD leverages the cool stuff made by Robert Klep.So what you need is to
Install the nefit-easy-http-server developed by robertklep (see https://github.com/robertklep/nefit-easy-http-server) on another device. I use a raspberry pi. Follow the instructions on the site and check if the server is working properly Install the virtual device you can download here Add the IP address of the device where you run the nefiteasy server in the advanced setting of the VD Same for the port (standard setting of the server is 3000) You can use the icon provided if you like I use the two buttons at the bottom of the VD to lower the temperature when I am away (trigerred by a scene), and go back to the normal clock program when I'm back home By inspecting the code in the VD I guess you can see how you can read and write data to the server. There are many more info and settings you can extract or change from the server (see https://github.com/robertklep/nefit-easy-core/wiki/List-of-endpoints for the list of endpoints you can use). These are the ones I picked but I assume you understand how to change to your needs
Rene.
81 downloads
-
 (0 reviews)
0 comments
Submitted
-
(0 reviews)
0 comments
Submitted
-
Download Statistics
-
New reviews
-
 By Bornheim · PostedI integrated two HUE bridges in my HC3. It works perfect (and much better and more powerful then the app integrated in HC3). In particular, also sensors, temperature measures etc. are available and can be used in Scenes. However, in both cases after installing and entering the IP adress of my HUEs I had to restart the HC3 to get the authentification running. So I assume to install one has to (i) upload / install the QuickApp, (ii) enter the IP address of the HUE in the local LAN, (iii) rest
 -

-

-

-
 By Sankotronic · PostedVery useful solution to help with gradually moving from HC2 to HC3. I have tested few of the QA and used them to test some of my new solutions on HC3 keeping HC2 still having main controll of our house. Thank you @cag014 for yet another excellent solution!
 -

-

-

-
 By SmartHomeEddy · PostedGreat QuickApp and excellent configuration manual. QuickApp works smooth. Thanks!
 -

-
-
Highest Rated Submitters
No ratings this week.
No ratings this month.
No ratings this year.
-
1

-
2

-
3

-
4
-
5

-