
Welcome to Smart Home Forum by FIBARO
Dear Guest,
as you can notice parts of Smart Home Forum by FIBARO is not available for you. You have to register in order to view all content and post in our community. Don't worry! Registration is a simple free process that requires minimal information for you to sign up. Become a part of of Smart Home Forum by FIBARO by creating an account.
As a member you can:
- Start new topics and reply to others
- Follow topics and users to get email updates
- Get your own profile page and make new friends
- Send personal messages
- ... and learn a lot about our system!
Regards,
Smart Home Forum by FIBARO Team


Virtual Devices
The category contains virtual devices submitted by users.
Downloading and submission terms have to be accepted.
Types of files accepted: LUA, VFIB, ZIP, TAR, RAR, JSON.
Virtual devices have to be described properly, screen shots are optional.
Support topics are created automatically here Virtual devices
Report topics and files that are no longer supported by authors.
All the files submitted have to be approved by administrators.
86 files
-
[VD + APP + PHP] Text To Speach (TTS) solution for HC2 and Apple Mac (OS X) - version October 2017
By gucio1234
Text To Speach (TTS) solution for HC2 and Apple Mac (OS X) - version October 2017:
PREFACE :
I am happy to present my second approach for TTS (Text To Speech) and multi room audio for Fibaro HC2 and Apple OS X computer.
I call it “second approach” rather then second version because it uses different mechanism to control audio of the computer, however the goal remain the same.
That is also the reason why I decided to publish it in the new thread.
I hope that this guide let you setup TTS on your Fibaro HC2 and Mac computers.
INTRODUCTION :
I have noticed that wide used solution for TTS and multiroom is to use Sonos speakers (probably because of the Fibaro plugin available) and VoiceRSS (http://www.voicerss.org/).
My solution is different. It uses the text synthesizer (TTS) which we have already implemented in our computers and which can speak in variety of languages – also those not supported by VoiceRSS. To change text into speech I used “SAY” command of OS X. The other advantage is that we are independent on internet connection and there are no charges for TTS processing. It has also multiroom solution. You can have installed all over your place a number of speakers. The volume of each speaker can be individually adjusted from HC2 (Volume range from 0 to 100 %) so it is possible to select in which room/rooms you hear the voice announcement.
If you use the iTunes VD it is also possible to distribute music.
Integration of iTunes with and HC2 was discussed and published here :
The supported speakers/devices/protocols are as for now :
- Apple AirPlay
- Google Chromcast
- Bluetooth
- Windows computers (with installed app to become AirPlay compatible)
The supported languages/voices of OS X v. 10.12.2 (macOS Sierra) are listed in Paragraph 2 below.
WHAT WE NEED :
- Fibaro HC2
- Apple Mac computer
- Audio Mixer VD installed on HC2
- Some LUA experience to fine tune VD on HC2 and have your user defined TTS messages in your scenes
- Airfoil by Rouge Amoeba application installed on Mac - for TTS it is OK to use free demo version
- Fibaro TTS Bridge application for OS X by Marcin S. Milewski (gucio1234) installed on Mac
- Speakers/audio receivers (any from the list of compatible devices) :
. Apple AirPlay
. Google Chromcast
. Mac , Windows or Linux computer with Airfoil Satellite installed
( see https://rogueamoeba.com/airfoil/ )
. iOS or Android device with Airfoil Speakers installed
(if one wants to have TTS on mobile device)
. Bluetooth
The presented solution was tested with the following software versions / hardware :
- Fibaro HC 2 firmware 4.140
- Airfoil for Mac v. 5.5.1
- Airfoil Sattelite for Windows v.5.1.6
- OS X v. 10.12.2 (macOS Sierra) and OS X v. 10.13 (macOS High Sierra)
- Apple AirPort versions A1088, A1264, A1392
- JBL Flip 3 Bluetooth Speaker
- Fibaro TTS Bridge v. 0.1
- Fibaro HC 2 v. 4.110
It was not tested with Google Chromcast (as I do not have any) but this is supported by Airfoil.
IMPLEMENTATION :
Please read the whole instruction carefully before you start.
1.
Define the global variable “PAMessage” in your HC2 (top part of the Variables’ Panel):
This variable will store the text you want to convert to speech, whatever is there, the system will speak when you press TTS button of the VD
2.
Test and select desired language/voice for your TTS.
To change text into speech we used “SAY” command of OS X.
Open “Terminal “ application on your Mac.
Type ‘SAY –v ?’ to see the list of available voices/languages
Type ‘SAY –v <name of the voice>’ to select the voice of your preference
Type ‘SAY “THIS IS A TEST MESSGE IN MY LANGUAGE” ’ to test your selected voice
More details on this can be found here: https://developer.apple.com/legacy/library/documentation/Darwin/Reference/ManPages/man1/say.1.html
Here is the result of
‘SAY –v ?’ :
3.
Install “Airfoil” for Mac downloaded from https://rogueamoeba.com/airfoil/
NOTE: The free demo version lets to transmit audio up to 10 minutes long (which is more than enough for TTS). After that time the noise distortion will be added by the application.
If one wants to use Airfoil for transmission of music it is recommended to purchase a license.
4.
Setup web server with PHP Module running on our Mac computer.
In my case I have it on iMac and I followed this guide :
https://medium.com/@JohnFoderaro/how-to-set-up-apache-in-macos-sierra-10-12-bca5a5dfffba
I skipped "Configuring Virtual Hosts" as that was not working for me.
As my web server is accessible only by my devices, I did not care.
Important is that apache web server is managing PHP scripts .
NOTE: If you already implemented iTunes VD, you should have already running web server with PHP module installed.
5.
Install Audio Mixer VD on your HC 2.
Define parameters of this VD :
Set IP address of your Apple Mac computer
Set port number as 7000. The communication between HC2 and Mac will be on port 7000 and this is hard coded in “Fibaro TTS Bridge v..1” application.
Define in VD as many audio mixer sliders as you have audio devices to be linked with your multi room audio system.
In the VD attached FOR EACH SLIDER you have to define the PATH for your PHP script “airfoil.php”. Also for each slider the local variable ‘pokoj’ has to be defined as substring of the ID of the speakers defined in Airfoil app on Mac.
(see Paragraph 6 “How to know the IDs of your speakers defined for AirFoil”)
Example:
In my case I have my airfoil.php script placed as :
MacintoshHD/Users/username/Sites/airfoilremote/airfoil.php
and my path defined in the VD is :
Note : “LocalSpeaker” is the speaker connected to your Mac.
Example:
In my case I have the following local variables for each slider :
local pokoj = “WIATROLAP"
local pokoj = “LocalSpeaker"
local pokoj = "59-a7”
local pokoj = "POKOJ-3”
local pokoj = “JADALNIA"
local pokoj = “AppleTV"
local pokoj = “ANTRESOLA"
local pokoj = “MIODARNIA"
There are three buttons on Audio Mixer VD :
“Weather Outside” – to send current weather information to TTS system. In my VD it reads information from Netatmo VD.
This should be adjusted to user’s preferences.
User may adjust it to her/his needs at the end when all the rest is up and running.
NOTE: In the code of VD attached it reads the variable from my Netatmo device ID.
It will not work for you without fine tuning.
“Weekday / Time” – to send TTS with the text taken from HC2 system variables
“TTS” – to send TTS with the text taken from global variable “PAMessage”
6.
Place the „airfoil.php” file into you OS X computer. The path for it has to match whatever is defined as the path in your VD
(see example in paragraph 3.)
7.
How to know the IDs of your speakers defined for AirFoil
You have to use Apple Script Editor which is application delivered along with your OS X system. no need to purchase or install anything.
Just use your search bar of OS X system.
You have to write
into Apple Script Editor.
Here is the screen shot of the OS X script editor which shows you the complete IDs of your Airfoil Speakers.
You can see that part of each ID (after @) matches my local variables for each slider of VD.
8.
Setup Airplay/Chromecast/Bluetoth devices with your Mac
9.
If you want to have other computers to act as clients with speakers install Airfoil Sattelite for each of them. The app is to be downloaded from https://rogueamoeba.com/airfoil/
10.
If you want to have mobile devices to act as clients with speakers install Airfoil Speakers for each of them. The info on these apps can be found on https://rogueamoeba.com/airfoil/
11.
Copy the “Fibaro Text to Speech Bridge v.0.1” application to your Mac computer.
Attached is the zipped file. You have to unzip it to have .app file.
NOTE:
If it happens that HC2 needs to be restarted, it is required to restart “Fibaro Text To Speech Bridge v.0.1”also (Exit and Run).
Restart of “Fibaro Text To Speech Bridge v.0.1” is to be done after HC2 is back operational.
FILES TO DOWNLOAD :
Application for OS X (zipped) -> Fibaro_Text-To-Speech_Bridge_0.1.app.zip
VD for HC2 ------------------------> AUDIO_MIXER_+_TTS.vfib
ICON for VD of HC2 ------------>
AIRFOIL.PHP (zipped) ------>
airfoil.php.zip
39 downloads
(0 reviews)0 comments
Updated
-
[VD + APP] Text To Speach (TTS) solution for HC2 and Apple Mac (OS X) - version February 2017
By gucio1234
Text To Speach (TTS) solution for HC2 and Apple Mac (OS X) :
PREFACE :
It took me two months of tests to make this solution at present stage and I had to learn a little Python and Applescript.
I am aware that lots of details can be improved. However all programmers knows there are no software without bugs and there is never final version. The attached OS X app is fully functional and it is called “Fibaro Airfoil Bridge v.0.1”.
I had no experience with OS X programming. This is the very first OS X app I wrote.
INTRODUCTION :
I have noticed that wide used solution for TTS and multiroom is to use Sonos speakers (probably because of the Fibaro plugin available) and VoiceRSS (http://www.voicerss.org/).
My solution is different. It uses the text synthesizer (TTS) which we have already implemented in our computers and which can speak in variety of languages – also those not supported by VoiceRSS. To change text into speech I used “SAY” command of OS X. The other advantage is that we are independent on internet connection and there are no charges for TTS processing. It has also multiroom solution. You can have installed all over your place a number of speakers. The volume of each speaker can be individually adjusted from HC2 (Volume range from 0 to 100 %) so it is possible to select in which room/rooms you hear the voice announcement.
The supported speakers/devices/protocols are as for now :
- Apple AirPlay
- Google Chromcast
- Bluetooth
- Windows computers (with installed app to become AirPlay compatible)
The supported languages/voices of OS X v. 10.12.2 (macOS Sierra) :
PLANS FOR FUTURE :
Fine tune the app and improve GUI of Fibaro Airfoil Bridge application.
Enhance the functionality with multiroom audio with distribution music from internet radio and iTunes.
This is an open project and I count on your constructive comments.
If there is anybody who would like to be involved in future enhancements please let me know in private message.
WHAT WE NEED :
- Fibaro HC2
- Apple Mac computer
- Audio Mixer VD installed on HC2
- Some LUA experience to fine tune VD on HC2 and have your user defined TTS messages in your scenes
- Airfoil by Rouge Amoeba application installed on Mac (for TTS it is OK to use free demo version)
- Fibaro Airfoil Bridge by Marcin S. Milewski (gucio1234) installed on Mac
- Speakers/audio receivers (any from the list of compatible devices) :
o Apple AirPlay
o Google Chromcast
o Mac , Windows or Linux computer with Airfoil Satellite installed
o iOS or Android device with Airfoil Speakers installed (if one wants to have TTS on mobile device)
o Bluetooth
The presented solution was tested with the following software versions / hardware :
- Airfoil for Mac v. 5.5.1
- Airfoil Sattelite for Windows v.5.1.6
- OS X v. 10.12.2 (macOS Sierra)
- Apple AirPort versions A1088, A1264, A1392
- JBL Flip 3 Bluetooth Speaker
- Fibaro Airfoil Bridge v. 0.1
- Fibaro HC 2 v. 4.110
It was not tested with Google Chromcast (as I do not have any) but this is supported by Airfoil.
IMPLEMENTATION :
Please read the whole instruction carefully before you start.
1.
Define the global variables in your HC2 (top part of the Variables’ Panel):
“PAMessage” - This variable will store the text you want to convert to speech.
“AudioMixer” – This variable will store the audio mixer settings for the devices.
2.
Install Audio Mixer VD on your HC 2.
Define parameters of this VD :
Set IP address of your Apple Mac computer
Set port number as 7000. The communication between HC2 and Mac will be on two ports: 7000 and 7001.
Define in VD as many audio mixer sliders as you have audio devices to be linked with your multi room audio system. Provide names for each slider corresponding to the devices/rooms you want to control. You may use your local language names, with spaces and local characters.
IMPORTANT:
Remember what is the order of your sliders. It is needed in next steps for proper link between HC2 and Mac.
The LUA code for each slider has to be same but it depends on the number of sliders one has defined. Here are examples :
If there are two sliders, LUA definition for each should be :
If there are four sliders, LUA definition for each should be :
Adjust the LUA code of each slider according to number of sliders there are in your VD.
There are four buttons on Audio Mixer VD (they can be adjusted for user’s preferences ):
“Test Message” – to send a test message to TTS system. In my VD the predefined test message is in Polish. It should be adjusted to your language.
“TTS” – to execute TTS with the text taken from global variable “PAMessage”
“Weather Outside” – to send present weather conditions to TTS system. In my case it is based on global weather variables received from Netatmo weather station. The message is in Polish. It should be adjusted to your local language and preferences.
“Send Data” – to send audio mixer settings from HC2 to Airfoil without processing any TTS
3.
Test and select desired language/voice for your TTS.
To change text into speech I used “SAY” command of OS X.
Open “Terminal “ application on your Mac.
Type ‘SAY –v ?’ to see the list of available voices/languages
Type ‘SAY –v <name of the voice>’ to select the voice of your preference
Type ‘SAY “THIS IS A TEST MESSGE IN MY LANGUAGE” ’ to test your selected voice
More details on this can be found here: https://developer.apple.com/legacy/library/documentation/Darwin/Reference/ManPages/man1/say.1.html
4.
Setup Airplay/Chromecast/Bluetoth devices with your Mac
5.
If you want to have other computers to act as clients with speakers install Airfoil Sattelite for each of them. The app is to be downloaded from https://rogueamoeba.com/airfoil/
6.
If you want to have mobile devices to act as clients with speakers install Airfoil Speakers for each of them. The info on these apps can be found on https://rogueamoeba.com/airfoil/
7.
Install “Airfoil” for Mac downloaded from https://rogueamoeba.com/airfoil/
NOTE: The free demo version lets to transmit audio up to 10 minutes long (which is more than enough for TTS). After that time the noise distortion will be added by the application.
If one wants to use Airfoil for transmission of music (which I hope will be introduced with future version of my solution) it is recommended to purchase a license.
IMPORTANT:
All the names of the audio devices configured with Airfoil HAVE TO HAVE names of the speakers without spaces and without any special/national characters. Rename the devices in Airfoil if it is needed.
8.
Copy the “Fibaro Airfoil Bridge v.0.1” application to your Mac computer. DO NOT RUN IT YET.
Attached is the zipped file. You have to unzip it to have .app file.
IMPORTANT:
Right click on “Fibaro Airfoil Bridge v.0.1” and select “Show Package Content”
Navigate to Contents -> Resources
Locate the file “SpeakersNAME.txt”
Edit the file “SpeakersNAME.txt”. Put names of your speakers each in the new line. They have to be same as names defined in Airfoil (paragraph 7.). The order of the speakers is EXACTLY SAME as order of the sliders of your HC 2 VD “Audio Mixer” (paragraph 2.) .
NOTE: The very first speaker has to be “LocalSpeaker” which is the default speaker of your Mac computer. This has to be defined even if you do not use the speaker of your Mac.
Here is an example of “SpeakersNAME.txt” file:
LocalSpeaker JADALNIA AppleTV PC-ANTRESOLA POKOJ-3 WIATROLAP MIODARNIA
9.
After the “SpeakersNAME.txt” is updated one can run “Fibaro Airfoil Bridge v.0.1” applicaton.
NOTE:
If it happens that HC2 needs to be restarted, it is required to restart “Fibaro Airfoil Bridge v.0.1”also (Exit and Run).
Restart of “Fibaro Airfoil Bridge v.0.1” is to be done after HC2 is back operational.
IMPORTANT:
This is known bug with 0.1 version. If you want to close the app use the EXIT button on the main window or the EXIT option of the second pull down menu.
If you close the app with red circle on top left corner of the application’s window or with the QUIT option from the first pull down menu the application is not closed completely. In this case you have to find its icon on the bottom bar of OS X, right click and force close it .
17 downloads
(0 reviews)0 comments
Updated
-
[VD + SCENE + PHP] APC UPS Monitor and auto shutdown of HC2
By gucio1234
PREFACE :
I noticed in the Forum that there is some interest for link APC UPS with Fibaro HC2 and have auto shutdown of HC2 if there is no electricity.
I have spent few evenings and I am happy to share what I did.
I want to thank @Sankotronic for the permission to use part of his code and @Lambik whose icons of UPS I used as a base to create icons representing various status of the UPS device.
Also I have used a bit of the code of @drboss .
INTRODUCTION :
The proposed solution reads the status of the UPS device using SNMP protocol and based on this it triggers appropriate actions.
The status of UPS is represented with the various icons of the VD :
Email messages and pop-up notifications are sent whenever :
there is electricity outage the battery level is critical and HC2 shutdown is triggered the power is restored The status is updated whenever the REFRESH button of VD is pressed.
For constant monitoring I have used @Sankotronic’s scene „Main Timer“ which presses the button every minute.
WHAT WE NEED :
1.
On HC2 - we need :
- VD for UPS monitoring and triggering actions
- Scene to trigger Shutdown of HC2.
2.
We need web server with PHP Module running on something.
It can be RaspberryPI, Windows PC or anything.
In my case I have it on iMac and I followed this guide :
https://medium.com/@JohnFoderaro/how-to-set-up-apache-in-macos-sierra-10-12-bca5a5dfffba
I skipped "Configuring Virtual Hosts" as that was not working for me.
As my web server is accessible only by my devices, I did not care.
Important is that apache web server is managing PHP scripts .
3.
SNMP command line tool has to be present on the server (it is present by default on OS X)
SNMP tool is present by default with OS X.
Here are links describing how to install it for Windows - different resources (not tested) :
https://www.ipconvertertools.com/snmpwalkinstructions
https://syslogwatcher.com/cmd-tools/snmp-walk/
4.
APC UPS with network management card.
The presented solution was implemented and tested with APC Smart UPS 3000 with Network Management Card AP9631
IMPLEMENTATION :
1.
Implement web server with PHP module running.
Activate SNMP command line tool on your server (if not already there).
2.
Copy APC.php script to the web server.
You have to edit the file with any text editor to provide username and password for your HC2, IPs of HC2 and UPS.
If username or password contain `@` it has to be replaced with `%40‘
Eg. If Your username is `user@` You have to enter `user%40`
Note: You have to make a note of the path to the script.
Here is a code :
3.
Create new scene in HC2 for auto shutdown.
IMPORTANT: You have to pay attention NOT TO CHECK MARK that the scene is starting while HC2 starts.
The HC2 would restart itself after boot.
If you do so you have to do restore to factory state and load last working backup.
4.
Import the VD from the attached .vfib file to your HC2.
Import all provided icons for graphical representation of the UPS status.
There is a bunch of global variables needed, but they will be created automatically by the VD – so you do not have to worry. All of these global variables starts with `UPS_` .
Edit the `USER SETTINGS` section of the LUA code for the REFRESH button :
The icon for the REFRESH button should be `IconTimer`.
As the parameters for the VD:
- enter the IP address of web server with PHP script
- enter 80 as a port number
That is all.
I hope those how are interested will be able to implement what I did.
132 downloads
(1 review)0 comments
Updated
-
![More information about "[VD] BBQ Guru CyberQ WIFI"](https://forum.fibaro.com/uploads/monthly_2019_01/How-CyberQ-Works.thumb.png.ca5021bf7c291fe8ff179b100c621812.png)
[VD] BBQ Guru CyberQ WIFI
By Barlow
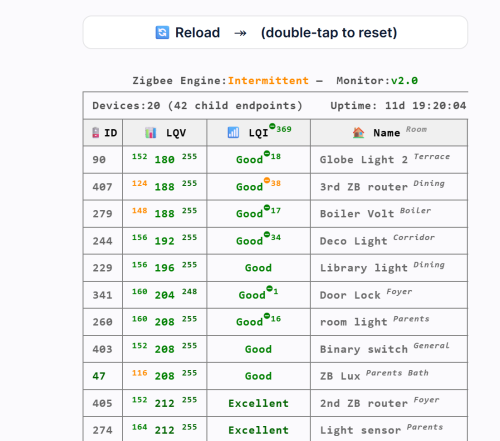
Monitor:
Fan speed Temperature of the Pit and core temperatures of Food1, Food2 and Food 3 probes in Celsius or Fahrenheit. Status of each of the temperature sensors ("OK", "HIGH", "LOW", "DONE", "ERROR", "HOLD", "ALARM", "SHUTDOWN"). Status codes are also available as global variables for use in block scenes. Control:
1. Temperature setpoints for the Pit and Food1, Food2 and Food 3 cores.
2. Timer and timeout actions (none, sound alarm, hold pit at set temperature, shutdown fan; or any scene-based action you specify.
3. Ramp the pit temperature (cook and hold) from any selected food item.
Installation and configuration:
Install the CyberQ WIFI VD, which you can download below. I will also post it on Fibaro Marketplace.
Enter the CyberQ WIFI IP address and port number in the advanced settings. Scroll down to the main loop section to set the authentication details.
14 downloads
-
![More information about "[VD] Daily Triggers"](https://forum.fibaro.com/uploads/monthly_2020_04/trigger_none_today.thumb.png.ea533531744f63b48280506f7c5fc6d6.png)
[VD] Daily Triggers
By J3R3M
Daily Triggers
First release on french board in April 2018
INTRODUCTION
This VD was my first contribution on the french forum. I was so glad! I learnt to use LUA tables just before and I wanted to use them in a VD which can be useful.
This VD allows you to easily manage some one-time actions for each day in a week. With it, you quickly can change the time to trigg one or many actions, or see when an action will be done. It's possible to set one our per day, using a time shift if needed.
It's my first VD, I was learning how to program in LUA and I was beginning to work with time in LUA, so it's not perfect in the programming way, but it works! I used it for a long time and I have never met any issue!
INSTALLATION
Create a Global Variable called VD_TRIGGERS Import the VD Change the Icons ID in the Main Loop, using the icons below -- Icons IDs local icone_ok = 1156 local icone_wait = 1158 local icone_no_trigg = 1155 local icone_triggers_off = 1157 local icone_vd_off = 1160 Add your to-do actions for each day with the totrigg() function, into the Main Loop -- To do each day local function totrigg(day) -- Here actions for everyday if day == 1 then -- Actions for Monday elseif day == 2 then -- Actions for Tuesday elseif day == 3 then -- Actions for Wednesday elseif day == 4 then -- Actions for Thursday elseif day == 5 then -- Actions for Friday elseif day == 6 then -- Actions for Saturday elseif day == 7 then -- Actions for Sunday end end
VD CONFIGURATION AND USE
This VD is divided into 4 parts :
Information about the next trigger The Programmer View on all triggers set Enable/Disable VD
3 Sliders and the OFF button can be used to prepare trigger informations : Hours Sliders will convert 0-100 value to 1 - 23 in the programmer Minutes Sliders will convert 0-100 value to 1 - 59 in the programmer Time Shift Sliders will convert 0-100 value to -30 - +30 in the programmer Please take care to set 0 (Slider at 50) if you want to trigg your actions at the time set! OFF Button will replace all the programmer's informations by OFF If you want to set a new time information, you only need to click on any slider above After each slider move, check the Prog Label content to avoid any error Once the Prog content is correct and checked, you can affect its value for each day you want by simply clicking on its name! You will be able to see the affected times just 3 seconds after in the Triggers Views At this time, the actions set in the totrigg() function will be done Of course, if the VD is disabled, no actions will be triggered
ICONS
Waiting to trigg today's action Today's action triggered No action planned today (OFF) All triggers set at OFF VD OFF83 downloads
-
![More information about "[VD+Scene] Advanced Alarm Clock"](https://forum.fibaro.com/uploads/monthly_2020_04/AdvancedAlarmClockScene.thumb.png.07237ec21a59b8fafc43c56a0e0c947d.png)
[VD+Scene] Advanced Alarm Clock
By J3R3M
Advanced Alarm Clock
First release on the French board in March 2019.
INTRODUCTION
This VD+Scene Bundle will help you to wake up in better shape by simulating a smooth dawn with any device in your HC2 : Roller Shutters, lights devices and VD.
After the ignition at the value that you have set up in the VD, the scene can fade one or more speakers. The curves for light and audio fade in can be choosen separately.
The scene manages itself if it's day or not. So, for each light you will set up in the scene, you can decide if it has to be active everytime, or only when it's day or only when it's night. For example, you can set up a Roller Shutter which is active only if it's day!
This Bundle can be used as much as you want, just by adding it again and creating a new Global Variable for each new bundle set.
THE SCENE IS ABLE TO MANAGE
Roller Shutters (FGR22, FGR223...) Dimmers (FGD211, FGD212...) Switchs (FGS211, FGS212, FGS213...) RGBW Devices (FGRGBW, RGBW Controller 1, RGB Controller 2) RGBW Programs (Any Fibaro's programs) Home Center Scenes Any Light VD (Philips Hue, Ikea TRÅDFRI...) Any VD clickable Any Audio VD (Sonos, Yamaha Multicast or any else...)
INSTALLATION
Most of explainations are in the scripts.
Create a Global Variable which starts with REVEIL_ (what means alarm clock in French ?) and import the Virtual Device you want (12h or 24h).
VD CONFIG
-- Manageable Alarm Clock Scene Id local SceneID = 193; -- Which room will this VD Manage ? Must be the same than the Scene local ROOM = "ROOM"; -- Days Off local DaysOff = {"Saturday","Sunday"}; -- By defaut, this scene will be launched to have full light at the time set up in the VD : Actual Hour - Dawn Time -- Change this var to anything else if you want to trigg the scene at the hour H. local StartScene = "DEFAULT"; -- Icon's ids local icon_ok = 1156 local icon_wait = 1158 local icon_off = 1160 SceneID : ID of the scene Advanced Alarm Clock ROOM : Value corresponding to the Global Variable you created DaysOff : List here all your days off within quotes marks, separated by commas. Take care of the uppercase at the beggining of the days names! StartScene : Start the scene to have the full ignition at the time set in VD (DEFAULT), or start to begin the dawn's simulation at the time set in the VD (anything else) icon_ok : ID of the icon which will be displayed when the scene is triggered and active icon_wait : ID of the icon ID which will be displayed when an alarm is set and waiting to trigg the scene icon_off : ID of the icon which will be displayed when the alarm is disabled Note: In this Virtual Device, you have to change 3 times the variable's value of ROOM, corresponding to the Global Variable you have created before : REVEIL_ROOM.
VD USE
Press on : will display 12:00 (or 07:30am in the 12h version). This can be changed by anything else with the variable ClickHour in the corresponding button Sound Volume is in percentage (Act on sliders) Audio fade-in is in seconds Light's Power is in percentage* Dawn's duration is in minutes Once button sets the alarm for the next avalaible scheduele, regardless of the day (DayOff or not). The alarm will automatically be disabled after the dawn's ignition Week of job sets the alarm for everyday, without the days set in the variable table DaysOff. Scene will automatically be launch until it's manually deactivated Recall will recall every parameters set before last VD deactivation Alarm OFF will save every actual parameters and disable the alarm * Rollers Shutters will open at the same time than others lights devices, but will not been affected by Light's Power parameter
I thought it was better to be able to choose the power of lights, without having a half opened roller shutter.
SCENE
local ROOM = "ROOM"; -- Room code corresponding to the Global Var created local StartVolume = 15; -- Which Speakers volume value the fadein will start at (percentage) local CurveLight = "linear"; -- Which function will be used to fadein light keys local CurveAudio = "linear"; -- Which function will be used to fadein speakers keys BASIC SETTINGS
ROOM The famous variable wich has to be the same in the Scene+VD StartVolume could be useful if you don't want to start audio fadein from 1. CurveLight & CurveAudio Curves that will be used to fade lights and audio. See the following image to have a better understanding Note1: If you comment a Curve Variable, the curve will be randomly choosen
Note2: The curves are possible thanks to the great work that Robert Penners made in 2001.
POSSIBLE CURVES : Linear + Robert Penner's Easing Equations
-- Debug Vars local debug = 1; -- 1 Enable / 0 Disable local lang = "en"; -- Debug lang local DisplayNamesorID = "ID"; -- Display DeviceName + RoomName (Names) or Type + ID (ID) on each Debug line local DisplayNamesAtStartup = 1; -- Display Rooms & Names at scene startup (1) or not (0) local DisplayRGBWValues = 1; -- Display RGBW Values increasement when fading in (1) instead of only multiplier (0) local DayLightDelay = 60; -- After sunrise/sunset, it's still daylight for .. mn local VolDiffMin = 5; -- Minimum difference between Start Volume and Volume set in VD (in case of Start Volume > Volume set) local LimitDebugLines = 1; -- Limit number of Debug Lines to 4 max per device and to 20 max per roller shutter -- Changing next var values may seriously impact the scene local CheckAlarmMode = 1; -- Check if the alarm is set and not just memorized before starting sthis scene local DisplayScenesNames = 0; -- Display Scenes Names in debug (1) or not (0)! Active this function may delay the script local tempo = 1; -- Pause between two actions in LightsAction and SpeakersAction functions (s) - It' not recommended to change this value DEBUGS SETTINGS
debug lang DisplayNamesorID DisplayNamesAtStartup DisplayRGBWValues DaylighDelay VolDiffMin LimitDebugLines CheckAlarmMode If this var value is set on 0, this scene will be able to be launched manually with stored values, even though the VD displays None DisplayScenesNames tempo Note: everything explained in the script!
ADDING YOUR DEVICES
Add a Roller Shutter (FGR) Parameter "steps" is needed to set how many steps this roller shutter will do to open (to protect motors of 100 steps) table.insert(LightsList, {typ="Shutter", id=279, steps=6}); Add a Dimmer (FGD) table.insert(LightsList, {typ="Dimmer", id=10}); Add a RGBW device (FG-RGB) : To fade a choosen color with RGBW parameters (Set this color at full range, scene will fade this value from 0 to the value set in VD) table.insert(LightsList, {typ="RGBW", id=20, r=150, g=100, b=0, w=255}); Add a RGBW Program : To set a RGBW program, just use "program" parameter Add "start" parameter to manage when this program will be started during the light fadein (in percentage) If no "start" parameter is set, program will be started at the beginning of the scene table.insert(LightsList, {typ="Program", id=20, program=3, start=50}); Add a switch (FGS) Add "start" parameter to manage when this turnon action will be done during the light fadein (in percentage) If no "start" parameter is set, action will be done at the beginning of the scene table.insert(LightsList, {typ="Switch", id=49,start=100}); To add a VD If it's a light VD : Parameter "slider" needed to manage brightness table.insert(LightsList, {typ="VD", id=298, slider=10}); "btn" paramater can be added to set a color preset before the fadein (Be sure that the VD brightness for this button is set et 1%) table.insert(LightsList, {typ="VD", id=298, slider=10, btn=6}); If it's not a light VD (with brightness slider) : Just indicate "btn" parameter table.insert(LightsList, {typ="VD", id=298, btn=6}); Add "start" parameter if you want to manage when this button will be pressed during the dawn fade in (in percentage) table.insert(LightsList, {typ="VD", id=298, btn=6, start=50}); Scene : To start a scene Add "start" parameter to manage when the action will be done during the light fadein (in percentage) If no "start" parameter is set, action will be done at the beginning of the scene table.insert(LightsList, {typ="Scene", id=254, start=50}); To add Speakers VD : One action per key Example for an action on the slider 15 of the VD 245 table.insert(SpeakerAction, {id=245, slider=15}); Example for an action on the button 6 of the VD 245 table.insert(SpeakerAction, {id=245, btn=6});
Note: This is an extract of the scene. So you will find it in the scene to help you if needed
One line = One device
LightsList typ = Shutter id Roller Shutter ID steps Number of steps which will be done by the roller shutter (to preserve shutter's motor). 2 mini / 20 maxi typ = Dimmer id Device ID typ = VD id VD ID slider Slider number to manage light power btn* Button to push start* When the button have to be pushed during dawn"s ignition (if not set, the button will be pressed just before acting on slider) typ = RGBW id Device ID r Red Value(0-255) g Green Value (0-255) b Blue Value (0-255) w White Value (0-255) Note: Please write the parameters for a full power. The scene will calculate the values needed from them
typ = Scene id Device ID start* At which percentage of the dawn's ignition this scene will be started. 1 will be use by default if nothing is set. typ = Switch id Device ID start* At which percentage of the dawn's ignition this switch will be turned on. 1 will be use by default if nothing is set. typ = Program id Device ID program ID of the program to launch start* At which percentage of the dawn's ignition this program will be started. 1 will be use by default if nothing is set. SpeakerAction id VD ID 2nd parameter = Button Type (One or the other) with this button number slider Number of the volume's slider btn Number of the button to push Note: This actions will be done in the order you declare them in the script
Note: items with * are not mandatory
MODE PARAMETER
This parameter is not mandatory. If not set, all your keys will be used to fade the dawn. You can mix modes and no modes keys!
For each light key, if you want to see it lighting only when it's day, just add mode="day", or mode="night" if you want to see a key lighting only if it's night.
To use a key everytime : no mode or mode="both".
WHERE CHANGE GLOBAL VARIABLE "ROOM" VALUE
At the beginning of the scene In the "Once" Button of the VD In the "Week of Work" Button of the VD In the "Alarm OFF" Button of the VD At the beginning of the Main Loop of the VD Note: Please take care of this changement of value. If the value is not the same everywhere, the scene could not be launched!
DEBUG EXAMPLE
SUPPORT
In case on any issue, please try again with defaults debug's values and post all your DEBUG lines to help me to understand what happens in your configuration.
CONTENT
Advanced Alarm Clock Scene v3.6 Multilingual Advanced Alarm Clock Trigger 12h v2.2 for people that have 12-hour clocks (am-pm) Advanced Alarm Clock Trigger 24h v2.2 3 Icons for the VD 1 icon for the Scene info.txt file
TRANSLATION
All Debugs texts are available in english and french. They could be easily translated in any other language without any LUA knowledge, by creating a new language condition and translating every DebugMsg vars.
Don't hesitate to contact me with the support thread if you want to translate them in another language. Only 37 sentences in the scene v.3.6! Your translations could be added in this official bundle.
173 downloads
- dawn simulator
- dawn simulation
- (and 5 more)
-
20180525 Presence_Detector (posted).vfib
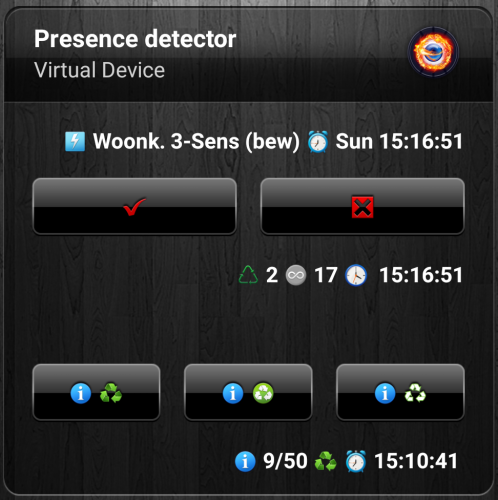
By Lambik
20180525 (Stable) release
Added/Changed: - Added some code to the mainloop to detect critical error occurring when a device is forced-removed
[ERROR] line 195: attempt to perform arithmetic on a nil value
312 downloads
- presence detector
- vitual device
- (and 1 more)
-

Advanced Battery Check (ABC) VD standalone
By Sankotronic
INTRODUCTION
Advanced Battery Check VD (further in text ABC VD) scans for all included battery devices and adds them to the list sorted by either battery level, device ID or room ID depending on user settings. Also it can send list of all devices or just devices that needs battery to be replaced to e-mail and/or popup. Can also send push notification with the worst battery status.
PREREQUISITES
Fibaro Home Center 2 with firmware 4.160 or greater
FEATURES
Scans for all battery powered devices adds them to the list and shows their battery level status. It is possible to scroll through the list of battery devices and see battery level, type, amount of battery needed for selected device and price of the battery (if entered by user). Easy adding or removing battery devices to be ignored Included 30 types of battery devices (products) in ABC VD version 1.0 for the list please check APPENDIX 2 Automatic recognition and adding of not included types of devices (products) for which user can setup battery type, amount needed and price Predefined types of battery types including Unknown and Rechargeable Sends list of all battery devices found or only dead devices and devices with battery level bellow 35% to e-mail and popup notification depending on user selection. Calculates total price for devices that need battery replacement on the bottom of the list sent to e-mail (user need to setup currency and price for batteries) Sends push notification for device with lowest battery level found or dead device It can automatically remember date when battery is replaced on device after updating the list. This is done by comparing previous measured battery level with the currentone. VD has built in multi-language support with 28 languages included (see APPENDIX 1 for the list). VD can use HC selected language or user can select any other available language. VD will be automatically translated to selected language (visible after refreshing page on browser or refreshing network data on Fibaro mobile application) Easy setup for VD icons (on UHASTM compatible version is this even easier) Global variables are automatically added, monitored and repaired and does not require user intervention
INSTALLATION
Please check provided User Manual and video provided by @MarcoTorino71:
PACKAGE CONTENT
Advanced Battery Check VD v.1.0 Standalone Icon pack User manual EN
TERMS AND CONDITIONS
Permision to use, copy, modify and distribute this software and its documentation for educational, research, personal use and non-profit purposes, without fee and without a signed licencing agreement is hereby granted, provided that the copyright notice, with "Terms and conditions" and "Disclaimer" appear in all copies, modifications and distributions.
It is strictly forbidden to sell, rent, lease and/or lend this software for profit without prior consent from the Author.
DISCLAIMER
This software is provided by copyright owner "as is" and any express or implied warranties, including, but not limited to, the implied warranties of merchantability and fitness for a particular purpose are disclaimed. In no event shall the author and distributor be liable for any direct, indirect, incidental, special, exemplary, or consequential damages (including, but not limited to, procurement of substitute goods or services; loss of use, data, or profits; or business interruption) however caused and on any theory of liability, whether in contract, strict liability, or tort (including negligence or otherwise) arising in any way out of the use of this software, even if advised of the possibility of such damage.
Fibar Group S.A. and their employees are not responsible for support of the ABC VD. Please contact the author Sankotronic, on the Fibaro Forum, for any questions or support required.
VERSION HISTORY
1.0 – First release used as a base for UHAS version
Here is look of the ABC VD:
Enjoy coding and your new ARM virtual device!
Sankotronic
885 downloads
-

Advanced Radiation Monitor (ARM) VD standalone
By Sankotronic
IMPORTANT NOTICE!
This VD is currently not working since Radioactive@Home website has changed their map. All users that installed this VD please DELETE it or at least DISABLE it since it can produce some problems on your HC2. Sorry for the inconvenience.
INTRODUCTION
ARM VD collects radiation levels from all available stations around the world and shows 5 nearest stations to your location and one station with highest reading. It is using map of radiation detector stations on Radioactive@Home website. Radioactive@Home is a Polish science project using the distributed computing capabilities of the BOINC platform. The main goal of the project is to create a free and continuously updated map of radiation levels available for everyone, by gathering information about gamma radiation using sensors connected to the computers of volunteers willing to participate in the project. Project is completely non-commercial, participating will be free of charge (excluding cost of detector) and the software will be licensed under the GNU General Public License (GPL).
PREREQUISITES Fibaro Home Center 2 with firmware 4.120 or greater
FEATURES
ARM VD collects radiation levels from all available stations around the world and shows 5 nearest stations to your location and one station with highest readings Simple installation and setup. Uses Developer HERE Geocode API freemium plan to show radiation monitor station location, nearest city name and country. Multi-language support with 27 languages included. Easy setup for VD icons (on UHASTM compatible version is this even easier) Global variables are automatically added, monitored and repaired.
INSTALLATION
Please check provided User Manual where all steps are explained in detail
PACKAGE CONTENT
Advanced Radiation Monitor VD v2.2 standalone Colorful icon pack User Manual v1.2 EN
CREDITS
Many thanks to BodyArt and gucio1234 from Fibaro forum for help with coding, testing, translations and user manual and andre from http://forum.lic.pl for the original idea.
TERMS AND CONDITIONS
Permission to use, copy, modify and distribute this software and its documentation for educational, research, personal use and non-profit purposes, without fee and without a signed licensing agreement is hereby granted, provided that the copyright notice, with "Terms and conditions" and "Disclaimer" appear in all copies, modifications and distributions. It is strictly forbidden to sell, rent, lease and/or lend this software for profit without prior consent from the Author.
DISCLAIMER
This software is provided by copyright owner "as is" and any express or implied warranties, including, but not limited to, the implied warranties of merchantability and fitness for a particular purpose are disclaimed. In no event shall the author and distributor be liable for any direct, indirect, incidental, special, exemplary, or consequential damages (including, but not limited to, procurement of substitute goods or services; loss of use, data, or profits; or business interruption) however caused and on any theory of liability, whether in contract, strict liability, or tort (including negligence or otherwise) arising in any way out of the use of this software, even if advised of the possibility of such damage.
Fibar Group S.A. and their employees are not responsible for support of the ARM VD. Please contact the author Sankotronic, on the Fibaro Forum, for any questions or support required.
VERSION HISTORY
2.2 – Corrected bug that was stopping code on error if HERE service does not send city name for the location provided by VD.
2.1 – Replaced Google location service to get nearest city name and country and introduced HERE service. Also moved code for getting country and city name for location of the station from scene to Update button on VD.
2.0 – Completely revamped ARM VD to show five nearest radiation measuring stations and the one with highest measuring. Also introduced Google service to retrieve nearest city name and country for the station location provided.
Here is look of the ARM VD:
Enjoy coding and your new ARM virtual device!
Sankotronic
206 downloads
-
Airly Status - Air Quality Sensor based on Airly.eu (API 2.0)
By Guest macjoker
Device features
Periodic reports on air quality for a defined location.
Be warned about the smog conditions at your place instantly.
Advantages for everyone
Automatic status update. Custom interval value for update queries. Manual update is also available (via button). May use "interpolation mode" (enabled by default in Lua scene). Airly gives you an option to calculate estimated values for any location near their stations, to see more then just what is exactly measured by the station. You may select the language used for Airly messages. Polish and English are supported. Colors to visualize Smog description. This will work on PC only. The mobile app does not interpret HTML tags. Icon color is changing according to air quality measured. The colors are in correspondence with Airly recommendations. One of three different air quality indexes from Airly might be selected. Airly supports: "AIRLY_CAQI", "CAQI" and "PIJP". Each may have different levels, descriptions, and pieces of advice. Customizable location for reports. The location might be read automatically from your Home Center box or it might be set as a fixed one. Data retrieved from Airly are stored in a global variable. The variable might be used to trigger another scene.
Advantages for geeks
Using the newest API 2.0. Missing pieces of data from Airly are properly detected and do not stop the device from working. No label "flickering" ("50%" → "missing data" → "52%", e.g.) on data updates. Changes on any update are reported once. Clear information about the license (MIT). Make any changes you want, distribute, sell or whatever. Just include my name and the copywrite information. Easy to change labels content, data grouping within labels, etc. (data selectors within one config variable labelConfig). Source code easy to maintain and develop: rich debug information; separation of acquisition, extraction and data presentation, etc. Installation
Import the virtual device and create a new Lua scene with the code provided in the file. Add device icons and update their IDs in the virtual device main loop. Replace 'xxx...x' with the key you can get from Airly free of charge. Start the Lua scene manually (just for the first time). (optional) Customize: update interval, display language, labels content and many more (see details below). Configuration
Read comments in Lua scene and VD main loop.
Each configuration parameter is described there in details.
Zip file content
Virtual device: "Airly Status". Lua scene for grabbing data from Airly: "Airly Status scraper". Nine device icons to visualize air quality. Screenshots. FAQ
How can I get Airly API key?
Get one from developer.airly.eu. When you register an account within that website you will get your free API key.
How to upload/add device icons?
Open (any) virtual device configuration page. Press "Change icon". Press "Select file" (in the bottom), choose file, then confirm with "Add" button (even lower). Please make sure to execute step 1 properly. Icons in Home Center are divided into several categories. If your icons are placed not in the "virtual device collection", they will not be visible for the device.
How can I get an icon ID?
Open (any) virtual device configuration page. Press "Change icon". Right click on the icon you want to get an ID. Select "Open graphics in a new tab". The address should be like: "http://hc2/fibaro/n_vicons/User1003.png". 1003 is your ID in this case. How can I change the language for all displayed information?
Change config variable in Lua scene. Only "pl" and "en" messages are supported by Airly API. Update display name of each label. Update labels content (if needed) by editing labelConfig variable in VD main loop. There is the same string formatting as for the Lua print function.210 downloads
-

Ambient Weather Station VD
By Sankotronic
Ambient Weather Station VD standalone
INTRODUCTION
Ambient Weather station (AWS) VD reads measurements provided by Ambient weather stations which are connected to ambientweather.net service on internet. VD is tested with Ambient Weather station WS-1401-IP OBSERVER, but should also work with other similar types of Ambient weather stations.
PREREQUISITES
Fibaro Home Center 2 with firmware 4.560 or greater
Emoji VD standalone must be downloaded and installed for AWS VD to function properly.
At least one Ambient weather station connected to internet and user application key and API key
FEATURES
User can install multiple instances of VD for as many Ambient Weather stations he/she might have. Uses ambient weather cloud API to retrieve latest measurements. Provides measurements in imperial or metric units and also wind speed in m/s. Provides global variables for indoor and outdoor temperature, indoor and outdoor humidity, wind and gust speed, rain event, solar radiation, UV, outdoor and indoor PM25 and CO2 that can be used to trigger block or LUA scenes for specific user actions. Multi-language support with 27 languages included (see APPENDIX 1 for the list). VD can use HC selected language or user can select any other available language. VD will be automatically translated to selected language Easy setup for VD icons (on UHAS™ compatible version is this even easier) Global variables are automatically added, monitored, repaired and cleaned and does not require user intervention
INSTALLATION
Please check provided User Manual
PACKAGE CONTENT
Ambient Weather Station VD v1.1 Icon pack User manual EN
TERMS AND CONDITIONS
Permission to use, copy, modify and distribute this software and its documentation for educational, research, personal use and non-profit purposes, without fee and without a signed licensing agreement is hereby granted, provided that the copyright notice, with "Terms and conditions" and "Disclaimer" appear in all copies, modifications and distributions. It is strictly forbidden to sell, rent, lease and/or lend this software for profit without prior consent from the Author.
DISCLAIMER
This software is provided by copyright owner "as is" and any express or implied warranties, including, but not limited to, the implied warranties of merchantability and fitness for a particular purpose are disclaimed. In no event shall the author and distributor be liable for any direct, indirect, incidental, special, exemplary, or consequential damages (including, but not limited to, procurement of substitute goods or services; loss of use, data, or profits; or business interruption) however caused and on any theory of liability, whether in contract, strict liability, or tort (including negligence or otherwise) arising in any way out of the use of this software, even if advised of the possibility of such damage.
Fibar Group S.A. and their employees are not responsible for support of the ABC VD. Please contact the author Sankotronic, on the Fibaro Forum, for any questions or support required.
116 downloads
(0 reviews)0 comments
Submitted
-

Automatic Icon Downloader
Automatic Icon Downloader
What does this device:
Device can automatically download from dedicated web-page all icons that you use to your HC2. The device can be used by installers to easily download their favorite sets of icons to new HC2, by end users to get back icons after recovery or any other purpose. Device before uploading any icon to your HC2 check if any of selected in IconSet already exists so it should be safe to click on "Download to HC2" button many times.
This solution has to separate parts: vd and portal.
Version history:
0.6 - first published version of AID
To Do VD:
- future version of virtual device will be updated automatically from internet if user agreed to do it, after HC2 restart
To Do portal:
- next version will support adding user device icon to library (on, off, state 1-10)
Manual
1. Download and install virtual device.
2. Go to: www.grace-land.pl/fibaro/aid portal to get your IconSet. Current version looks like below.
Please note some important things:
- HC2 keeps your icons in 4 separate groups: devices, virtual devices, scenes, rooms. It means that if you want to use one image as room image and virtual device image it needs to be added twice - that is why portal items are divided into four groups (for user convenience - each group has different color)
How the portal works?
You just check all icons in each group you want to add to your IconSet and then click "Get your IconSet".
Please remember that you can edit this IconSet later.
What if I have icon/s that is not in portal library?
There is option to upload your icons and make library bigger. In this case you click on "Add new icons" button. You will be redirected to new page.
Please note some important things:
- You can upload many files and many groups in the same time,
- All icons will be checked before upload. Icon needs to be: PNG file, 128x128 size, unique [portal checks if this icon exists in this group*], no bigger then 1MB (one icon),
- You will see preview of icons that you want to add but without category,
- For now there is no option to add "device" icons. I am working on it to make it simple,
- You will get status whats was added and what not.
How to edit my IconSet?
You need to know your IconSetID and then click on "Edit your IconSet" button. Page will refresh and all icons from your set will be automatically checked.
What you need to do is to check more icons or uncheck unwanted icons and then click "Update your IconSet".
Please note that VD doesn't delete icons from your HC2.
3. After you have your IconSetID there is time to configure virtual device. In this case you need to provide some information.
a) In VD information please provide IP and TCP port.
IP: grace-land.pl
TCP port: 80
b) In Advanced tab scroll to button and replace needed credentials.
c) click "Save".
Please note that virtual device only downloads data so there is no risk in providing credentials.
------------------------------------------------- -- PUT YOUR ADMIN CREDENTIALS ------------------------------------------------- sv_user = '[email protected]'; sv_password = 'Y0urP@ssword'; sv_automaticDownloaderId = 'iconSetID_from_website';
4. Your device is ready to use. You just click on "Download to HC2" and wait. All needed information is in debug for vd button.
Device before uploading any icon to your HC2 check if any of selected in IconSet already exists so it should be safe to click on "Download to HC2" button many times, but it will take a while.
Have fun!
Disclaimer:
Every of icons on portal [grace-land.pl/fibaro/] aid library are not my property.
The code wasn't inspired by the somebody mentioned in comment below - the first version of uploading I found in 2013 [https://github.com/rafikel/Fibaro/tree/master/ncplus] - and I went this way to make something usefull.
580 downloads
- icons
- automatic_download
- (and 1 more)
-
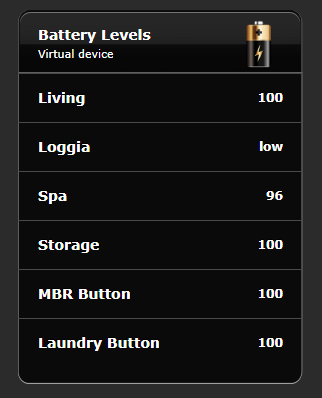
Battery Level Display
By RohitNz
The Virtual Device shows the battery status of battery powered devices. In addition, it will send an email to a user when the battery is low or dead. It is suitable for a small number of devices and gives you a snapshot view.
Note that the Lithium battery drops suddenly and if its below 80 then its marked as low and should be replaced. The battery is checked once a day roughly.
The lua code is attached. I have written it for efficiency instead of accuracy, as lua execution is so so slow. Hence the use of delays. You need as many labels in the VD as the number of devices and it uses label1..labeln for simplicity.
CODE.TXT
272 downloads
-
BLE Detector - Presence detector based on iNode LAN and BLE devices
By Guest macjoker
Features
The virtual device communicates with iNode LAN, receives and decodes information about all BLE devices available nearby. This allows tracking user presence if small BLE tags are attached to their belongings (like notiOne with a bunch of keys, e.g.).
What you need
iNode LAN - it can detect any Bluetooth 4.0/4.1 device (Bluetooth Low Energy = BLE) BLE tag (iNode Beacon , TrackR , notiOne , etc.) Installation
Configure your iNode LAN to use unicast or broadcast for sending datagrams (UDP packets) Go to the Setup page. For "BLE IP address" put your HC2 IP address (unicast) or broadcast address (192.168.1.255e.g.). For "BLE IP port" you may leave the default value (20000). Create a new virtual device (BLE Detector). Update IP Address and TCP Port (use the same values as for iNode LAN in step 1). Create a new scene (BLE Users). Update config values in the scene (provide names and MAC addresses of persons and their belongings).
That's all to make it work!
Now you can use global variables you have defined in Lua scene (users variable) to check if a person is away or home.
Want to tweak it? Sure!
There are more options. Please read all the comments in the source code.
You may try to:
define MACs of devices to ignore in discovery (your iNode LAN itself), define signal values for IN/OUT events (separately for each user), define the timeout value for each device (this also makes user away), turn on/off debug messages. Zip file content
Virtual device: "BLE Detector". Lua scene with user detection configuration: "BLE Users". Device icon for iNode LAN. FAQ
What are these scripts missing?
Only basic information is decoded from BLE datagrams (counter, MAC address, and signal strength). If you use iNode Sensors you will not get additional values (like temperature, pressure, magnetic or movement changes).
Why is it better than other solution (x) of presence detection?
It does not depend on any movement in your house, which can make many false positives - a running dog e.g. (x = motion sensors) It is independent of other devices. HC2 communicates directly with iNode LAN. (x = RaspberryPi to read iNode and press some virtual buttons in HC2) More stable results (x = python script from iNode website; explained below).
The Python script published by iNode manufacturer for presence detection uses only signal strength. That means to detect that someone is leaving we need to use some (lower part) signal range to have the record of going away. This additionally reduces the signal range for detecting "being home" (higher part of the signal range) and can give effect to the person appearing and disappearing all the time.
To avoid that we also check the latest timestamp of the device activity. Owing to this feature we may extend range signal for "being home" to all possible values, and use only timeout to decide whether a person is home or not (set "-100" to both signalIn and signalOut in users config to achieve that).
What messages should I expect to get from working device?
Here are some logs of the working device...
[DEBUG] 23:29:58: No: 35216 MAC: 00:12:6F:E0:BB:DB Signal: -16 dBm [DEBUG] 23:30:03: No: 35217 MAC: C0:36:A0:DC:87:99 Signal: -79 dBm [DEBUG] 23:30:08: No: 35218 MAC: 00:12:6F:E0:BB:DB Signal: -16 dBm [DEBUG] 23:30:09: No: 35219 MAC: C0:36:A0:DC:87:99 Signal: -79 dBm [DEBUG] 23:30:12: No: 35220 MAC: C0:36:A0:DC:87:99 Signal: -69 dBm and the scene:
[DEBUG] 23:30:21: MAC: C0:36:A0:DC:87:99 Signal: -79 (dBm) Time ago: 0 (sec) [DEBUG] 23:30:21: MAC: DF:12:45:F7:40:65 Signal: -84 (dBm) Time ago: 30 (sec) [DEBUG] 23:30:21: Gienia is home [DEBUG] 23:30:21: Zenek is home [DEBUG] 23:30:24: MAC: DF:12:45:F7:40:65 Signal: -84 (dBm) Time ago: 0 (sec) [DEBUG] 23:30:24: MAC: C0:36:A0:DC:87:99 Signal: -79 (dBm) Time ago: 3 (sec) [DEBUG] 23:30:24: Zenek is home [DEBUG] 23:30:24: Gienia is home Is it a stable solution? Can you share any experience about it?
For my configuration, I am using two pieces of notiOne. They are really tiny, the batteries are supposed to stay alive for about a year (from my experience it was usually about 6 months). Additionally, you can track them whenever someone with BLE and their App is near.
The results I get in my flat, where walls are made of silicate blocks, are quite stable. iNode LAN can detect these notiOnes with the weakest signal (-90 to -88 dBm) from a distance of 7-8 meters even through two silicate walls (24cm + 12cm thick). So placing iNode LAN in the middle of the flat covers the whole area.
My iNode LAN works with firmware version published in December 2017 ("FW date: Dec 14 2017/09:10:32"). I had no issues about it for more than 18 months right now. It is stable. I even use it as a power failure indicator: it is not plugged to UPS (whereas HC2 and NAS are), so when the device disappears from my LAN, I know there is something wrong with the power line.
Is there any way to extend Bluetooth range for iNode LAN? My house is too large for a single device of that kind.
Well, the device range is connected to Bluetooth limitations. If you need a larger area to be covered with BLE devices detection you could use more then one iNode LAN device. Each device should use a different global variable for storing detected BLE events (BleDevicesA, BleDevicesB, ...). The best way to merge these results would be an updated Lua scene, which could analyze more variables and properly select best data (i.e. select stronger signal if the same BLE tag is seen in many iNode LAN devices). This is not supported with the current version of Lua scene.
Another (not so nice, but quicker to achieve) workaround for that could be duplicating not only the BLE Detector VD but also the BLE Users scene. Each scene copy should have different global variables for users (like: isZenekHomeA, isZenekHomeB, ...) and additional code can interpret these variables to get final detection value (local isZenekHome = isZenekHomeA or isZenekHomeB or ...)
62 downloads
(0 reviews)0 comments
Updated
-
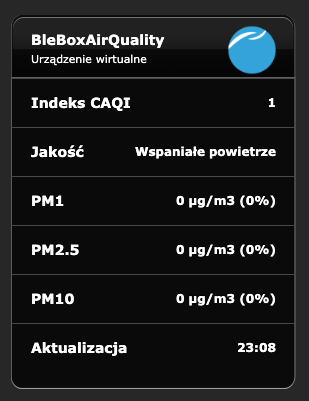
BleBox AirQuality Monitor
By Mieszko64
Poniżej pierwsza wersja kodu dla Fibaro VD odczytująca dane z Blebox AirSensor -dane dostępne po sieci lokalnej: adresIP.
- wymaga wpisania adresu IP urządzenia Blebox AirSensor dostępnego po sieci lokalnej WiFi
- wymaga wpisania miejscowości
- wymaga weryfikacji numeracji/ id ikon (ikony powszechnie wykorzystywane w różnych prezentacjach i VD, bedą też dostępne po zainstalowaniu Airly VD lub lookO2 VD. Można oczywiście wgrać też swoje własne projekty ikon.
VD umożliwia:
1. Prezentacje danych:
-indeks jakości powietrze 1 z 5
-indeks PM1
-indeks PM2.5
-indeks PM10
3. Zapis zmiennej globalnych "BleBox" indeksu jakości powietrza(IJP)- przydatna do wywoływania z innych np własnych VD
4 downloads
(0 reviews)0 comments
Submitted
-

Bluesound interface, first setup
By doezel
Hi,
here's a quick version to gain basic control of a bluesound device in your network.
Make sure to set up the correct IP address.
TCP port should be 11000
For now the following functions are supported:
- polling of the status, every second
- volume
- pause
- play
151 downloads
-
 (0 reviews)
0 comments
Submitted
-

Checking devices connected to the WI-FI network Sprawdzanie urządzeń podłączonych do sieci WI-FI
By talar26
Checking devices connected to the WI-FI network
Checking devices connected to WI-FI
We create a global variable, for example TabletSony
Then we import the Tablet_Sony_WI-FI virtual device after loading the device, we change the name according to our own needs, e.g. phone of the wife, etc., enter the IP address and port of the device to be checked if it is connected to the local network
tcpSocket = Net.FTcpSocket ("192.168.1.009", 8071) - ip address and device port
bytes, errorCode = tcpSocket: write ("test")
local device = 743 - virtual device id
if errorCode == 0
then
fibaro: call (device, "setProperty", "currentIcon", 1181) - id of the ON icon
fibaro: setGlobal ("TabletSony", "1"); - we create a global variable called eg TabletSony
fibaro: log ("Sony ON tablet ..os.date ("% H:% M ")) - displays the status of the device and the time on the notification bar
else
fibaro: call (device, "setProperty", "currentIcon", 1179) - id of the OFF icon
fibaro: setGlobal ("TabletSony", "0");
fibaro: log ("Sony OFF Tablet" ..os.date ("% H:% M")); ")) - displays the device status and time on the notification bar
end
Sprawdzanie urządzeń podłączonych do WI-FI
Tworzymy zmienną globalną np. TabletSony
Następnie importujemy urządzenie wirtualne Tablet_Sony_WI-FI po załadowaniu urządzenia zmieniamy według własnych potrzeb nazwę np. telefon żony itd. ,wpisujemy adres ip i port urządzenia które ma być sprawdzane czy jest podłączone do sieci lokalnej
tcpSocket = Net.FTcpSocket("192.168.1.009", 8071) -- adres ip i port urządzenia
bytes, errorCode = tcpSocket:write("test")
local device = 743 -- id urządzenia wirtualnego
if errorCode == 0
then
fibaro:call(device, "setProperty", "currentIcon", 1181) -- id ikony ON
fibaro:setGlobal("TabletSony", "1"); -- tworzymy zmienną globalną o nazwie np. TabletSony
fibaro:log("Tablet Sony ON "..os.date("%H:%M"));-- wyświetla na pasku powiadomienie stan urządzenia oraz godzinę
else
fibaro:call(device, "setProperty", "currentIcon", 1179) -- id ikony OFF
fibaro:setGlobal("TabletSony", "0");
fibaro:log("Tablet Sony OFF "..os.date("%H:%M")); "));-- wyświetla na pasku powiadomienie stan urządzenia oraz godzinę
end
297 downloads
-
CO_MANAGER
By lukasztylski
https://github.com/litepl/fibaro-heating-vd
Heating solution VD, based on Danfoss's thermostats and temperature sensors.
16 downloads
(0 reviews)0 comments
Submitted
-

Co_otwarte.vfib
By tefil
Co_otwarte.vfib
Polaczenie dwóch vd z następujące za zgodą autora
Urządzenie pokazuje stan otwarcia/zamknięcia drzwi i okien oraz stan czujników ruchu
136 downloads
(0 reviews)0 comments
Submitted
-

Control McLighting v2 based on ESP8266 board
By Pcg
Control ESP8266 lighting gadget developed by Tobias Blum
Change light modes and control through HC2
Requirements:
ESP8266 board programmed with McLighting software For every button you should change "local led_pin = [your control pin]" Use your own ip address and port
Fell free use and modify,but let me have a copy please for improving my knowledge.
29 downloads
(0 reviews)0 comments
Updated
-

COVID-19 Stats suite
By Sankotronic
COVID-19 Stats suite standalone
INTRODUCTION
COVID-19 Stats suite consists of virtual device and two scenes. It is using free COVID-19 API released by Kyle Redelinghuys. VD is getting back details about global and regional coronavirus data, including latest numbers that are updated close to real-time by gathering information from Johns Hopkins CSSE.
PREREQUISITES Fibaro Home Center 2 with firmware 4.580 or greater
Sankortonic Lab. Emoji VD standalone
FEATURES
COVID19 Stats suite is getting details about global and regional corona virus spread and show them on Fibaro mobile app or browser connected to HC2 home page.
Uses COVID-19 API built by Kyle Redelinghuys to show latest data on corona virus spreading.
Provides total global pandemic numbers for total and new cases, total and new deaths and total and new recovered cases and total active cases.
Provides user to select default country to monitor corona virus latest numbers
Provides user to check corona virus latest numbers for 190 countries worldwide.
Provides global variable trigger that user can setup to be updated either by global total active cases or their default country active cases. This trigger can then be used to start scene that will send notifications using any available service.
Multilingual support with 27 languages included. VD can use HC2 selected language or user can select any other available language. VD will be automatically translated to selected language
Easy setup for VD icons
Global variables are automatically created, monitored and repaired.
INSTALLATION
Please check provided User Manual
PACKAGE CONTENT
COVID-19 Stats VD COVID-19 Stats scene COVID-19 Triggered scene Icon pack for VD and scene User manual EN Updated code for scene and VD main loop and Update button
TERMS AND CONDITIONS
Permission to use, copy, modify and distribute this software and its documentation for educational, research, personal use and non-profit purposes, without fee and without a signed licensing agreement is hereby granted, provided that the copyright notice, with "Terms and conditions" and "Disclaimer" appear in all copies, modifications and distributions. It is strictly forbidden to sell, rent, lease and/or lend this software for profit without prior consent from the Author.
DISCLAIMER
This software is provided by copyright owner "as is" and any express or implied warranties, including, but not limited to, the implied warranties of merchantability and fitness for a particular purpose are disclaimed. In no event shall the author and distributor be liable for any direct, indirect, incidental, special, exemplary, or consequential damages (including, but not limited to, procurement of substitute goods or services; loss of use, data, or profits; or business interruption) however caused and on any theory of liability, whether in contract, strict liability, or tort (including negligence or otherwise) arising in any way out of the use of this software, even if advised of the possibility of such damage.
Fibar Group S.A. and their employees are not responsible for support of the COVID-19 Stats suite. Please contact the author Sankotronic, on the Fibaro Forum, for any questions or support required.
219 downloads
(1 review)0 comments
Updated
-
Daikin SkyFi
By seiq
Virtual device for control of Daikin air conditioners with the SKYFi addon. (untested)
128 downloads
- air conditioning
- daikin
- (and 3 more)
(0 reviews)0 comments
Submitted
-

Dane ze stacji meteorologicznej UMK
By m4rlb0r0
Urządzenie wirtualne wyświetlające parametry pogodowe pobierane ze stacji meteorologicznej UMK. Najbardziej przyda się osobom z Torunia i okolic
Samo urządzenie wyświetla dane ze zmiennych globalnych, które są przy pomocy api fibaro aktualizowane przy pomocy skryptu php. Wymagane jest wobec tego posiadanie w sieci lokalnej serwera z apachem i php oraz dodanie skryptu do harmonogramu zadań cron dla cyklicznej aktualizacji.
Mam nadzieję, że komuś się przyda.
Pozdrawiam
m4fibaro_umk_meteo_php.zip
15 downloads
- opad
- wilgotnosc
- (and 4 more)
(0 reviews)0 comments
Updated
-
Emoji VD standalone
By Sankotronic
Emoji VD standalone
INTRODUCTION
Emoji VD brings more than 950 nice small icons to Home Center 2. Emojis are sorted in logical groups and named with short names to make them much easier to find and use in user code. I’m using them in my work to reduce need for translations and also to enhance look and feel of virtual devices. Another reason why I made this VD is to avoid problems with listing code in some editors that might still have problems with displaying emojis due to different UTF coding.
IMPORTANT NOTICE
All my future work will require Emoji VD to be installed
PREREQUISITES
Fibaro Home Center 2 with firmware 4.580 or greater
FEATURES
Brings more than 950 emojis to HC2
Simple installation and setup.
Users can easily find any emoji needed because they are separated in logical groups and VD shows their names that can be used in code.
Global variables are automatically created, monitored and repaired and no user action needed. Just import Emoji VD, setup icon and room and start using it.
INSTALLATION AND UPGRADE
Please check provided User Manual
PACKAGE CONTENT
Emoji VD Icon pack User manual EN
TERMS AND CONDITIONS
Permission to use, copy, modify and distribute this software and its documentation for educational, research, personal use and non-profit purposes, without fee and without a signed licensing agreement is hereby granted, provided that the copyright notice, with "Terms and conditions" and "Disclaimer" appear in all copies, modifications and distributions. It is strictly forbidden to sell, rent, lease and/or lend this software for profit without prior consent from the Author.
DISCLAIMER
This software is provided by copyright owner "as is" and any express or implied warranties, including, but not limited to, the implied warranties of merchantability and fitness for a particular purpose are disclaimed. In no event shall the author and distributor be liable for any direct, indirect, incidental, special, exemplary, or consequential damages (including, but not limited to, procurement of substitute goods or services; loss of use, data, or profits; or business interruption) however caused and on any theory of liability, whether in contract, strict liability, or tort (including negligence or otherwise) arising in any way out of the use of this software, even if advised of the possibility of such damage.
Fibar Group S.A. and their employees are not responsible for support of the Emoji VD. Please contact the author Sankotronic, on the Fibaro Forum, for any questions or support required.
626 downloads
-
Download Statistics
-
New reviews
-
 By Bornheim · PostedI integrated two HUE bridges in my HC3. It works perfect (and much better and more powerful then the app integrated in HC3). In particular, also sensors, temperature measures etc. are available and can be used in Scenes. However, in both cases after installing and entering the IP adress of my HUEs I had to restart the HC3 to get the authentification running. So I assume to install one has to (i) upload / install the QuickApp, (ii) enter the IP address of the HUE in the local LAN, (iii) rest
 -

-

-

-
 By Sankotronic · PostedVery useful solution to help with gradually moving from HC2 to HC3. I have tested few of the QA and used them to test some of my new solutions on HC3 keeping HC2 still having main controll of our house. Thank you @cag014 for yet another excellent solution!
 -

-

-

-
 By SmartHomeEddy · PostedGreat QuickApp and excellent configuration manual. QuickApp works smooth. Thanks!
 -

-
-
Highest Rated Submitters
No ratings this week.
No ratings this month.
No ratings this year.
-
1

-
2

-
3

-
4
-
5

-