Welcome to Smart Home Forum by FIBARO
Dear Guest,
as you can notice parts of Smart Home Forum by FIBARO is not available for you. You have to register in order to view all content and post in our community. Don't worry! Registration is a simple free process that requires minimal information for you to sign up. Become a part of of Smart Home Forum by FIBARO by creating an account.
As a member you can:
- Start new topics and reply to others
- Follow topics and users to get email updates
- Get your own profile page and make new friends
- Send personal messages
- ... and learn a lot about our system!
Regards,
Smart Home Forum by FIBARO Team
Search the Community
Showing results for tags 'LUA'.
-
 Czy chcesz nauczyć się razem ze mną jak pisać sceny Lua i budować Quick App? Chcesz w pełni wykorzystać potencjał swojego inteligentnego domu z systemem NICE? Jeśli tak to zobacz co dla Ciebie przygotowałem..... Dołącz do zaawansowanego kursu, który poprowadzi Cię krok po kroku przez najważniejsze zagadnienia automatyzacji domu! Dlaczego warto wziąć udział w tym kursie? W trakcie 6 spotkań online poznasz: Blokowe sceny automatyzacji – dowiesz się, jak stworzyć automatyzacje, które działają samodzielnie i oszczędzają Twój czas. Programowanie w Lua – otworzy Ci to drzwi do zaawansowanych i elastycznych scen dostosowanych do Twoich potrzeb. Tworzenie Quick App – nauczysz się budować wirtualne urządzenia, które zautomatyzują Twój dom jednym kliknięciem. Integracja z urządzeniami firm trzecich – połączysz swój system FIBARO z urządzeniami IoT i zarządzasz wszystkim z jednej platformy. A poza tym: Nie musisz potrafić programować w języku Lua, nauczysz się tego na kursie ze mną. Znajomość języka angielskiego nie jest wymagana. W ofercie: 6 spotkań online – po 2 godziny każde w kilku osobowym zespole ze mną - specjalistą od Lua i Quick App w praktyce. Roczny dostęp do filmów instruktażowych i kursów dostępnych na portalu: https://www.ztechnikazapanbrat.pl/ Kursy dobywają się co miesiąc, wykup uczestnictwo już dziś! https://app.easy.tools/ec/30353747/szkolenie-fibaro-sceny-quickapp-integracje Do zobaczenia na kursie, Lukasz Z Techniki za Pan Brat.
-
Hi all. So I have a QA I am playing around with which provides a graph of my home temperatures from various sensors. It automatically adjusts depending the number of items in the array. This is done with HTML tags (below). I would like the 10,20,30 & 40 to be aligned at the top of the "cells" but everything I have tried doesn't work. Any suggestions? Thanks. GUI: function QuickApp:updatechart() local scaleMin = 0 local scaleMax = 40 local quantity = 0 local wdth = 0 local hgt=0 local trhgt =0 local tblVar="" local legVar="" -- 273.value for outside temp local arr = {{name="Outside",val=hub.getValue(273, "value")},{name="Master",val=getVar(308,"Temperature")},{name="Ensuite",val=hub.getValue(113, "value")},{name="Study",val=getVar(288,"Temperature")},{name="Guest",val=getVar(309,"Temperature")},{name="Living",val=getVar(310,"Temperature")},{name="Lounge",val=getVar(311,"Temperature")},{name="Entry Front",val=hub.getValue(119, "value")},{name="Entry Rear",val=hub.getValue(125, "value")}} self:debug(scaleMin .. " - " .. scaleMax.." - ") for _,i in ipairs(arr) do quantity = quantity+1 end for _,i in ipairs(arr) do self:debug("element ".. i.name) self:debug("value ".. i.val) wdth = (10*quantity)+120 trhgt = quantity*100//6 hgt = ((quantity*100//6)*i.val)/(scaleMax-scaleMin) tblVar = tblVar.."<td><table><table width=10px><tr height="..trhgt-hgt.." bgcolor=black><td></td></tr><tr height="..hgt.." bgcolor=blue><td></td></tr></table></td>" legVar = legVar.."<tr bgcolor=black><td>"..i.name.."</td></tr>" end local tblhtml = "<table><table width="..wdth.."px><tr height="..tostring(trhgt).."px><td><table><table width=20px border=white><tr height="..tostring(trhgt//4).." bgcolor=black ><td>"..tostring(scaleMax).."</td></tr><tr height="..tostring(trhgt//4).." bgcolor=black><td>"..tostring(3*(scaleMax-scaleMin)//4).."</td></tr><tr height="..tostring(trhgt//4).." bgcolor=black><td>"..tostring(2*(scaleMax-scaleMin)//4).."</td></tr><tr height="..tostring(trhgt//4).." bgcolor=black><td>"..tostring(1*(scaleMax-scaleMin)//4).."</td></tr></table></td>"..tblVar.."<td><table><table width=100px>"..legVar.."</td></tr></table>" self:updateView("lblTable", "text", tblhtml) end

-
Hello, I have an application where if I manually turn on a light, I need to know that the light was manually turned on and not automatically by some sensor. But I stuck at setting and reading the value of the global variable. The value printed is always Nil. Why? This is the only code in the LUA scene. local value = tonumber(hub.getGlobalVariable("GarageLightBackForced")) hub.setGlobalVariable("GarageLightBackForced", tostring(2)) hub.setTimeout(900000,function() hub.setGlobalVariable("GarageLightBackForced", tostring(0)) end) print(tonumber(hub.getGlobalVariable("GarageLightBackForced"))) -- print to debug only Help
-
In making the transfer from HC2 to HC3 based on a cloud backup (update 4.581 Beta) it is stated that "scenes will not be moved and need to be created again". That's OK, but it would be helpful when planning the transfer to know what the differences are (in syntax and available functions) between the two LUA versions. I know that the new LUA editor is documented in https://manuals.fibaro.com/home-center-3-lua-scenes/ . What I would hope to see in addition, is a side by side comparison of all the crucial differences, to enable a pre-edit of the old LUA scenes before entering them into the new editor. Something like this: If you used this in HC2 LUA: You need to do this in HC3 LUA: fibaro.debug("txt") fibaro.debug("tag", "txt") os.time() ??? etc. If we all contribute to such a table as we identify all the differences, we may be able to help each other prepare for HC3. Not all differences can easily be summarized in the simple two-column format above, however. For the new definition of conditions and triggers, it seems it would be more appropriate to give a few examples of old codes (with triggers) converted to new codes. PS: I haven't even decided to buy the HC3 yet! But getting a feel for the amount of re-programming needed to convert my scene is an important factor in making that decision. The suggested table is now shown in a pdf file attached to this post, see below. It is regularly updated as new contributions are posted. LUA HC2 vs HC3.pdf
-
Has anyone found a simple solution to play internet radio stations from like Tunein? if so can you share your VD. thanks
-
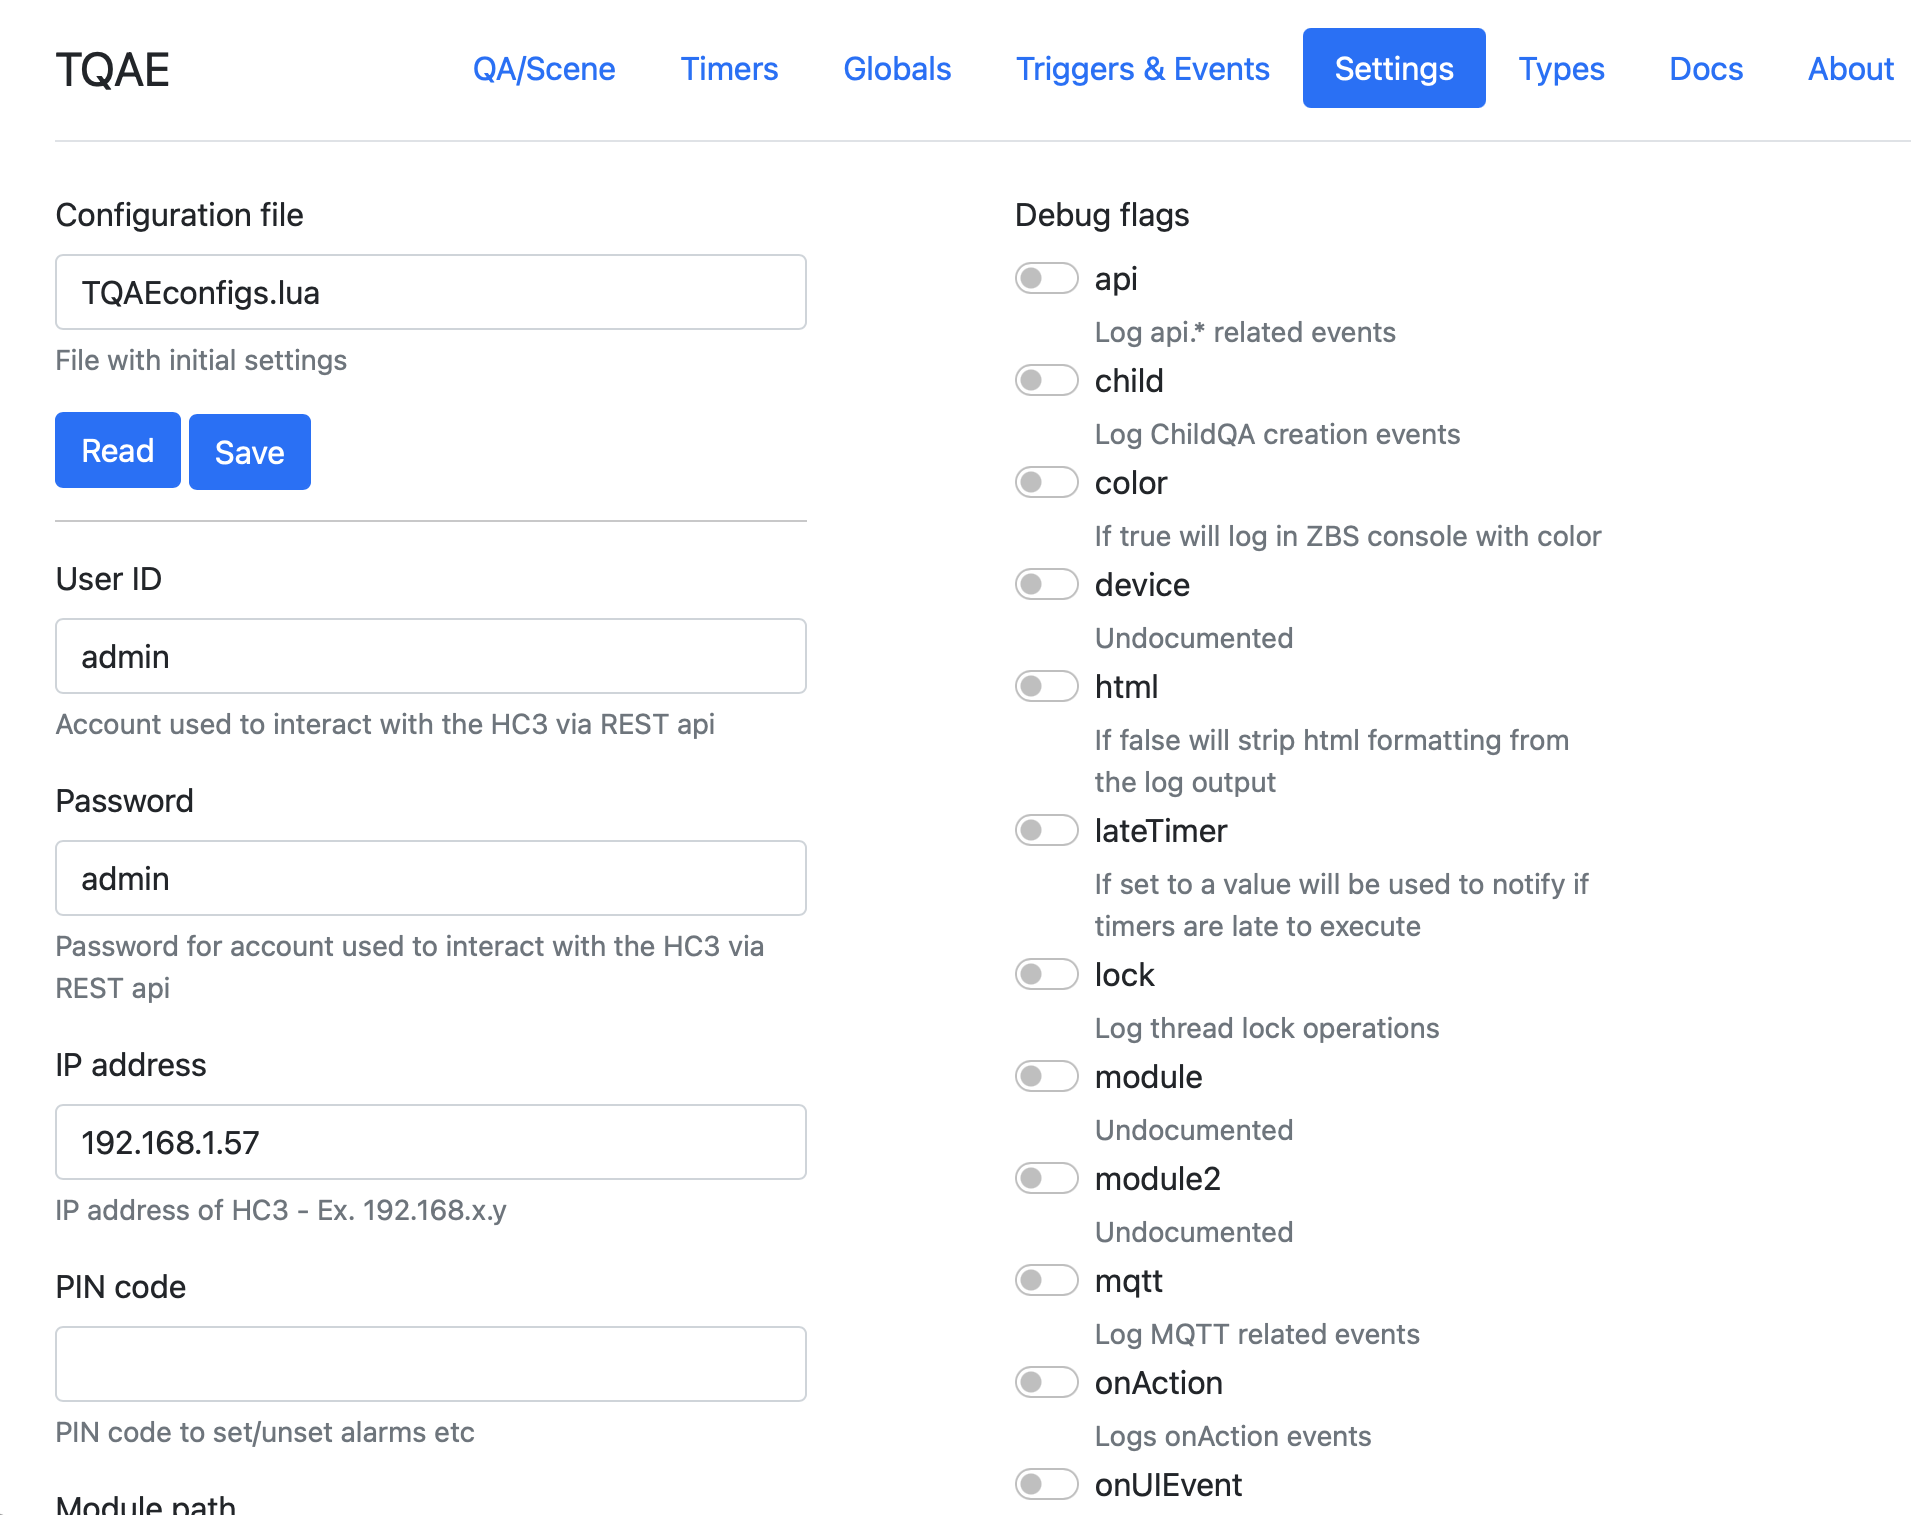
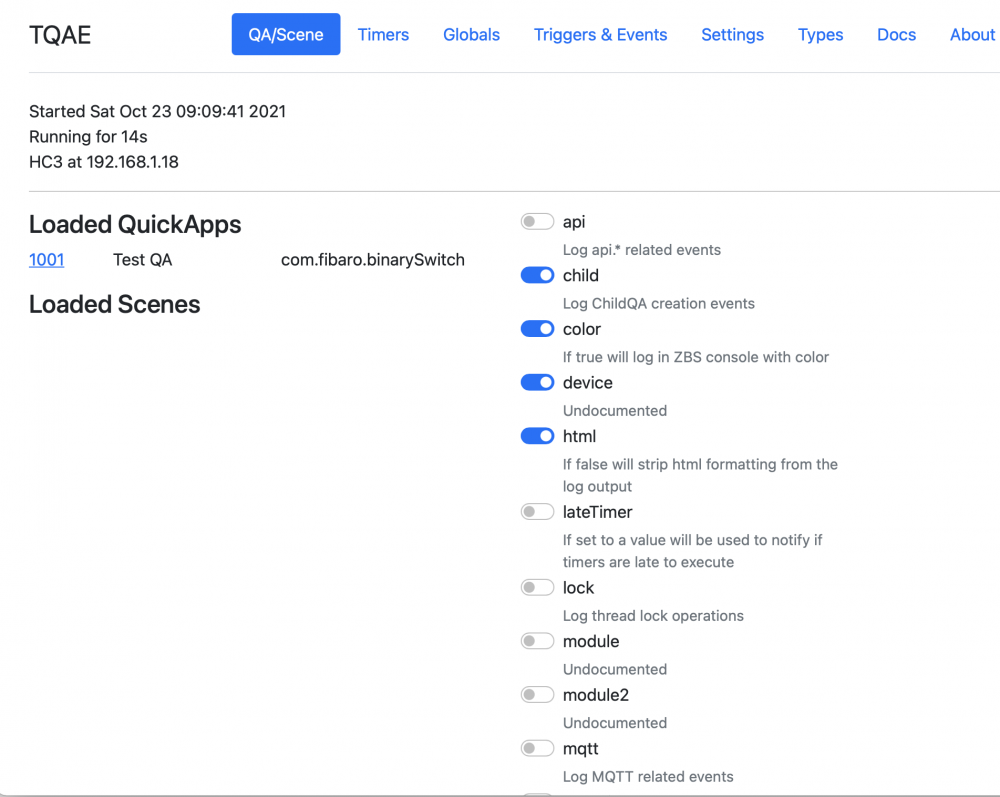
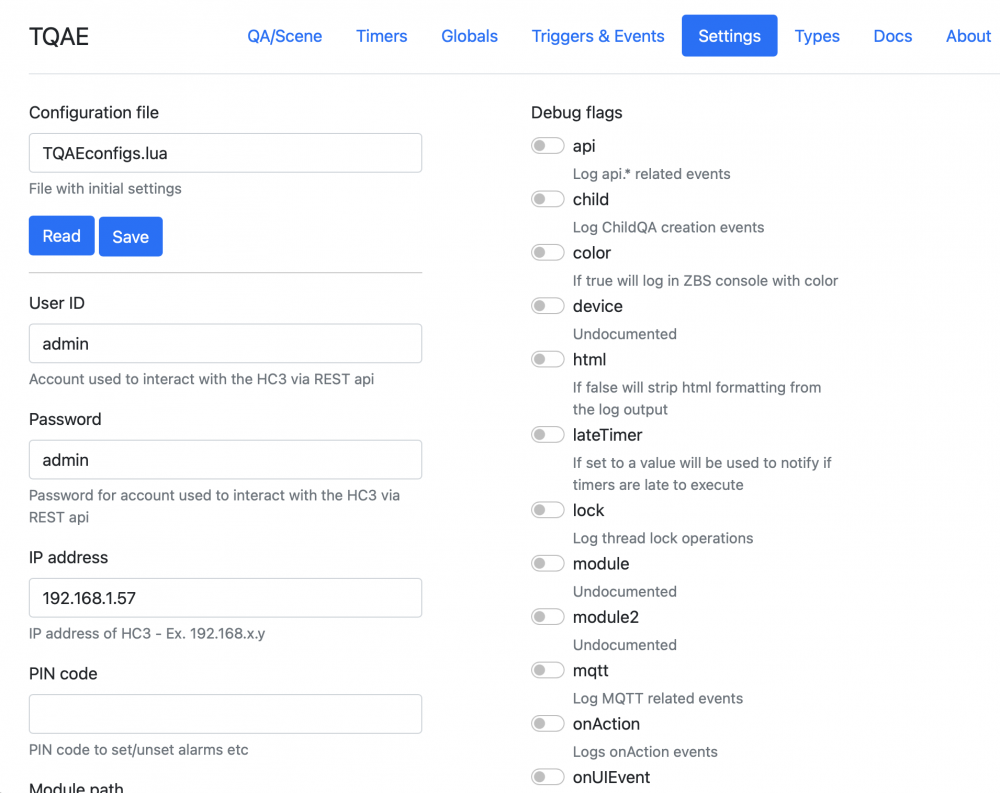
Tiny QuickApp Emulator (TQAE) started out as a simple modular QuickApp emulator but have evolved into a pretty good development environment. (Great intro to TQAE <here> from @Joep - thanks!) If you want to use vscode, I recommend this project that I'm currently focusing my development efforts on. /TQAE.lua v0.60 -- Main emulator, loads other modules /modules/sync.lua -- timers with fake asynchronous IO /modules/async.lua -- timers with asynchronous IO based on copas /modules/copas.lua -- copas.* functions /modules/net.lua -- net.* functions /modules/api.lua -- api.* and web api /modules/json.lua -- json library /modules/fibaro.lua -- fibaro.* functions /modules/class.lua -- class function /modules/files.lua -- support for loading files, *.lua and *.fqa files /modules/QuickApp.lua -- QuickApp classes /modules/devices.json -- device templates /modules/webserver.lua -- web server for remote calls (ex. from proxy) /modules/proxy.lua -- creates QA proxy on the HC3 for funnelling back onAction and UIevents /modules/ui.lua -- Local Web UI for QA /modules/time.lua -- Time manipulation - changing start time... /modules/refreshStates.lua -- /refreshStates support /modules/Scene.lua -- Initial support /modules/offline.lua -- Support for local shadowing resources. Currently /globalVariables /modules/stdQA.lua -- Standard (simulated) devices /web/main.html -- Web - Main emulator page /web/qa.html -- Web - QuickApp info /web/ui.html -- Web - QuickApp UI /web/timers.html -- Web - list of active timers /web/settings.html -- Web - editor for configuration file examples/MyQuickApp.lua -- Simple QuickApp examples/Hue.lua -- Hue QuickApp with QuickAppChildren examples/Scheduler.lua -- Simple minute based scheduler examples/Ping.lua -- Ping QuickApp that loads Pong QuickApp and exchanges fibaro.calls... examples/Pong.lua examples/TestScene.lua -- Test scene examples/TestSceneCron.lua -- Test scene with Date condition examples/Backup.lua -- Non-QA code that backs up QuickApps from the HC3 to the local filesystem as *.fqa files examples/SamsunWebSocket.lua -- WebSocket example controlling my Samsung TV examples/TestTCPSocket.lua -- TCPSocket example with emulated responses setup/TQAEplugin.lua -- ZBS plugin to give editor help and fibaro command completion. TQAE.gz -- Every file in one archive Installation First time download the archive, TQAE.tar.gz and unpack it in a suitable directory on your PC/Mac/Linux. On Linux: >tar xvf TQAE-main.tar On PC/Mac use suitable archive program to unpack the archive. ../TQAE/TQAE.lua ../TQAE/TQAE_QA.lua ../TQAE/modules/* ../TQAE/web/* ../TQAE/examples/* ../TQAE/... Alternatively, and preferred, clone the GitHub repository >git clone https://github.com/jangabrielsson/TQAE The setup procedure would be EMB-31KYQ6LT:~ erajgab$ mkdir development # Create new directory to develop in EMB-31KYQ6LT:~ erajgab$ cd development/ EMB-31KYQ6LT:development erajgab$ git clone https://github.com/jangabrielsson/TQAE # Clone repository Cloning into 'TQAE'... remote: Enumerating objects: 1790, done. remote: Counting objects: 100% (192/192), done. remote: Compressing objects: 100% (135/135), done. remote: Total 1790 (delta 118), reused 122 (delta 57), pack-reused 1598 Receiving objects: 100% (1790/1790), 1.75 MiB | 7.28 MiB/s, done. Resolving deltas: 100% (1198/1198), done. EMB-31KYQ6LT:development erajgab$ ls # We got the code... TQAE EMB-31KYQ6LT:development erajgab$ cd TQAE/ EMB-31KYQ6LT:TQAE erajgab$ ls LICENSE TQAE.tar.gz examples modules README.md TQAE_QA.lua jgabs_QAs setup TQAE.lua TQAEconfigs.example lib web EMB-31KYQ6LT:TQAE erajgab$ mkdir test # Create 2 directories to do your own development in EMB-31KYQ6LT:TQAE erajgab$ mkdir dev So both directories dev and test are in .gitignore, so you can update the TQAE code with the command (while standing in the TQAE directory) EMB-31KYQ6LT:TQAE erajgab$ git fetch This will update the TQAE code (it's usually updated quite often) but will leave your test and dev directories untouched. You can also link dev to some other directory where you do your development. I will do my best to keep the repository clean. This way it's easy to keep up with updates of the code. Download ZeroBrane studio <link> Open ZBS and open the TQAE_QA.lua file Set project directory in ZBS to the current file, TQAE_QA.lua (Project->Project Directory->Set From Current File) Also set Lua interpreter to Lua 5.3 (Project->Lua Interpreter->Lua 5.3) Now, run TQAE_QA.lua (F5 in ZBS). The output will look something like: ---------------- Tiny QuickAppEmulator (TQAE) v0.30 ------------- [11.10.2021] [08:33:23] | SYS|: No connection to HC3 [11.10.2021] [08:33:23] | SYS|: Created WebAPI at 192.168.1.18:8976 [11.10.2021] [08:33:23] | SYS|: sunrise 07:43, sunset 19:50 Note first that there is no connection to the HC3 - we are missing user, password, and IP for the HC3. Secondly, note the WebAPI address. 192.168.1.18 is my machine, your IP address may be different. The port is 8976. While TQAE_QA.lua is running open http://192.168.1.18:8976/web/main in your browser. (the Web UI only works while the emulator is running) Goto [Settings] in the web page menu (upper right). Fill in User ID, Password, and IP address for the HC3. Click "Save" Hopefully there is now a TQAEconfigs.lua file with the HC3 credentials that the emulator can use. Go back to ZBS and stop the program (Shift-F5) and run it again: ---------------- Tiny QuickAppEmulator (TQAE) v0.30 ------------- [11.10.2021] [09:13:43] | SYS|: Using config file TQAEconfigs.lua [11.10.2021] [09:13:43] | SYS|: Created WebAPI at 192.168.1.18:8976 [11.10.2021] [09:13:43] | SYS|: sunrise 07:14, sunset 17:52 It loads the config file and doesn't complain that there is no connection to the HC3 anymore. If you run ZBS I strongly encourage you to download the copy the TQAE/setup/TQAEplugin.lua file to your home directory ~/.zbstudio/packages/TQAEplugin.lua Also create directory ~/.zbstudio/tqae and move the files TQAE/setup/codeTemplates.lua and TQAE/setup/fileDownloads.lua to that directory. It will give you tooltips for the fibaro lua functions and some shortcuts to download updates to TQAE. Restart ZBS after installing the files. Great we are up and running! Supported functions (v0.33) fibaro.debug(tag,str) fibaro.warning(tag,str) fibaro.trace(tag,str) fibaro.error(tag,str) fibaro.call(deviceID, actionName, ...) fibaro.getType(deviceID) fibaro.getValue(deviceID, propertyName) fibaro.getName(deviceID) fibaro.get(deviceID,propertyName) fibaro.getGlobalVariable(varName) fibaro.setGlobalVariable(varName ,value) fibaro.getRoomName(roomID) fibaro.getRoomID(deviceID) fibaro.getRoomNameByDeviceID(deviceID) fibaro.getSectionID(deviceID) fibaro.getIds(devices) fibaro.getAllDeviceIds() fibaro.getDevicesID(filter) fibaro.scene(action, sceneIDs) fibaro.profile(profile_id, action) fibaro.callGroupAction(action,args) fibaro.alert(alert_type, user_ids, notification_content) fibaro.alarm(partition_id, action) fibaro.setTimeout(ms, func) fibaro.clearTimeout(ref) fibaro.setInterval(ms, func) fibaro.clearInterval(ref) fibaro.emitCustomEvent(name) fibaro.wakeUpDeadDevice(deviceID) fibaro.sleep(ms) net.HTTPClient() net.TCPSocket() net.UDPSocket() net.WebSocketClient() net.WebSocketClientTLS() mqtt.Client.connect(uri, options) <mqttclient>:addEventListener(message,handler) <mqttclient>:subscribe(topic, options) <mqttclient>:unsubscribe(topics, options) <mqttclient>:publish(topic, payload, options) <mqttclient>::disconnect(options) api.get(call) api.put(call <, data>) api.post(call <, data>) api.delete(call <, data>) setTimeout(func, ms) clearTimeout(ref) setInterval(func, ms) clearInterval(ref) json.encode(expr) json.decode(string) plugin.mainDeviceId plugin.deleteDevice(deviceId) plugin.restart(deviceId) plugin.getProperty(id,prop) plugin.getChildDevices(id) plugin.createChildDevice(prop) class QuickAppBase class QuickApp class QuickAppChild class <name> property(get,set) QuickApp:onInit() -- called at startup if defined QuickApp - self:setVariable(name,value) QuickApp - self:getVariable(name) QuickApp - self:debug(...) QuickApp - self:trace(...) QuickApp - self:warning(...) QuickApp - self:error(...) QuickApp - self:updateView(elm,type,value) QuickApp - self:updateProperty(name,value) QuickApp - self:createChildDevice(props,device) QuickApp - self:initChildDevices(table) The idea and reason that I implement an offline emulator for the HC3 is that it is generally speaking a pain to debug a moderately complex QuickApp on the HC3. You are left to using debug statements and it slow you down as you can not set breakpoint and step through the code to understand what logic it is following. With an offline emulator running on a PC/Mac you can use a modern IDE like ZeroBrane or VisualStudio to develop your QA. You can quickly put together 99.9% of your QA and the speed/productivity tripples. When it works in the emulator you can move the code to the HC3 and it will work. No need to develop on the HC3 and accidentally crash the whole box and make your family upset. Here is a video showing a typical workflow. (Note that the Web UI now has a button "Upload" that uploads the QuickApp when it's ready to the HC3) Writing HC3 (HC2) emulators seems to be a hobby for me - but what better thing to do on a vacation? So far I have HC2 Scene emulator - quite ok and feature complete, not actively developed anymore but still works well (not much has happened to the HC2 scene framework lately) HC3 emulator (fibaroapiHC3.lua) - gazillion of features, 9.5k lines - haven't come across any QA it can't run. Also some basic Scene support HC3 micro emulator - ~70 lines of Lua that can run QAs in parallel but have a very limited function support. Developed to prove that we could enhance the call model of QAs without much work Well, the micro emulator got my interest and I have evolved it to a more full featured emulator - Tiny QuickApp Emulator (TQAE). Runs multiple QAs in parallel - can test fibaro.calls between them Supports net.HTTPClient, setTimeout, clearTimeout, setInterval, clearInterval, json.*, class, property Supports QuickApp methods - self:setVariable, self.getVariable, self:updateProperty, self:updateView Supports fibaro.* functions Supports QuickAppChild devices Supports simple web UI to test QuickApp buttons/sliders Supports proxy QA on the HC3 to make to emulated QA interact with QAs running on the HC3 - Real HC3 QAs can call the QA you are running in the emulator. (and you get a real UI too) The main idea is that the emulator could be used as a light weight playground for testing out QAs The main logic is still under 1000 lines with current modules but stuff like json support and the whole fibaro.* sdk requires quite some code so it tends to swell - in any case it's modular. Dependencies on luasocket. (I recommend the free ZeroBrane Studio as it comes with the necessary libraries and is a specialised development environment for Lua) local http = require("socket.http") local socket = require("socket") local ltn12 = require("ltn12") It has an easy structure (I think). There are very few differences between TQAE and fibaroapiHC3.lua so I mainly work with TQAE these days. Advantages compared to fibaroapiHC3.lua. Easier to debug as code is not as asynchronous as it is in the fibaroapiHC3 scheduler (possibility to use a sync scheduler). Uses a vanilla fibaro.* implementation only leveraging api.* and __fibaro_* calls, so it should be easy to upgrade if we get new fibaro.* calls. Module structure makes it easy to add new libraries etc. It's modular. Include it in your QA code _=loadfile and loadfile("TQAE.lua"){ user="admin", pwd="admin", host="192.168.1.57" } --%%name='Test' --%%id=99 --%%quickVars={x=88,y=99} function QuickApp:onInit() self:debug(self.name,self.id) self:debug("y=",self:getVariable("y")) local n = 5 setInterval(function() n=n-1 if n <= 0 then os.exit() end self:debug("PING") end,1000) end The loadfile at the top loads in the emulator and run your QA. The { ... } table after loadfile("TQAE.lua") is a table with configuration options to the emulator. The emulator needs ip, user and password to access the HC3. If you don't want to type that you can store a config file for TQAE with you standard settings. The default name for the file is "TQAEconfigs.lua" and it can look like return { user="admin", pwd="admin", host="192.168.1.57", verbose=false, modPath = "TQAEmodules/", temp = "temp/" --localModules = {"myModule.lua"} --globalModules = {"UDP.lua"} } However, you still need to call loadfile("TQAE.lua"){} with and empty table. If you would like to have another name of the file you can specify that loadfile("TQAE.lua"){ config = "myTQAEconfigfile.lua" } The config is parameters for the emulator. Then you can also set "parameters" for the individual QAs that you run using --%% directives The --%% directives in your QA code are collected into a Lua table. In the case above { name='Test', id=99, quickVars = { x=88, y=99 } } and if present will be used to add fields to the QA. This is the way to tell what name, id and type you want your QA to have. A special field is quickVars that will be inserted as quickAppVariables of the QA at startup. Note that each field can only be one line. It's easy to startup another QA from within your code _=loadfile and loadfile("TQAE.lua"){ user="admin", pwd="admin", host="192.168.1.57" } --%%name='Test' --%%id=99 hc3_emulator.installQA{id=444,file='MyOtherQA.lua'} -- Load in another QA and set id to 444 function QuickApp:onInit() self:debug(self.name,self.id) fibaro.call(444,"test",5,6) -- call other QA end If the other file is open in the IDE you can set breakpoints in it and jump between the QAs. In fact, hc3_emulator.installQA{id=444,file='MyThirdQA.fqa'} will load in a .fqa file directly. In that case temporary files are stored for each of the files in the .fqa. This means we can do trick like this, downloading a QA from the HC3 and run it in the emulator with one line of code _=loadfile and loadfile("TQAE.lua"){ user="admin", pwd="admin", host="192.168.1.57" } hc3_emulator.installQA{id=700,code=api.get("/quickApp/export/700")} -- Load in QA 700 from HC3 and run it function QuickApp:onInit() self:debug(self.name,self.id) fibaro.call(700,"test",5,6) -- call QA 700 end Another useful directive is --FILE:<filename>,<name>; that allow us to include extra files in our QA. A QA can consist of several files but it must have a 'main' file. The QA code you run in the emulator will always be the main, and then you can include extra files that will be added to the QA as "files". Ex. _=loadfile and loadfile("TQAE.lua"){ user="admin", pwd="admin", host="192.168.1.57" } --FILE:myUtilities.lua,utilities; function QuickApp:onInit() self:debug(self.name,self.id) LOG("This is a test") -- Using global LOG function defined in myUtilities.lua end Running and logs When running there will be output of two types. Standard logging that the QA does with fibaro.debug, self:debug etc,. System debugs, that are the emulators way to inform on what is ongoing. How much the system logs depends on the configuration parameter .logLevel. ---------------- Tiny QuickAppEmulator (TQAE) v0.5 ------------- [29.07.2021] [11:17:34] |SYS |: Loading QA:TestQA1 - ID:1001 Start [29.07.2021] [11:17:34] |SYS |: Starting QA:TestQA1 - ID:1001 [29.07.2021] [11:17:34] [DEBUG] [QUICKAPP1001]: TestQA1 - 1001 Here we se the system log (|SYS |) that the QA is loading and then the log that it's running. The first is when the QA code is loaded and all functions are defined. Also if you do something on top-level, outside functions it will run here. In the example the QA does a print("Start") on top-level of the QA so that is executed when loading. Then, if the QA is successfully loaded, it will be "started, meaning that the function QuickApp:onInit() will be called if it's defined. That's the second SYS log. It's good to pay notice to this. If you get an error before Loading it typically means that you have a syntactic error in the QA code - non-valid Lua code. If you get an error after Loading but before Starting it's something on top-level that is run, outside of function QuickApp:onInit() If you get an error after Starting, well, then it's just something wrong with your code when it runs. A run-time error will look like: [29.07.2021] [12:27:47] [ERROR] [QUICKAPP1002]: [string "temp/main_16546.lua"]:5: attempt to call a nil value (global 'foo') This tells us that the error was in the QA with id 1002 (unless you have changed __TAG) The QA file is 'main'. A QA can consist of many files and this gives us the clue in what file the error was. If you only have one file, its name is 'main'. Then it tells us that is was line 5 where the error occurred ([string "temp/main_16546.lua"]:5:) and then that we tried to call a global variable 'foo' that didn't have a value (a function) So, in the main file look for a foo() call on line 5 - that's the error... Turning up logLevel will also log modules loaded etc. It also sets a Lua global in the QA, LOGLEVEL to the level, so that variable can be used by you to also allow your code to log more or less. Other features The Web UI allows the file to be saved as a *.fqa file that can be uploaded manually to the HC3. It you have included multiple files with the --FILE: directive they will also be included. A simple way to code and create multi-file QAs. The Web UI can also upload the QA directly to the HC3. The directive 'interfaces' Ex. --%%interfaces={"power"} will add the interfaces as the initialInterfaces property of the .fqa. An easy way to include and extra interface in the ready .fqa. Emulator options: (set in the header _=loadfile and loadfile("TQAE.lua"){...} ) user=<user> Account used to interact with the HC3 via REST api pwd=<Password> Password for account used to interact with the HC3 via REST api host=<IP address> IP address of HC3 configFile = <filename> File used to load in emulator options instead of specifying them in the QA file. Great place to keep credentials instead of listing them in the QA code, and forget to remove them when uploading codeto forums... Default "TQAEconfigs.lua" debug={ traceFibaro=<boolean> -- default false QA=<boolean>, --default true module=<boolean>, --defaul false module2=<boolean>, --defaul false lock=<boolean>, --default false child=<boolean>, --default true device=<boolean>, --default true refreshStates=<boolean> -- default false } modPath = <path>, Path to TQAE modules. Default "TQAEmodules/" temp = <path> Path to temp directory. Default "temp/" startTime=<time string> Start date for the emulator. Ex. "12/24/2024-07:00" to start emulator at X-mas morning 07:00 2024. Default, current local time. htmlDebug=<boolean>. If false will strip html formatting from the log output. Default true colorDebug=<boolean>. If true will log in ZBS console with color. Default true copas=<boolean> If true will use the copas scheduler. Default true. noweb=<boolean> If true will not start up local web interface. Default false lateTimers=<seconds> If set to a value will be used to notify if timers are late to execute. Default false timerVerbose=<boolean> If true prints timer reference with extended information (expiration time etc) QuickApp options: (set with --%% directive n file) --%%name=<name> --%%id=<number> --%%type=<com.fibaro.XYZ> --%%properties={<table of initial properties>} --%%interfaces={<array of interfaces>} --%%quickVars={<table of initial quickAppVariables>} --%%proxy=<boolean> --%%save=<boolean> Documentation Emulator parameters and QA parameters Web UI - and QA UI Some implementation notes Notes and ToDos Mostly developed as a playground for my own coding and it fits my workflow. I may add features/fix bugs if others are using it - but no more than 500 lines of code
-
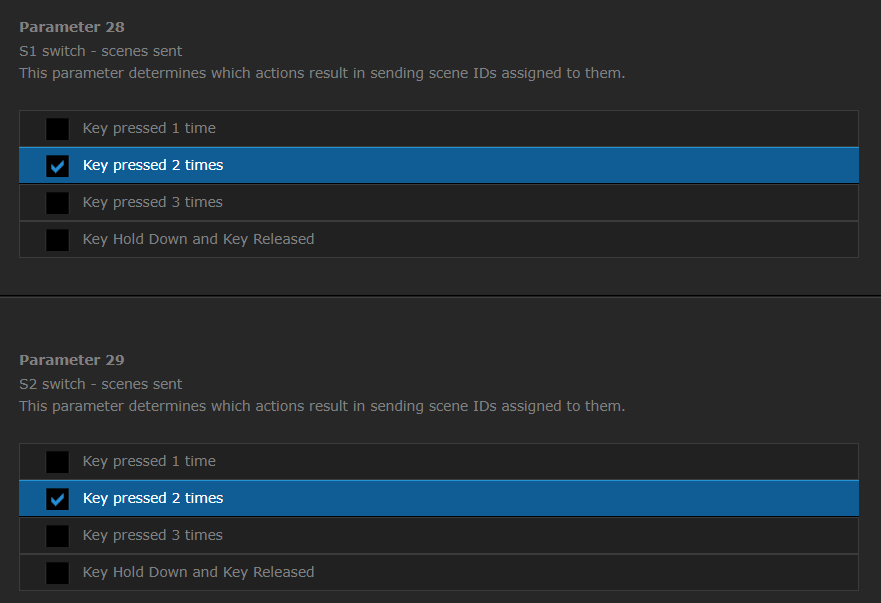
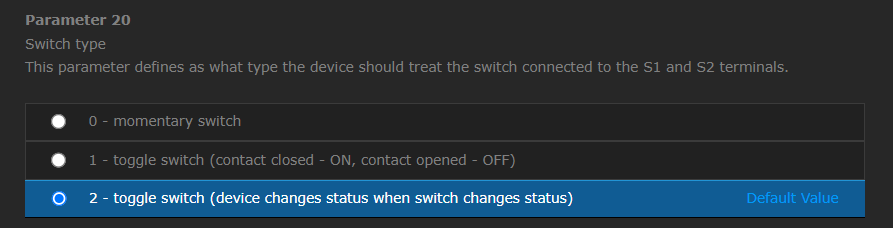
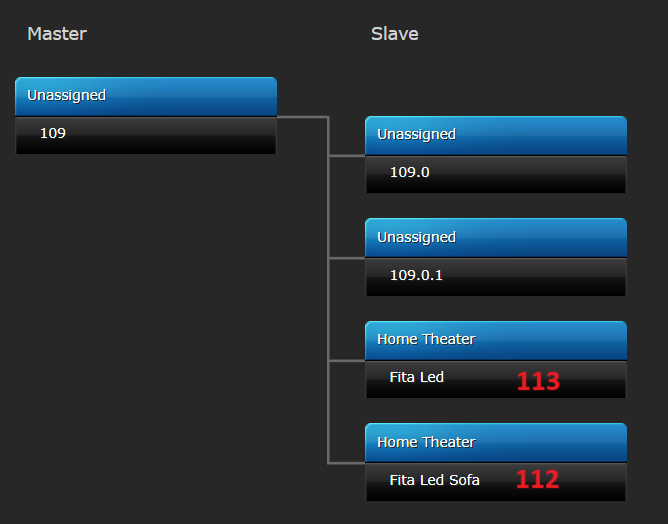
I have been trying to create the following scene in LUA: When i double click the light switch (Fibaro Switch 2), i want to turn all the room lights on. I have set the switch's parameters 28 and 29 to enable 2x click. I have also set the parameter 20 to the correct switch type. This is my object IDs: This is my LUA scene code (I have used this code as a template, since i don't know much about lua https://forum.fibaro.com/topic/23423-switch-2-trigger-scene/😞 --[[ %% properties %% events 109.0 CentralSceneEvent %% globals --]] local pressSource = fibaro:getSourceTrigger()["event"]["data"] --fibaro:debug(json.encode(pressSource)) if (tostring(pressSource["keyAttribute"]) == "Pressed2") then fibaro:debug('Pressed 2 times') if fibaro:getGlobalValue("Home") ~= "1" then fibaro:setGlobal("Home", "1") fibaro:debug(" Global Home set to "..fibaro:getGlobalValue("Home")) fibaro:startScene(68) else fibaro:setGlobal("Home", "0") fibaro:debug(" Global Home set to "..fibaro:getGlobalValue("Home")) fibaro:startScene(69) end end So the idea would be: if key is pressed 2x, the variable "Home" gets 1 (and trigger sceneID 68 - turn all on) or 0 (and trigger sceneID 69 - turn all off) The issue is that i don't know which "CentralSceneEvent" ID to use, i tried 109.0.1 (remote controller) but it didn't work. How does these IDs work exactly for this type of event call? What should i point the id to? Another thing i would like to know: Here i use a single ID that would call to both S1 and S2 of one switch. Can i insert more CentralSceneEvent IDs into this code, so that more switches can trigger the same scene, or i should copy this scene and create a new one for each switch? EDIT: So i figured i was not using the correct ID's to trigger the scene. The 109.0 is actually 110, which made the scene work. Now i just have to figure if i can use more than one ID in the same scene, or if I have to duplicate the scene and switch the ID to the other switch that needs to trigger too. Does anyone know that?
-
Dear readers, I am looking for an option to make an integration for the products from plugwise. their products are programmed with Lua so I think it is an easy job. but i can't find any documentation about how to make an integration so that the fibaro HC2 can work with their devices. products links : www.plugwise.com
-
Hi, we use 6 MCO MH7 devices in our house and all have the same behavior. I have scenes with the Device MCO MH7 Heating Control. They worked propely. I am switching the temperature based on a heating plan for our water florr heating. Since the inclusion of the "Engery safing heating" state I got the problem, that the temperature isn´t set well to the new values. fibaro:call(420, "setSetpointMode", 11) fibaro:call(420, "setThermostatSetpoint", 11, "21"); fibaro:call(420, "setSetpointMode", 1) fibaro:call(420, "setThermostatSetpoint", 1, "21"); to be safe I also send it to both "setpointMode", but sometimes the device doesn´t catch the new value. Is some one here who has the same issue or know how to solve it?
-
Hi there, recently updated to a HC3 and would like to add 2 Deye inverter to the energy panel. I did my research, but no idea how to implent it. Inverters are accesible via http://username.password@IP/status.html. Any idea and help would be great! Regards Francisco
-
Hi Brains, This was working fine with my HC2. I've just moved to HC3 and I'm perplexed by the following behaviour: I have a Fibaro Dimmer with an S2 button and I have parameter 28 active and everything else is default. And this is happening with 5 separate dimmers. So when I double click the S2 btn for the first time it prints out DoubleClick and works fine. However the second time I double click it though it doesn't do anything. I try it again and nothing. I then single click the S2 btn and it prints out Click. I then double click and it works and prints out DoubleClick. However I try double clicking again and nothing. Same thing happens for single clicking the S2; first time it works and prints Click. Try it again and nothing happens. Try it again still nothing. Its not until I double click and it prints DoubleClick and then can single click and it prints Click. Any ideas what I've done wrong? { conditions = { { id = 23, isTrigger = true, operator = "anyValue", property = "sceneActivation", type = "device" } }, operator = "all" } local Debugger = 'True' local sa = sourceTrigger if sa.value == 16 then if Debugger == 'True' then print('Click') end end if sa.value == 22 then if Debugger == 'True' then print('Hold') end end if sa.value == 23 then if Debugger == 'True' then print('Release') end end if sa.value == 24 then if Debugger == 'True' then print('DoubleClick') end end if sa.value == 25 then if Debugger == 'True' then print('TripleClick') end end if sa.value == 26 then if Debugger == 'True' then print('Click') end end
-
Hi guys, is there a way to stop the ringing or cancel the call using lua or an api call? Sometimes I just walk to the door and open it. But the intercom keeps ringing. Thanks
-
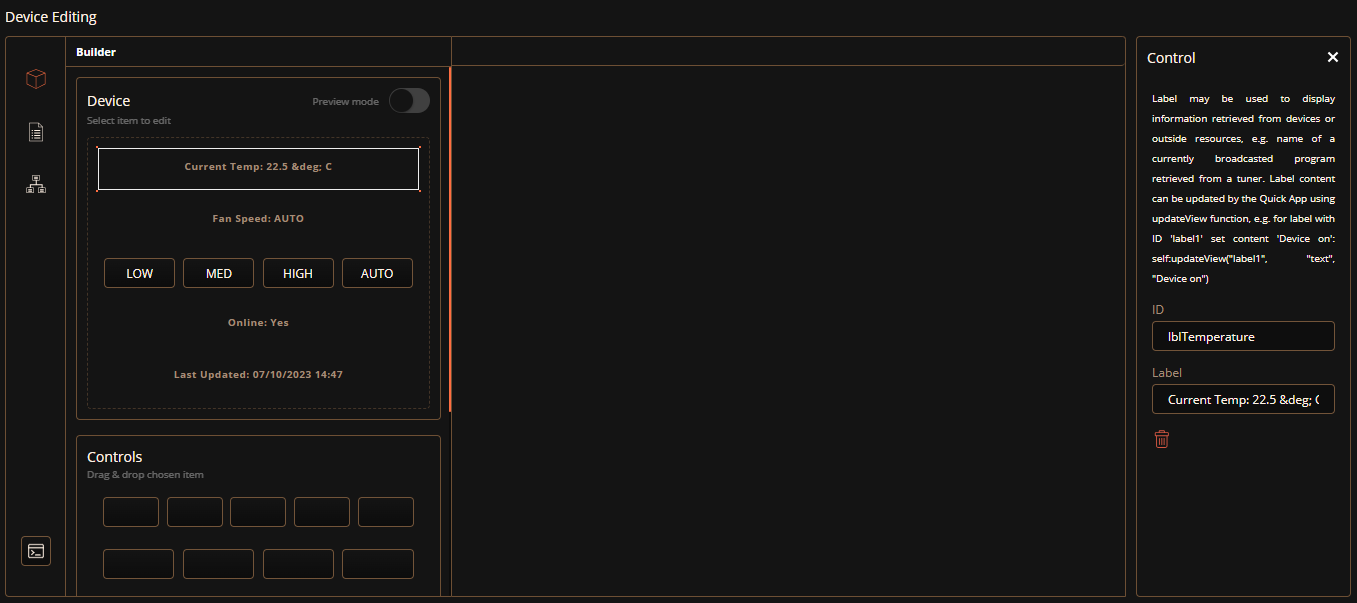
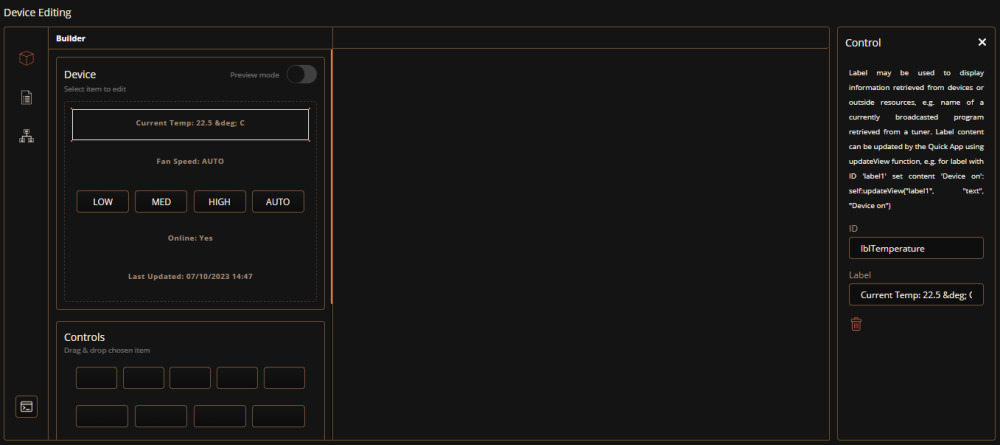
Hi everyone, So I have a Skaro automation bridge which connects my iZone HVAC system to my HC3. On the quickapp is a label representing the current temperature in the zone: I cannot seem to reference the lblTemperature value in LUA. I am actually trying to get the actual temperature into a global variable within a scene but cannot work out the syntax. I downloaded the device file under advanced to see if I can see any other references to lblTemperature but cannot see how it gets the value from the device. I assume it is part of the API. So for the scene action I just have local MST = hub.getValue(99, "lblTemperature") print(MST) where the QA device is 99 and the debug screen displays: [07.10.2023] [15:08:11] [DEBUG] [SCENE74]: nil I'd really appreciate any ideas you may have. Thanks. Anth
-
fibaroapiHC3.lua Note, I currently only support my new emulator, TQAE, and have moved all my development to that - please check it out... It's a rewrite with the learnings I have made coding fibaroapiHC3.lua... (Note: The new version of the emulator has gone through extensive rewrite and is stabilising (0.300). The old version of the emulator is here fibaroapiHC3_classic.lua.) This is a thread for the fibaroapiHC3.lua sdk that is under development (keeping it separate from the HC3 QuickApps coding - tips and tricks thread) I've started to run and test HC3 QuickApps offline and have made a fibaroapi.lua file that can be included to emulate the fibaro calls and call out to the HC3. This means that a whole QA can be developed offline, debugged and verified before deploying to the HC3. Something that significantly reduces the development process. It's an emulation so it's not 100% but it will cater for 99.99% of the needs to catch bugs, get decent error messages when things doesn't work (like timers). Be able to set breakpoints and inspect states etc. It's complete enough to run the most demanding QuickApps that I have found on the forum so far... If it runs in the emulator and it doesn't run on the HC3 or vice versa I will prioritise to fix it. Latest version here fibaroapiHC3.lua (v0.311) The code is updated weekly so please make sure you have the latest... It was inspired by the old fibaroapi for the HC2 in a thread started by @riemers but has evolved with more extensive support to create a better debugging and "offline experience"... in fact, it's really an HC3 emulator now. The video is an earlier version of the emulator but the principles are more or less the same. Note the nice tooltip and autocompletion of fibaro commands we get with the fibaroapiHC3plugin for ZBS. Enable English subtitles to see instructions... Some benefits: Use a modern development environment such as ZeroBrane Studio (free for Mac/PC/Linux, HC3 plugin here) on your laptop/PC to develop and debug QuickApps and Scenes. Here is a good introduction to Lua (using ZeroBrane) Step through code, inspect Lua variables, set break-points etc - all that is possible in a good IDE. Faster to pin-point errors as the error messages are better than on the HC3 - stack-traces etc. Advanced timer info (setTimeout) warning of late timers and from where the offending function was called if a timer function crashes. Info from where an eronous json.encode was called from in your code so you can easily find the error (instead of seeing a line from deep inside the json encoder) Use the whole Fibaro API fibaro.call etc and net.HTTPClient(), setTimeout(), json.ecode/decode, QuickApp self:functions like self:getVariable, self:updateView Support for MQTT client and QuickApp child devices Both QuickApps and Scenes are supported. Scenes support most conditions and are triggered by real triggers from the HC3 or simulated triggers. Speed up clock to run faster than real time, to watch a Scene or QuickApp over days/weeks/months in seconds. Start at any given time and date - test if your scene behaves on week-ends ? Automatically create a proxy QuickApp on the HC3 that sends UI clicks back to the code your are running and displays self:updateView updates. This way you can test the QuickApp UI (buttons etc) and still debug the main code on your PC. Develop and run multi-file QuickApps, allowing you to build up a library of common code to share between your QAs. Run completely disconnected from the HC3 simulating devices and other resources (now you can take your coding with you on your vacation ) There is a possibility to download resource definitions from the HC3 and use them (devices, globals etc) while running disconnected. Load multiple QAs/Scenes into the emulator at the same time to debug interaction patterns between QAs (or just run all your QAs offline and use the HC3 as a wave GW ) Telnet into the running emulator to capture logs or issue Lua commands like turning on/off devices at runtime to test you QA/Scene. Move the code as-is over to the HC3 when it runs in the emulator - and it will most likely run on the HC3. Scenes needs to be moved to conditions/actions part on the HC3 - may automat that in the future. Oh, and an emulated Web GUI for the quickApp so you can try out button/slider clicks without connecting to the HC3. And lastly, it makes it fun to develop code for the HC3 To get going download the fibaroapiHC3.lua and put in in the working directory where you code your QA(s) If you run ZerobraneStudio (recommended) paste this and run if dofile and not hc3_emulator then dofile("fibaroapiHC3.lua") end--hc3 hc3_emulator.downloadPlugin() hc3_emulator.downloadAssets() Please note the 'end--hc3' that ends the 'if dofile and not hc3_emulator then' statement. It requires the '--end' comment so I can recognise it. Also, you need to set the Lua interpreter to version 5.3 (In ZBS, Menu ; Project -> Lua Interpreter -> Lua 5.3) It will install the. ZBS plugin in ~/.zbstudio/packages and some code templates in ~/.zbstudio/hc3emu/ (Restart ZBS for the plugin to. be installed) Create a Lua file and create a header + QA/scene code. An example of a minimal QA can look like if dofile and not hc3_emulator then hc3_emulator = { name = "My QA", poll=1000, -- Poll for triggers from the HC3 every 1s credentials = {ip="192.168.1.X", user="<user>", pwd="<password>"} } dofile("fibaroapiHC3.lua") end--hc3 function QuickApp:onInit() fibaro.call(88,"turnOn") -- turns on device 88 on your HC3 end We wrap the emulator specific stuff inside "if dofile and not hc3_emulator then .... end" as the symbol 'dofile' is not defined on the HC3 and will thus be false and not include the code - This means that we can take the code as-is and paste it into the HC3 and it works. Note the credentials that contains the IP, username and password so that the emulator can access the HC3 box. If you use ZBS and the plugin there is an Edit-HC3 SDK templates-> menu that will insert a standard QA and Scene header + code in the current buffer. Most of the functions are there and will be improved over time. There are support for net.HTTPClient() and setTimeout/clearTimeout and api.* There are support for getting triggers and events from the HC3 Support for auto-creating a QuickApp proxy with UI elements that sends events back to the code being debugged. There are support for both QuickApps and Scenes (with conditions) Currently supported (v 0.300) fibaro.debug(type,str) fibaro.warning(type,str) fibaro.trace(type,str) fibaro.error(type,str) fibaro.call(deviceID, actionName, ...) fibaro.getType(deviceID) fibaro.getValue(deviceID, propertyName) fibaro.getName(deviceID) fibaro.get(deviceID,propertyName) fibaro.getGlobalVariable(varName) fibaro.setGlobalVariable(varName ,value) fibaro.getRoomName(roomID) fibaro.getRoomID(deviceID) fibaro.getRoomNameByDeviceID(deviceID) fibaro.getSectionID(deviceID) fibaro.getIds(devices) fibaro.getAllDeviceIds() fibaro.getDevicesID(filter) fibaro.scene(action, sceneIDs) fibaro.profile(profile_id, action) fibaro.callGroupAction(action,args) fibaro.alert(alert_type, user_ids, notification_content) fibaro.alarm(partition_id, action) fibaro.setTimeout(ms, func) fibaro.clearTimeout(ref) fibaro.setInterval(ms, func) fibaro.clearInterval(ref) fibaro.emitCustomEvent(name) fibaro.wakeUpDeadDevice(deviceID) fibaro.sleep(ms) net.HTTPClient() net.TCPSocket() net.UDPSocket() net.WebSocketClient() -- needs extra download net.WebSocketClientTLS() -- needs extra download api.get(call) api.put(call <, data>) api.post(call <, data>) api.delete(call <, data>) setTimeout(func, ms) clearTimeout(ref) setInterval(func, ms) clearInterval(ref) mqtt.Client.connect(uri, options) -- needs extra download <mqttclient>:addEventListener(message,handler) <mqttclient>:subscribe(topic, options) <mqttclient>:unsubscribe(topics, options) <mqttclient>:publish(topic, payload, options) <mqttclient>::disconnect(options) plugin.mainDeviceId plugin.deleteDevice(deviceId) plugin.restart(deviceId) plugin.getProperty(id,prop) plugin.getChildDevices(id) plugin.createChildDevice(prop) class QuickAppBase class QuickApp class QuickAppChild json.encode(expr) json.decode(string) QuickApp:onInit() -- called at startup if defined QuickApp - self:setVariable(name,value) QuickApp - self:getVariable(name) QuickApp - self:debug(...) QuickApp - self:updateView(elm,type,value) QuickApp - self:updateProperty() QuickApp - self:createChildDevice(props,device) QuickApp - self:initChildDevices(table) sourceTrigger - scene trigger Supported scene events: {type='alarm', id=<id>, property='armed', value=<value>} {type='alarm', id=<id>, property='breached', value=<value>} {type='alarm', property='homeArmed', value=<value>} {type='alarm', property='homeBreached', value=<value>} {type='weather', property=<prop>, value=<value>, old=<value>} {type='global-variable', property=<name>, value=<value>, old=<value>} {type='device', id=<id>, property=<property>, value=<value>, old=<value>} {type='device', id=<id>, property='centralSceneEvent', value={keyId=<value>, keyAttribute=<value>}} {type='device', id=<id>, property='accessControlEvent', value=<value>} {type='device', id=<id>, property='sceneActivationEvent', value=<value>} {type='profile', property='activeProfile', value=<value>, old=<value>} {type='location', id=<uid>,property=<locationId>, value=<geofenceAction>, timestamp=<timestamp>} {type='custom-event', name=<name>} {type='UpdateReadyEvent', value=_} {type='onlineEvent', value=<bool>} Some of the parameters that affect the behaviour of the emulator and can be set in the header are: hc3_emulator.name=<string> -- Name of QuickApp, default "QuickApp" hc3_emulator.id=<QuickApp ID> -- ID of QuickApp. Normally let emulator asign ID. (usually 999 for non-proxy QA) hc3_emulator.poll=<poll interval> -- Time in ms to poll the HC3 for triggers. default false hc3_emulator.type=<type> -- default "com.fibaro.binarySwitch" hc3_emulator.speed=<speedtime> -- If not false, time in hours the emulator should speed. default false hc3_emulator.proxy=<boolean> -- If true create HC3 procy. default false hc3_emulator.UI=<UI table> -- Table defining buttons/sliders/labels. default {} hc3_emulator.quickVars=<table> -- Table with values to assign quickAppVariables. default {}, hc3_emulator.offline=<boolean> -- If true run offline with simulated devices. default false hc3_emulator.autocreate=<boolean> -- Autocreate local resources hc3_emulator.apiHTTPS=<boolean> -- If true use https to call HC3 REST apis. default false hc3_emulator.deploy=<boolean>, -- If true deploy code to HC3 instead of running it. default false hc3_emulator.assetDirectory=<string> -- Directory where assets shoud be downloaded (ZBS). Default ~/.zbstudio/hc3emu hc3_emulator.resourceFile=<string> -- When doing a resource download, use this file as default. hc3_emulator.db=<boolean/string>, -- If true load a "resource download" from hc3_emulator.resourceFile or string hc3_emulator.htmlDebug=<boolean> -- Try to convert html tags to ZBS console cmds (i.e. colors) hc3_emulator.terminalPort=<boolean> -- Port used for socket/telnet interface hc3_emulator.webPort=<number> -- Port used for web UI and events from HC3 hc3_emulator.HC3_logmessages=<boolean> -- Defult false. If true will push log messages to the HC3 also. hc3_emulator.supressTrigger -- Make the emulator ignore certain events from the HC3, like = PluginChangedViewEvent hc3_emulator.negativeTimeout=<boolean> -- Allow specification of negative timeout for setTimeout (will fire immediatly) hc3_emulator.strictClass=<boolean> -- Strict class semantics, requiring initializers hc3_emulator.consoleColors=<table> -- Maps fibaro.debug/self:debug etc to color (debug.color enables color debugging) hc3_emulator.sysConsoleColors=<table> -- Maps colors used for system logs hc3_emulator.userdataType=<boolean> -- If true intercepts type(...) to return 'userdata' for our Lua classes. Some apps checks this... Some useful emulator functions: hc3_emulator.setOffline(<boolean>,<boolean>) -- hc3_emulator.getIPaddress() -- Return HC3 IP address hc3_emulator.prettyJsonFormat(<table>) -- Return json formatted string of Lua table hc3_emulator.postTrigger(<event>,[<time ms>]) -- Posts a trigger to the emulator... hc3_emulator.loadScene(...) -- Load scene from file or HC3... hc3_emulator.loadQA(...) -- Load QA from file or HC3... hc3_emulator.downloadPlugin() -- (ZBS). Default ~/.zbstudio/packages hc3_emulator.downloadAssets() -- (ZBS). Default ~/.zbstudio/hc3emu hc3_emulator.downloadResources([<filename>]) -- Downloads a "backup" of HC3 resources hc3_emulator.loadResources([<filename>]) -- ...that can be loaded as "local" resources for the emulator. Some debug flags that can be set with hc3_emulator.debug.<flag>=<value> fibaro=false, -- Logs calls to fibaro api trigger=true, -- Logs incoming triggers from HC3 or internal emulator timers=nil, -- Logs low level info on timers being called, very noisy. refreshloop=false, -- Logs evertime refreshloop receives events mqtt=true, -- Logs mqtt message and callbacks http=false, -- Logs all net.HTTPClient():request. ALso includes the time the request took api=false, -- Logs all api request to the HC3 onAction=true, -- Logs call to onAction (incoming fibaro.calls etc UIEvent=true, -- Logs incoming UIEvents, from GUI elements zbsplug=true, -- Logs call from ZBS plugin calls webServer=false, -- Logs requests to /web/ including headers webServerReq=false, -- Logs requests to /web/ excluding headers files=false, -- Logs files loaded and run color=true, -- Logs in console using ANSI colors (see hc3_emulator.consoleColors for mapping) locl=true, -- Log creation of local devices breakOnInit=<boolean> -- Tries to set breakpoint on QuickApp:onInit (mobdebug) breakOnLoad=<boolean> -- Tries to set breakpoint on first line in loaded file (mobdebug) breakOnError=<boolean> -- Tries to break after error (makes it easier to look at call stack etc) ctx=false, -- Logs Lua context switches timersSched=false, -- Logs when timers are scheduled timersWarn=0.500, -- Logs when timers are called late or setTimeout with time < 0 timersExtra=true, -- Adds extra info to timers, like from where it's called and definition of function (small time penalty) In the example in the beginning, the HC3 credentials are listed in the header. If you don't want that (it's easy to forget it and share the code with your passwords in plain sights<9 you can create a credentials.lua file with your secret stuff and it will be automatically included by the SDK. The format should be return { ip="2912.168.77", user="admin", pwd="admin", mySecret="hgskjfhgjhgkdfh" } It returns a Lua table with the relevant keys. ip, user,and pwd is used to log into the HC3. We have added another key here to 'mySecret'. Assume that you want you QA to have a defined quickAppVariable with the value of mySecret. It could be the password to log into an external services. Then you can do like this if dofile and not hc3_emulator then hc3_emulator = { name="My QA", quickVars = {["password"]="$CREDS.mySecret"}, This define a quickAppVariable with the name 'password' and it fetches the key 'mySecret' from the credentials table and uses that as the value. When you QA starts up you can do self:getVarible('password') and it will return the credential. This is useful as not to litter your code with visible credentials. NOTE. Be aware that if you deploy the real QA with hc3_emulator.deploy=true or using the menu commands with the plugin, the deployed QA will have the quickAppVariable defined and if you upload that for sharing people will see your credential. If someone wants to try this in another IDE than Zerobrane that I use (like Visual Studio) the only thing that could be an issue is to have access to the Lua libraries require("socket") -- LuaSocket require("socket.url") -- LuaSocket require("socket.headers") -- LuaSocket require("ltn12") -- LuaSocket require("mime") -- LuaSocket require("lfs") -- LuaFileSystem They are pretty standard lua libraries - based on LuaSocket. @10der has managed to run it under Visual Studio on Windows. Here is an updated library/project map to work with the latest version of the emulator vscode_fibaro_bin.zip. Note that you should update the fibaroapiHC3.lua file provided i the archive when new are released as I will not update this archive for every new release. @petergebruers also have some tips. Any improvements are happily received (in code) and credits will be due granted. Links to notable post Here is a description of the various way to use the emulator when developing code (high-level) Some in-depth posts Running "Offline" (TBD) Running in "Mix mode". Mixing real devices and locally emulated devices (TBD) Running with a "Proxy QA" (TBD) Using real QA as "Proxy" (TBD) Downloading HC3 resources to file and emulate them locally (TBD) Running standard Lua with access to HC3 functions (developing management scripts etc) (TBD) Loading multiple QAs/Scenes and run them in parallel in the emulator (also getting QAs/Scenes from the HC3 and install them in emulator on the fly...) (TBD) Running faster than real-time and manipulating start dates (TBD) A ZeroBrane plugin to make life easier while debugging A post introducing the SDK with QuickApps. A post introducing the SDK with Scenes. Scene support is not complete. Creating and debugging multi-file QuickApps The debug flags that can be set are described The new dynamic load functions to run multiple QAs/Scenes in the emulator are described Telneting into the emulator to capture logs and issuing Lua calls <here> (nice way to test your code) Using the Web GUI Debugging setTimeout code and tracking timers. MQTT support. Another post with running a scene completly without being connected to the HC3. Some notes on the implementation of the SDK - if you would like to hack on it A collection of QA's I developed with the SDK - which means that they can be run offline ChildrenOfHue. A QA that creates QA children devices for your Hue devices (It's the Hue QA I use myself these day) iOSLocator. An iOS geopresence QA. iCal (iOS,Google) QA Telegram QA. Event watcher QA. Helper QA to get/subscribe on event triggers Vonage/Nexmo SMS service. Send SMS. Changelog: v 0.67 - numerous bug fixes caused by the restructuring. hc3_emulator.start{startTime="07:00 4/5/2000"} - will start the simulation at the given time. v 0.68 - fibaro.debug behaves more like original. v 0.70 - better offline support and speeding. v 0.72 - More offline and support for downloading HC3 resources to be used while running disconnected from the HC3 v 0.73 - Various speed-time related bugs v 0.75 - Better http sync behaviour. Set hc3_emulator.asyncHTTP=true to get some pseudo asynchronous behaviour v 0.77 - Support for 5.030.45. Initial support for childDevices and fixes for the changed handling of UI events v 0.78 - UI fix. Name of callbacks defaults to button.."Clicked", unless you have a onReleased=name or onChanged=name in the UI table struct. v 0.80 - Fixed bug in self:getVariable and self:setVariable v 0.81 - Better quickVariables handling for proxies, and self.childDevices list updated when children are deleted. v 0.83 - self:getVariable returns the empty string "" if the variable does not exists according to the latest behaviour on the HC3... 'class' is not redefined if available from Luabind... However, I've not had a chance to test if it's 100% compatible yet... v 0.84 - Initial support for mqtt. You need to have installed https://github.com/xHasKx/luamqtt so that require("mqtt") works from fibaroapiHC3.lua. I have tried to mimic the HC3 mqtt api but I have not really used mqtt that much so if someone uses it with fibaroapiHC3.lua and discovers if stuff is not compatible with the HC3 implementation please let me know and we fix it. v 0.85 - Compatibility fix for function 'class' to adhere more closely to the HC3/luabind version v 0.90 - Cleanup of code, Better handling of children and QuickApps, ZBS color output with ansi escapes; hc3_emulator.colorDebug=true v 0.93 - New model for QuickApp proxies. Better child device compatibility. v 0.95 - Various bug fixes - log prints more in line with HC3 log console. fibaro.emitCustomEvent bug fix. v 0.98 - First support for backup/download/upload with the ZeroBrane plugin (another post here) v 0.99 - Better trigger handling and new way to include SDK in your QA/scene code. No hc3_emulator.start at the end. v 0.100 - Web GUI emulator for QuickApps. New format for using credentials.lua. Bug fixes... v 0.102 - Better handling of children and their quickAppVariables v 0.104 - Rewrite of offline mode. Better web UI support. v 0.105 - Support for new QA file format (proxies work again) v 0.106 - Added support for net.UDPSocket() v 0.109 - UDPSocket bug fix. ( @10der), property() support for class() - much harder than it looks... v 0.110 - Oops, serious bug in 'class' affecting ...everything. Hopefully fixed. v 0.111 - Removed unnecessary os.exit(). urlencode api calls ( @10der) v 0.112 - UDP fixes. ( @10der) v 0.114 - Bug fix (global 'self' escaped) v 0.115 - Bug in url encode for api calls. UDPSocket :bind(ip,port) function added. v 0.116 - :bind(ip,port) really fixed.... v 0.117 - startup fix v 0.119 - "Softer os.exit()" - better compatibility with Visual Studio (thanks @10der) v 0.120 - Debugger friendly QuickApp class (no __index). First version of file/backup v 0.121 - api.get bug fix. Faster proxy/deploy. v 0.123 - QuickApp:setVariable bug (thanks @10der) v 0.124 - fibaro.clearTimeout added, MQTT fixes. v 0.125 - fibaro.alarm() was buggy - fixed. Set self.USERPIN to pincode to allow fibaro.alarm("disarm") to be allowed from emulator. v 0.126 - fix __fibaro_get_device() ( @10der) v 0.128 - fix sort order of triggers. Default room in offline mode ( @10der) v 0.130 - fix UI handling ( @rangee. More UI options. v 0.131 - fix uiCallbacks not always updating when updating proxy v 0.135 - fixes... v 0.137 - TCPSocket fixes v 0.138 - setTimeout for negative times are inserted in the queue.... i.e. will execute as soon as possible. v 0.140 - fixed bug with setInterval (clearInterval within a setInterval function didn't work...) v 0.141 - fix bug in net.TCPClient() v 0.145 - bug in printout of sockets... stricter class constructor requirements v 0.148 - MQTT event format bug ( @jayrock) v 0.150 - Initial websocket support. Need to download wsLua_ER.lua from my github and put in project directory. v 0.152 - support fibaroapiHC3plug.lua v0.4 v 0.155 - bugfixes. v 0.156 - html color bugfix v 0.198 - New version of emulator with better support for everything. Thanks to @petrkl12 that has been a guinea pig and helped in debugging the code. v 0.200 - Fixed bug in speedTime. plugin.restart() now restarts the QA in a correct way. v 0.299 - Major rewrite of the HC3 API - cleaner architecture and prepared for being split into sub-files (I'm approaching 10k lines now). Note 'end--hc3' required to end header. v 0.300 - Bugfixes from v0.299 v 0.301 - Better/simpler class definition - easier to debug/step into classes (avoiding __index unless class uses property() )

-
Hi all!! Thank you all for this forum and all nice people that helping eachother out. Now its my turn to ask a question regarding LUA scripting, a script that makes my system to stall within 24h What the script basicaly does is that it checks if doors, windows, motionsencors etc is open or closed and then send it to a QA but also to a global value from a standard LUA scene. I am running the QA on diffrent screens in my home to so i get a nice view of what´s going on. The global value i pick up then i am arming the house and sending it to a a TTS-script. Always nice to hear a voice that tells me that a window is open etc... when i am leaving. But i think something is draining resources, i have tried to only activate the script via Conditions and Triggers, but also via a loop with diffrent sleep times. It does not say in Diagnostics that i am out of recourses se my sample below short version (The script works fine but after aprox 24h HC3 stalls or not working as expected ). How can i do it better ? ::BEGIN:: local var = {}; local debug = 1; ----------------WINDOWS------------ local Windows = ""; local WindowsAlarm = ""; local WindowsLiving = ""; local WindowsLivingAlarm = ""; local WLiving = fibaro.getValue(249, "value"); --...and 6 more sencors ----------------DOORS------------ local Doors = ""; local DoorsAlarm = ""; local Freezer = "" ; local FreezerAlarm = "" ; local DFreezer = fibaro.getValue(355, "value") ; --...and 10 more sencors ----------------MOTION---------- local Motion = ""; local MotionAlarm = ""; local Kitchen = ""; local KitchenAlarm = ""; local MKitchen = fibaro.getValue(21, "value"); --...and 7 more sencors ----------------Switches 1st and 2nd floor---- --...About 30 switches ----------------TEMPS---------------------- --... collecting temps round house ----------------Secure-------------------- local SecureFrontdoor = " " local Parm = " " -- ...Checking if frontdoor is locked and if it is armed etc... ----------------Garage-------------------- -- ... same with garage local Garage = "Garage : " ..IR ..Outlet ..Mainlight ..Port ----------------Setting Variable--------- if WLiving == true then WindowsLiving = "Livingroom" WindowsLivingAlarm = "Vardagsrums fönster, " end; if DFreezer == true then Freezer= "Frys, " FreezerAlarm = "Frysdörr. " end ; if MKitchen == true then Kitchen = "Köket, " KitchenAlarm = "Rörelse i köket, " end; if fibaro.getValue(30, "value") == true then sink = fibaro.getName(30)..", " end; -------------CONSOLIDATE --------------- Windows = "Fönster: " ..WindowsLiving .." " .. Bathroom; -- for screens QA var.WindowsAlarm = WindowsLivingAlarm ..BathroomAlarm; Doors = "Dörrar: " ..Refrigerator .." "..StoreTrash ; -- for screens QA var.DoorsAlarm = RefrigeratorAlarm ..StoreTrashAlarm ; Motion = "Rörelse:" ..Kitchen .." "..Shower ; -- for screens QA var.MotionAlarm = KitchenAlarm ..ShowerAlarm ; -- .. and some more... -------------SEND UPDATES---------------------------------------------------------------------- fibaro.call(103,"updateView","windows","text", Windows); fibaro.call(103,"updateView","doors","text", Doors) fibaro.call(103,"updateView","detectors","text", Motion); fibaro.call(103,"updateView","avgtemp","text", avgtemp) ; fibaro.call(103,"updateView","secure","text", SecureFrontdoor .." " ..Parm ); fibaro.call(103,"updateView","garage","text", Garage) ; fibaro.call(103,"updateView","first","text",first) ; fibaro.call(103,"updateView","second","text",second) ; fibaro.setGlobalVariable('Status',json.encode(var)) -------------DEBUG-------------- ------Loop Me ------------------ fibaro.sleep(5*1000); goto BEGIN
-
 Witam, szukam odpowiedzi na uważam dość szczegółowe pytanie dotyczące QuickApp. Otóż postawiłem sobie cel by z pomocą QuickApp "Termostat auto" zrobić sterowanie prędkością wentylatora od klimatyzacji. W termostacie MCO Home MH8-FC spotkałem się z czymś takim że ma on taką wbudowaną opcję w interface służącą do tego, dodatkowo ma też sekcję pokazującą w jaki jest stan jego pracy, wygląda to tak: Zależy mi na tym żeby stworzyć QuickApp, który też będzie miał te dwie sekcje, chodzi o to żeby nie tworzyć tego ręcznie za pomocą kontrolek i etykiet.
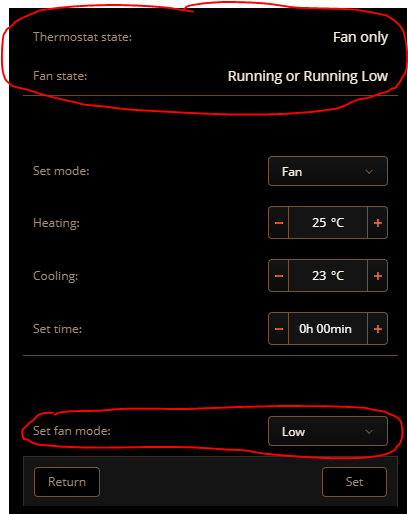
-

HC3 how to create a Global Variable from LUA
ChristianSogaard posted a question in Scenes and Interface
How do I create a Global Variable from LUA in HC3? I'm trying to create a light dimmer function for Philips HUE using a Logic Group Matrix ZDB5100 switch so when I hold the Button its starts dimming up or down. But to keep track if the button is released and pressed again I need to keep track of the direction from last time it was pressed. So I'm thinking of using an Enumerated global variable "dimDirection" that can be set to Up or Down. I want the code to create the variable if not present. My working code whiteout remembering dimDirection is here https://pastebin.pl/view/d74c93bb In HC2 i used this snippet of code. But how is it in HC3 ? local ProjectorStatus = {On="Tændt", Off="Slukket"}; -- in code you then declare predefined global variable using users mapped values: local varName = { ["Projector"] = { value = ProjectorStatus.On, isEnum = true, isTable = false, enumValue = {ProjectorStatus.On, ProjectorStatus.Off} }, } function checkGlobalVariable(varName) -- Check if variable exist for i , v in pairs(varName) do if fibaro:getGlobalValue(i) == nil then api.post("/globalVariables/", { name = i }); fibaro:sleep(400) api.put("/globalVariables/"..i, { name = i, value = v.value, isEnum = v.isEnum, enumValues = v.enumValue }) if v.isTable then ok, msg = pcall(function() wT = json.decode(fibaro:getGlobalValue(i)) if type(wT) ~= "table" then error() end end ) if not ok then fibaro:debug("ERROR - Creating table was unsuccessful, error code: "..msg) else fibaro:debug("Variable '"..i.."' created successfully."); end else if fibaro:getGlobalValue(i) ~= nil then fibaro:debug("Variable '"..i.."' created successfully."); else fibaro:debug("ERROR - Variable '"..i.."' was NOT created!") end end end -- update all predefined global variables in case user changed default values if v.isEnum then fibaro:debug("Variable '"..i.."' allready exists."); local value = fibaro:getGlobalValue(i) for i,m in pairs(v.enumValue) do if m == value then v.value = value end end if v.value == value then fibaro:debug("For variable '"..i.."' found current value ("..value..") and will keep it") else fibaro:debug("For variable '"..i.."' NOT found current value, will set default value ("..value..")") end api.put("/globalVariables/"..i, { name = i, value = v.value, isEnum = v.isEnum, enumValues = v.enumValue }) fibaro:sleep(400) end end updateVar = true end checkGlobalVariable(varName) -

Query JLR InControl SoC of Electric Vehicle
Corceiro posted a question in Other Devices / Third-party devices
Does anyone already tried to access JLR InControl API with LUA code to get the State of Charge (SoC) of their vehicles (Jaguar I-Pace or some Land Rover PHEV cars like the Evoque P300e)? I have some lines of code working on Google Apps that can query that value and put it on a Google sheet cell. Is it possible to convert it to Z-Wave LUA (Home Center 3)? It could be great to get the SoC and use that value in some scenes associated to the different electric costs tariffs. -
Hi Fibaro/Community, Before buying fibaro and 90+ devices to set up the house, I did some basic programming on the HC2. I liked the ability of making a small function library and using my functions in scenes and triggers. I am not a great programmer but the great help of the community and code snippets available make a central function library VERY useful to a novice like me and makes it easy to write a function once and then use it successfully later. However I ended up buying HC3 and here EVERYTHING is different. As many have written. For the great programmers this seems to be no problem, you guys are deep into QuickApps and OO classes and the loss of the HomeTable is not a problem for you, and the amazing EventRunner class in HC2 seems to have found a home in Quickapps - BUT - this is pretty hard for the novice like me to follow. It is like Fibaro has decided to provide a super complex API but no path to learn in steps for the novice. Like playing Donkey Kong without ramps up. Fibaro if you are listening : What is the way for a novice to make a function library with simple small functions to reuse in scenes? Like a small function to turn on a given ID of a light, then turn it off 60 seconds later. Trivial I know, but why copy this 100 times in each scene when a function would do? Fibaro, also, how to create a table of all the IDs of my motion sensors and a column with light IDs to turn on, and the time delay until turn off? The hometable concept in HC2 could have done that. But in HC3? I know it is super advanced somewhere up there but for basic programmers like me who have googled and read the forums and only found the super stuff like Quickapps, what do we do? It seems to me there are only 20 people in the world who understand HC3. Like Quantum Mechanics. You need please to help the people below that..
-
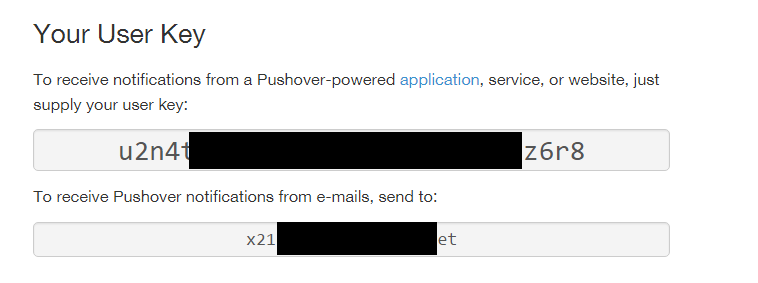
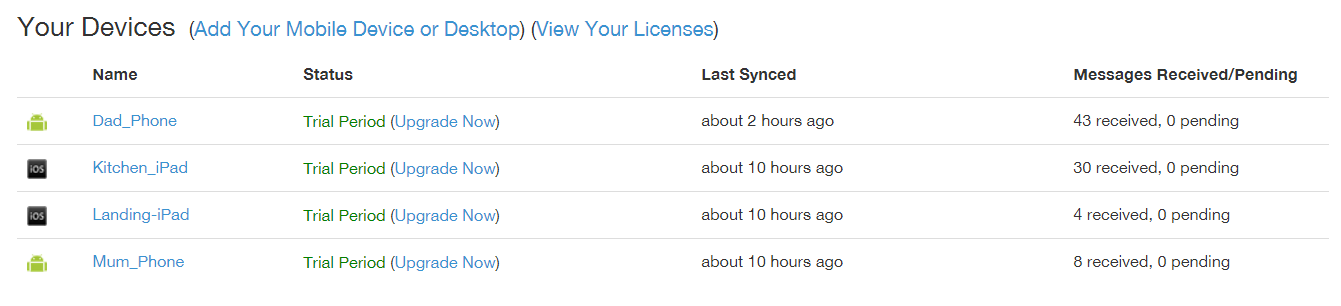
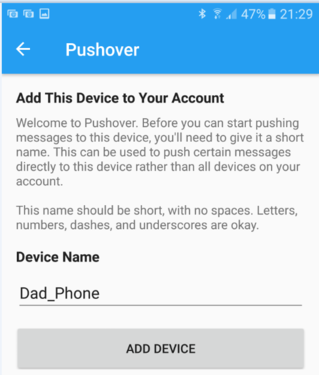
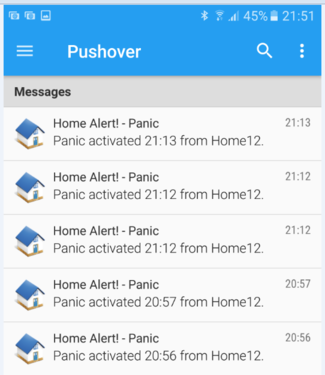
Hi, I have been working with the pushover service recently as an alternative the native notification service within the HC2. I think it is worth exploring if you are looking for another option. Since it is fresh in my mind I thought I'd document it and share to hopefully help others This draws on previous work from @SDeath and @sj3fk3 and others so all credit goes to them. STEP 1 – SIGN UP AND GET USER KEY 1. Sign up at pushover.net, usual stuff. You can use a trial account for 7 days and after that you'll need to purchase a license per platform (ie iOS, Android, etc) irrespective of how many devices you have with each platform. The licenses per platform are approx €5 each so they shouldn't break the bank 2. Open confirmation email and verify account 3. Log back into pushover and make note of your User Key which will be something like ubp44xxxxxxxxxxxxxx8497aihkq and this is your User Key 4. Copy this out as you will need this in the scenes in HC2 Note: There is also a pushover email address under your user key should you need this for another project but you don't need it for what we are doing here STEP 2 - REGISTER YOU APPLICATION 1. Scroll down to the bottom of the dashboard and click (Register Application/Create an API Token) 2. Give it a Name (we call our HC2 domino so I named it domino) This will appear in your client device where you receive your messages 3. Type = Application 4. Description/URL and icon all optional. (I added an icon as it appears on the alerts that you receive on your client devices (72px x 72px, png) and attached is the one I used) 5. Check the box and Click Create Application 6. This is the second Token Key, it’s something like aphmpbezxxxxxxxxxerqjwsg. Copy is out as you will need this in the scenes in HC2 STEP 3 – ADD CLIENT DEVICES (TO RECEIVE ALERTS ON ) 1. Android/iOS - Download the app from the appropriate store playstore or appstore 2. Log in to the app using your username and password that you got when you opened your pushover.net account 3. Give your device a name and click Register Device (I think it's better to avoid spaces and special characters if possible) 4. Go back to pushover.com and on your dashboard you'll see this new device added with the name you gave it. (Clicking the Pushover icon on the top left gets you back to your dashboard should you navigate off to another page) Repeat all part of STEP 3 for all other client devices. If you have multiple you'll end up with something like following You will see an Alert in your pushover app for each device that is added Within the pushover dashboard you can set up quiet times, groups and aliases but you don't need any of this to get started. STEP 4 – HC2 SETUP 1. Create a variable called pushoverBody in the top part of the variables panel 2. Create a new scene called pushoverSend and copy the following code into it ( this is the 'engine' that will call the pushover api and send the alert) 3. You will need to add your own user key and token key to line 14 -- SCENE THAT SAVES THE DATA TO THE GLOBAL VARIABLE 'pushoverBody' AND SENDS TO API --[[ %% events %% properties %% globals pushoverBody --]] -- Stops the scene if gv not populated if (tonumber(fibaro:getGlobalValue("pushoverBody")) == 0) then fibaro:abort(); end local selfhttp = net.HTTPClient({timeout=2000}) local tkn, usr = "a51eryn9t2qcg5bvoubzhqs29z2yc6", "u2n4tb99eckm6qw3hz365ts9r5z6r8" local msg = fibaro:getGlobalValue("pushoverBody") local requestBody = 'token=' ..tkn ..'&user=' ..usr ..msg selfhttp:request('https://api.pushover.net/1/messages.json', { options={ headers = selfhttp.controlHeaders, data = requestBody, method = 'POST', timeout = 5000 }, success = function(status) local result = json.decode(status.data); if result.status == 1 then fibaro:debug("Success: " ..result.request); else fibaro:debug("Failed: " ..status.data); end end, error = function(error) fibaro:debug("Success: " ..error); end }) --Reset the gv to 0 for next message fibaro:setGlobal("pushoverBody", "0") 4. Create another scene and call the pushover Test 5. Copy the following code to run a test (Change line 11 & 12 to the names of your device(s) that you wish to send the alert to. I have included 2 devices on my sample code) Change the Alert/Message Text as required -- CODE THAT SENDS THE DATA TO 'pushoverBody' GLOBAL VARIABLE -- THIS IS THE PART THAT YOU INCLUDE IN A SCENE TO SEND THE ALERT --[[ %% events %% properties %% globals pushoverBody --]] local dvc, prio = "Dad_Phone,Kitchen_iPad", "0" local ttl, msg = "Home Alert! - Panic", "Panic activated from Home." local requestBody = '&device='..dvc ..'&priority=' ..prio ..'&title=' ..ttl ..'&message=' ..msg fibaro:setGlobal("pushoverBody", requestBody) 6. Confirm that you should see an alert on the devices that you specified This is the code that you can put into any scene that you wish to send an alert from, making the necessary adjustments to receiving devices, message and priority should you wish Full details of the API can be found at https://pushover.net/api After 7 days it will stop working and you will need to purchase the required licenses at ~ €5 each .. and that it !! -f


-

[TUTORIAL] Introduction to Lua tables (2nd edition)
AutoFrank posted a topic in Tutorials and Guides
**MAJOR UPDATE TO THIS TUTORIAL** Hi, This tutorial has been going through a major update and expansion since the first release. Special thanks deserved to @petergebruers and others for helping me understand many of the underlying table concepts and for also contributing a lot to this tutorial. It may be a good idea to paste some of the code in this tutorial into a test scene to understand how they work by reviewing the output Topics covered with lots of sample code and expected outputs Table basics Creating tables and printing (ordered, non-ordered, numerical and non numerical keys) #operator - pros and cons kv pairs - advantages Updating tables - adding adding, inserting values Nested Tables - printing, updating, inserting, Summary of key points Storing tables in global variables I would have found this very useful when I started so hopefully some users will find it useful as well. -frank & peter Tables A table is a tree structure, consisting of field and each field has a "key" and "value" pair. The key can be any Lua value except nil and NaN. A table can store anything except nil. The name of the table is the variable that stores a reference to the table so it can be accessed Creating Tables and displaying the table data a = {} This is the smallest table and stores the reference to the table {} in the variable a Consider the following table print("table with numerical keys") fav = {[1] = "4FM", [2] = "96FM", [3] = "Calm", [4] = "Heart", [5] = "Red_FM"} fav is the table (or at least the name of the variable where the table is stored), in the above table 'fav', it has 5 fields and each field consists of a key/value pair 4 is the key and 4FM is the value , 2 is a key and 96FM is the value, etc You can display all the key/value pairs using the following ... print("table with numerical keys and using k/v pairs to display the fields but they won't be in order") fav = {[1] = "4FM", [2] = "96FM", [3] = "Calm", [4] = "Heart", [5] = "Red_FM"} for k,v in pairs(fav) do print("k: " ..k..", v: "..v) end the result is ... and you'll notice that the results are NOT returned in order if you have numerical keys [1], [2] then you will need to use ipairs to return them in order print("table with numerical keys and using k/v ipairs to display the fields in order") fav = {[1] = "4FM", [2] = "96FM", [3] = "Calm", [4] = "Heart", [5] = "Red_FM"} for k,v in ipairs(fav) do print("k: " ..k..", v: "..v) end #operator The #operator (#tablename) is used by a lot of people to identify the length of the table and use this to iterate through the table but it is not always recommended an example of where it will work is here print("table with numerical keys and using the #operator to iterate through the table") radio = {"4FM", "96FM", "Calm", "Heart", "Red_FM"} print("#operator: "..#radio) for i = 1, #radio do print(radio[i]) end if the table keys are numerical and contiguous, it will work.. ....but if they are not or you have inserted or removed values then it won't work A good example of where it doesn't work very well is here print("table where numerical keys are not explicitly defined but are still the table keys") print(" example where the #operator doesnt return the correct count") radio = {"4FM", "96FM", "Calm", "Heart", "Red_FM"} for k,v in pairs(radio) do print("k: " ..k..", v: "..v) end print("#operator: "..#radio) -- remove one value, set it to nil radio[3] = nil for k,v in pairs(radio) do print("k: " ..k..", v: "..v) end print("#operator: "..#radio) you can see that the second loop in the debug is showing an #operator value of 5 (because it is the last key but there are only 4 key/value pairs as we removed one Another approach that is recommended to use is as follows use the k/v approach to count the fields and then use the counter to iterate through.. print("table where numerical keys are not explicitly defined but are still the table keys") print(" example using k/v pairs to calculate the correct table field count") radio = {"4FM", "96FM", "Calm", "Heart", "Red_FM"} counter = 0 for k,v in pairs(radio) do counter=counter+1 end print("counter: "..counter) for i = 1, counter do print(radio[i]) end radio[3] = nil -- remove the row by setting the key to nil counter = 0 for k,v in pairs(radio) do counter=counter+1 end print("counter: "..counter) for i = 1, counter do print(radio[i]) end and you can see that the counter is correct in both loops Updating Tables you can update a table by setting Key/Value pairs or delete a value as follows print("table where numerical keys are not explicitly defined but are still the table keys") print("examples of updating the table") fav = {"4FM", "96FM", "Calm", "Heart", "Red_FM"} -- update one value add another value fav[2] = "Soul" fav[4] = "Classic" -- delete value at key 1 fav[1] = nil for k,v in pairs(fav) do print("k: " ..k..", v: "..v) end if the k/v pair already exists it overwrites it or of the k/v pair didn't exist, it simply adds it as above This is the same example but the table has the numerical keys explicitly defined print("updating a table") fav = { [1] = "4FM", [2] = "96FM", [3] = "Calm", } fav[2] = "Soul" fav[4] = "Classic" for k,v in ipairs(fav) do print("k: " ..k..", v: "..v) end Example of adding key/value pairs to this table using table.insert fav= {"4FM","96FM", "Soul", "Jazz"} table.insert(fav, "Calm") table.insert(fav, "Red_FM") table.insert(fav, "Heart") for k,v in pairs(fav) do print("k: " ..k..", v: "..v) end The extra key/value pairs will be added as extra fields as you cannot specify the exact field you want to update as in the approach above Tables with non-numerical keys are also possible as shown below print("Table initialiser with alpha keys") fav = { ["a"] = "4FM", ["b"] = "96FM", ["c"] = "Calm", ["d"] = "Heart", ["e"] = "Red_FM"} for k,v in pairs(fav) do print("k: " ..k..", v: "..v) end the same table can be represented in a simpler form print("Table initialiser with alpha keys - simplified") fav = { a = "4FM", b= "96FM", c= "Calm", d = "Heart", e= "Red_FM"} for k,v in pairs(fav) do print("k: " ..k..", v: "..v) end If you chose or have to use non numerical keys or a mix, then Lua makes no guarantee on order as the spec says random. The only way to order a table with non-numerical keys (such as alphabetical order) is to use an external reference. Nested Tables Lets take the following table, it looks like each value in the key/value pair is a table in itself as if one table is nested inside the other table = { [1] = {loc="utility_room", name="HeatingTemp"}, [2] = {loc="bed_room", name="FreezerTemp"}, } for k,v in pairs(table) do print(k,v) end if you run the usual k/v code you will see the second/nested set of tables To list the k/v inside the second table you need to iterate through the first table we use a counter like before to find out how many fields are in the outer most table There are two tables nested within the outer most table table [1] which has two fields with k/v pairs table [2] which has two fields with k/v pairs print("Nested table example") table = { [1] = {loc="utility_room", name="HeatingTemp"}, [2] = {loc="bed_room", name="FreezerTemp"}, } for k,v in pairs(table) do print("first level key: " ..k..", first level value: "..tostring(v)) for k2,v2 in pairs(v) do -- This works because we KNOW v is a table. print(" second level key: " ..k2..", second level value: "..v2) end end we then use the counter to expose the k/v pairs at table[1] and table [2] with the following result You could also expose specific values (in the nested able) using the following table = { [1] = {loc="utility_room", name="HeatingTemp"}, [2] = {loc="bed_room", name="FreezerTemp"}, } for k,v in pairs(table) do print("location: "..table[k].loc) end with the following expected result You could also have used the #operator that we discussed earlier BUT only because the key's in the outer-most table are numerical and contingous for i = 1, #table do -- #list refers to the max number of items in the table fibaro:debug(table[i].ip, table[i].port) end Updating a value in a nested table If you want to update a specific value in the nested table you need to use the k/v method we have discussed fav = { [1] = {loc="utility_room", name="HeatingTemp"}, [2] = {loc="bed_room", name="FreezerTemp"}, } -- update nested table on the second field with a new value fav[2].loc = "kitchen" fav[2].name = "Hobtemp" -- or you could use the following format to do accomplish the same update fav[2]["loc"] = "kitchen" fav[2]["name"] = "Hobtemp" -- print out the updated table... for k,v in pairs(fav) do for k,v in pairs(fav[k]) do print("k: " ..k..", v: "..v) end end -- second option to print out the updated table with more explanation for k,v in pairs(fav) do print("first level key: " ..k..", first level value: "..tostring(v)) for k2,v2 in pairs(v) do -- This works because we KNOW v is a table. print(" second level key: " ..k2..", second level value: "..v2) end end the result is If you want to add/insert a new k/v pair in the nested level, you can use the table.insert method fav = { [1] = {loc="utility_room", name="HeatingTemp"}, [2] = {loc="bed_room", name="FreezerTemp"}, } -- insert a new value table.insert(fav,{loc="bedroom", name="sinktemp"}) -- print out the updated table... for k,v in pairs(fav) do for k,v in pairs(fav[k]) do print("k: " ..k..", v: "..v) end end -- second option to print out the updated table with more explanation for k,v in pairs(fav) do print("first level key: " ..k..", first level value: "..tostring(v)) for k2,v2 in pairs(v) do -- This works because we KNOW v is a table. print(" second level key: " ..k2..", second level value: "..v2) end end and the result is three fields in the table So before we go to the last task of storing the table in a global variable, I thought it would be good to have a quick recap.. Summary A table is a tree structure, consisting of field and each field has a "key" and "value" pair. The name of the table is the variable that stores a reference to the table so it can be accessed you can explicitly declare a numerical key in a table but you don't have to for a table with a numerical key - use ipairs to print the table fields in order #operator can be used but ONLY for tables with numerical keys that are contiguous it is recommended to use the standard k/v approach to count the number of fields remove a value by setting its key = nil update a table using the table[key] method add a new field using table.insert(table, "value") and will add a numerical key table.insert will not work with tables with non-numerical keys tables with non-numerical keys cannot be printed in order by ipairs, result will be random nested tables require iteration to print the inner-most tables multiple levels of iteration required for multi-nested tables updating nested table - iterate with k/v and use table[key].nested-key = "value" inserting into nested table - iterate with k/v and use table.insert(table,{key="value, key="value} tables can be very confusing and frustrating to us newbie's , so take your time Storing a table in a global variable if you take the following table structure Table = { group = { option1=1560,option2=1507,option3=881 }, } If you want to store this table in a global variable you will need to encode the table as a string. One of the most common formats to encode a table (structure) is json from json.org "JSON (JavaScript Object Notation) is a lightweight data-interchange format. It is easy for humans to read and write. It is easy for machines to parse and generate." To save the table you need to encode it and then save it to the global variable jTable = json.encode(table) fibaro:setGlobal("StateTable", jTable) In order to read back a single value you need to decode the string local jT = json.decode(fibaro:getGlobalValue("Table")) once it's decoded you can then read one of the values or manipulate the table fibaro:debug(jT.group.option1) Updating a single value - assign the new value, encode it and the store it..... jT.group.option3 = 987 jTable = json.encode(jT) fibaro:setGlobal("StateTable", jTable) Making json strings/output easier to read... Sometimes a json string can be difficult to read and understand its structure. Typically they would look something like this... {"widget": {"debug": "on","window": {"title": "Sample Konfabulator Widget","name": "main_window","width": 500,"height": 500},"image": {"src": "Images/Sun.png","name": "sun1","hOffset": 250, "vOffset": 250,"alignment": "center"},"text": {"data": "Click Here","size": 36,"style": "bold","name": "text1","hOffset": 250,"vOffset": 100,"alignment": "center","onMouseUp": "sun1.opacity = (sun1.opacity / 100) * 90;"}}} There are a number of websites that will 'pretify' the string make it easier to read the structure and enable you to understand how you might navigate it. If you take json string above and paste it into http://jsonprettyprint.com/ it will display it more like a table This format is easier to understand { "widget": { "debug": "on", "window": { "title": "Sample Konfabulator Widget", "name": "main_window", "width": 500, "height": 500 }, "image": { "src": "Images\/Sun.png", "name": "sun1", "hOffset": 250, "vOffset": 250, "alignment": "center" }, "text": { "data": "Click Here", "size": 36, "style": "bold", "name": "text1", "hOffset": 250, "vOffset": 100, "alignment": "center", "onMouseUp": "sun1.opacity = (sun1.opacity \/ 100) * 90;" } } } Finally.... There is a very good discussion on using a table in a predefined variables to store the ID's of scenes and devices for the HC2 - https://forum.fibaro.com/index.php?/topic/23942-tutorial-using-a-hometable-to-store-device-and-scene-ids/ suggestions to improve welcome -f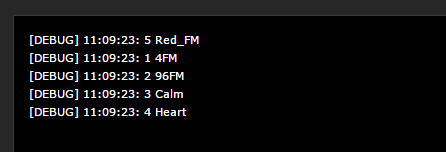
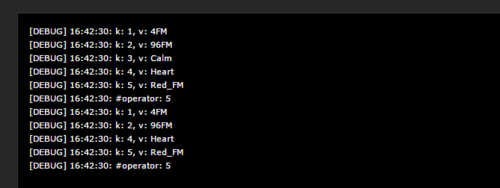
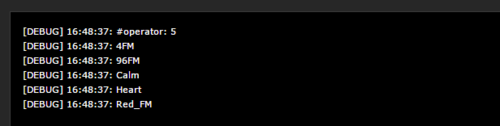

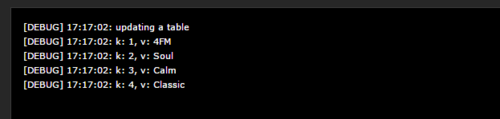
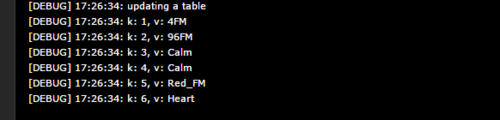

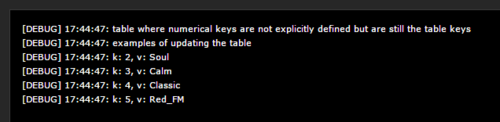


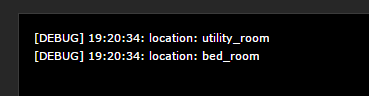

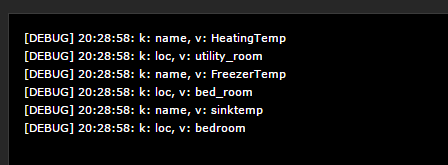
- 47 replies
-
- 9
-

-

-
- 2nd edition
- lua
- (and 3 more)
-
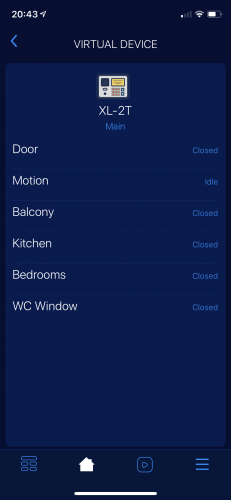
Version 1.1.0
84 downloads
Hello Everyone, I 've tried Konnected alarm panel in parallel with my old alarm system, and it is working great. (Konnected) My task that was assigned to myself was to integrate Konnected directly to my HC2. So with a little LUA magic we have ready the Konnected Virtual Device for HC2. You can find the Virtual Device Repository here. Enjoy! -
Is it possible to create a Lua code when a relay or switch changes state (e.g. from on to off). I often get multiple messages instead of one. For example, if I choose to receive a notification when my thermostat's relay goes from off to on, the notification works, but a few minutes later I get that notification again and again... Thanks
-
This is a Quickapp script for HC3. I am trying to get this to work in a VD on HC2. Is it possible, or do I have to do it together with a scene to make it work? Can anyone help? function QuickApp:onInit() self:updateProperty("unit", "kr/kWh") self.refresh = 60 -- in seconds local function loop() self:webrequest(); setTimeout(loop,self.refresh * 1000) end if self.username ~= "changeme" then loop() end end function QuickApp:webrequest() local tid = os.date("%R") local minutt = os.date("%M") --OPPDATERER STRØMPRIS OG SNITT HVER TIME if (minutt == "00") then self:OppdaterPris(); self:OppdaterSnitt(); end end function QuickApp:OppdaterPris() --Opprette lokale variable local GammelStrompris = fibaro.get(126,"value") local NyStrompris --Definerer http local http = net.HTTPClient(); --Definerer strengen Payload til å være kommando til tibber local payload = '{"query": "{viewer {homes {currentSubscription{priceInfo{current{total}}}}}}", "variables": null, "operationName": null}'; --API.POST til Tibber-- http : request('https://api.tibber.com/v1-beta/gql', { options = { method = "POST", headers = { ['Authorization'] = '.........', --Min Tibber ID her. ['Content-Type'] = 'application/json' }, data = payload -- Query. }, success = function(response) --fibaro.debug (response.data) --Verifiser at en har fått response.data. Dette er data som en har fått fra Tibber local data = json.decode(response.data); --fjernet local under??? NyStrompris = json.encode(data.data.viewer.homes[1].currentSubscription.priceInfo.current.total); self:updateProperty("value", tonumber(NyStrompris)) --print("OK") end, error = function(err) fibaro.debug ("Error:" .. err) end }); end function QuickApp:OppdaterSnitt() --Definerer http local http = net.HTTPClient(); --Definerer strengen average til å være kommando til tibber local average = '{"query": "{viewer {homes {currentSubscription{priceRating{daily{entries{total}}}}}}}", "variables": null, "operationName": null}'; --API.POST Til Tibber http : request ('https://api.tibber.com/v1-beta/gql', { options = { method = "POST", headers = { ['Authorization'] = '...............', --Min Tibber ID her. ['Content-Type'] = 'application/json' }, data = average -- Query }, success = function(response) --fibaro.debug(response.data) --Verifiser at en har fått response.data. Dette er data som en har fått fra Tibber local data = json.decode(response.data); local Nypris = tostring(json.encode(data.data.viewer.homes[1].currentSubscription.priceRating.daily.entries[31].total)); self:updateProperty("log", tostring(Nypris)) end, } ) end
-