
Welcome to Smart Home Forum by FIBARO
Dear Guest,
as you can notice parts of Smart Home Forum by FIBARO is not available for you. You have to register in order to view all content and post in our community. Don't worry! Registration is a simple free process that requires minimal information for you to sign up. Become a part of of Smart Home Forum by FIBARO by creating an account.
As a member you can:
- Start new topics and reply to others
- Follow topics and users to get email updates
- Get your own profile page and make new friends
- Send personal messages
- ... and learn a lot about our system!
Regards,
Smart Home Forum by FIBARO Team


Virtual Devices
The category contains virtual devices submitted by users.
Downloading and submission terms have to be accepted.
Types of files accepted: LUA, VFIB, ZIP, TAR, RAR, JSON.
Virtual devices have to be described properly, screen shots are optional.
Support topics are created automatically here Virtual devices
Report topics and files that are no longer supported by authors.
All the files submitted have to be approved by administrators.
86 files
-

COVID-19 Stats suite
By Sankotronic
COVID-19 Stats suite standalone
INTRODUCTION
COVID-19 Stats suite consists of virtual device and two scenes. It is using free COVID-19 API released by Kyle Redelinghuys. VD is getting back details about global and regional coronavirus data, including latest numbers that are updated close to real-time by gathering information from Johns Hopkins CSSE.
PREREQUISITES Fibaro Home Center 2 with firmware 4.580 or greater
Sankortonic Lab. Emoji VD standalone
FEATURES
COVID19 Stats suite is getting details about global and regional corona virus spread and show them on Fibaro mobile app or browser connected to HC2 home page.
Uses COVID-19 API built by Kyle Redelinghuys to show latest data on corona virus spreading.
Provides total global pandemic numbers for total and new cases, total and new deaths and total and new recovered cases and total active cases.
Provides user to select default country to monitor corona virus latest numbers
Provides user to check corona virus latest numbers for 190 countries worldwide.
Provides global variable trigger that user can setup to be updated either by global total active cases or their default country active cases. This trigger can then be used to start scene that will send notifications using any available service.
Multilingual support with 27 languages included. VD can use HC2 selected language or user can select any other available language. VD will be automatically translated to selected language
Easy setup for VD icons
Global variables are automatically created, monitored and repaired.
INSTALLATION
Please check provided User Manual
PACKAGE CONTENT
COVID-19 Stats VD COVID-19 Stats scene COVID-19 Triggered scene Icon pack for VD and scene User manual EN Updated code for scene and VD main loop and Update button
TERMS AND CONDITIONS
Permission to use, copy, modify and distribute this software and its documentation for educational, research, personal use and non-profit purposes, without fee and without a signed licensing agreement is hereby granted, provided that the copyright notice, with "Terms and conditions" and "Disclaimer" appear in all copies, modifications and distributions. It is strictly forbidden to sell, rent, lease and/or lend this software for profit without prior consent from the Author.
DISCLAIMER
This software is provided by copyright owner "as is" and any express or implied warranties, including, but not limited to, the implied warranties of merchantability and fitness for a particular purpose are disclaimed. In no event shall the author and distributor be liable for any direct, indirect, incidental, special, exemplary, or consequential damages (including, but not limited to, procurement of substitute goods or services; loss of use, data, or profits; or business interruption) however caused and on any theory of liability, whether in contract, strict liability, or tort (including negligence or otherwise) arising in any way out of the use of this software, even if advised of the possibility of such damage.
Fibar Group S.A. and their employees are not responsible for support of the COVID-19 Stats suite. Please contact the author Sankotronic, on the Fibaro Forum, for any questions or support required.
219 downloads
(1 review)0 comments
Updated
-

Smarter Coffee VD
By Sankotronic
Smarter Coffee VD
Hello friends of Fibaro and a good cup of coffee!!!
When I became proud owner of Smarter coffee machine, I didn't know that Smarter is making smart appliances that are actually not connectible to home automation. I have ask them several times if they plan to publish coffee machine API or what ever is needed so that it can became connected part of our every day smarter home. What is the use of smart coffee machine if you have to grab mobile phone every morning in bed to tell it that you want coffee to be brewed!! The answer was always "maybe soon". So I get tired of waiting!
I was intensively searching the wast land of internet and just few days ago finally stumble on at least some kind of solution provided by Simone Margaritelli the evilsocket and Aden Forshaw. Of course their solution is written in python but for me is unacceptable to have additional server even on small PI just to start coffee machine. So done little experimenting because this coffee machine has really simple commands in bytes where first byte is command and last byte is marking end of command. Here is what evilsocket and Aden found and I provide translation to our LUA language with this little knowledge I have just in case if you want to experiment further or do similar VD for iKittle 2:
-- Smarter coffee commands: command - hexadecimal - decimal format used in LUA -------------------------------------------------------------------------------------- brew = "7" = "7" reset = "\x10" = "\16" get wifi aps = "\xD" = "\13" toggle grind = "\x3c\x7e" = "\60\126" set strength = "\x35%\x7e" = "\53\%\126" where % = 0-2 (weak, mid, strong) set cups = "\x36%\x7e" = "\54\%\126" where % = 1-12 cups set config = "\x38\%1\%2\%3\%4\x7e" = "\56\%1\%2\%3\%4\126" where %1 = strength %2 = cups %3 = mode (grind, filter) %4 = warm time warm % min = "\x3e%\x7e" = "\62\%\126" where % = 1-30 min warm stop = "\x4a\x7e" = "\74\126" -- Smarter coffee response response - hex - decimal counterpart ------------------------------------------------------- brewing or OK = "\x03\x00~" = "\3\0~" already brewing = "\x03\x01~" = "\3\1~" invalid argument = "\x03\x04~" = "\3\4~" no carafe = "\x03\x05~" = "\3\5~" no water = "\x03\x06~" = "\3\6~" low water = "\x03\x07~" = "\3\7~" reset ok = "\x03i~" = "\3i~" -- In LUA backslash \ is used to mark byte in the string so it cannot stand alone or be -- last character in string like this: "\" or this "\56\". ''So this is problem if you want -- to combine different values in string commands like for changing number of cups -- since it is impossible to join "\54\" ..cups.. "\126". 'Only possibility that -- came across my mind is to use table with predefined strings for coffee strenght, -- number of cups and Keep wamring time as listed bellow. local comm = "\56"; local cups = {"\1", "\2","\3", "\4","\5", "\6","\7", "\8","\9", "\10", "\11", "\12"}; local stre = {"\0", "\1","\2"}; local mode = {"\0", "\1"}; local time = {"\5", "\10", "\15", "\20", "\25", "\30", "\35", "\40"} local endb = "\126" -- example of building command for setting coffee machine default settings local command = comm..stre[2]..cups[2]..mode[1]..time[1]..endb I should actually put this part in developer section but here it is for those of you who like to play with it.
So here it is SMARTER COFFEE VD V0.1 first release
Smarter_coffee.vfib.json
To be able to use this VD you will need following devices:
1) HC2 - VD will work only on HC2 due to LUA code (Will try to do HCL version but will not be with all possibilities as LUA version)
2) Smarter Coffee machine with latest firmware V 22.0 (will work with older version but you will not be able to stop Keep warming or set it to 40 min)
3) FGWP smart plug or any other similar. It is needed to monitor coffee machine consumption from which is determined if it is brewing, keep coffee warm or stopped
Also after importing VD to your system you need to setup IP address and TCP port. Since it is not possible to get IP address of your precious coffee machine from original app you will need some other app to find it for you. I used Fing on my iPhone. TCP port is 2081. And it should be entered on advanced tab of the VD:
Before you start using VD first you will need to define some global variables in global variable panel. I was planning to add code to do that part for you, but since Fibaro is constantly changing API on HC I decided to leave this part to you. Besides you can put values of global variables in your language but then you will also have to change few things in code of each button and main loop. Will explain later what to change.
So this are global variables that are needed for Smarter coffee VD to work properly:
First are variables (top part in panel):
Name of variable - possible value that you must enter when adding (DO NOT leave 0 if is not possible value!!)
-----------------------------------------------------------------------------------------------------------------------------
SmarterCups - possible values: between 1 and 12. Do not leave 0. Keeps number of cups of coffee.
SmarterStrength - possible values: 0 - Weak, 1 - Medium or 2 - Strong. Keeps value of coffee strength
SmarterWarm - possible values: 5, 10, 15, 20, 25, 30, 35 and 40. Keeps time for how long coffee will be kept warm
Following are predefined global variables (bottom part in panel):
Name of variable - possible values that you must enter in order I put them here bellow.
-----------------------------------------------------------------------------------------------------------------------------
SmarterBrewed - possible values: No, Yes. Used to prevent starting brewing twice in a row. This is filter coffee and filter is better to cleaned after each use.
SmarterDefaults - possible values: table that contains coffee machine default values for strength, number of cups, mode (Filter or Grind) and time to Keep warm. You need to define only one value with name Table and then save. Open again to edit and then delete Value2. VD will take care of the rest.
SmarterMode - possible values: Filter, Grind. It is self explanatory
SmarterPush - possible values: No, Yes. It is used to send push notification only ones from VD main loop when coffee is ready
SmarterStatus - possible values: Ready, Not ready, Brewing, Keep warm, Faulty, No carafe, No water, Low water. Status of the machine.
SmarterUseDef - possible values: No, Yes. If using default values then VD needs to restore to those values after brewing is finished.
For global variables SmarterBrewed, SmarterMode and SmarterStatus you can use words in your language but if you do then you will have to change in code as follows:
-- GLOBAL VARIABLES -- enter names and value mapping of your -- global variables or leave as it is and add to variables panel -- "SmarterStatus" is predefined global variable. Enter your -- name and mapping of values local smarterStatus = "SmarterStatus"; -- change value mapping to corresponds to your values in your global variable local smarterStatusMapping = {ready="Ready", notready="Not ready", brewing="Brewing", warming="Keep Warm", faulty="Faulty", nocarafe="No carafe", nowater="No water", lowater="Low water"}; -- "SmarterMode" is predefined global variable local smarterMode = "SmarterMode"; -- change value mapping to corresponds to your values in your global variable local smarterModeMapping = {filter="Filter", grind="Grind"}; -- "SmarterWarm" is global variable possible value 5 to 40 in -- step of 5 local smarterWarm = "SmarterWarm"; -- "SmarterBrewed" is predefined global variable used to change -- machine status local smarterBrewed = "SmarterBrewed"; -- change value mapping to corresponds to your values in your global variable local smarterBrewedMapping = {Yes="Yes", No="No"}; and this has to be done in all code for each button and main loop!
Next step is to add icons and then do mapping of their IDs in the code. Here are the icons in order and with their names in code:
Main icon that you will set as default on the VD and all buttons except on button Brew and Keep warm:
In code is named iconBrewing so you will need ID and also set it up on Brew button:
In code is named iconWarming so you will need ID and also set it up on Keep warm button:
in code is named iconNoCarafe so you will need ID:
in code is named iconLoWater and ID is needed:
in code is named iconNoWater and ID is needed:
in code is named iconFilter0 you need ID and it is showing setting for Weak strength and Filter mode:
in code is named iconFilter1 you need ID and it is showing setting for Middle strength and Filter mode:
in code is named iconFilter2 ID is needed and it is showing setting for Strong coffee and Filter mode:
in code is named iconGrind0 ID is needed and it is showing setting for Weak coffee and Grind mode:
in code is named iconGrind1 Id is needed and it is showing setting for Medium coffee and Grind mode:
and the last one is named in code iconGrind2 Id needed and is showing setting for Strong coffee and Grind mode:
How to get icon ID is explained many times here on forum so I will skip that. After you get ID of all icons then you need to replace them in main loop and for buttons Brew, Keep warm, Weak, Medium, Strong, Change mode, Reset machine and main loop. Code is well commented and looks like this:
-- VD ICONS ---------------------------------------------------- -- enter ID numbers of corresponding icons on your system local iconBrewing = 1041; local iconWarming = 1042; local iconNoCarafe = 1044; local iconFilter0 = 1045; local iconFilter1 = 1046; local iconFilter2 = 1047; local iconGrind0 = 1048; local iconGrind1 = 1049; local iconGrind2 = 1050; local iconLoWater = 1051; local iconNoWater = 1052; And before you can start enjoying your coffee there is one more touch that needs to be done. You need to go to main loop code and first setup smart plug ID. Look for this code in main loop:
-- SMART PLUG -------------------------------------------------- -- enter ID nuber of smart plug to which Smarter cofee is -- connected. Smart plug is the only way to check machine status -- at the present moment so it is needed for proper functioning -- of this VD local plugID = 135; Then if you want to be notified by VD when coffee is ready then find this code and enter ID of your mobile devices to which will be send. You can put as many as you like between brackets {} just separate them by comma eg. {2, 45, 121}:
-- PUSH NOTIFICATIONS ------------------------------------------ -- define users that will receive push notifications when -- coffee is ready if leaved empty no notification will be send local userID = {} -- enter default flags: 1 - will send, 0 - will not send -- must be same number of flas as users local userFlag = {}; -- enter push message text that will be sent when coffee is -- ready local pushMessage = "Coffee is ready!" -- here you can put code that will change flags to whom push -- notification will be sent function setupUsers() -- here you can put code to dynamically change which users -- will get push notifications if you use flags end If you want to change who will receive push notifications you can use variable userFlag for that. For each userID you can enter 1 to send push notification or 0 not to send. Then you can add some code in function setupUsers() where you can change flags as you wish. For example I use that code to stop receiving push notifications when I'm away from home. If you don't need this feature then just leave brackets empty. And of course you can change message for pushMessage to your language.
And if you want to completely translate VD to your language you just need to check all code for this part:
-- MESSAGES ---------------------------------------------------- -- enter messages in your language -- response messages from coffee machine local _respBrewing = "Brewing"; local _respAlready = "Already brewing"; local _respInvalid = "Invalid argument"; local _respNocarafe = "No carafe" local _respNowater = "No water"; local _respLowater = "Low water"; local _respResetOK = "Reset OK"; local _respCheck = "Check machine"; local _respFailed = "Transfer failed"; -- command sent by this button local _command = "Brew"; -- coffee machine status messages local _statReady = "Ready"; local _statNotready = "Not ready - fill in coffee"; local _statBrewing = "Already brewing!"; local _statWarming = "Warming coffee!"; local _statFaulty = "Faulty - check machine"; local _statNocarafe = "No carafe - put it back"; local _statLowater = "Warning! - Low water"; local _statNowater = "No water - fill tank"; I try to make it easier for you as much as I could in this four days of development so all messages I collected on beginning of the code. Some buttons have more messages, some don't so you better check them all.
At the end just short explanation how it works. Before first run, you will need to check if settings in VD corresponds to machine settings by checking display on the machine or original app. When this is synced you can start using it.
Before first brewing status of VD must be Ready. If it is not you can press button Reset status to just reset VD or Reset machine to reset all to factory settings. Reseting machine will clear all default settings so you will need to send them again by pressing button Set above as default after you make your favorite choice of strength, cups and mode. This default settings will be always set back after brewing coffee no matter what settings was for the last brew. After brewing coffee status of the VD will be always set to Not ready except if there is No carafe in place, or No water or Low water. After rectifying cause: placing carafe in place, filling water and cleaning filter you will need to press button Reset status to put it back into Ready state. If this is too annoying you can always setup some short scene that you will trigger with some switch, button or swipe or whatever and reset VD to Ready status. If you want to keep coffee warm after brewing you can do that by setting time and then pressing button Set above as default so warming will start immediately after brewing, or you can setup time and then press button Keep warm. If during Keep warm you press button Keep warm again this will stop warming but only with new machine firmware. Keep warming time can be set up to 40 minutes. And that's it!
Enjoy coding and coffee!!!
EDIT
Still working on 4.180
68 downloads
(1 review)0 comments
Updated
-
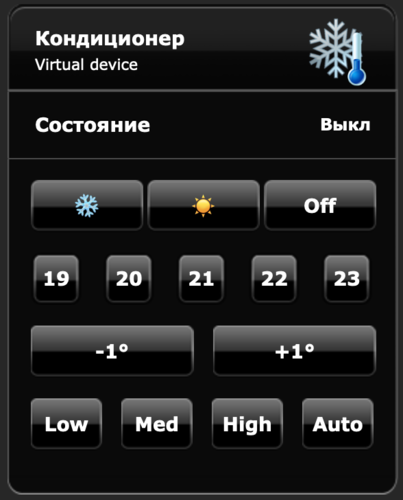
ZXT-120 AC control VD
By baskalex
This is a simple VD+Scene to control ZXT-120 AC controllers. I use it because of 2 factors:
1) You can control everything on one screen instead of 3 devices in HC2 interface
2) it is visible in Home Center app (ZXT-120 is not visible natively yet)
It supports heating and cooling modes and fan speed. You can see current status as well.
Setup is very simple:
VD - just put ID of the child device of ZXT-120 which controls temperature into the "Port" field of VD
Scene - You have to put IDs of three child deviced of ZXT in the triggers field annd the same ID into "Options" part of the scene. Also put VD ID inn the "Options" part.
Maybe it can be useful for some of you.
ZXT-120.zip
116 downloads
-
Netatmo Weather Station suite standalone
By Sankotronic
Netatmo Weather Station suite standalone v3.5.2
INTRODUCTION
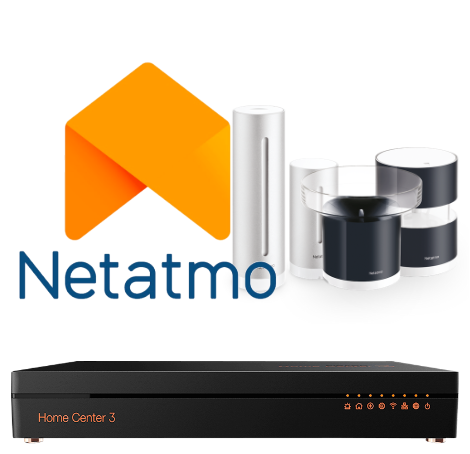
Netatmo Weather station suite brings complete integration of Netatmo weather station to HC2 users including rain and wind gauges and support for more than one station.
PREREQUISITES
Fibaro Home Center 2 with firmware 4.160 or greater
Sankotronic Lab. Emoji VD standalone (not required since v3.4)
Netatmo Weather station
FEATURES
Complete integration of Netatmo weather station with HC2 including rain gauge and anemometer
Support for multiple Netatmo weather stations
Support for maximum 3 additional indoor modules
Since version 3.5 support for Indoor main module that is missing outdoor module
Smart update system that follows Netatmo weather station cloud updates
Completely independent installation does not require any more Weather State VD or Main scene FTBE
Netatmo weather station measurements can be shown on Weather State VD and HC2 web GUI and mobile applications by means of Weather State VD and Weather
provider plugin
VD has built in multi-language support with 27 languages included (see APPENDIX 1 for the list). VD can use HC selected language or user can select any other available
language.
Easy setup for VD icons (on UHASTM compatible version is this even easier)
Global variables are automatically added, monitored and repaired and does not require user intervention
INSTALLATION
Please check provided User Manual and video from @MarcoTorino71:
PACKAGE CONTENT
Netatmo Main module VD Netatmo Outdoor module VD Netatmo Additional indoor module VD Netatmo Wind sensor VD Netatmo Rain sensor VD Netatmo Weather station scene Set of icons for all VD's and scene
UPRADE PACKAGE CONTENT v3.5.2
Netatmo Weather station scene Updated user manual
TERMS AND CONDITIONS
Permission to use, copy, modify and distribute this software and its documentation for educational, research, personal use and non-profit purposes, without fee and without a signed licensing agreement is hereby granted, provided that the copyright notice, with "Terms and conditions" and "Disclaimer" appear in all copies, modifications and distributions. It is strictly forbidden to sell, rent, lease and/or lend this software for profit without prior consent from the Author.
DISCLAIMER
This software is provided by copyright owner "as is" and any express or implied warranties, including, but not limited to, the implied warranties of merchantability and fitness for a particular purpose are disclaimed. In no event shall the author and distributor be liable for any direct, indirect, incidental, special, exemplary, or consequential damages (including, but not limited to, procurement of substitute goods or services; loss of use, data, or profits; or business interruption) however caused and on any theory of liability, whether in contract, strict liability, or tort (including negligence or otherwise) arising in any way out of the use of this software, even if advised of the possibility of such damage.
Fibar Group S.A. and their employees are not responsible for support of the ABC VD. Please contact the author Sankotronic, on the Fibaro Forum, for any questions or support required.
VERSION HISTORY
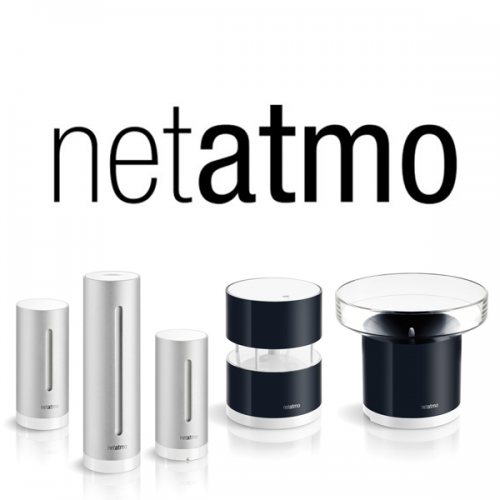
3.5.2 - Scene code changed to support Netatmo servers domain api.netatmo.com, since the other one will be removed 3.5 - Suite now support Netatmo weather station indoor main module that is missing outside module 3.4 - Scene code changed to use new Netatmo API grant access by replacing username and password with tokens. All VD's since v3.4 do not need Emoji VD to be installed to work properly. 3.3.1 - Scene code changed to get rain amount for past 3 adn 6 hours to better support Irrigation Control VD. All VD's corrected some translations. Rain gauge VD changed labels content to display last 3 hours rain amount 3.3 - Check below version description or consult User manual for more details 3.2 - Corrected rain sensor code and cleaned some bugs in scene. Indoor modules corrected handling of CO2 measurement, improved updating code. 3.0 – This new version is completely redesigned and made independent. Does not require Main scene FTBE and Weather State VD anymore. Updating is now synced with Netatmo cloud so readings are always up to date. 2.0.2 – Code optimized and resolved some bugs Here is look of the Netatmo Weather set:
Enjoy coding and your new Netatmo weather station suite!
Sankotronic
4,349 downloads
-

Main scene FTBE
By Sankotronic
Main scene FTBE v1.3.4
UPDATE (30 December 2019)
Changed only Main scene FTBE code. Changed function for time of day calculation and added use of SleepState global to set time of day to morning when Awake and current time is between midnight and sunrise time.
KNOWN ISSUES v1.3.4
Sunrise and Sunset VD will not show correctly default sunrise and sunset time set by user in Main scene in case that that times are used due to problem with HC settings. If sunset time is before sunrise time then user must check that night time is not set to start after sunrise. Sunrise & Sunset VD does not check this time automatically. INTRODUCTION
Main scene FTBE is the beating heart of the HA system. It is the only scene necessary to loop endlessly because it is the source of most important events generated on our gateways and that are time based events! It is looping once every minute making sure that our gateways are aware of the current time, part of the day, week, month and season of the year. Many actions done by our gateways are depending on current time like raising or lowering blinds, lighting control, waking up of our home and us, brewing coffee at proper time (this is extremely nice!), reminding us of important events and many other things. This scene will take care of that by changing various global variables at appropriate time thus activating other scenes triggered by them and the user can even configure it to start other scenes or press buttons on VD's at predefined intervals or at scheduled times.
PREREQUISITES
Fibaro Home Center 2 with firmware 4.110 or greater FEATURES
Consists of scene and three VD's. Main scene FTBE loops and takes care of all timers like darkness, time of day, week days, month and season. Can also be setup to run other scenes, activate buttons on VD's or change global variables value at predefined times. VD's are used to set values of timers and show them on HC2 interface Can be setup to send push messages for scheduled execution of scenes and VD's Can track users location and calculate distance from home Darkness can be changed either by user set sunrise and sunset times or by light level measured by devices Part of the used global variables are automatically added to the system by Sunrise & Sunset VD and are automatically repaired INSTALLATION & UPGRADE
Please check provided User Manual where all steps are explained in detail and check video from @MarcoTorino71:
PACKAGE CONTENT
Main scene FTBE v1.3.4 Sunrise & Sunset VD v1.4.0 Home Status VD v1.0 Home Timers VD v1.0.1 Icons for scene and VD's User Manual EN v1.3 CREDITS
Many thanks to many Fibaro forum users for help with testing and suggestions for improvements.
TERMS AND CONDITIONS
Permission to use, copy, modify and distribute this software and its documentation for educational, research, personal use and non-profit purposes, without fee and without a signed licensing agreement is hereby granted, provided that the copyright notice, with "Terms and conditions" and "Disclaimer" appear in all copies, modifications and distributions.
It is strictly forbidden to sell, rent, lease and/or lend this software for profit without prior consent from the Author.
DISCLAIMER
This software is provided by copyright owner "as is" and any express or implied warranties, including, but not limited to, the implied warranties of merchantability and fitness for a particular purpose are disclaimed. In no event shall the author and distributor be liable for any direct, indirect, incidental, special, exemplary, or consequential damages (including, but not limited to, procurement of substitute goods or services; loss of use, data, or profits; or business interruption) however caused and on any theory of liability, whether in contract, strict liability, or tort (including negligence or otherwise) arising in any way out of the use of this software, even if advised of the possibility of such damage.
Fibar Group S.A. and their employees are not responsible for support of the Main scene FTBE. Please contact the author Sankotronic, on the Fibaro Forum, for any questions or support required.
2,945 downloads
-

Yeelight Manager
By ojc
VD YEELIGHT MANAGER
Originally released on domotique-fibaro.fr
v. 1.3.0 - 14/01/2018
I present the VD Yeelight Manager which, as its name suggests, allows you to integrate Yeelight products with the HC2. To be very precise, I only have a Bedside Lamp and I have not tested this VD with other products. However, since the API is generic, there are no reasons that it does not work too. The only limit, I did not integrate in the DV management of the background light since the Bedside Lamp does not have such a light.
To use it, simply enter the IP of the Yeelight in the IP field of the DV, and the port in the Port field of the DV (the port used by the Yeelights is 55443). You can add or change elements of the virtual device according to your needs (the white light bulb does not need, for example, anything related to color management), as long as the TCP Connection and Transmission buttons keep their respective names (btnTCPConnection and btnTransmission). Yeelight Manager will find them himself by these names.
In order to be able to manage a Yeelight 'almost' like a module, simply insert in the scene or the code of the button or Main Loop the following code:
_y={credits='Yeelight Controller v. 1.3.0 - Copyright 2018 Olivier Meyer - GNU GPLv3',global='y_yeelight_global',item='y_yeelight_',props={power=true,bright=true,ct=true,rgb=true,hue=true,sat=true,color_mode=true,flowing=true,delayoff=true,flow_params=true,music_on=true,name=true,bg_power=true,bg_flowing=true,bg_flow_params=true,bg_ct=true,bg_lmode=true,bg_bright=true,bg_rgb=true,bg_hue=true,bg_sat=true,nl_br=true},f=fibaro,debug=function(s,m,c)s.f:debug(string.format('<span style="color:%s;">%s</span>', c, m))end,here=function(s)local h=type(s.f.getSelfId)=='nil' if h then return h,__fibaroSceneId else return h,s.f:getSelfId(),_elementID_ end end,log=function(s)local h=s:here()if h then local a=s.f:args()if a then if a[1].yeelight then s:debug(a[1].debug,a[1].color);s:debug(a[1].command,a[1].color);os.exit()end end end end,getBtn=function(s,i,n)local c,r=0,api.get('/devices/'..tostring(i))['properties']['rows'] local x=#r for a=1,x do local y=#r[a].elements for b=1,y do c=c+1 if n==r[a].elements[b].name then return c end end end s:debug('[Yeelight] Unable to locate button '..n..', check virtual device '..i,'Tomato');return nil end,build=function(s,m,p)local c='{"id":1, "method":"'..m..'", "params":['for i=1,#p do if type(p[i])=="number"then c=c..p[i]else c=c..'"'..p[i]..'"'end;if i~=#p then c=c..', 'end end;c=c..']}\r\n'return c end,load=function(s,v)local g=s.f:getGlobalValue(v)if string.len(g or '')>0 then local d=json.decode(g)if d and type(d)=='table'then return d else s:debug('[Yeelight] Unable to process data, check variable','Tomato')end else s:debug('[Yeelight] No data found!','Tomato')end return nil end,set=function(s,i,d)local g=s:load(s.global)if g[tostring(i)]then local a,b,c=s:here();g[tostring(i)].scene=a;g[tostring(i)].id=b;g[tostring(i)].button=c;g[tostring(i)].command=d;s.f:setGlobal(s.global,json.encode(g))end end,call=function(s,i,m,p)local b=s:getBtn(i,'btnTransmission')if b==nil then return nil end;local c=s:build(m,p)s:set(i,c)s.f:call(i,'pressButton',b)end,getValue=function(s,i,p,g)if s:checkP(p) then if type(g)~='table' then g=s:load(s.item..i)end if g.properties then if g.properties[p] then if g.properties[p].value then return g.properties[p].value end end end s:debug('[Yeelight] Unable to get value of '..tostring(p)..', please check variable.','Tomato');end return nil end,getModificationTime=function(s,i,p,g)if s:checkP(p) then if type(g)~='table' then g=s:load(s.item..i)end if g.properties then if g.properties[p] then if g.properties[p].modificationTime then return g.properties[p].modificationTime end end end s:debug('[Yeelight] Unable to get modification time of '..tostring(p)..', please check variable.','Tomato');end return nil end,get=function(s,i,p)local g=s:load(s.item..i);return s:getValue(i,p,g),s:getModificationTime(i,p,g)end,getStatus=function(s,i)local g=s:load(s.item..i)if g then if g.status then return g.status end end return nil end,getLastChange=function(s,i)local g=s:load(s.item..i)if g then if g.last then return g.last end end return nil end,checkP=function(s,p)if not s.props[p] then s:debug('[Yeelight] '..p..' is not an existing property!','Tomato') return false end return true end} _y:log() This code above offers the following functions:
_y:call(id, method, params) which allows to send a command to the lamp. The various buttons of the VD give examples. To go further, please have a look at the Yeelight API documentation : Yeelight_Inter-Operation_Spec.pdf _y:get(id, property) which does exactly the same thing as fibaro:get() _y:getValue(id, property) which does exactly the same thing as fibaro:getValue() _y:getModificationTime(id, property) which does exactly the same thing as fibaro:getModificationTime() _y:getStatus(id) which returns "online" if the lamp is connected to the wifi network, and "offline" otherwise _y:getLastChange(id) which returns a table containing the properties that have just been modified and their new value
The logs generated by the call () function are displayed in the debug zone of the scene (do not forget the _y: log () line and allow enough instances) or in the button or main loop of the virtual module from which the function was used.
To use these lamps as scene triggers, the VD automatically creates a global variable y_yeelight_XXX, where XXX is the ID of the VD. This global variable contains all the properties of the lamp and is updated in real time.
For example, to start a scene when a Yeelight is turned on:
--[[ %% globals y_yeelight_XXX --]] _y={credits='Yeelight Controller v. 1.3.0 - Copyright 2018 Olivier Meyer - GNU GPLv3',global='y_yeelight_global',item='y_yeelight_',props={power=true,bright=true,ct=true,rgb=true,hue=true,sat=true,color_mode=true,flowing=true,delayoff=true,flow_params=true,music_on=true,name=true,bg_power=true,bg_flowing=true,bg_flow_params=true,bg_ct=true,bg_lmode=true,bg_bright=true,bg_rgb=true,bg_hue=true,bg_sat=true,nl_br=true},f=fibaro,debug=function(s,m,c)s.f:debug(string.format('<span style="color:%s;">%s</span>', c, m))end,here=function(s)local h=type(s.f.getSelfId)=='nil' if h then return h,__fibaroSceneId else return h,s.f:getSelfId(),_elementID_ end end,log=function(s)local h=s:here()if h then local a=s.f:args()if a then if a[1].yeelight then s:debug(a[1].debug,a[1].color);s:debug(a[1].command,a[1].color);os.exit()end end end end,getBtn=function(s,i,n)local c,r=0,api.get('/devices/'..tostring(i))['properties']['rows'] local x=#r for a=1,x do local y=#r[a].elements for b=1,y do c=c+1 if n==r[a].elements[b].name then return c end end end s:debug('[Yeelight] Unable to locate button '..n..', check virtual device '..i,'Tomato');return nil end,build=function(s,m,p)local c='{"id":1, "method":"'..m..'", "params":['for i=1,#p do if type(p[i])=="number"then c=c..p[i]else c=c..'"'..p[i]..'"'end;if i~=#p then c=c..', 'end end;c=c..']}\r\n'return c end,load=function(s,v)local g=s.f:getGlobalValue(v)if string.len(g or '')>0 then local d=json.decode(g)if d and type(d)=='table'then return d else s:debug('[Yeelight] Unable to process data, check variable','Tomato')end else s:debug('[Yeelight] No data found!','Tomato')end return nil end,set=function(s,i,d)local g=s:load(s.global)if g[tostring(i)]then local a,b,c=s:here();g[tostring(i)].scene=a;g[tostring(i)].id=b;g[tostring(i)].button=c;g[tostring(i)].command=d;s.f:setGlobal(s.global,json.encode(g))end end,call=function(s,i,m,p)local b=s:getBtn(i,'btnTransmission')if b==nil then return nil end;local c=s:build(m,p)s:set(i,c)s.f:call(i,'pressButton',b)end,getValue=function(s,i,p,g)if s:checkP(p) then if type(g)~='table' then g=s:load(s.item..i)end if g.properties then if g.properties[p] then if g.properties[p].value then return g.properties[p].value end end end s:debug('[Yeelight] Unable to get value of '..tostring(p)..', please check variable.','Tomato');end return nil end,getModificationTime=function(s,i,p,g)if s:checkP(p) then if type(g)~='table' then g=s:load(s.item..i)end if g.properties then if g.properties[p] then if g.properties[p].modificationTime then return g.properties[p].modificationTime end end end s:debug('[Yeelight] Unable to get modification time of '..tostring(p)..', please check variable.','Tomato');end return nil end,get=function(s,i,p)local g=s:load(s.item..i);return s:getValue(i,p,g),s:getModificationTime(i,p,g)end,getStatus=function(s,i)local g=s:load(s.item..i)if g then if g.status then return g.status end end return nil end,getLastChange=function(s,i)local g=s:load(s.item..i)if g then if g.last then return g.last end end return nil end,checkP=function(s,p)if not s.props[p] then s:debug('[Yeelight] '..p..' is not an existing property!','Tomato') return false end return true end} _y:log() local function run() --executed on light on end local trigger = fibaro:getSourceTrigger() if trigger.type == "global" then if trigger.name == "y_yeelight_XXX" then if _y:getLastChange(XXX)["power"] == "on" then run() end end end429 downloads
(1 review)0 comments
Updated
-
ZeverSolar Monitor
By Mieszko64
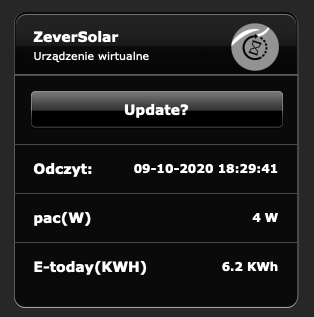
Poniżej pierwsza wersja kodu dla Fibaro VD odczytująca dane z falownika ZeverSolar -instalacji fotowoltaicznej dostępne po sieci lokalnej: adresIP/home.cgi.
VD ZeverSolar wymaga tylko wpisania swojego adresu IP
VD ZeverSolar umożliwia:
1. Prezentacje danych: czas odczytu, wartość chwilowa pacW, wielkość produkcji dziennej.
2. Przycisk wymuszający odczyt on demand "Update?".
3. Zapis zmiennych globalnych pacW, etodayKWh.
76 downloads
(1 review)0 comments
Updated
-

Twinkly Light VD
By Sankotronic
Twinkly Light VD v1.0
(standalone version)
IMPORTANT NOTIFICATION!
If you plan to continue use this VD with your Twinkly LED then DO NOT update them to latest firmware 2.7.1 because it will stop working!
Some companies just refuse to understand importance of HA integration and it is just up to some geeks to publish unofficial API and make integration possible.
INTRODUCTION
Twinkly lights brings amazing effects and most stunning light animations to users fingertips. This beautiful Christmas lights can now be controlled by our Fibaro gateways.
PREREQUISITES
Fibaro Home Center 2 with firmware 4.120 or higher At least one Twinkly light (1st or 2nd generation) connected to home WiFi network with static IP address setting. VD is tested with 190 RGB LED icicle and 250 RGB LED strings of 2nd generation and also strings of 1st generation at the time of publishing
FEATURES
User can install multiple instances of VD for as many Twinkly lights he/she might have. Only one scene is needed to be installed for any number of Twinkly Light VD’s Uses local WiFi network connection for control. Provides turning on/off and changing brightness of the Twinkly light.
Provides control from other code and scenes by using global variable and Update button. Multi language support with 27 languages. VD will be automatically translated to HC selected language or user can select any other available language. Easy setup for VD icons with automatic setup of icons for buttons and sliders too. (UHAS™ compatible version has even more easier icon setup) Self adding and checking of global variable data integrity. Automatic repair of global variables without user intervention
INSTALLATION
Please check provided User Manual where all steps are explained in detail and video kindly provided by @MarcoTorino71:
PACKAGE CONTENT
Twinkly Light VD v1.0 (standalone) 2 icon sets for VD (icicle and strings) Twinkly Light Scene with icon User manual v1.0 EN
CREDITS
The Author wishes to acknowledge the help received from the Fibar Group S.A. in that they have kindly supplied the use of a HC2 for development purposes, free of charge.
The Author also wishes to thanks to Pavol Babinčák for providing unofficial API reference documentation for Twinkly – Smart decoration LED lights for Christmas. Big thanks to @MarcoTorino71 for video!
TERMS AND CONDITIONS
Permission to use, copy, modify, and distribute this software and its documentation for educational, research, personal use and non-profit purposes, without fee and without a signed licensing agreement, is hereby granted, provided that the copyright notice, with "Terms and Conditions" and "Disclaimer" appear in all copies, modifications, and distributions.
It is strictly forbidden to sell, rent, lease and/or lend this software for profit without prior consent from the Author.
DISCLAIMER
This software is provided by copyright owner "as is" and any express or implied warranties, including, but not limited to, the implied warranties of merchantability and fitness for a particular purpose are disclaimed. In no event shall the author and distributor be liable for any direct, indirect, incidental, special, exemplary, or consequential damages (including, but not limited to, procurement of substitute goods or services; loss of use, data, or profits; or business interruption) however caused and on any theory of liability, whether in contract, strict liability, or tort (including negligence or otherwise) arising in any way out of the use of this software, even if advised of the possibility of such damage.
Fibar Group S.A. and their employees are not responsible for support of the Twinkly Light VD. Please contact the author Sankotronic, on the Fibaro Forum, for any questions or support required.
LEGAL NOTICE
Twinkly is registered trademark of LEDWORKS SRL registered in Italy and other countries.
VERSION HISTORY
1.0 - First release of standalone version build on VD code for UHAS™
Here is look of the Twinkly Light VD:
Enjoy coding and your new Twinkly Light virtual device!
Sankotronic
210 downloads
- sankotronic
- lights
- (and 1 more)
-
Irrigation Control standalone
By Sankotronic
Irrigation Control standalone
INTRODUCTION Finally a solution that brings seamless and easy Irrigation control to HC2. This solution overrides all limitations of the HC2 sprinklers panel. With this solution it is possible to set watering duration up to 100 minutes. Also no more overlapping zone watering times. Adjustment of watering is done according to current and forecast weather and rain amount and then zone watering start times automatically adjusted so there is no more overlapping and pressure drops in the system. Your beautiful garden will stay beautiful with this solution
PREREQUISITES
Fibaro Home Center 2 with firmware 4.600 or greater with devices added to the Sprinklers panel
Sankotronic Lab Weather State & Forecast suite v2.8.1 or greater
Sankotronic lab Netatmo Weather Station suite v3.3.1 or Netatmo Public Weather Station suite v1.0
FEATURES
Watering delays and duration adjustment - Works with Weather State & Forecast suite and 6 most popular weather services on the planet to automatically adjust or delay watering depending on current and forecast temperatures and rain precipitation Irrigation pump control – If irrigation system has water supply pump then user can setup pump device ID and irrigation control will take care to start pump before watering cycle starts and stop pump when watering cycle is finished. Sprinklers panel - Works with HC2 Sprinklers panel and overrides panel limitations of 15 minutes watering duration and eliminates overlapping of watering zones by recalculating and setting of zones watering start times depending on adjusted watering duration times. From version 1.2 it is also possible to setup each zone watering start times manually to overlap them and shorten time needed for watering cycle. Watering cycles - User can setup any number of watering cycles with VD and then save them to sprinklers panel with one press of the button. Cycle watering start time and zones watering duration and weekdays all can be setup with this VD and then transferred to sprinkler panel. Auto and Off mode - User can set all watering zones to auto or off mode at once with press of a button Manual watering - User can activate any selected watering zone manually with preselected duration. Great option for maintenance and check of the sprinklers. Watering state at a glance - VD icon shows current overall status of the watering system by changing VD main icon and label accordingly. Watering history – VD is recording all watering cycles times and durations per zones and weather state and forecast measurements. Separate VD is provided for displaying history data. Multi-language support - VD has built in multi-language support with 27 languages included (see APPENDIX 1 for the list). VD can use HC selected language or user can select any other available language. E-mail and push messages are also translated
VD Icons setup - Easy setup for VD icons. User can download HC2 Icon Preview VD to easily
find icon ID numbers
Global variables - are automatically added, monitored, repaired and cleaned and does not require user intervention
INSTALLATION
Please check provided User Manual
UPGRADE
Since v1.2 has a new VD layout to upgrade, first delete Irrigation Control VD and remove global variable "IrrigationMain_XX" where XX is ID of the old VD and then import new Irrigation Control VD. Irrigation History VD v1.0 can remain installed and users do not have to replace it.
PACKAGE CONTENT
Irrigation Control VD v1.2 Irrigation History VD v1.1 Icon packs User manual EN v1.2
TERMS AND CONDITIONS
Permission to use, copy, modify and distribute this software and its documentation for educational, research, personal use and non-profit purposes, without fee and without a signed licensing agreement is hereby granted, provided that the copyright notice, with "Terms and conditions" and "Disclaimer" appear in all copies, modifications and distributions. It is strictly forbidden to sell, rent, lease and/or lend this software for profit without prior consent from the Author.
DISCLAIMER
This software is provided by copyright owner "as is" and any express or implied warranties, including, but not limited to, the implied warranties of merchantability and fitness for a particular purpose are disclaimed. In no event shall the author and distributor be liable for any direct, indirect, incidental, special, exemplary, or consequential damages (including, but not limited to, procurement of substitute goods or services; loss of use, data, or profits; or business interruption) however caused and on any theory of liability, whether in contract, strict liability, or tort (including negligence or otherwise) arising in any way out of the use of this software, even if advised of the possibility of such damage.
Fibar Group S.A. and their employees are not responsible for support of the ABC VD. Please contact the author Sankotronic, on the Fibaro Forum, for any questions or support required.
VERSION HISTORY
1.0 - First public release 1.2 - please see change log for detailed list of changes
Look and feel:
Enjoy coding and your new Irrigation Control!
Sankotronic
316 downloads
- irrigation
- watering
- (and 2 more)
-
Nanoleaf Canvas VD standalone
By Sankotronic
Nanoleaf Canvas VD v1.0.1
(standalone version)
INTRODUCTION
Nanoleaf Canvas light panels https://nanoleaf.me/en/ brings new way of lighting experience. Nanoleaf Cavas VD enables Fibaro Home Center 2 to control this lights and show their status.
PREREQUISITES
Fibaro Home Center 2 with firmware 4.530 (can work on older versions same as Nanoleaf Aurora VD down to 4.120) Nanoleaf Canvas starter kit with firmware 1.1.0 or greater
FEATURES
Enables HC2 to control Nanoleaf Canvas lights and show their status
Control brightness, hue, saturation, color temperature and activate Canvas effects VD automatically updates list of the available effects when added or deleted with Nanoleaf mobile application Scroll with buttons through available effects on VD and activate Selected and running effect type can now be recognized by small icon in front of the effect name.
Canvas control light panel has built in Rhythm module and there is no AUX input available. Rhythm module is automatically activated when rhythm effect is activated Use Process button to control Canvas light by other scenes and VD Built in button for generating authorization token for easy connection to Canvas light Multilanguage support with 27 languages. VD will be automatically translated to HC selected language or user can select any other available language. Easy setup for VD icons with automatic setup of icons for buttons and sliders too. (UHAS™ compatible version has even more easier icon setup) User can setup VD to have separated on and off buttons or to have toggle on/off button Light can be turned on/off with buttons and brightness slider. Even if brightness slider is used to turn off Aurora light, VD remembers last brightness settings so if light is turned back on with button it will be turned on at last brightness level. Self adding and checking of global variable data integrity. Automatic repair of global variables without user intervention New approach to programming other code to control this VD enables future upgrades without needing to change that code. (See more about that in User Manual provided)
INSTALLATION
Please check provided User Manual where all steps are explained in detail.
PACKAGE CONTENT
Nanoleaf Canvas VD v1.0.1 (standalone) Icons for VD User manual v1.1 EN
CREDITS
Many thanks to @gucio1234 and @Bodyart from forum.fibaro.com for help with testing, translations and manual.
TERMS AND CONDITIONS
Permission to use, copy, modify, and distribute this software and its documentation for educational, research, personal use and non-profit purposes, without fee and without a signed licensing agreement, is hereby granted, provided that the copyright notice, with "Terms and Conditions" and "Disclaimer" appear in all copies, modifications, and distributions. It is strictly forbidden to sell, rent, lease and/or lend this software for profit without prior consent from the Author.
DISCLAIMER
This software is provided by copyright owner "as is" and any express or implied warranties, including, but not limited to, the implied warranties of merchantability and fitness for a particular purpose are disclaimed. In no event shall the author and distributor be liable for any direct, indirect, incidental, special, exemplary, or consequential damages (including, but not limited to, procurement of substitute goods or services; loss of use, data, or profits; or business interruption) however caused and on any theory of liability, whether in contract, strict liability, or tort (including negligence or otherwise) arising in any way out of the use of this software, even if advised of the possibility of such damage.
Fibar Group S.A. and their employees are not responsible for support of the Nanoleaf Aurora VD. Please contact the author Sankotronic, on the Fibaro Forum, for any questions or support required.
LEGAL NOTICE
Nanoleaf and Canvas are registered trademarks or trademarks of Nanoleaf Energy Technology ShenZhen Limited registered in PR China and other countries.
NEWS
1 April 2019
Nanoleaf Canvas light panels latest firmware update v1.2.0 is out. If you upgrade to this latest firmware Nanoleaf Canvas VD v1.0 functionality will remain intact and will continue function properly.
12 September 2019
Canvas VD is working flawlessly with Canvas latest firmware version 1.5.0
VERSION HISTORY
1.0.1 - Corrected bug in VD main loop that prevented saving updated effect
1.0 - First release of standalone version build on code of VD for UHAS™
Here is look of the Nanoleaf Canvas VD:
Enjoy coding and your new Nanoleaf Canvas virtual device!
Sankotronic
150 downloads
-

uhas UHAS (Universal Home Automation System) for HC2
By Sankotronic
UHAS v1.0.4 (Universal Home Automation System) for HC2
UHAS INTRODUCTION
UHAS is a set of scenes and Virtual Devices (VD) that provide the following capabilities:
Auto translation of all scenes, VD's, predefined global variables, and messages to 31 different languages (19 directly supported by HC2) (NOTE – not all languages are translated, and users are very welcomed to help with translations that are not yet done) Scheduled and repeating events based on time of day, week, month, and season including Scene FTBE which provides repeating and scheduled actions Advanced Notification Center (ANC) brings centralized notifications with support for most popular services like Pushover, Telegram, GroupMe, WhatsApp and Signal, Sonos TTS and LaMetric TIME smart clock notifications Advanced Lighting Control (ALC) with integration for Philips HUE, Nanoleaf, LIFX and Blebox devices (will be provided in separate package)
Very Smart Blinds (VSB) automation
Presence monitoring and control with geofencing and Netatmo presence
Weather state and forecast with notifications and integration for Netatmo weather station and WeatherFlow and Tempest weather stations
Home consumption monitoring and recording
Appliance monitoring - with notifications
Safety alarms fire and flood
Security alarm integration ready with provided global variables
Irrigation control based on FIBARO devices
Scenes ready to use with Fibaro dimmer 2, Fibaro keyFob, Fibaro Swipe, Fibaro Button and Remotec ZRC-90 central scene activation with built in support for ANC
HC2 system status notifications, automatic backups and many more...
UHAS OVERVIEW
UHAS has been developed for the Fibaro Home Centre 2 (HC2) home automation controller, as a series of modules, which are responsible for one particular action or job, and the user can interact with them as a group, or on their own. UHAS provides an advanced Home Automation (HA) set of features, ready to be used out of the box with minimum user effort to set up and run. Running code is provided as part of the system, doing most of the settings for the user or a systems installer. UHAS is primarily intended to be used by users of the Fibaro HC2 system who wish to have fully featured HA without the need to learn LUA programming and spending a lot of time with coding Virtual Devices and scenes. UHAS can also become a part of a mature Fibaro system installation which has developed with many modules to cover more advanced HA and more devices. UHAS Virtual Devices and scenes use proprietary code developed by author. This code is developed to minimise users involvement in installation and setting of the system. Most of the necessary setting is done by the UHAS components and other settings are simplified and minimised as much as possible. This was also possible because all UHAS VD's and scenes use role system that is used to find necessary components for actions to be performed. UHAS Virtual devices category is set automatically during translation or changing of the main icon. This means that most of the VD's should show in proper category in new mobile app as lights, blinds, gates, ambience, climate, safety, security, multimedia, remotes and other. The same goes for scenes, when scenes save their settings after first manual run then also category is set.
UHAS PREREQUISITES
Fibaro Home Center 2 (HC2) with firmware version 4.120 or higher (recommended but not necessary expanded RAM memory to at least 2Gb)
Configured and installed z-wave devices – I.e., light switches, motion sensors, lux detectors etc.
INSTALLATION AND UPGRADE
NEW USERS - Please download provided UHAS v1.0.3 Installation package and UHAS Installation and User Manual v1.0.3 EN and then UHAS v1.0.4 update package and install. EXISTING USERS - if your UHAS is: Not yet started with installation then please download full package UHAS v1.0.3 Installation package and install. Still on v1.0 or V1.0.1 then please first download UHAS v1.02. upgrade package and install. Lastly download and install UHAS v1.03. upgrade package Installed v1.0.2 then please download UHAS v1.03. upgrade package and install. Installed v1.0.3 then please download UHAS v1.04. update package and install.
ADDITIONAL NOTE - In UHAS Installation and User Manual v1.0.3 EN instructions for ALC scene upgrade say:
UPGRADE INSTRUCTIONS – This upgrade is recommended. To upgrade and keep your ALC Scene settings please copy new code from ALC Scene v1.3.3.lua from line:
-- NEW v1.3.3 - copy code from here to the end of scene code to keep your settings above this line
to the end of code.
The mentioned line I forget to add to the code before making upgrade package, therefore please copy new code from line:
-- THE CODE BELOW DOES NOT REQUIRE MODIFICATION BY THE USER to the end of code. Thanks goes to @MiZ for pointing that out 🙏
IMPORTANT NOTE
UHAS uses its own unique global code variables. This means that UHAS will NOT influence the current system scenes, scripts, or virtual devices in any way, even if any of Sankotronic’s earlier UHAS beta versions and standalone scenes or VD's (Virtual Devices) are being used. There is no need for any changes to be made to the existing code before the installation of UHAS. The UHAS global variables are created and controlled automatically by the system so that you do not need to maintain them manually.
UHAS INSTALLATION PACKAGE CONTENT (29.1Mb)
92 Virtual Devices 53 scenes Icon sets for all the above VD's and scenes
THANK YOU! ❤️
I want to BIG thank to @clowg for helping me with translations and writing manual these last days speeding up publishing UHAS.
BIG thank to @gucio1234 and his son Cyprian for making logo for UHAS and 3D printed with real gears! I just love it ❤️
I also want to thank many of you who helped during testing of UHAS beta versions and with translations! @clowg, @speedoxx007 ,@Bodyart, @jimicr, @gucio1234, @jompa68, @Sjekke, @robw, @rbhun, @lennypenny, @FunkFib, @MarcoT, @Orgli, @MarcoTorino71 and many others. Your help is greatly appreciated. Apologies to all other not mentioned nice people who contributed in making UHAS.
I also want to thank gurus of this forum @petergebruers, @jgab, @cag014, @SmartHomeEddy and others for help with coding in LUA.
And of course a BIG thank to Fibaro for providing Home Center 2 and Home Center 3 for developing purposes!
BIG THANKS! also to all UHAS users for their donations! Your support is greatly appreciated! 🙏
TERMS AND CONDITIONS
Permission to use, copy, modify and distribute this software and its documentation for educational, research, personal use and non-profit purposes, without fee and without a signed licensing agreement is hereby granted, provided that the copyright notice, with "Terms and conditions" and "Disclaimer" appear in all copies, modifications and distributions. It is strictly forbidden to sell, rent, lease and/or lend this software for profit without prior consent from the Author.
DISCLAIMER
This software is provided by copyright owner "as is" and any express or implied warranties, including, but not limited to, the implied warranties of merchantability and fitness for a particular purpose are disclaimed. In no event shall the author and distributor be liable for any direct, indirect, incidental, special, exemplary, or consequential damages (including, but not limited to, procurement of substitute goods or services; loss of use, data, or profits; or business interruption) however caused and on any theory of liability, whether in contract, strict liability, or tort (including negligence or otherwise) arising in any way out of the use of this software, even if advised of the possibility of such damage.
Fibar Group S.A. and their employees are not responsible for support of the UHAS. Please contact the author Sankotronic, on the Fibaro Forum, for any questions or support required.
1,773 downloads
-
Weather State & Forecast suite standalone
By Sankotronic
Weather State & Forecast suite standalone
UPDATED USER MANUAL (09/10/2021)
I have updated user manual and added chapter 6.4 Weather Forecast global variable and how to read it
In this chapter users can find how to get forecast data and use this data in their code.
Please click on this link to download user manual: SA WS VD and WF VD User manual v2.3EN.pdf
UPGRADE PROBLEM?
Please check upgrade instructions in User manual or below in version history.
INTRODUCTION
Weather state & forecast module enhance HC2 weather capabilities. Weather State & Forecast module in its latest version works with five most popular weather services:
OpenWeatherMap Accu Weather NEW WeatherBit Weather HERE Weather API NEW Weather Underground NEW Weather Underground PWS
bringing completely new level of weather experience to Fibaro Home Center 2 users.
PREREQUISITES
Fibaro Home Center 2 with firmware 4.160 or greater with installed Weather provider plugin set as main weather provider.
Sankotronic Lab Emoji VD standalone
User account for at least one of the available weather services
FEATURES
With Netatmo Weather station suite or Netatmo Public Weather station suite gives best support for Irrigation Control watering adjustment Works with 7 most popular weather services on the planet Regularly refreshes weather state and forecast User can setup when forecast push and popup notifications will be sent same as e-mail with complete forecast User can install more than one set of VD’s and follow weather for more than one place It is now separated from Netatmo weather station but can still display Netatmo measurements (will be available only with UHAS version) User can add additional sensor for lux and UV Automatically finds weather provider plugin if installed and can then update weather on the HC2 web GUI and mobile applications VD has built in multi-language support with 27 languages included (see APPENDIX 1 for the list). VD can use HC selected language or user can select any other available language. VD will automatically translate current weather and forecast data to selected language Easy setup for VD icons. User can download HC2 Icon Preview VD to easily find icon ID numbers Global variables are automatically added, monitored, repaired and cleaned and does not require user intervention Supported are metric and imperial units for measured data. Wind speed can be set to show in meter per second (m/s) instead of km/h or mph
INSTALLATION AND UPGRADE
Please check provided User Manual
PACKAGE CONTENT
Weather State VD v2.8.1 Weather Forecast VD v2.8.1 Weather Module scene v2.8.1 (only one scene needed for multiple VD installed) Icon pack 1 - standard HC weather icons Icon pack 2 - flat weather icons provided by Wunderground User manual EN v2.2
TERMS AND CONDITIONS
Permission to use, copy, modify and distribute this software and its documentation for educational, research, personal use and non-profit purposes, without fee and without a signed licensing agreement is hereby granted, provided that the copyright notice, with "Terms and conditions" and "Disclaimer" appear in all copies, modifications and distributions. It is strictly forbidden to sell, rent, lease and/or lend this software for profit without prior consent from the Author.
DISCLAIMER
This software is provided by copyright owner "as is" and any express or implied warranties, including, but not limited to, the implied warranties of merchantability and fitness for a particular purpose are disclaimed. In no event shall the author and distributor be liable for any direct, indirect, incidental, special, exemplary, or consequential damages (including, but not limited to, procurement of substitute goods or services; loss of use, data, or profits; or business interruption) however caused and on any theory of liability, whether in contract, strict liability, or tort (including negligence or otherwise) arising in any way out of the use of this software, even if advised of the possibility of such damage.
Fibar Group S.A. and their employees are not responsible for support of the ABC VD. Please contact the author Sankotronic, on the Fibaro Forum, for any questions or support required.
VERSION HISTORY
2.8.1 - Weather Unlocked forecast extended for better support for Irrigation Control VD. Also corrected Weather API rain precipitation display 2.8 - Added new weather services and resolved some bugs, see bellow or User Manual for more details. 2.7.1 - Corrected bug that prevented using Wunderground, corrected day/night weather icons and other bugs. 2.7 - Added scene for safe communication with weather servers. Added e-mail notifications. Added 3 more weather services and updated WU service... For more detailed list check bellow 2.4 – VD completely redesigned and added openweathermap 5 day / 3 hour forecast. VD's update is synced to always have up to date weather info. Solved some more bugs 2.3.1 – Solved bug with Weather State VD update button 2.3 – First release on Fibaro marketplace
2,527 downloads
- vd
- sankotronic
- (and 1 more)
-
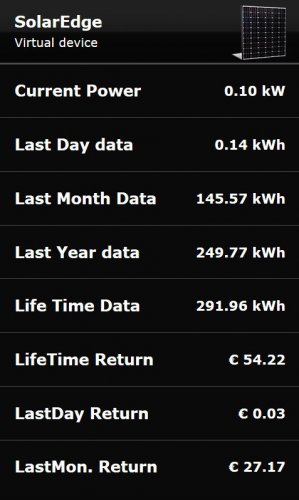
SolarEdge Monitor
By D-Vine
----------========== SolarEdge Monitor Virtual Device ==========----------
I want to share my virtual device to monitor SolarEdge solar panels.
SolarEdge have the possibility to read your system data with API.
What you need is the VD to download and ad into the Fibaro
Make a LUA scene where you copy the code
The code is based on @jompa68 Consumption Monitor Scene and I have permission to share my version of it with the change/ integrate of SolarEdge
With this it also supports
@AutoFrank SmartMessageHub and
@Sankotronic Time Based Events Control
First you need the API key that only a admin of the portal can give to you.
When the SolarEdge was installed at my home I register the system by myself.
You only need the serial number that is on the invertor
Go to:
https://monitoring.solaredge.com
And select new installer Fill in the information needed see example of serial number to fill in
Or ask the site admin to enable the API key
To generate a Site API key:
For most time people will have standard access to the portal and will not be able to set the API Key them self
Ask your Installer/ manufacturer to enable the API key by these steps or do it yourself.
In the Site Admin >> Site Access tab >> Access Control tab >> API Access > section:
Acknowledge reading and agreeing to the SolarEdge API Terms & Conditions. Click Generate API key. Copy the key. Click Save Use the key in all API requests
SolarEdge Scene setup
Line 23 local vDevId > enter the VD id SE_API > Your API Key SE_CLIENT_ID > Your Client ID Line 41 (true or false) and 42 possibility to calculate rates with the the power you get from the solar panels Line 51 refresh rate > set 60 or higher due API data restrictions of SolarEdge setup you push message when and in what way you want, see description in the scene.1,116 downloads
-

Philips HUE AIO VD standalone
By Sankotronic
Philips HUE AIO VD v3.1
(standalone version)
With Philips HUE preview VD v1.1 - brings easier setup and support for multiple Philips HUE bridges
INTRODUCTION
Philips HUE lighting brings colorful way of lighting experience. More about this lights you can find here https://www2.meethue.com/en-us Philips HUE AIO VD is All In One solution for HC2 owners to control Philips HUE lighting with support for all types of HUE lamps made by Philips and some other manufacturers.
PREREQUISITES
Fibaro Home Center 2 with firmware 4.120 or greater (tested up to 4.540) Philips HUE bridge V1 (round) with firmware up to 01041302 (released 05 February 2018) or Philips HUE bridge V2 (square) with firmware up to 1901181309 (released 07 February 2019)
FEATURES
Consists of two VD's: Philips HUE Preview VD which connects to Philips HUE bridge and downloads information of all lights and groups of lights and greatly simplifies installation of Philips HUE AIO VD that controls individual HUE bulbs or group of bulbs. Also added unreachable icon for Philips HUE bridge v1. Philips HUE Preview VD has button for generating authorization username and for easy connection to Philips HUE bridge Support for multiple HUE bridges and most of the Philips HUE bulbs including bulbs from other manufacturers that can be connected to HUE bridge. HUE AIO VD recognizes different types of bulbs like multicolor, white ambience and dimmable and enables proper controls Can control brightness, hue, saturation, color temperature and transition speed that can be set from instant to 10 seconds duration Buttons to activate colorloop efect and Alerts Multilanguage support with 27 languages included. VD's can use HC2 selected language or user can select any other available language. VD will be automatically translated to the selected language (visible after refreshing page on browser or refreshing network data on Fibaro mobile application) Easy setup for VD icons that will also setup icons for all buttons and sliders of the VD. (on UHASTM compatible version is even more easier to setup VD icons with Icon Preview VD) On HUE AIO VD user can setup separated on and off button or have on/off toggle button Self adding of global variables needed and global variable data integrity checking Automatic repair of global variables without user intervention New approach to programming other code to control this VD enables future upgrades without needing to change that code. (See more about that in User Manual provided)
INSTALLATION
Please check provided User Manual where all steps are explained in detail and this video made by @MarcoTorino71:
PACKAGE CONTENT
Philips HUE Preview VD v1.1 standalone Philips HUE AIO VD v3.1 standalone Icon pack Philips HUE E27 bulb indoor Icon pack Philips HUE E27 bulb outdoor Icon pack Philips HUE GU10 bulb indoor Icon pack Philips HUE GU10 bulb outdoor Icon pack Philips HUE LED strip indoor User Manual v1.1 EN
CREDITS
Many thanks to BodyArt, gucio1234 and many other Fibaro forum users for help with testing, translations and user manual.
TERMS AND CONDITIONS
Permission to use, copy, modify and distribute this software and its documentation for educational, research, personal use and non-profit purposes, without fee and without a signed licensing agreement is hereby granted, provided that the copyright notice, with "Terms and conditions" and "Disclaimer" appear in all copies, modifications and distributions.
It is strictly forbidden to sell, rent, lease and/or lend this software for profit without prior consent from the Author.
DISCLAIMER
This software is provided by copyright owner "as is" and any express or implied warranties, including, but not limited to, the implied warranties of merchantability and fitness for a particular purpose are disclaimed. In no event shall the author and distributor be liable for any direct, indirect, incidental, special, exemplary, or consequential damages (including, but not limited to, procurement of substitute goods or services; loss of use, data, or profits; or business interruption) however caused and on any theory of liability, whether in contract, strict liability, or tort (including negligence or otherwise) arising in any way out of the use of this software, even if advised of the possibility of such damage.
Fibar Group S.A. and their employees are not responsible for support of the Philips HUE AIO VD. Please contact the author Sankotronic, on the Fibaro Forum, for any questions or support required.
LEGAL NOTICE
HUE is registered trademark of Philips Lighting Holding B.V. registered internationally.
LATEST NEWS
1 April 2019
Philips HUE bridge firmware new version 1901181309 is out. If you upgrade to this latest firmware Philips HUE AIO VD will continue function properly.
VERSION HISTORY
3.1 - Corrected bug that was causing HUE AIO VD main loop to stop with error if user set light or group ID that does not exists on HUE bridge. Also corrected bug that was not updating list correctly after first scan if user removed or added light or group on HUE bridge.
3.0 - All In One solution, one VD for all types of bulbs and for control of individual light or group of lights with supporting Philips HUE Preview VD.
2.1 - added Philips HUE White dimmable VD of same version as color version.
2.1 - Corrected error handling when HUE bridge is not reachable.
2.0 - Added On/Off button; two version available: 2.0m with Main loop refresh or 2.0b with button refresh for systems with more than 15 HUE lamps to improve response and reduce network traffic; changing brightness, color or Saturation sliders now immediately refreshes VD status; code improved so users can easier setup necessary data
1.5 - Added sliders for color (hue) and Saturation, VD is now getting ID & TCP port setting from VD general tab
1.0 - Changing icons based on the brightness level, Changing icons based on HUE lights state (unreachable/error); Error handling for HUE response data, status information in the bottom bar of the VD; detailed comments in LUA code, main loop refresh code added
Here is a new look of Philips HUE AIO VD and companion Philips HUE Preview VD:
Enjoy coding and your new Philips HUE virtual device!
Sankotronic
PS
This solution is only for HC2. If you have HCL then please check @AkilliYuva.com solution here:
2,821 downloads
-

Gardena Status
By Guest macjoker
Main features
Watch and control Gardena Smart System devices.
Connects to your Gardena account, retrieves information about smart devices configured within that account and allows you to control them. Installation if fully automated: there is only a single scene to provide status gathering, sending commands and creating virtual devices in HC2.
Advantages
Detection of new Gardena devices and automatic creation of corresponding Fibaro virtual devices. Polish and English languages are supported. Easy installation: just put your account information and start the scene. Source code is easy to maintain and develop (rich debug information, separation of supported device types from data presentation, translation system included, etc.). Five categories of Gardena devices supported: gateway, irrigation control, watering valve, sensor, and mower.
What you need
At least Gardena Smart Gateway configured and access to your Gardena account. Any sensor, watering device or mower connected to that account will become available in Fibaro ecosystem.
Installation
Create LUA scene with the file provided in the archive. Put your Gardena account details (GARDENA_ACCOUNT and GARDENA_PASSWORD). Start the scene - it will automatically create global variables and virtual devices based on your account information. Update virtual device: set names, icons and categories as you wish. Optional configuration
Read comments in Lua scene.
Each configuration parameter is described there in detail.
FAQ
I don't want to import all devices from my account. How to achieve that?
You may do that by configuring IGNORE_CATEGORY variable if you would like to exclude all devices of a given type (like "sensor") or you may remove unwanted VDs manually and change CREATE_VIRTUAL_DEVICES to false so as not to recreate deleted devices.
Can I use two or more Gardena accounts in my HC2?
Sure. Just make a clone of the main Lua script, update account details and give a unique value to ACCOUNT_UNIQUE_ID variable.
Can I provide my own translation or change fields displayed in a virtual device?
Yes, it is simple. All language specific information is given in two variables: translations and repeatedTrans. Look for them in source code and that should make things clear. Also field definitions are provided in source code. Look for "TYPEconfig" variable (mowerConfig, e.g.) and change what you need. For labels the first value in each item is a number used for ordering elements, second is a default (English) label, third is a format ([d] is for timestamps, [u ] is for units retrieved from Gardena API). In the end, remember to use UPDATE_DEVICE_DEFINITION variable to apply changes in virtual device definition.
146 downloads
-

Automatic Icon Downloader
Automatic Icon Downloader
What does this device:
Device can automatically download from dedicated web-page all icons that you use to your HC2. The device can be used by installers to easily download their favorite sets of icons to new HC2, by end users to get back icons after recovery or any other purpose. Device before uploading any icon to your HC2 check if any of selected in IconSet already exists so it should be safe to click on "Download to HC2" button many times.
This solution has to separate parts: vd and portal.
Version history:
0.6 - first published version of AID
To Do VD:
- future version of virtual device will be updated automatically from internet if user agreed to do it, after HC2 restart
To Do portal:
- next version will support adding user device icon to library (on, off, state 1-10)
Manual
1. Download and install virtual device.
2. Go to: www.grace-land.pl/fibaro/aid portal to get your IconSet. Current version looks like below.
Please note some important things:
- HC2 keeps your icons in 4 separate groups: devices, virtual devices, scenes, rooms. It means that if you want to use one image as room image and virtual device image it needs to be added twice - that is why portal items are divided into four groups (for user convenience - each group has different color)
How the portal works?
You just check all icons in each group you want to add to your IconSet and then click "Get your IconSet".
Please remember that you can edit this IconSet later.
What if I have icon/s that is not in portal library?
There is option to upload your icons and make library bigger. In this case you click on "Add new icons" button. You will be redirected to new page.
Please note some important things:
- You can upload many files and many groups in the same time,
- All icons will be checked before upload. Icon needs to be: PNG file, 128x128 size, unique [portal checks if this icon exists in this group*], no bigger then 1MB (one icon),
- You will see preview of icons that you want to add but without category,
- For now there is no option to add "device" icons. I am working on it to make it simple,
- You will get status whats was added and what not.
How to edit my IconSet?
You need to know your IconSetID and then click on "Edit your IconSet" button. Page will refresh and all icons from your set will be automatically checked.
What you need to do is to check more icons or uncheck unwanted icons and then click "Update your IconSet".
Please note that VD doesn't delete icons from your HC2.
3. After you have your IconSetID there is time to configure virtual device. In this case you need to provide some information.
a) In VD information please provide IP and TCP port.
IP: grace-land.pl
TCP port: 80
b) In Advanced tab scroll to button and replace needed credentials.
c) click "Save".
Please note that virtual device only downloads data so there is no risk in providing credentials.
------------------------------------------------- -- PUT YOUR ADMIN CREDENTIALS ------------------------------------------------- sv_user = '[email protected]'; sv_password = 'Y0urP@ssword'; sv_automaticDownloaderId = 'iconSetID_from_website';
4. Your device is ready to use. You just click on "Download to HC2" and wait. All needed information is in debug for vd button.
Device before uploading any icon to your HC2 check if any of selected in IconSet already exists so it should be safe to click on "Download to HC2" button many times, but it will take a while.
Have fun!
Disclaimer:
Every of icons on portal [grace-land.pl/fibaro/] aid library are not my property.
The code wasn't inspired by the somebody mentioned in comment below - the first version of uploading I found in 2013 [https://github.com/rafikel/Fibaro/tree/master/ncplus] - and I went this way to make something usefull.
580 downloads
- icons
- automatic_download
- (and 1 more)
-
[VD + SCENE + PHP] APC UPS Monitor and auto shutdown of HC2
By gucio1234
PREFACE :
I noticed in the Forum that there is some interest for link APC UPS with Fibaro HC2 and have auto shutdown of HC2 if there is no electricity.
I have spent few evenings and I am happy to share what I did.
I want to thank @Sankotronic for the permission to use part of his code and @Lambik whose icons of UPS I used as a base to create icons representing various status of the UPS device.
Also I have used a bit of the code of @drboss .
INTRODUCTION :
The proposed solution reads the status of the UPS device using SNMP protocol and based on this it triggers appropriate actions.
The status of UPS is represented with the various icons of the VD :
Email messages and pop-up notifications are sent whenever :
there is electricity outage the battery level is critical and HC2 shutdown is triggered the power is restored The status is updated whenever the REFRESH button of VD is pressed.
For constant monitoring I have used @Sankotronic’s scene „Main Timer“ which presses the button every minute.
WHAT WE NEED :
1.
On HC2 - we need :
- VD for UPS monitoring and triggering actions
- Scene to trigger Shutdown of HC2.
2.
We need web server with PHP Module running on something.
It can be RaspberryPI, Windows PC or anything.
In my case I have it on iMac and I followed this guide :
https://medium.com/@JohnFoderaro/how-to-set-up-apache-in-macos-sierra-10-12-bca5a5dfffba
I skipped "Configuring Virtual Hosts" as that was not working for me.
As my web server is accessible only by my devices, I did not care.
Important is that apache web server is managing PHP scripts .
3.
SNMP command line tool has to be present on the server (it is present by default on OS X)
SNMP tool is present by default with OS X.
Here are links describing how to install it for Windows - different resources (not tested) :
https://www.ipconvertertools.com/snmpwalkinstructions
https://syslogwatcher.com/cmd-tools/snmp-walk/
4.
APC UPS with network management card.
The presented solution was implemented and tested with APC Smart UPS 3000 with Network Management Card AP9631
IMPLEMENTATION :
1.
Implement web server with PHP module running.
Activate SNMP command line tool on your server (if not already there).
2.
Copy APC.php script to the web server.
You have to edit the file with any text editor to provide username and password for your HC2, IPs of HC2 and UPS.
If username or password contain `@` it has to be replaced with `%40‘
Eg. If Your username is `user@` You have to enter `user%40`
Note: You have to make a note of the path to the script.
Here is a code :
3.
Create new scene in HC2 for auto shutdown.
IMPORTANT: You have to pay attention NOT TO CHECK MARK that the scene is starting while HC2 starts.
The HC2 would restart itself after boot.
If you do so you have to do restore to factory state and load last working backup.
4.
Import the VD from the attached .vfib file to your HC2.
Import all provided icons for graphical representation of the UPS status.
There is a bunch of global variables needed, but they will be created automatically by the VD – so you do not have to worry. All of these global variables starts with `UPS_` .
Edit the `USER SETTINGS` section of the LUA code for the REFRESH button :
The icon for the REFRESH button should be `IconTimer`.
As the parameters for the VD:
- enter the IP address of web server with PHP script
- enter 80 as a port number
That is all.
I hope those how are interested will be able to implement what I did.
132 downloads
(1 review)0 comments
Updated
-
Airly Status - Air Quality Sensor based on Airly.eu (API 2.0)
By Guest macjoker
Device features
Periodic reports on air quality for a defined location.
Be warned about the smog conditions at your place instantly.
Advantages for everyone
Automatic status update. Custom interval value for update queries. Manual update is also available (via button). May use "interpolation mode" (enabled by default in Lua scene). Airly gives you an option to calculate estimated values for any location near their stations, to see more then just what is exactly measured by the station. You may select the language used for Airly messages. Polish and English are supported. Colors to visualize Smog description. This will work on PC only. The mobile app does not interpret HTML tags. Icon color is changing according to air quality measured. The colors are in correspondence with Airly recommendations. One of three different air quality indexes from Airly might be selected. Airly supports: "AIRLY_CAQI", "CAQI" and "PIJP". Each may have different levels, descriptions, and pieces of advice. Customizable location for reports. The location might be read automatically from your Home Center box or it might be set as a fixed one. Data retrieved from Airly are stored in a global variable. The variable might be used to trigger another scene.
Advantages for geeks
Using the newest API 2.0. Missing pieces of data from Airly are properly detected and do not stop the device from working. No label "flickering" ("50%" → "missing data" → "52%", e.g.) on data updates. Changes on any update are reported once. Clear information about the license (MIT). Make any changes you want, distribute, sell or whatever. Just include my name and the copywrite information. Easy to change labels content, data grouping within labels, etc. (data selectors within one config variable labelConfig). Source code easy to maintain and develop: rich debug information; separation of acquisition, extraction and data presentation, etc. Installation
Import the virtual device and create a new Lua scene with the code provided in the file. Add device icons and update their IDs in the virtual device main loop. Replace 'xxx...x' with the key you can get from Airly free of charge. Start the Lua scene manually (just for the first time). (optional) Customize: update interval, display language, labels content and many more (see details below). Configuration
Read comments in Lua scene and VD main loop.
Each configuration parameter is described there in details.
Zip file content
Virtual device: "Airly Status". Lua scene for grabbing data from Airly: "Airly Status scraper". Nine device icons to visualize air quality. Screenshots. FAQ
How can I get Airly API key?
Get one from developer.airly.eu. When you register an account within that website you will get your free API key.
How to upload/add device icons?
Open (any) virtual device configuration page. Press "Change icon". Press "Select file" (in the bottom), choose file, then confirm with "Add" button (even lower). Please make sure to execute step 1 properly. Icons in Home Center are divided into several categories. If your icons are placed not in the "virtual device collection", they will not be visible for the device.
How can I get an icon ID?
Open (any) virtual device configuration page. Press "Change icon". Right click on the icon you want to get an ID. Select "Open graphics in a new tab". The address should be like: "http://hc2/fibaro/n_vicons/User1003.png". 1003 is your ID in this case. How can I change the language for all displayed information?
Change config variable in Lua scene. Only "pl" and "en" messages are supported by Airly API. Update display name of each label. Update labels content (if needed) by editing labelConfig variable in VD main loop. There is the same string formatting as for the Lua print function.210 downloads
-
BLE Detector - Presence detector based on iNode LAN and BLE devices
By Guest macjoker
Features
The virtual device communicates with iNode LAN, receives and decodes information about all BLE devices available nearby. This allows tracking user presence if small BLE tags are attached to their belongings (like notiOne with a bunch of keys, e.g.).
What you need
iNode LAN - it can detect any Bluetooth 4.0/4.1 device (Bluetooth Low Energy = BLE) BLE tag (iNode Beacon , TrackR , notiOne , etc.) Installation
Configure your iNode LAN to use unicast or broadcast for sending datagrams (UDP packets) Go to the Setup page. For "BLE IP address" put your HC2 IP address (unicast) or broadcast address (192.168.1.255e.g.). For "BLE IP port" you may leave the default value (20000). Create a new virtual device (BLE Detector). Update IP Address and TCP Port (use the same values as for iNode LAN in step 1). Create a new scene (BLE Users). Update config values in the scene (provide names and MAC addresses of persons and their belongings).
That's all to make it work!
Now you can use global variables you have defined in Lua scene (users variable) to check if a person is away or home.
Want to tweak it? Sure!
There are more options. Please read all the comments in the source code.
You may try to:
define MACs of devices to ignore in discovery (your iNode LAN itself), define signal values for IN/OUT events (separately for each user), define the timeout value for each device (this also makes user away), turn on/off debug messages. Zip file content
Virtual device: "BLE Detector". Lua scene with user detection configuration: "BLE Users". Device icon for iNode LAN. FAQ
What are these scripts missing?
Only basic information is decoded from BLE datagrams (counter, MAC address, and signal strength). If you use iNode Sensors you will not get additional values (like temperature, pressure, magnetic or movement changes).
Why is it better than other solution (x) of presence detection?
It does not depend on any movement in your house, which can make many false positives - a running dog e.g. (x = motion sensors) It is independent of other devices. HC2 communicates directly with iNode LAN. (x = RaspberryPi to read iNode and press some virtual buttons in HC2) More stable results (x = python script from iNode website; explained below).
The Python script published by iNode manufacturer for presence detection uses only signal strength. That means to detect that someone is leaving we need to use some (lower part) signal range to have the record of going away. This additionally reduces the signal range for detecting "being home" (higher part of the signal range) and can give effect to the person appearing and disappearing all the time.
To avoid that we also check the latest timestamp of the device activity. Owing to this feature we may extend range signal for "being home" to all possible values, and use only timeout to decide whether a person is home or not (set "-100" to both signalIn and signalOut in users config to achieve that).
What messages should I expect to get from working device?
Here are some logs of the working device...
[DEBUG] 23:29:58: No: 35216 MAC: 00:12:6F:E0:BB:DB Signal: -16 dBm [DEBUG] 23:30:03: No: 35217 MAC: C0:36:A0:DC:87:99 Signal: -79 dBm [DEBUG] 23:30:08: No: 35218 MAC: 00:12:6F:E0:BB:DB Signal: -16 dBm [DEBUG] 23:30:09: No: 35219 MAC: C0:36:A0:DC:87:99 Signal: -79 dBm [DEBUG] 23:30:12: No: 35220 MAC: C0:36:A0:DC:87:99 Signal: -69 dBm and the scene:
[DEBUG] 23:30:21: MAC: C0:36:A0:DC:87:99 Signal: -79 (dBm) Time ago: 0 (sec) [DEBUG] 23:30:21: MAC: DF:12:45:F7:40:65 Signal: -84 (dBm) Time ago: 30 (sec) [DEBUG] 23:30:21: Gienia is home [DEBUG] 23:30:21: Zenek is home [DEBUG] 23:30:24: MAC: DF:12:45:F7:40:65 Signal: -84 (dBm) Time ago: 0 (sec) [DEBUG] 23:30:24: MAC: C0:36:A0:DC:87:99 Signal: -79 (dBm) Time ago: 3 (sec) [DEBUG] 23:30:24: Zenek is home [DEBUG] 23:30:24: Gienia is home Is it a stable solution? Can you share any experience about it?
For my configuration, I am using two pieces of notiOne. They are really tiny, the batteries are supposed to stay alive for about a year (from my experience it was usually about 6 months). Additionally, you can track them whenever someone with BLE and their App is near.
The results I get in my flat, where walls are made of silicate blocks, are quite stable. iNode LAN can detect these notiOnes with the weakest signal (-90 to -88 dBm) from a distance of 7-8 meters even through two silicate walls (24cm + 12cm thick). So placing iNode LAN in the middle of the flat covers the whole area.
My iNode LAN works with firmware version published in December 2017 ("FW date: Dec 14 2017/09:10:32"). I had no issues about it for more than 18 months right now. It is stable. I even use it as a power failure indicator: it is not plugged to UPS (whereas HC2 and NAS are), so when the device disappears from my LAN, I know there is something wrong with the power line.
Is there any way to extend Bluetooth range for iNode LAN? My house is too large for a single device of that kind.
Well, the device range is connected to Bluetooth limitations. If you need a larger area to be covered with BLE devices detection you could use more then one iNode LAN device. Each device should use a different global variable for storing detected BLE events (BleDevicesA, BleDevicesB, ...). The best way to merge these results would be an updated Lua scene, which could analyze more variables and properly select best data (i.e. select stronger signal if the same BLE tag is seen in many iNode LAN devices). This is not supported with the current version of Lua scene.
Another (not so nice, but quicker to achieve) workaround for that could be duplicating not only the BLE Detector VD but also the BLE Users scene. Each scene copy should have different global variables for users (like: isZenekHomeA, isZenekHomeB, ...) and additional code can interpret these variables to get final detection value (local isZenekHome = isZenekHomeA or isZenekHomeB or ...)
62 downloads
(0 reviews)0 comments
Updated
-
(0 reviews)
0 comments
Submitted
-
(0 reviews)
0 comments
Submitted
-
VD - Switch CCGX Relais .lua
By Pflug
VD - Switch CCGX Relais .lua
A VD that can switch the AC-Out2 relais of the Victron inverter
One can not directly switch the Quattro relais,
therefore I used the “Venus GX Relais 2” (currently NOT used) and connected it to the contacts of the “AUX inputs of the Quattro inverter
and you have to install an assistant on the Quattro to do the final switching o the Relays.
61 downloads
- victron
- modbus tcp
- (and 6 more)
(0 reviews)0 comments
Submitted
-
VD-BMS.lua
By Pflug
VD-BMS.lua
This is for Canbus BMS
I have a BYD Battery monitor.
Most of the Registers are have only "0" valiues and I extracted only what I found having some values.
-- Unit ID /DeviceInstance Remark
-- 225 512 CAN-bus BMS
24 downloads
- bms
- canbus bms
- (and 4 more)
(0 reviews)0 comments
Submitted
-
(0 reviews)
0 comments
Submitted
-
VD-Solar-Charger.lua
By Pflug
VD-Solar-Charger.lua
This extracts all available information from the MPPT charger.
-- Unit ID Instance in VRM
-- 245 258 Venus GX VE.Direct 1 port (ttyO2)
-- 243 260 Venus GX VE.Direct 2 port (ttyO4)
45 downloads
(0 reviews)0 comments
Submitted
-
Download Statistics
-
New reviews
-
 By Bornheim · PostedI integrated two HUE bridges in my HC3. It works perfect (and much better and more powerful then the app integrated in HC3). In particular, also sensors, temperature measures etc. are available and can be used in Scenes. However, in both cases after installing and entering the IP adress of my HUEs I had to restart the HC3 to get the authentification running. So I assume to install one has to (i) upload / install the QuickApp, (ii) enter the IP address of the HUE in the local LAN, (iii) rest
 -

-

-

-
 By Sankotronic · PostedVery useful solution to help with gradually moving from HC2 to HC3. I have tested few of the QA and used them to test some of my new solutions on HC3 keeping HC2 still having main controll of our house. Thank you @cag014 for yet another excellent solution!
 -

-

-

-
 By SmartHomeEddy · PostedGreat QuickApp and excellent configuration manual. QuickApp works smooth. Thanks!
 -

-
-
Highest Rated Submitters
No ratings this week.
No ratings this month.
No ratings this year.
-
1

-
2

-
3

-
4
-
5

-